
Cityscape Photography Composition Masterclass: 15 Techniques to Take Better Photos

By Serge Ramelli
Honestly, my early cityscape photos were terrible. My compositions were flat, confusing, and had no depth. I shot at the wrong time and used way too much contrast.
But over time, I learned some powerful composition tricks, and I’m going to share them with you.
Composition is simple: decide what story you want to tell, remove what distracts from it, and add what makes it stronger.
Tip 1 — Use the Rule of Thirds
The rule of thirds is simple: divide your image into three equal sections, both horizontally and vertically, and place your main subject along one of those lines.
Instead of centering everything, decide what matters most — the sky or the foreground — and give it two thirds of the frame. This creates a stronger and more dynamic composition.
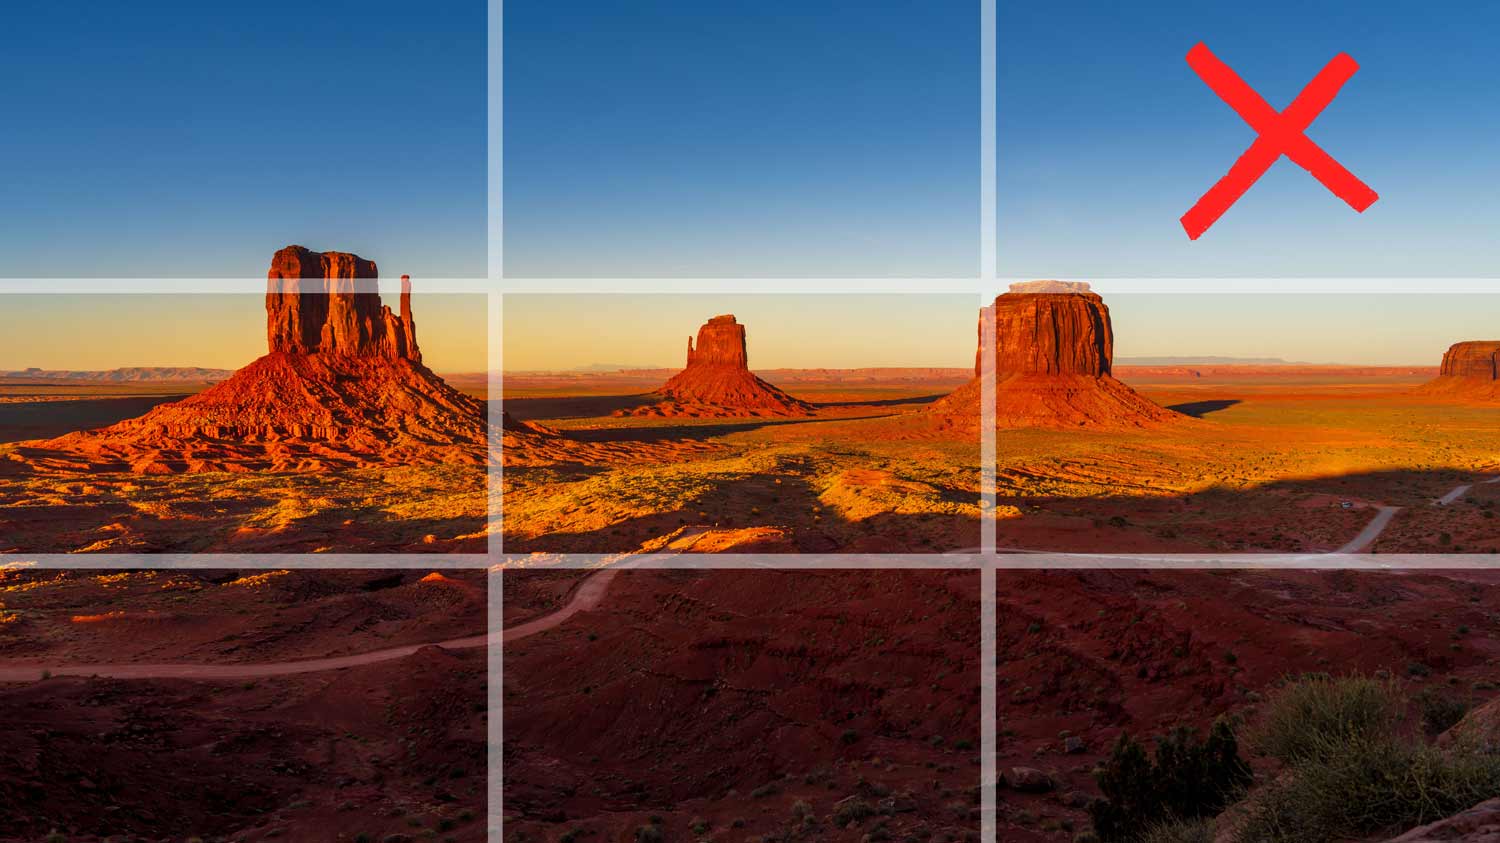
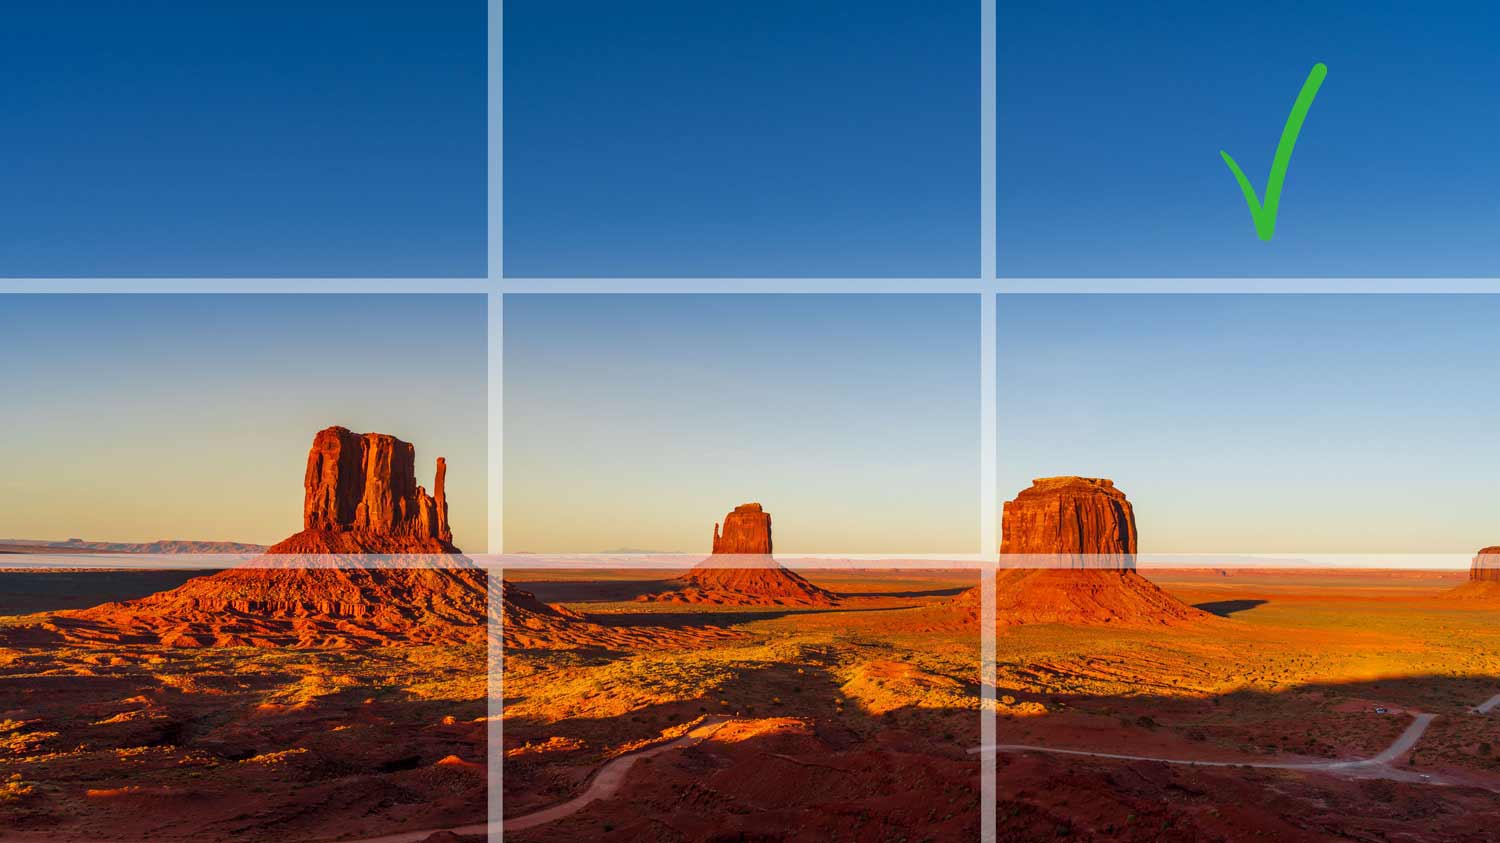
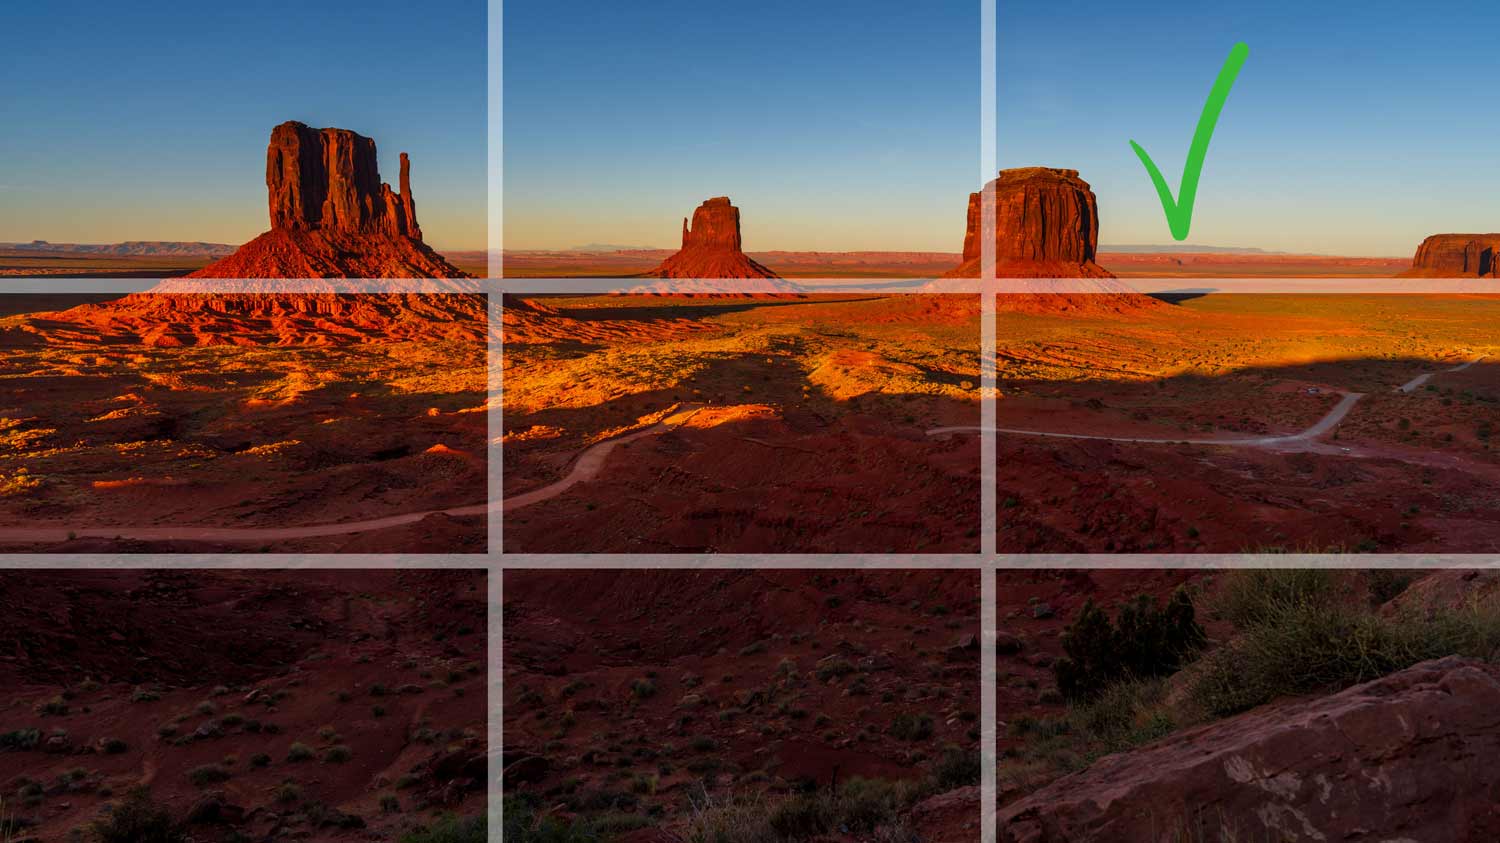
THE RULE: Try not to center your horizon. Put it on the top third or the bottom third. Decide which part of the scene is more interesting — the sky or the foreground — and give that element two thirds of the frame.
Tip 2 — Use a Leading Line
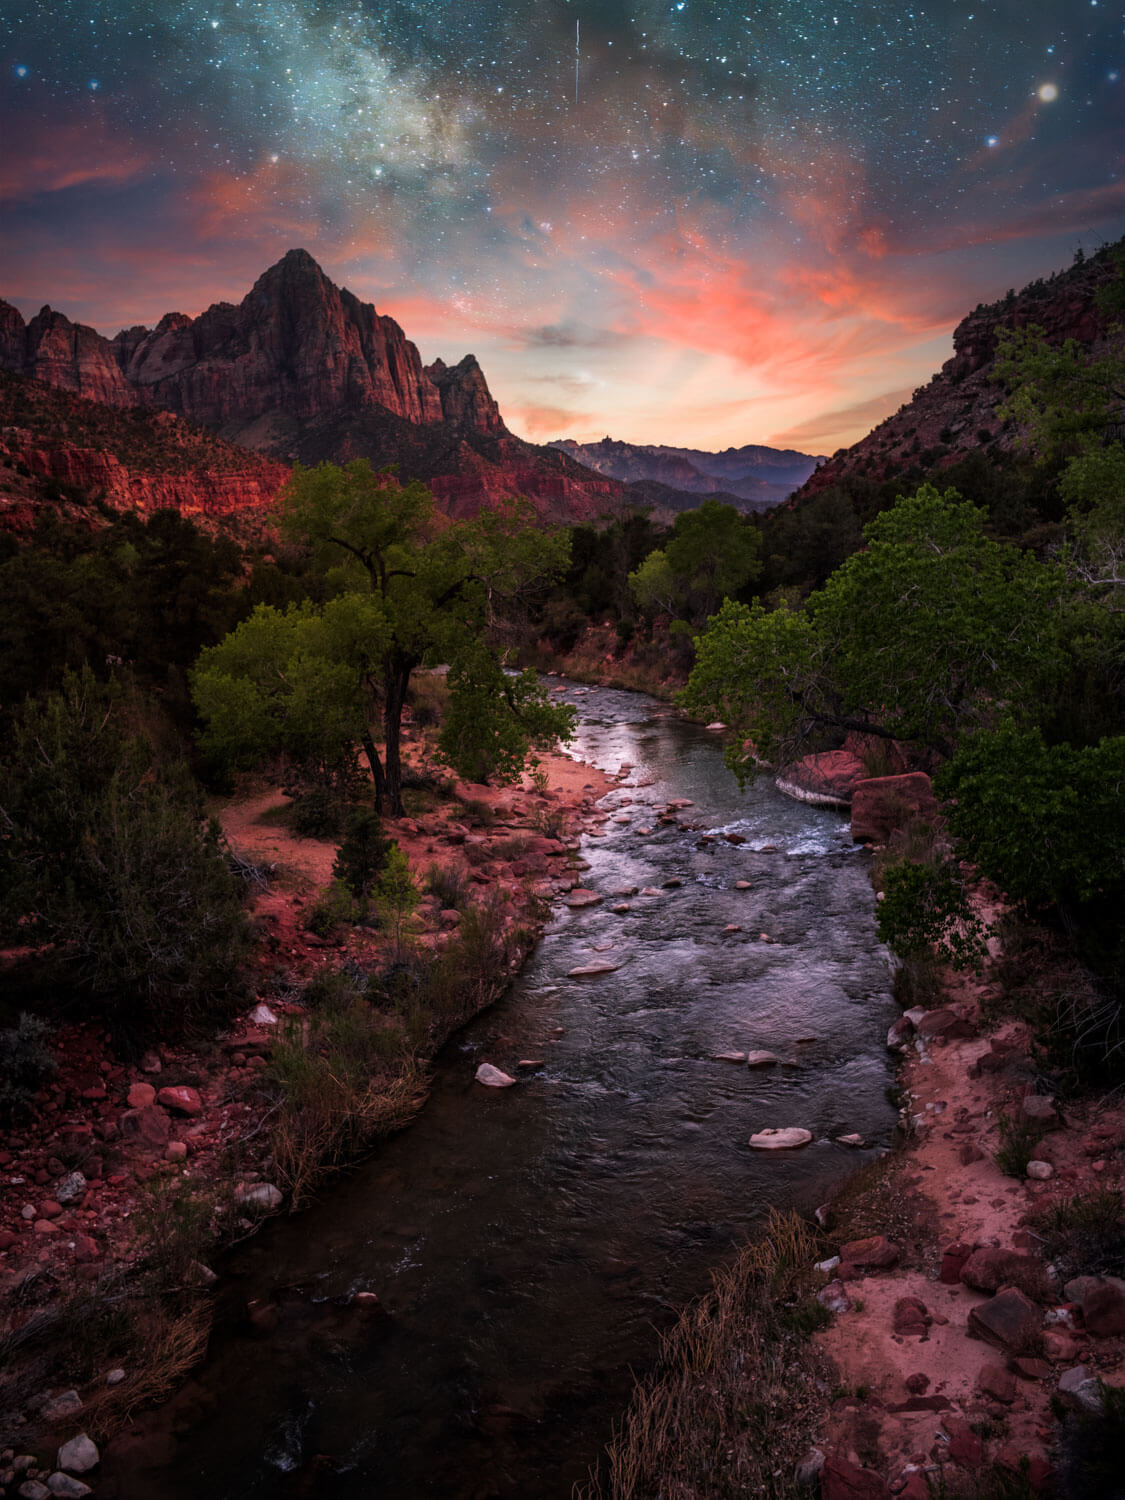
Leading lines are one of the best ways to create depth in a photo and guide the viewer’s eye through the frame. Curves, roads, or shapes that naturally draw attention into the image can make a composition feel stronger, more dynamic, and more immersive.
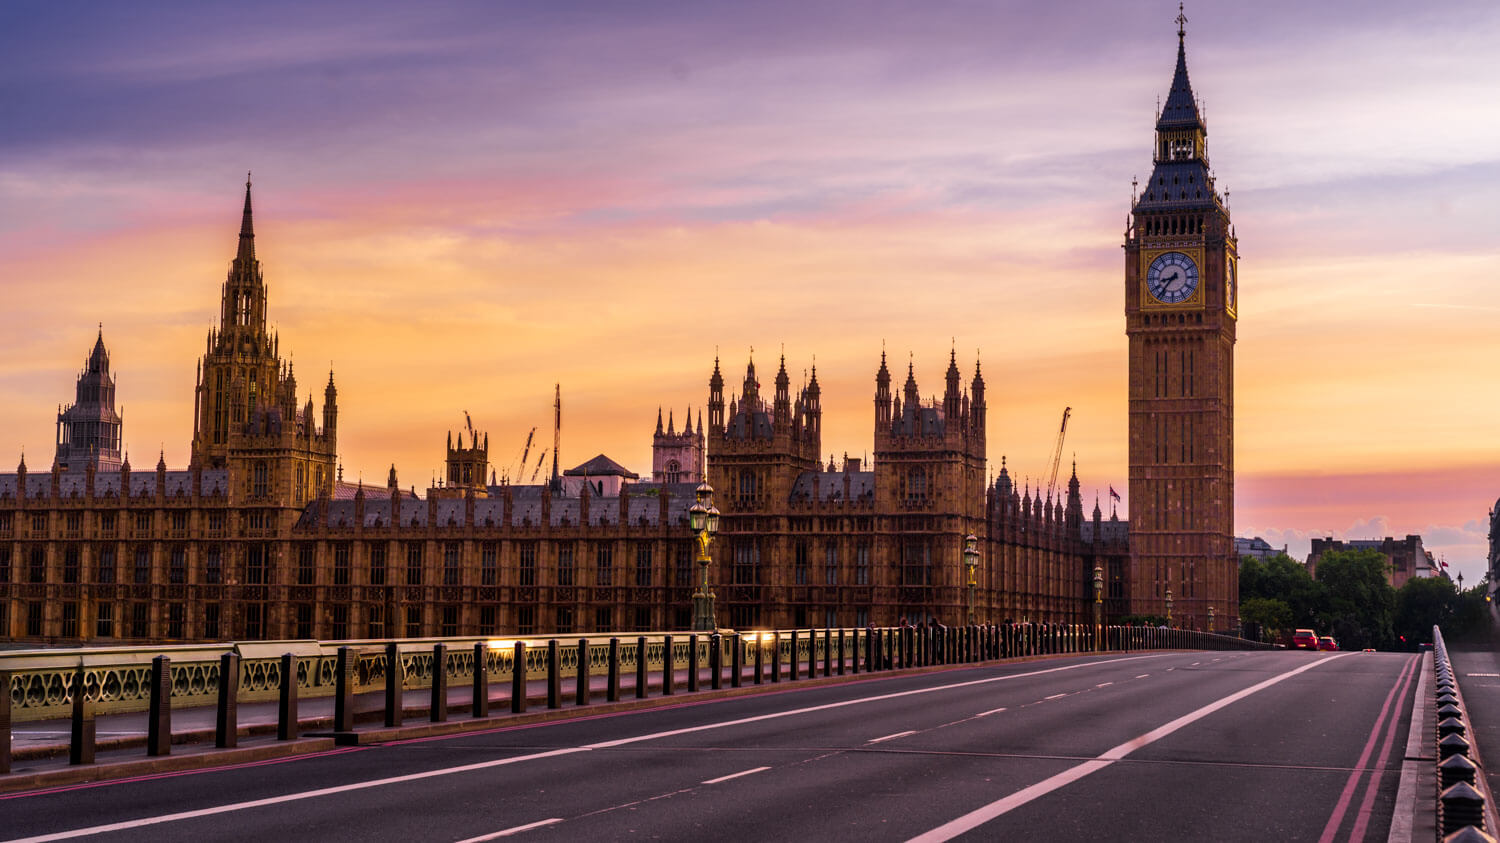
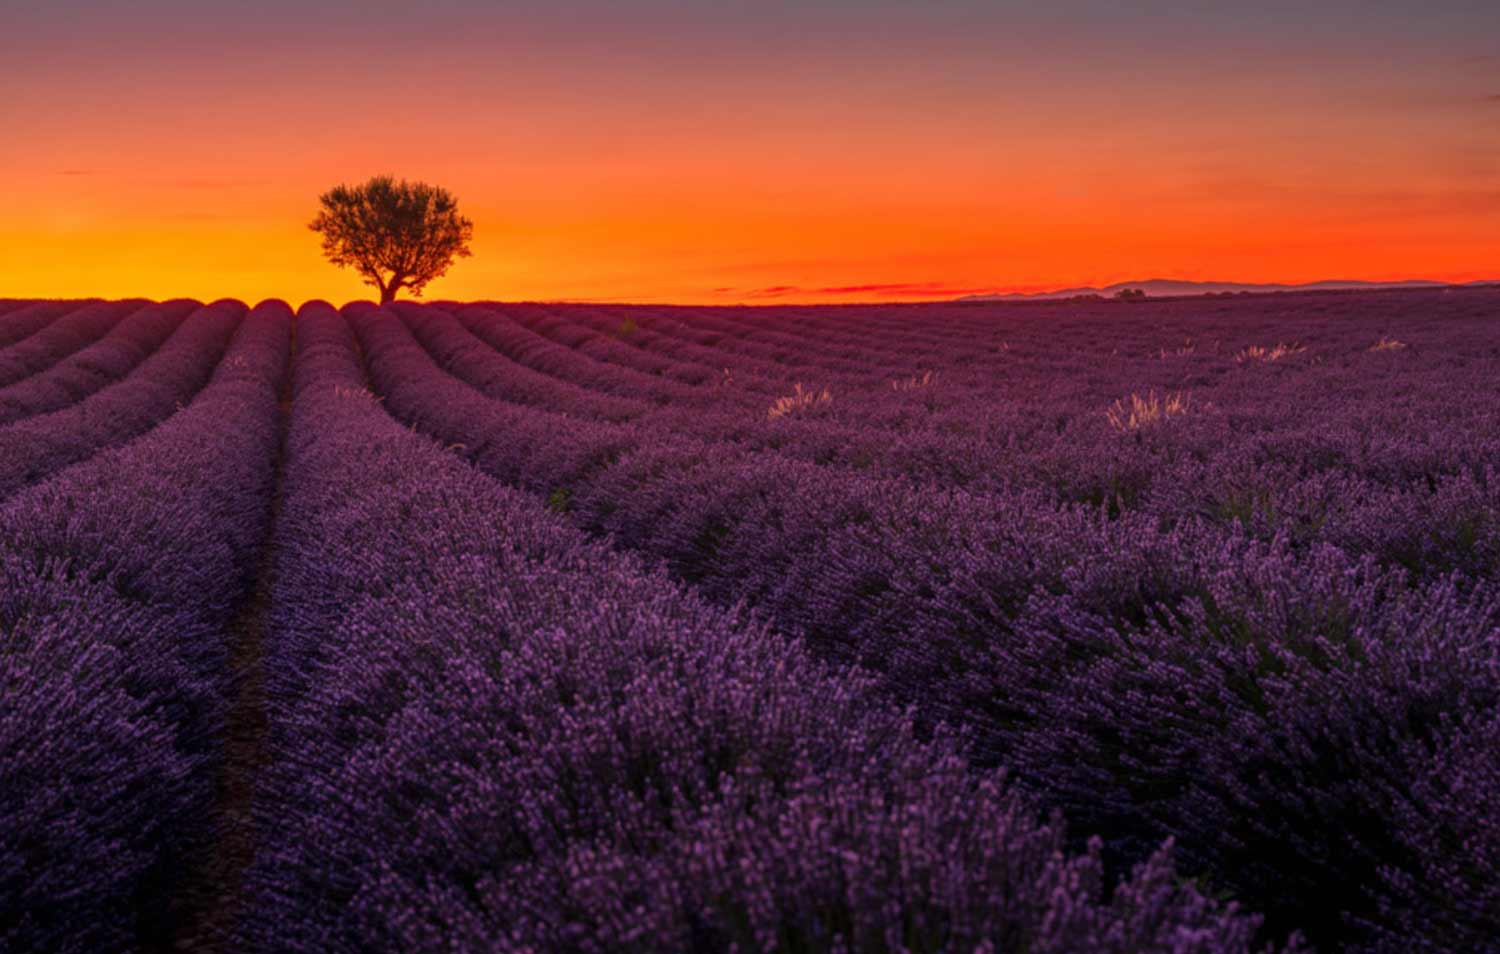
THE RULE: A leading line must lead the eye into the frame, not just across it. An S curve is the most powerful version. Walk around until you find the angle where the line pulls the viewer deep into the image.
Ready to get 1 on 1 support to master your tools and take photos that have that WOW factor? Apply to become a certified Master of Photography here.
Tip 3 — Try to Have a Foreground Element
One of the easiest ways to improve a composition is to add a foreground element. It could be a statue, a rock, a flower, or any object that helps create depth in the scene.
The key is not to place it too close or too far away. You simply want it to act as a visual anchor in the foreground.
Without a foreground element, a photo often feels flat and amateurish. With one, the image becomes more immersive and three-dimensional.
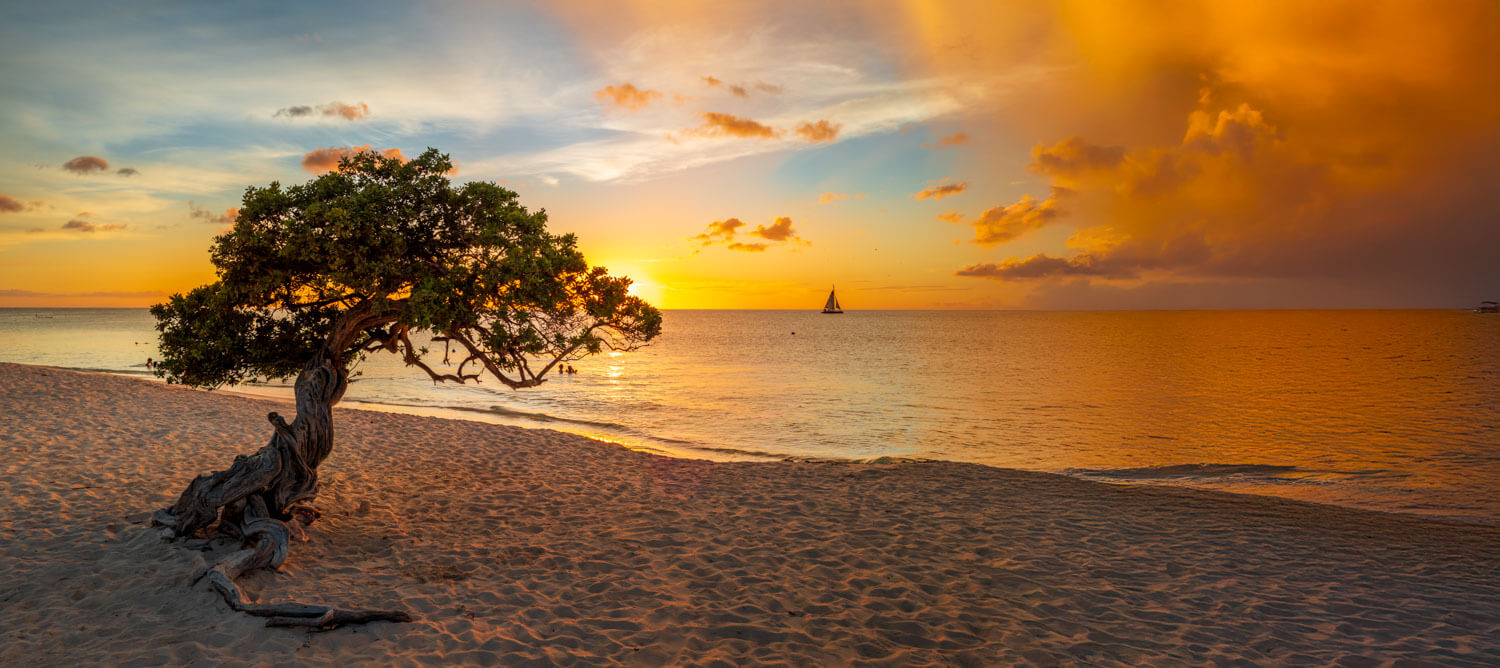
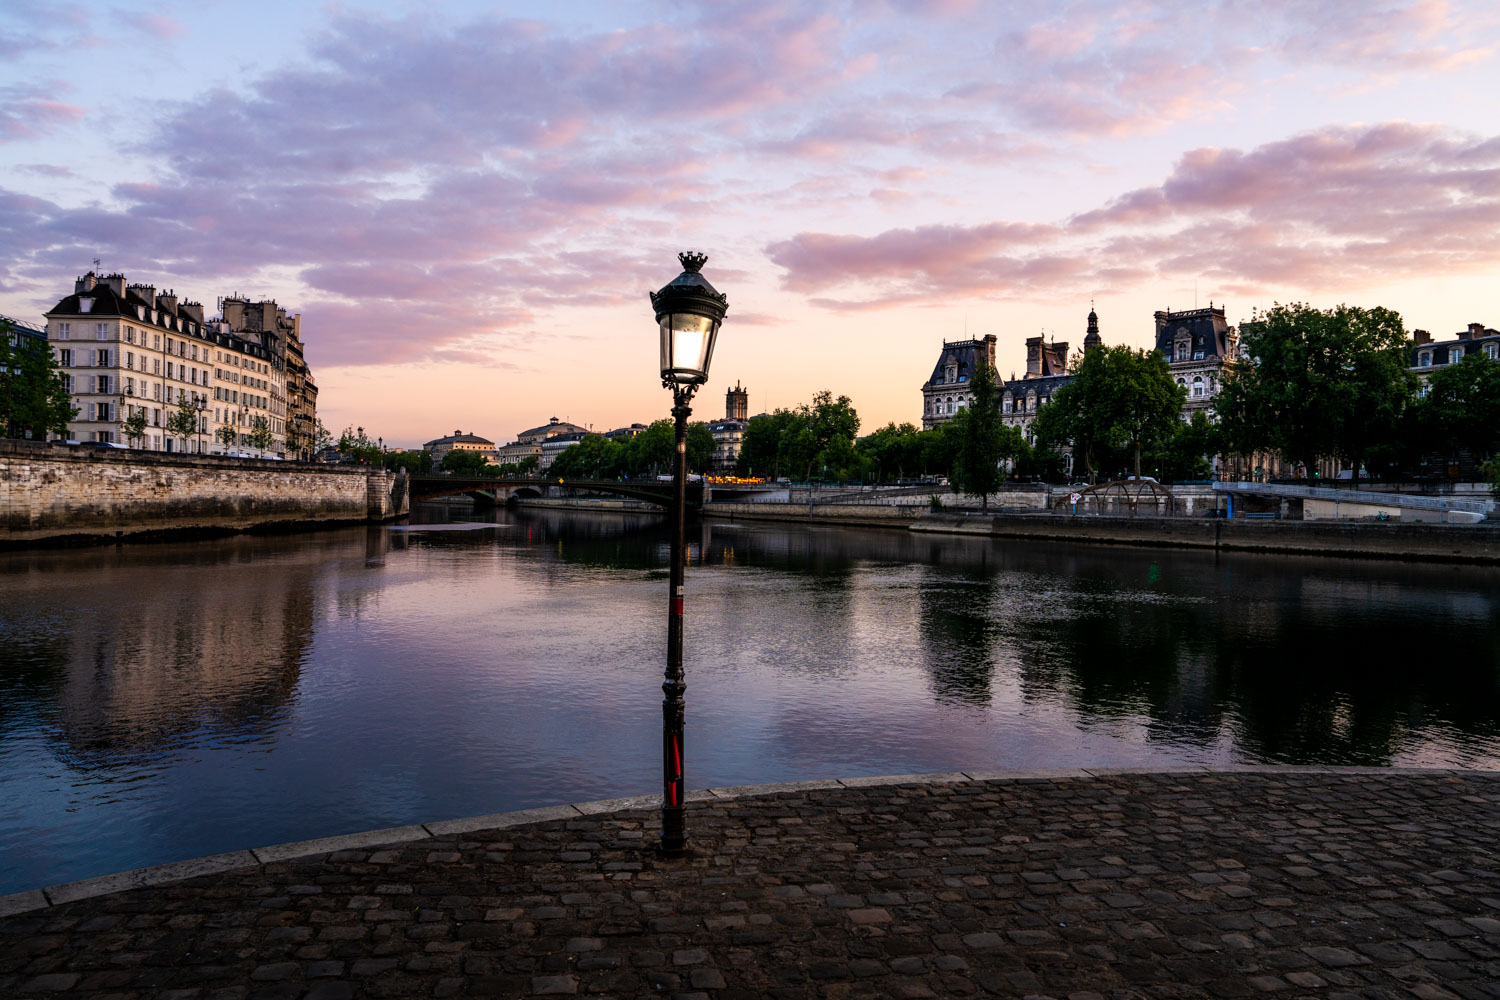
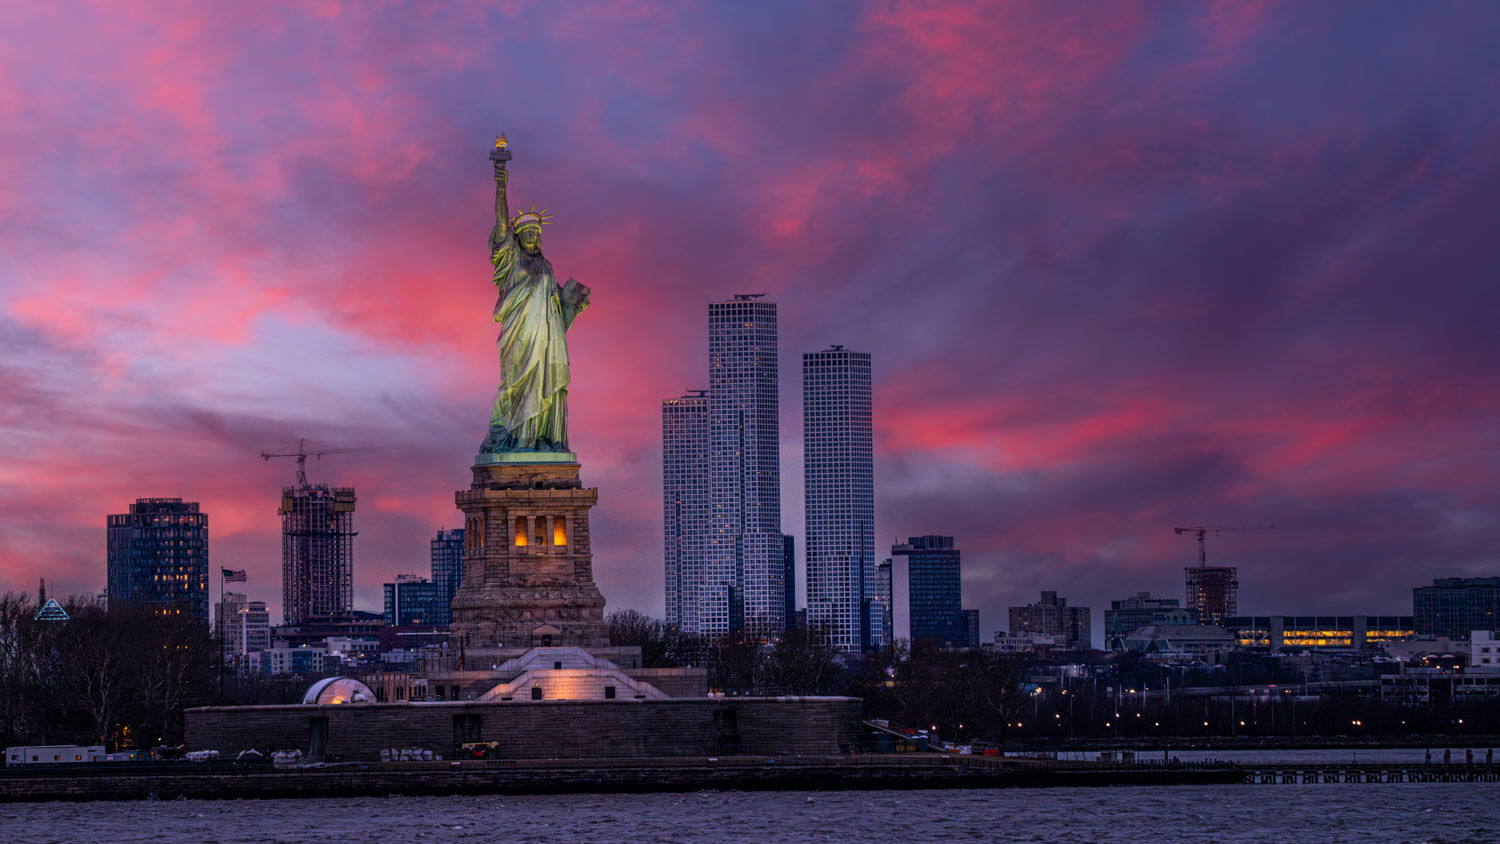
THE RULE: Try to look for something in the foreground — a statue, a flower, a rock, a puddle — that adds a layer of depth between the viewer and the main subject. It transforms a flat photo into a three-dimensional one.
Tip 4 — Frame Within a Frame
One of my favorite composition tricks is framing within a frame. The idea is simple: find natural elements that surround and highlight your subject.
Whether it's an arch, a doorway, or any opening in the scene, it creates a natural frame that draws the viewer's eye straight to the subject and adds a strong sense of depth.
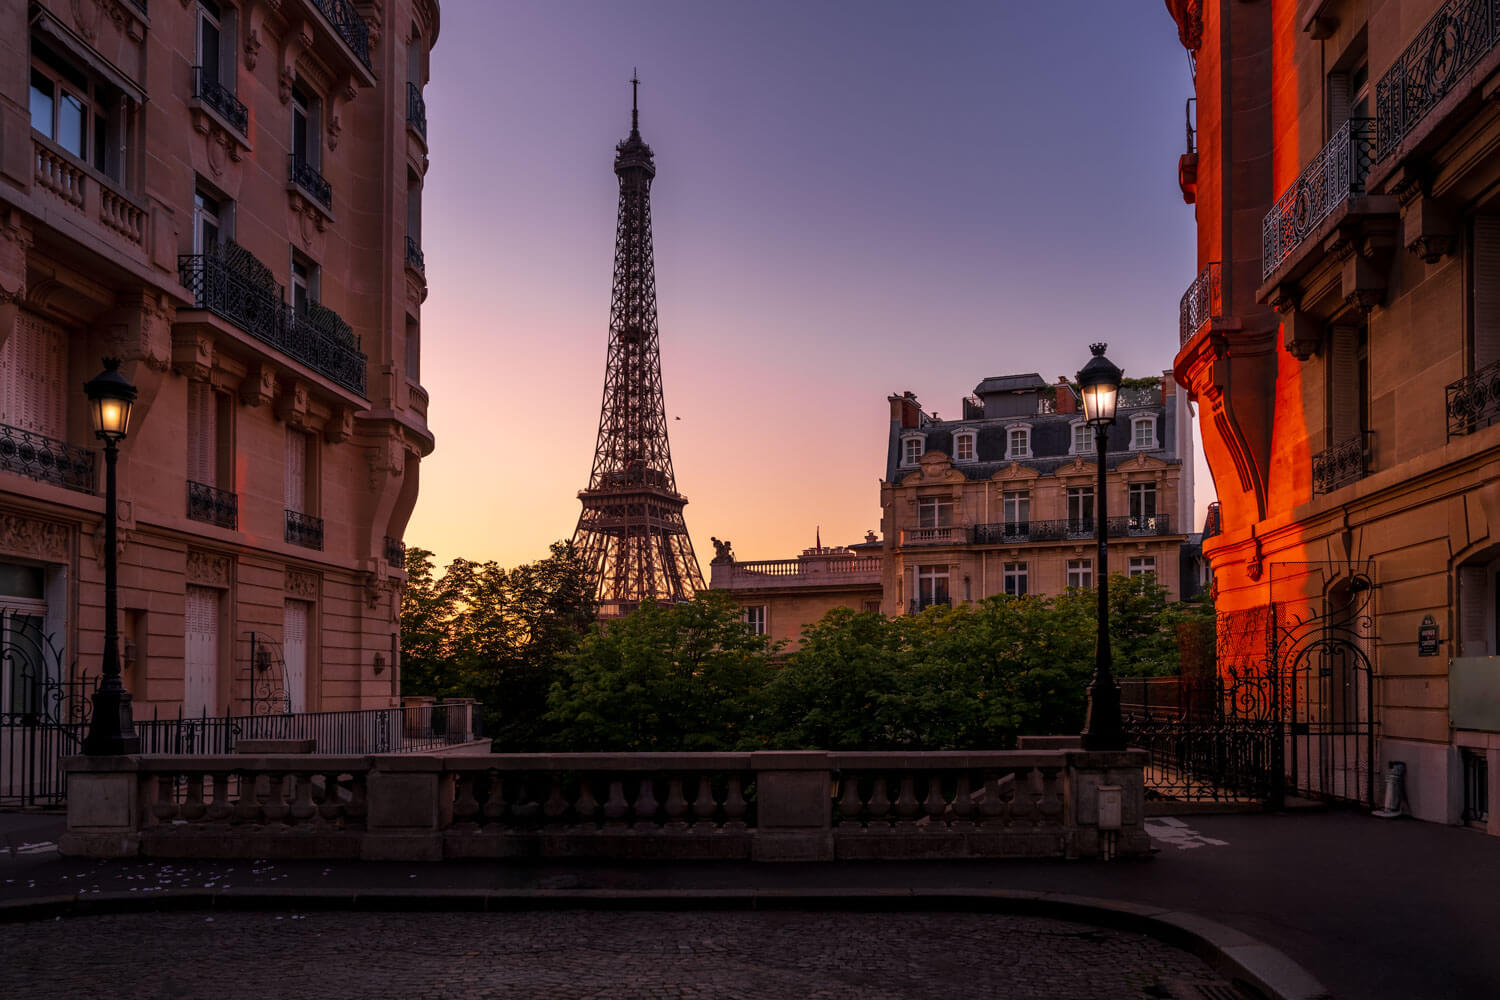
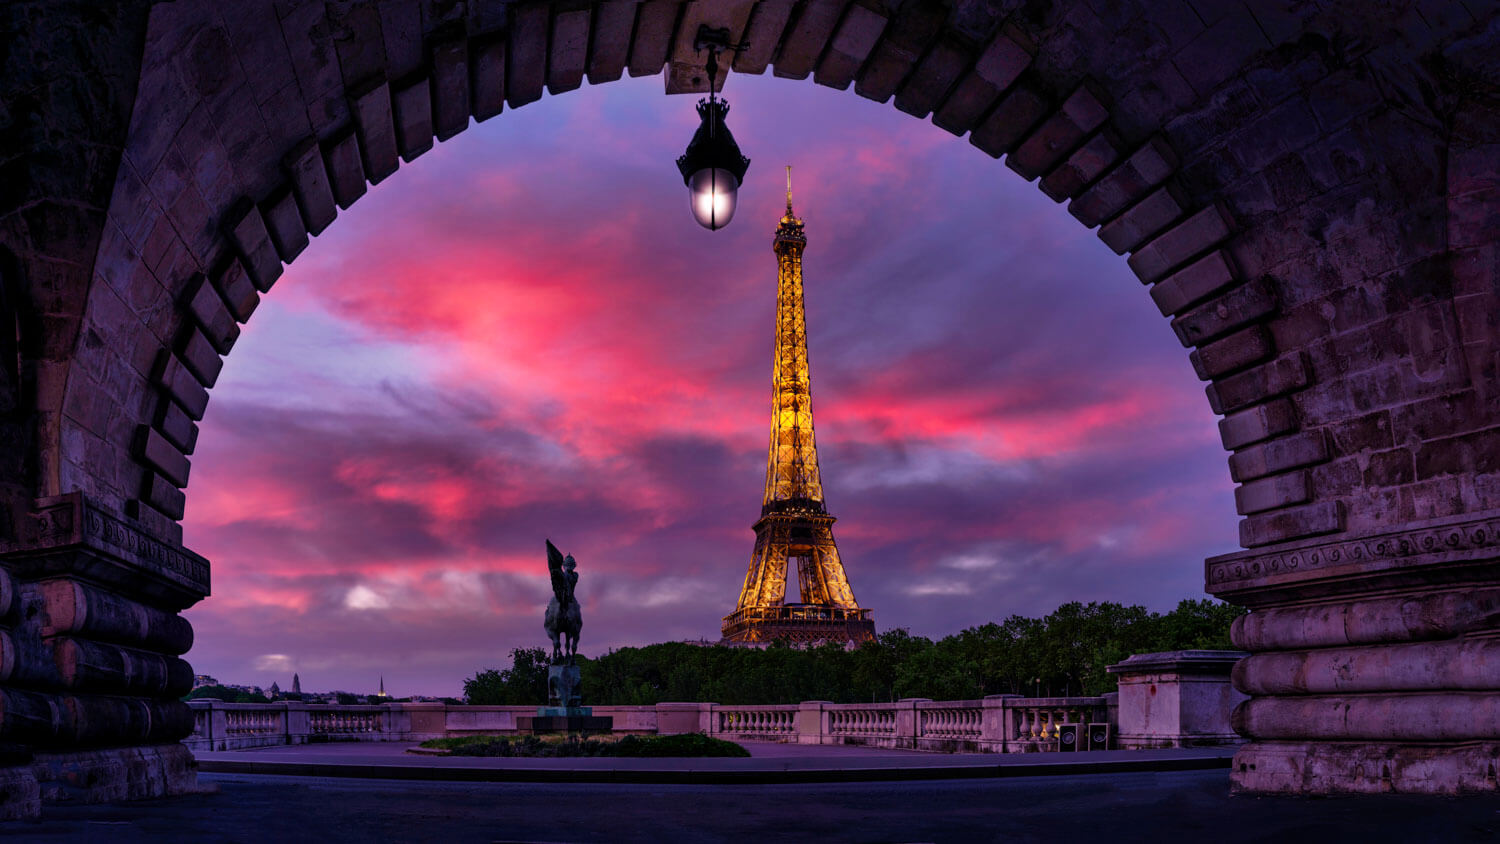
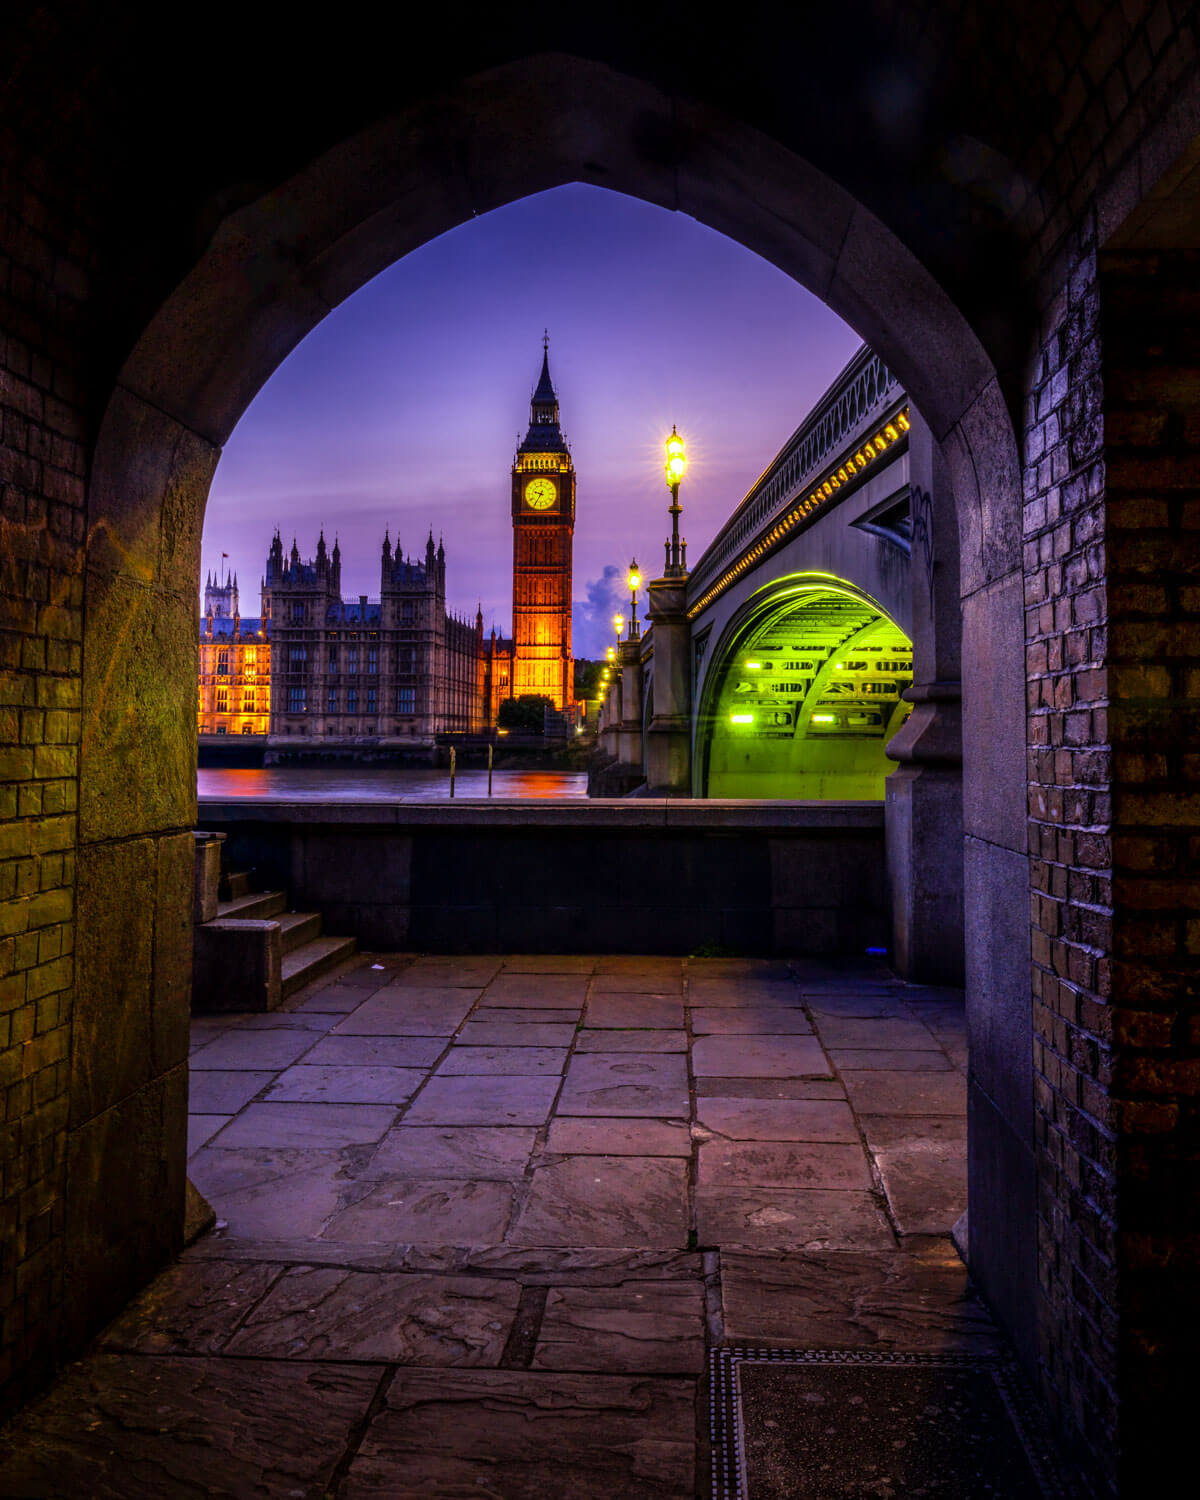
THE RULE: Look for arches, doorways, windows, tree branches, or any natural opening that you can use to frame your main subject. It creates a sense of depth and draws the eye directly to the subject.
Tip 5 — Shoot at the Golden Hour
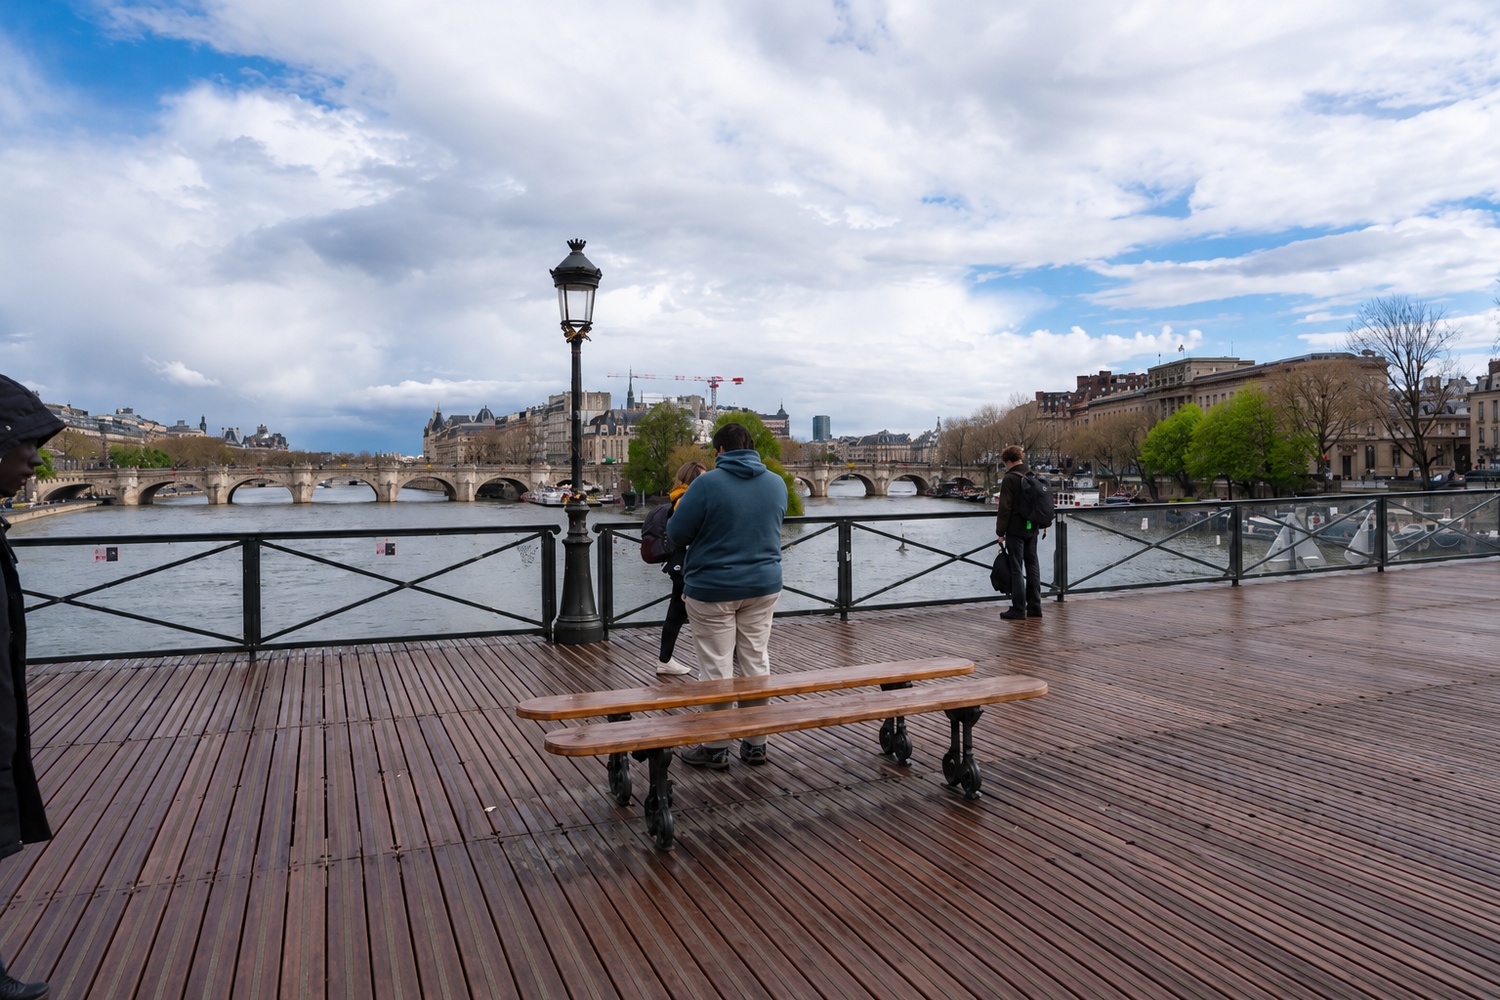
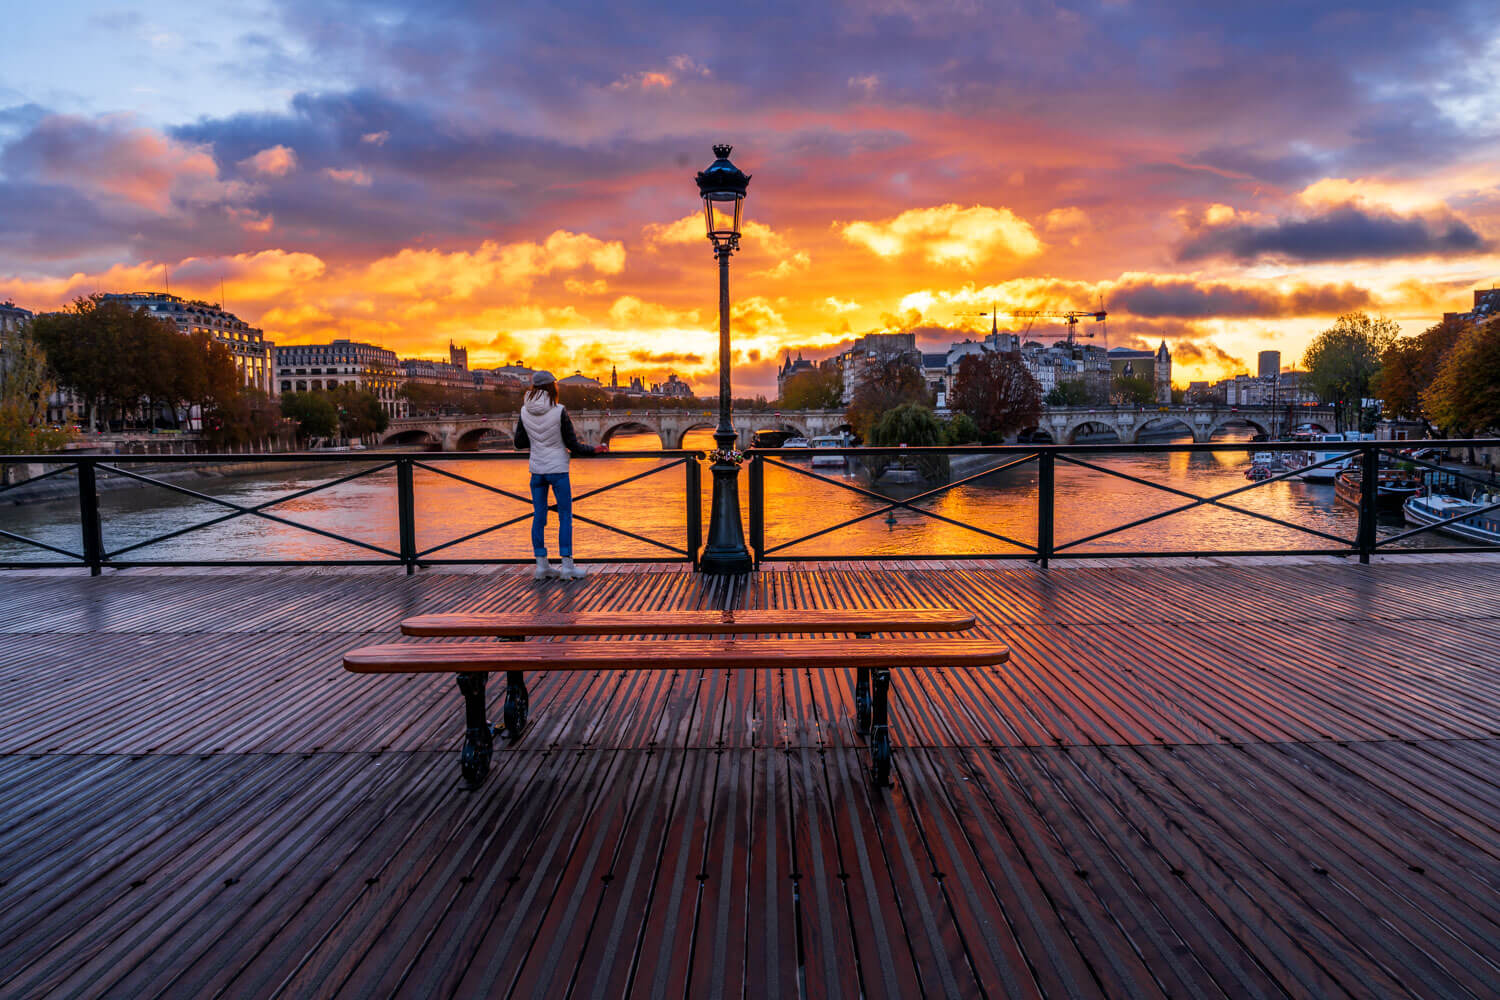
The golden hour is either at sunrise — after the sun has risen — or it is one hour before sunset. It's when the sun is low and everything is golden.
Great light can completely transform a photo. The exact same composition taken at sunrise feels far more powerful than in daylight, because photography is all about light.
THE RULE: Wake up before sunrise. Be on location 30 minutes before the sun comes up. The light lasts for about 20–30 minutes and it is absolutely worth it. A mediocre composition at golden hour will always beat a perfect composition at midday.
Tip 6 — Shoot at the Blue Hour
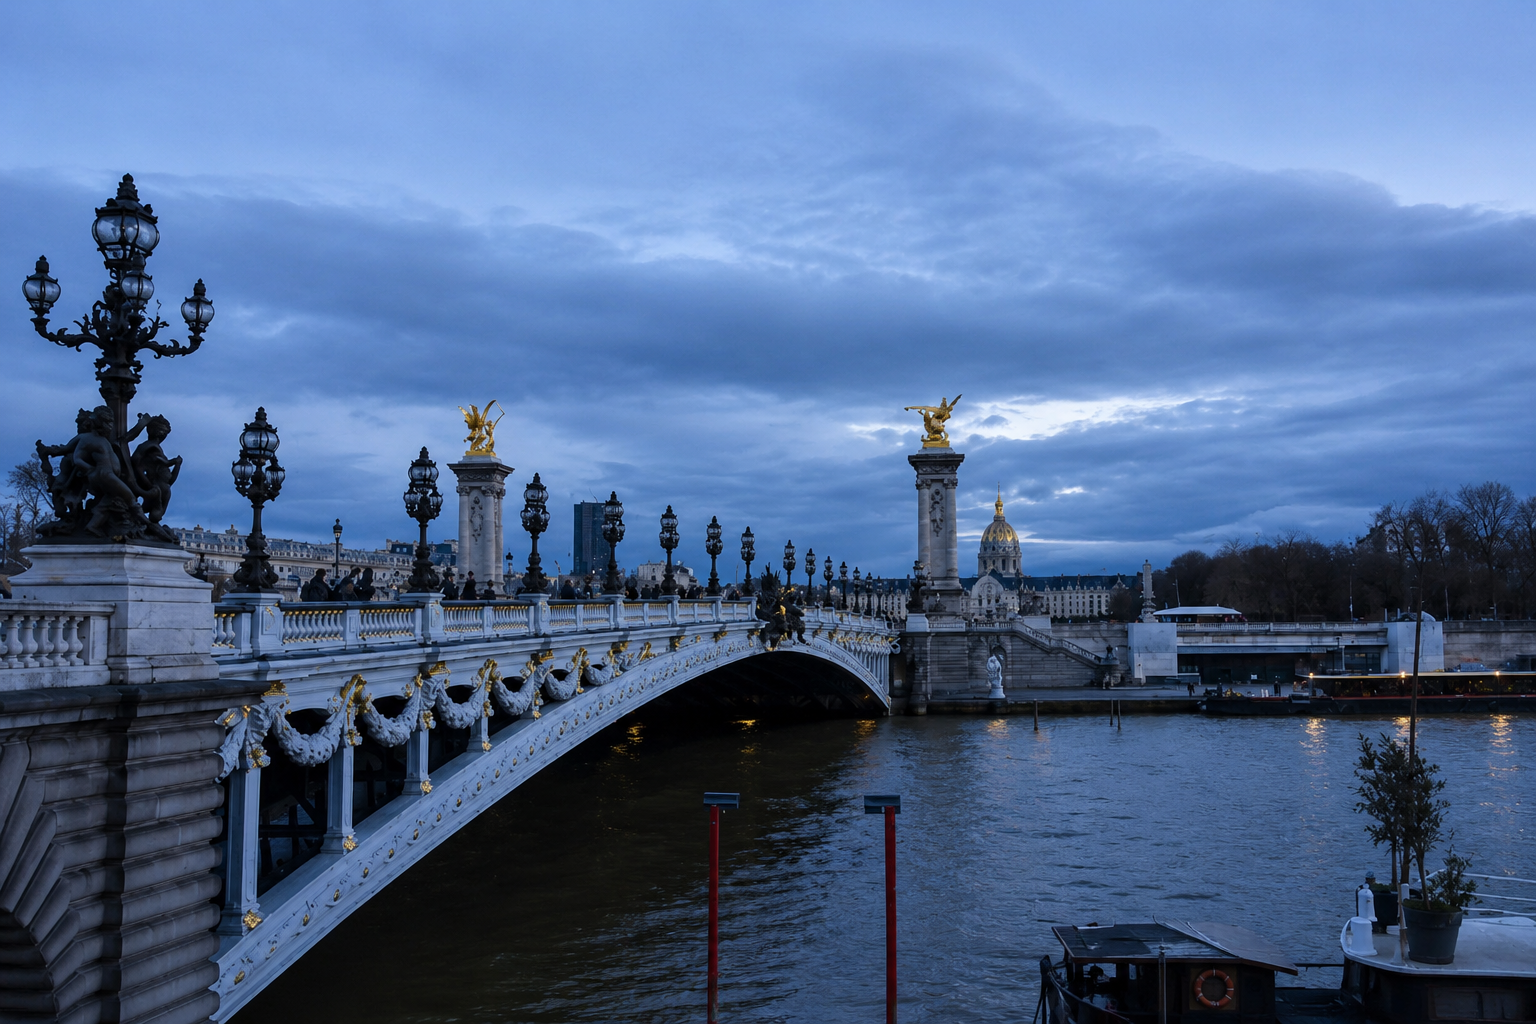
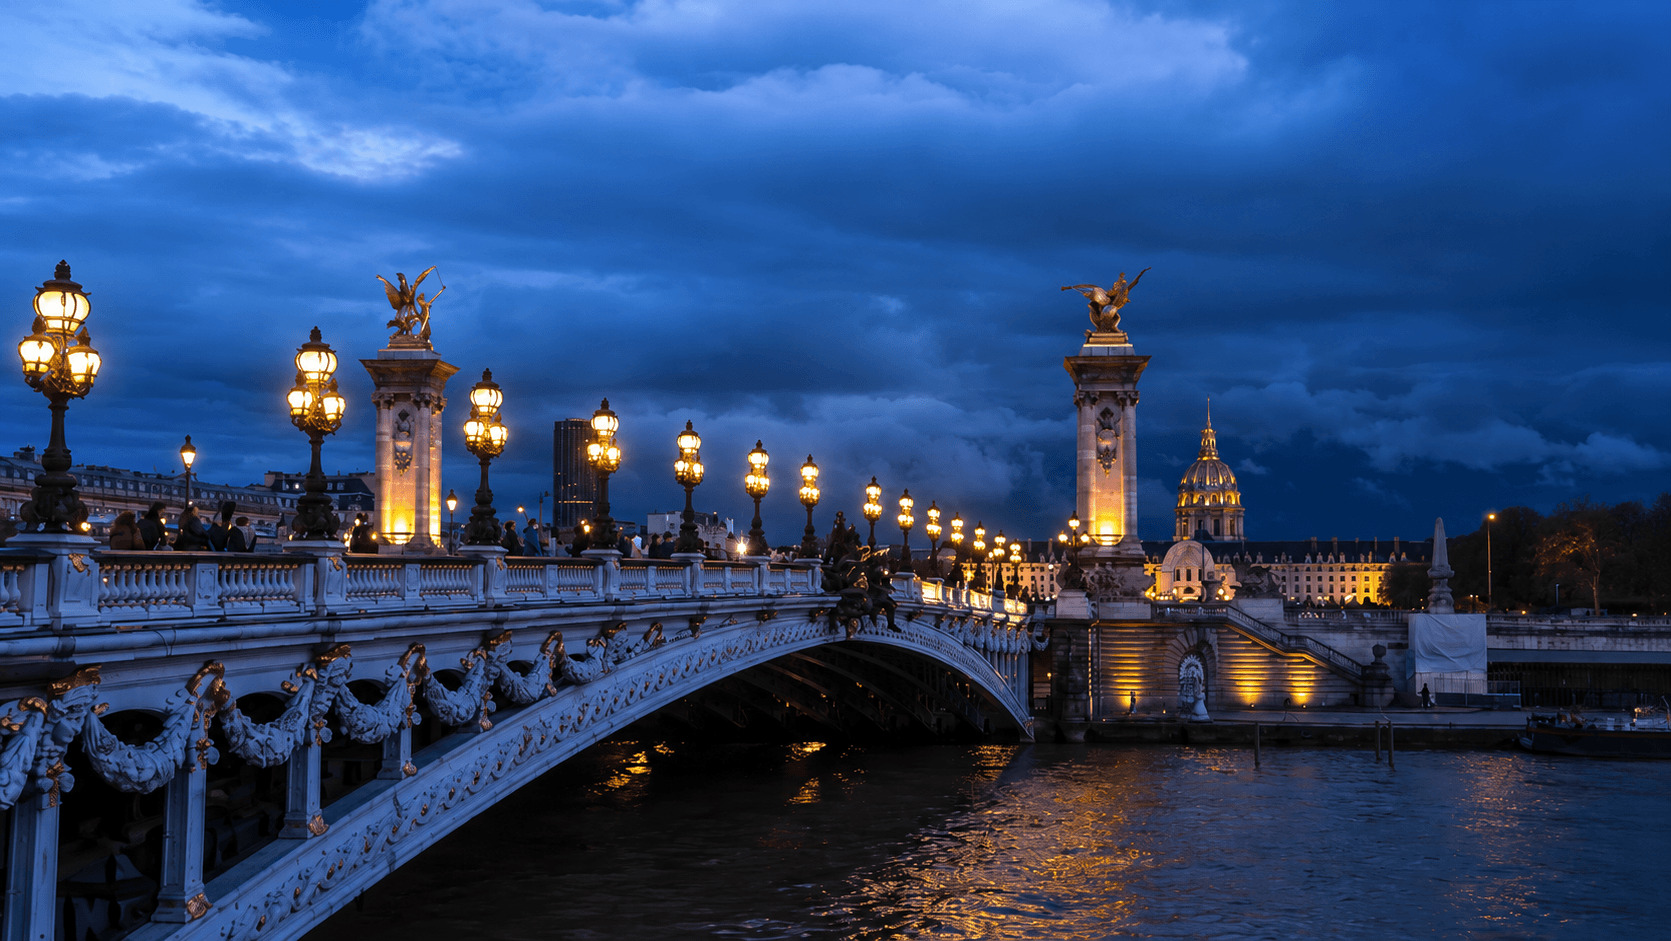
This view looks nice, but the magic happens during blue hour — when the city lights turn on before the sky gets dark. For a few minutes, the light is perfectly balanced, creating the best atmosphere for photography.
THE RULE: The blue hour happens twice a day — just before sunrise and just after sunset. You have roughly 10 minutes. Set up your composition in advance while the light is still bad, so that when the blue hour hits, you are ready to shoot immediately.
Tip 7 — Ride the Light, Not the Location
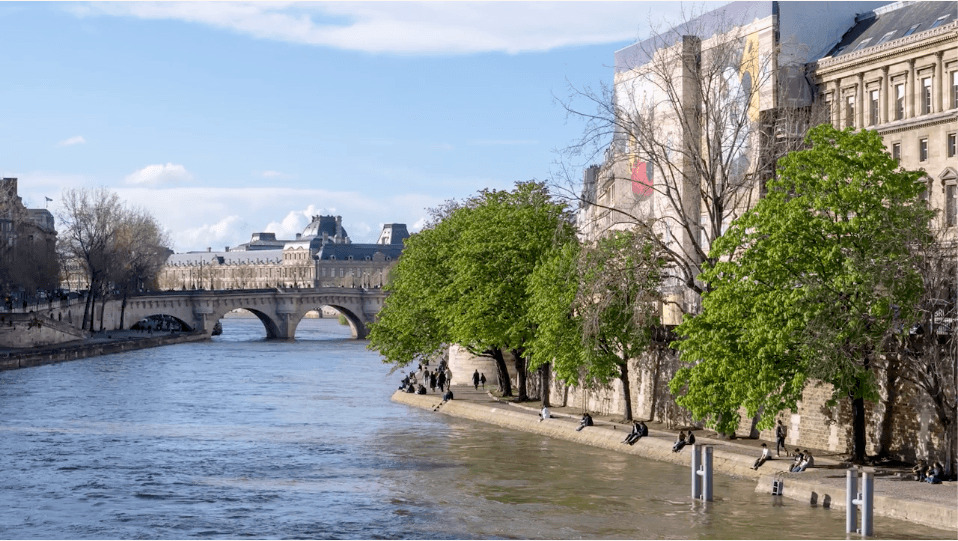
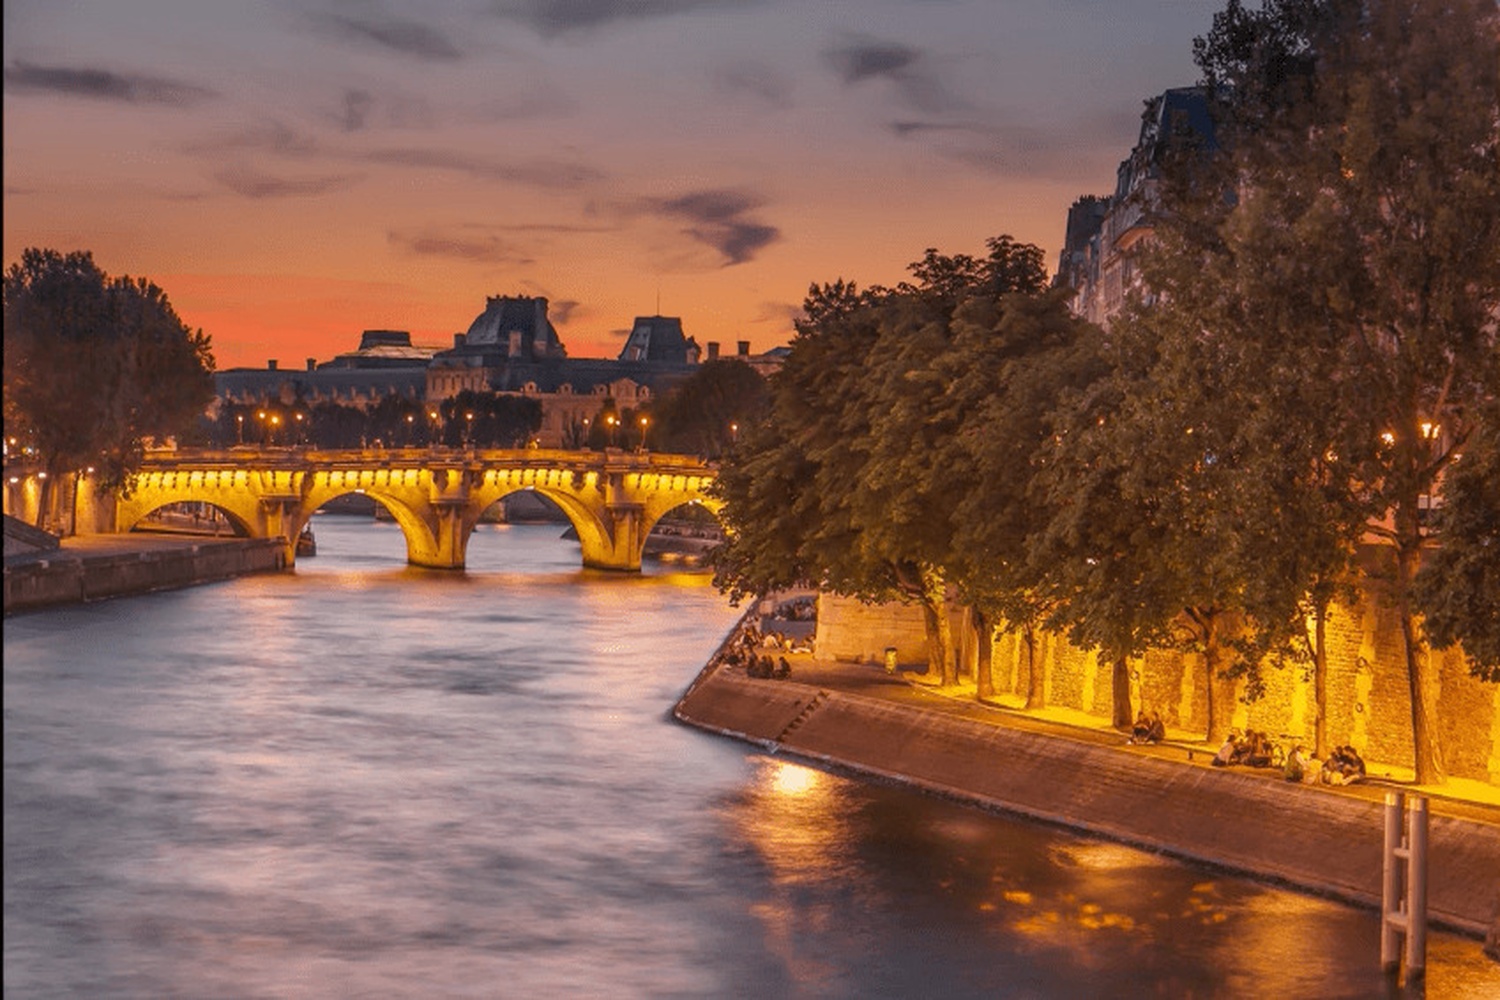
I love the leading lines of the Seine River, but right now the light is okay — but it's kind o boring.
Now compare this with this incredible sunset that I got, which I actually ended up making the cover of a book. Photography means riding with the light. And that's the difference.
THE RULE: A great location with bad light is a wasted trip. Come back. Come back again. The location does not change — the light does. Your job is to be there when the light is extraordinary.
Tip 8— Find High Vantage Points
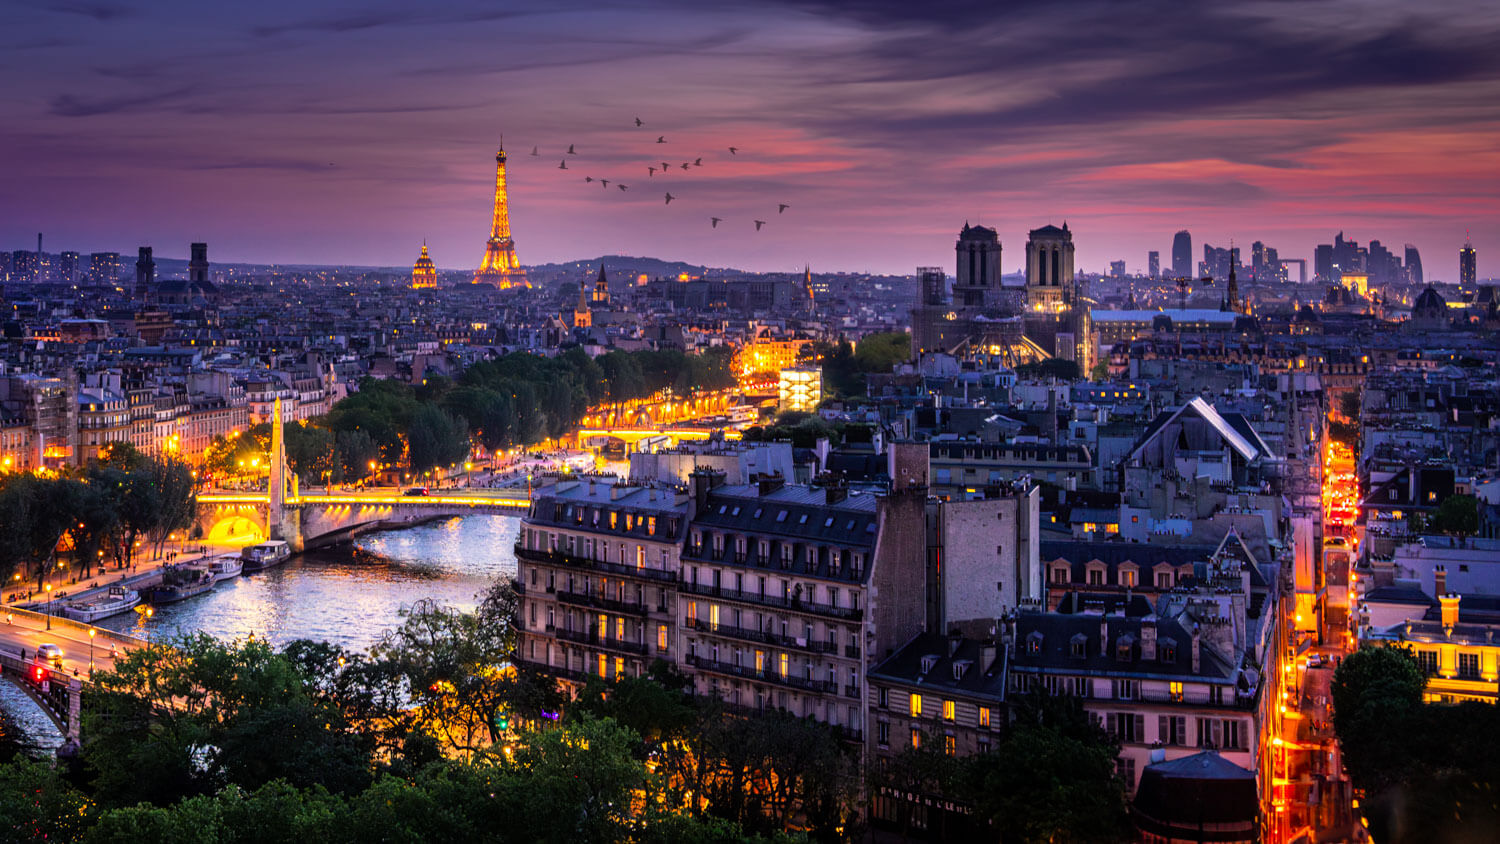

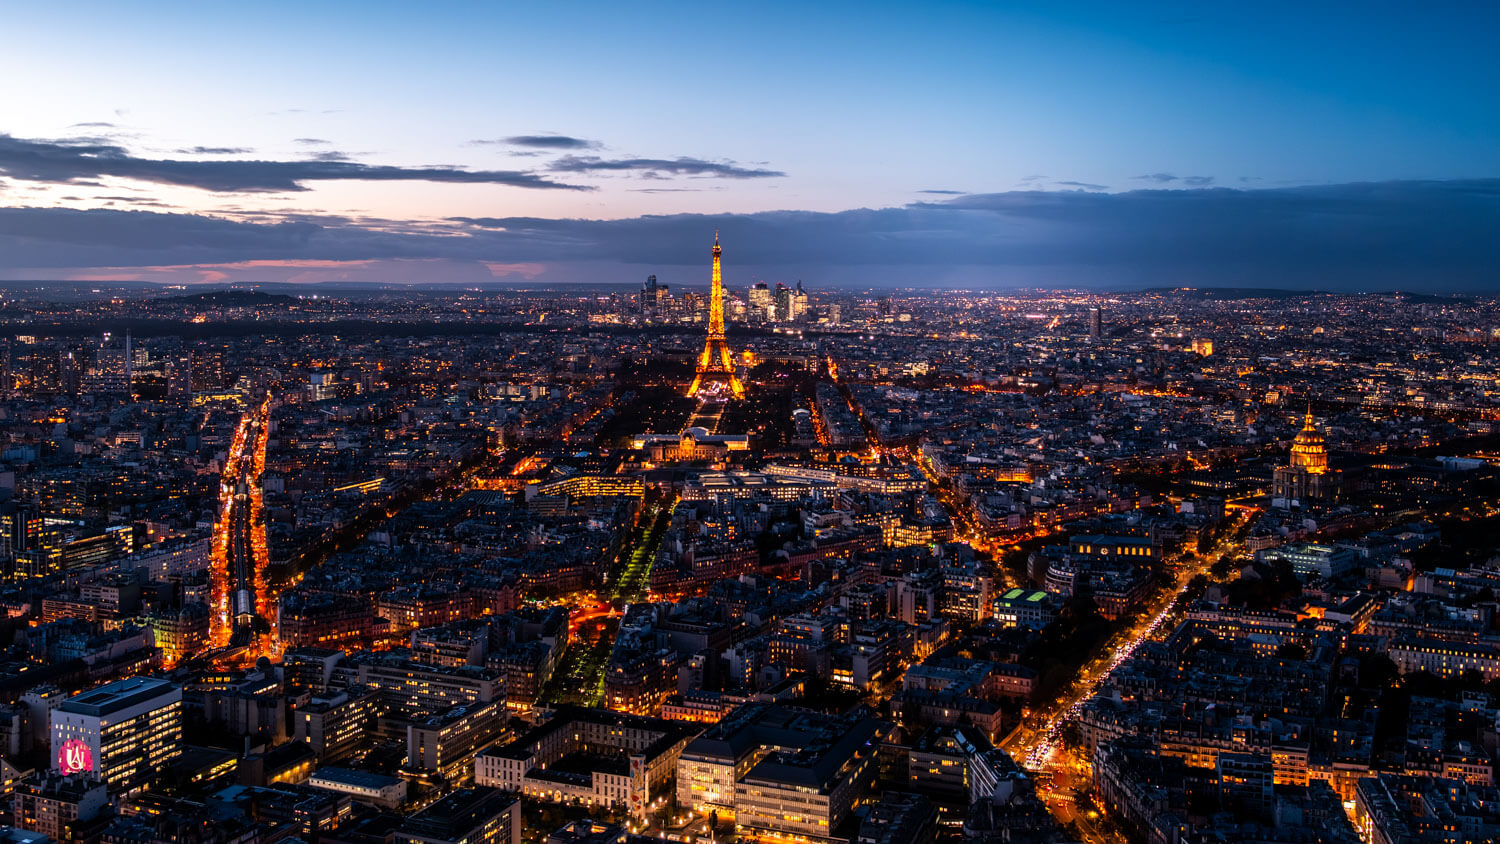
Finding high vantage points is a great way to capture unique city views. With a bit of research, you can discover amazing spots for powerful photos, especially at night.
THE RULE: Most photographers shoot from eye level. Go higher. Research rooftop bars, observation decks, hotel terraces, and hilltops before you arrive at a new city. The elevated perspective changes everything.
Tip 9 — Isolate Your Subject
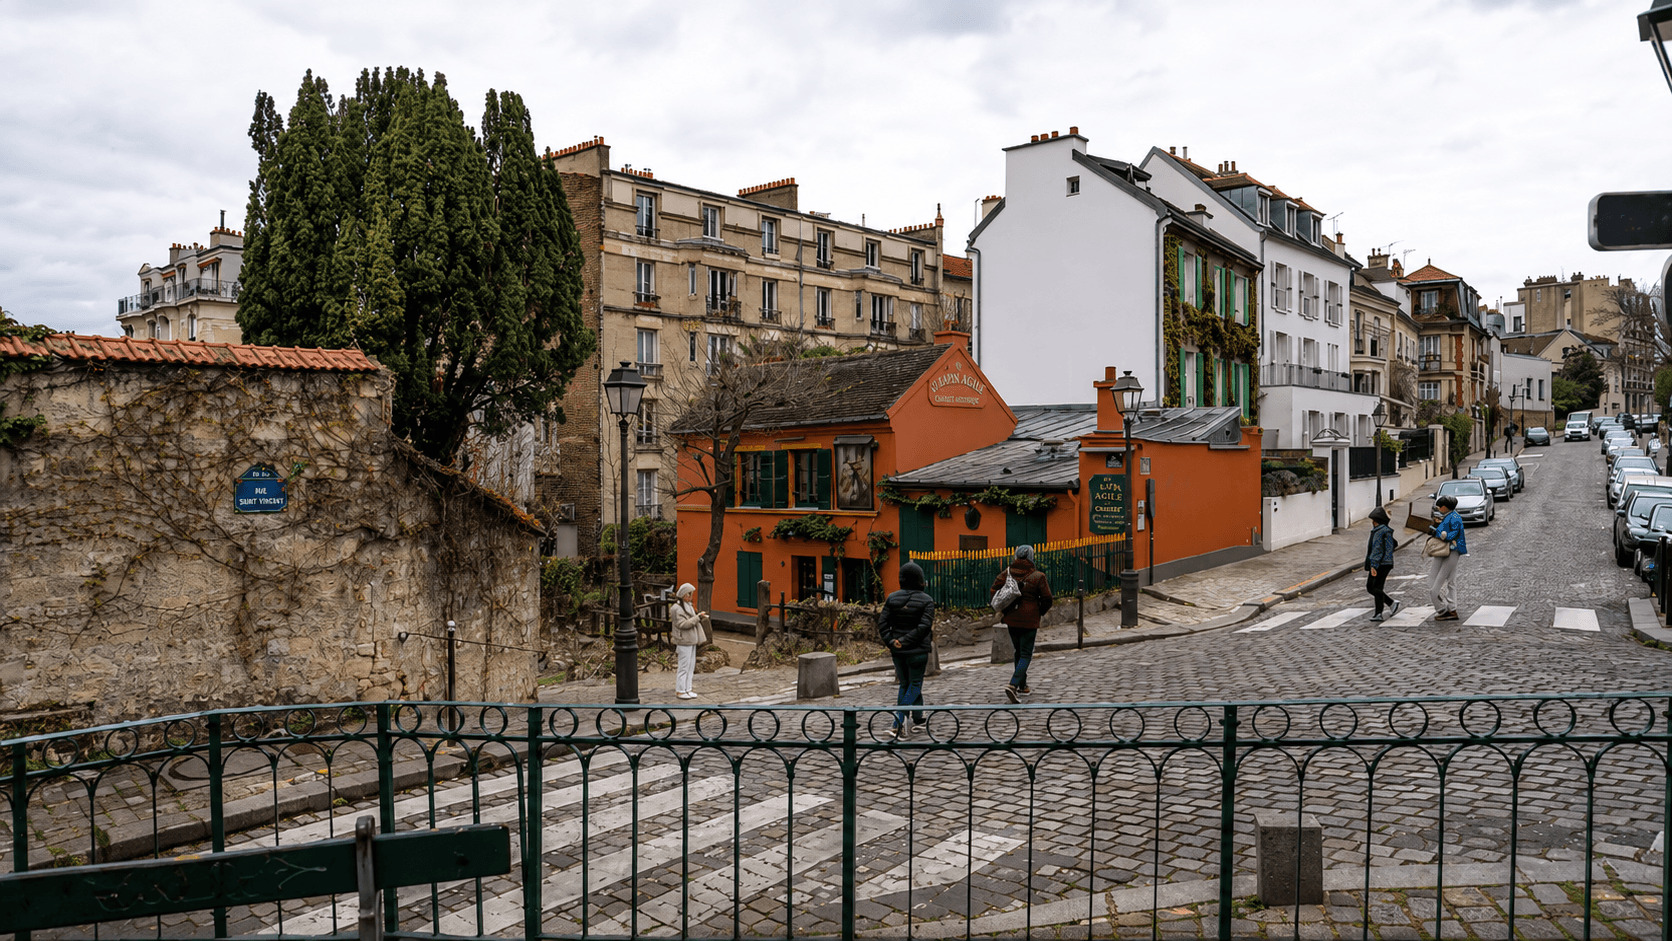
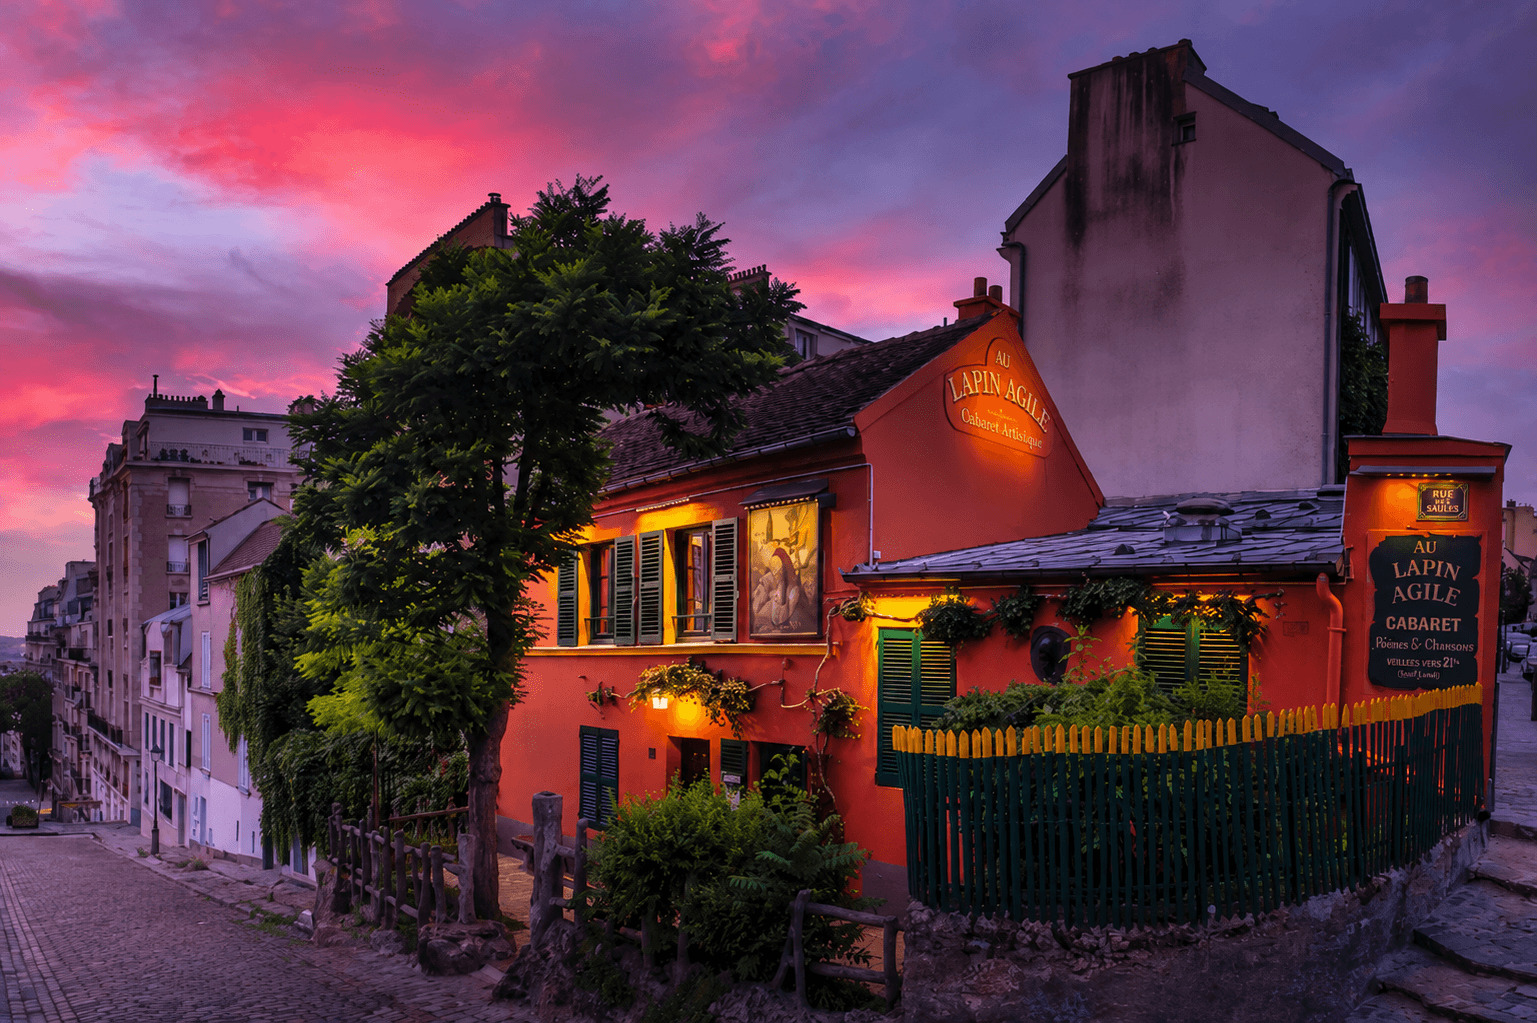
Composition is about telling a story: remove distractions and keep only what strengthens the image.
From far away, the scene can feel cluttered with distractions. By getting closer, choosing a better angle, or even creating a panorama, you can isolate the subject and build a much stronger photo.
THE RULE: Move closer. Change your angle. Eliminate distractions — trash cans, fences, random people, parked cars. Every element in your frame must earn its place. If it doesn't serve the story, remove it physically or in post.
Ready to get 1 on 1 support to master your tools and take photos that have that WOW factor? Apply to become a certified Master of Photography here.
Tip 10 — Use Telephoto Compression
Using a telephoto lens can compress a scene and create a strong frame within a frame. Adding foreground elements and waiting for the right light — especially blue hour — can completely transform the shot.
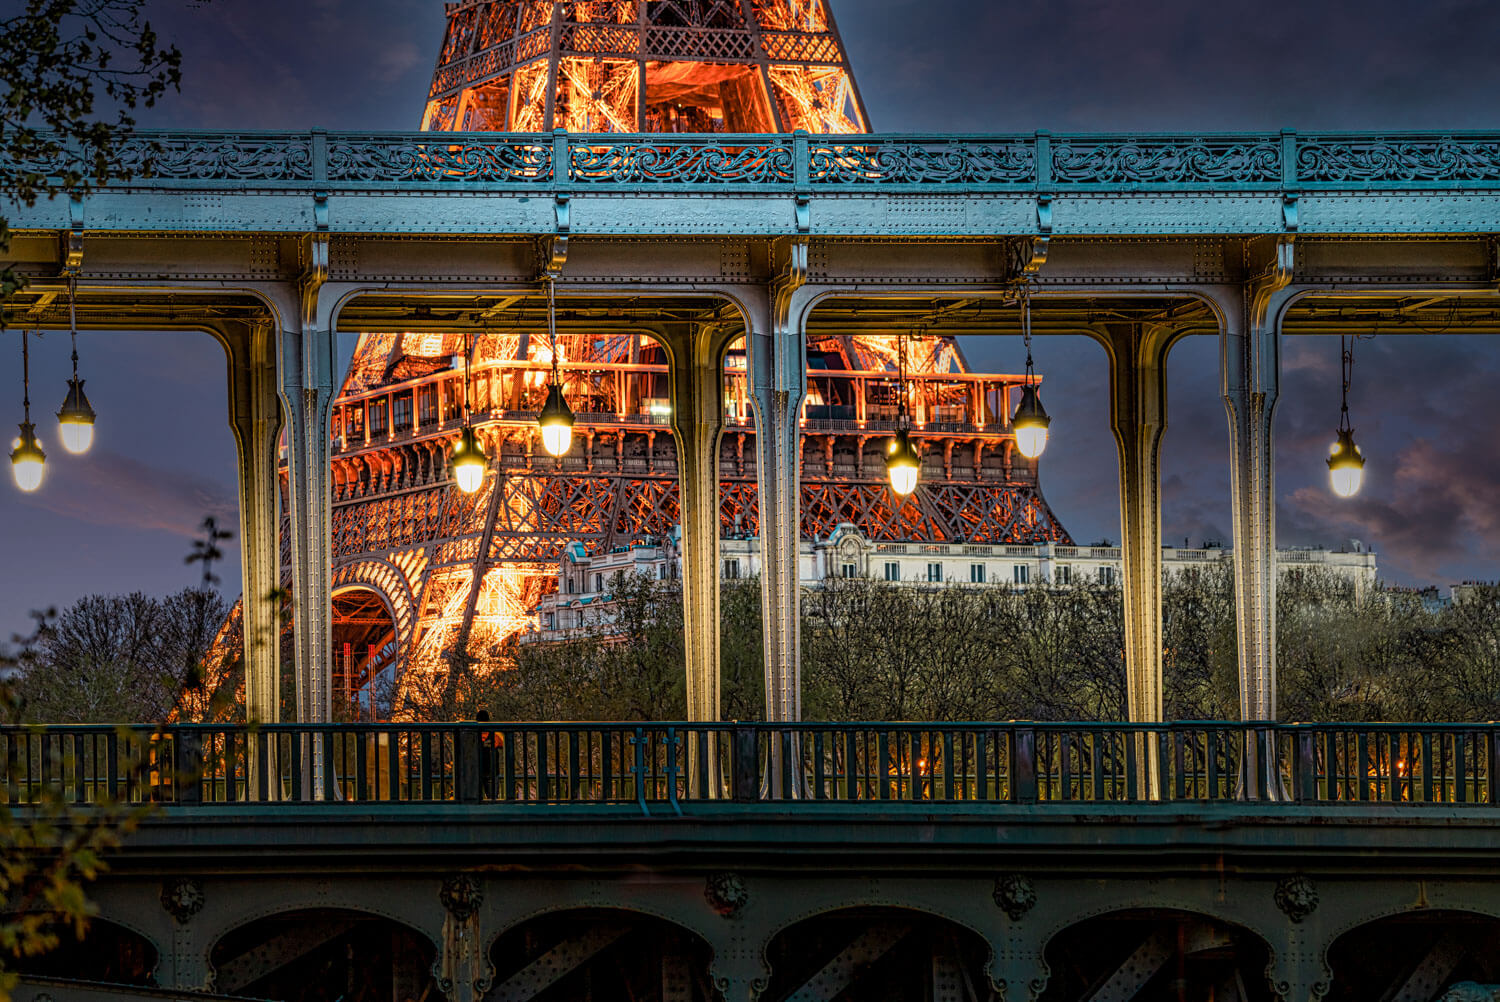
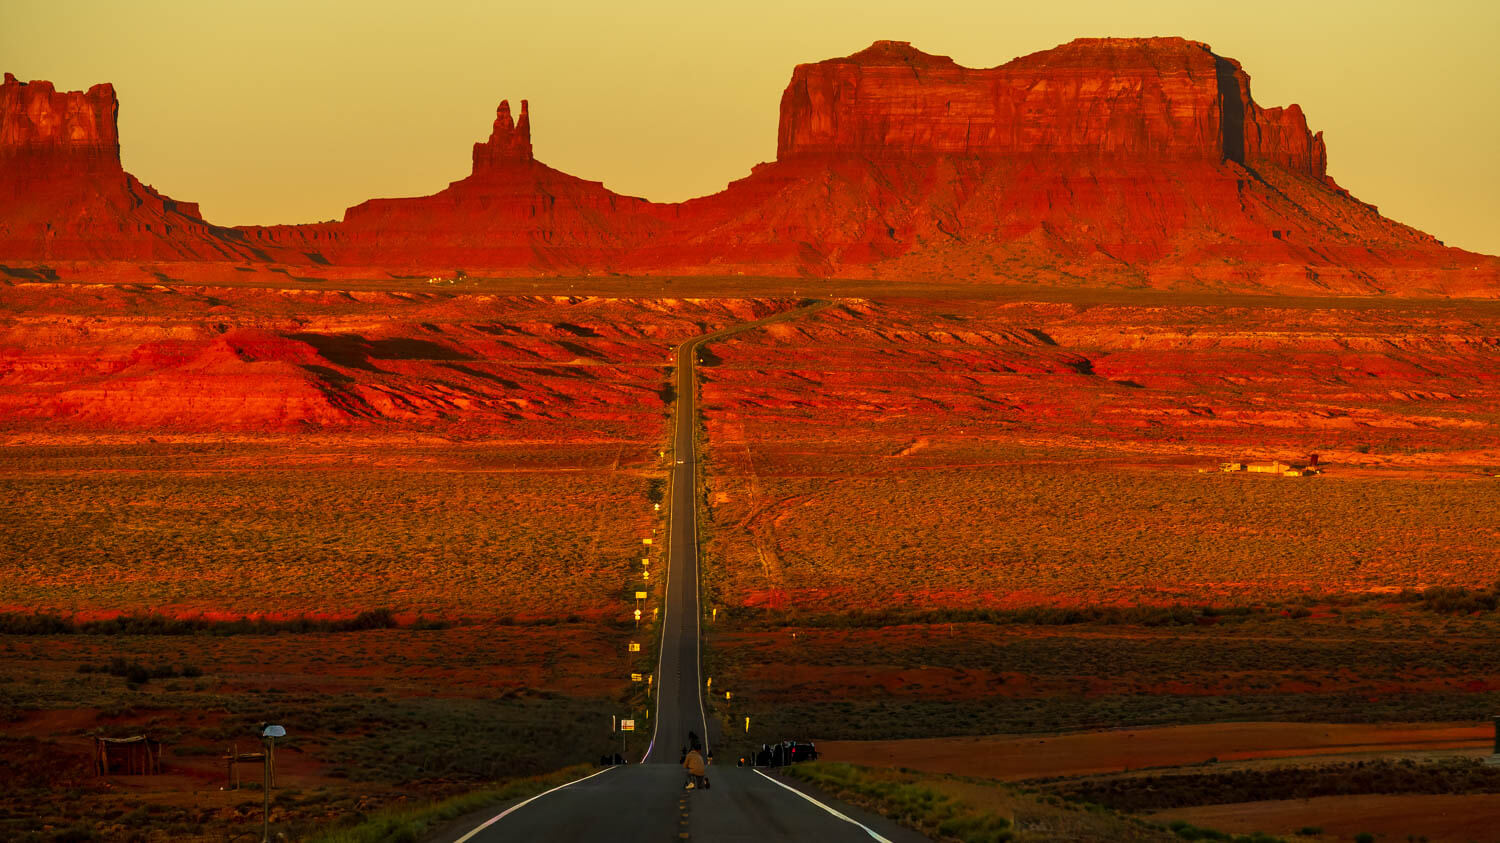
THE RULE: A telephoto lens does two things: it compresses distance (making background elements appear closer to the foreground) and it allows you to frame within a frame from far away. Use it when you want to stack layers of a city into a single powerful image.
Tip 11 — If Your Lens Isn’t Wide Enough, Do Pano !
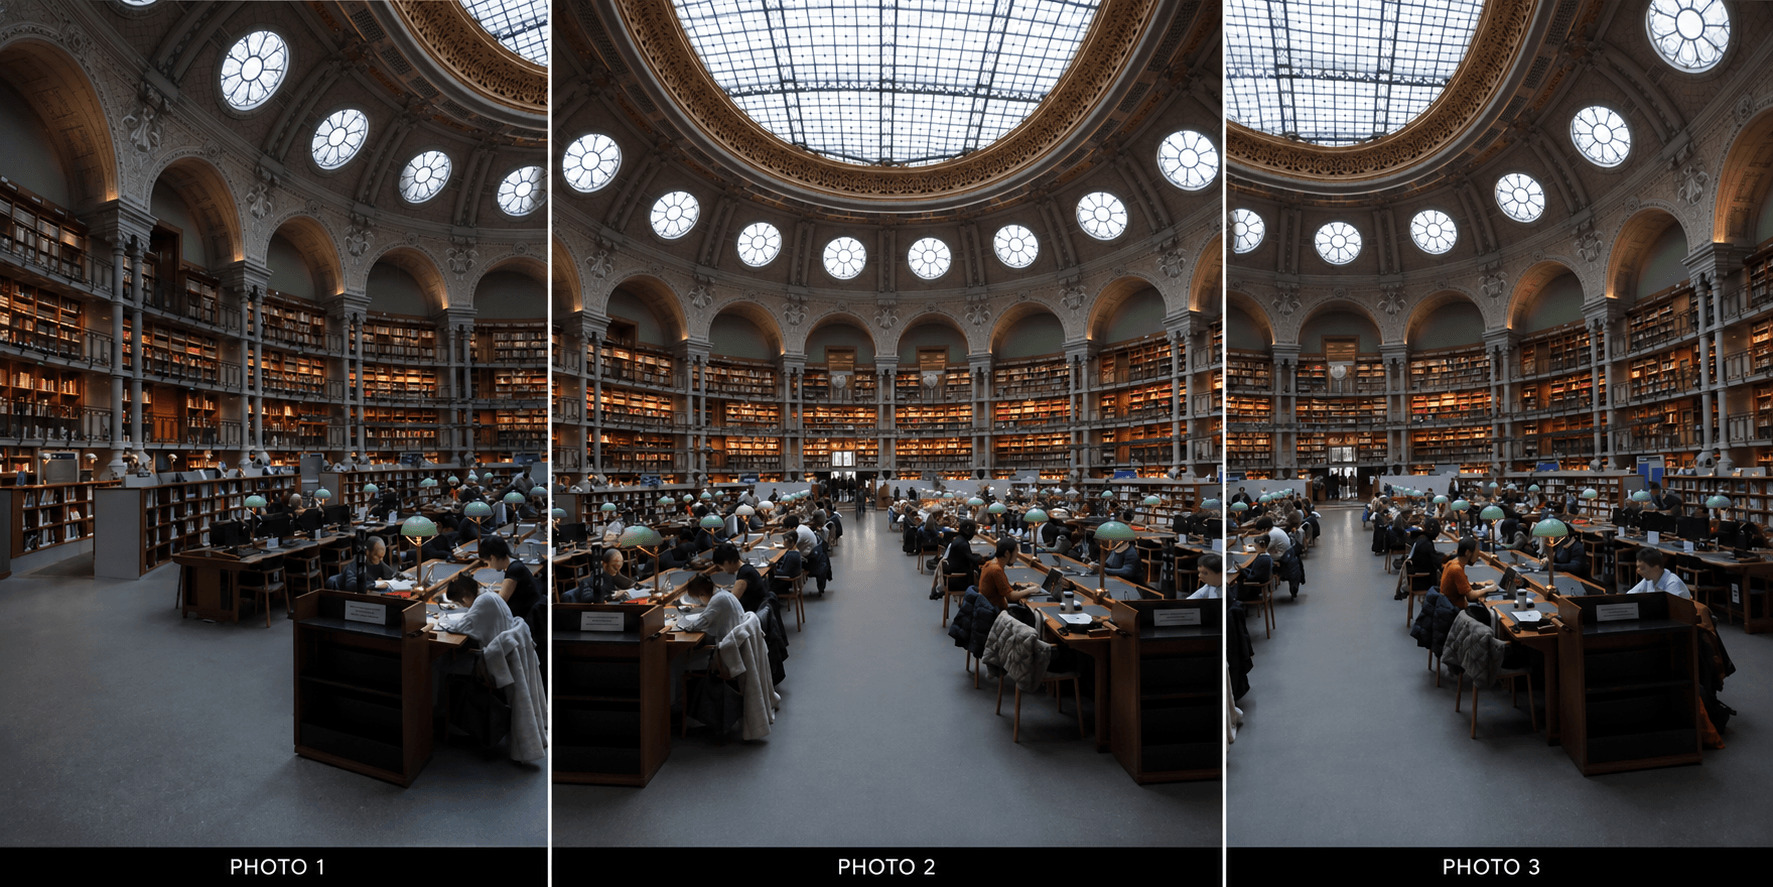
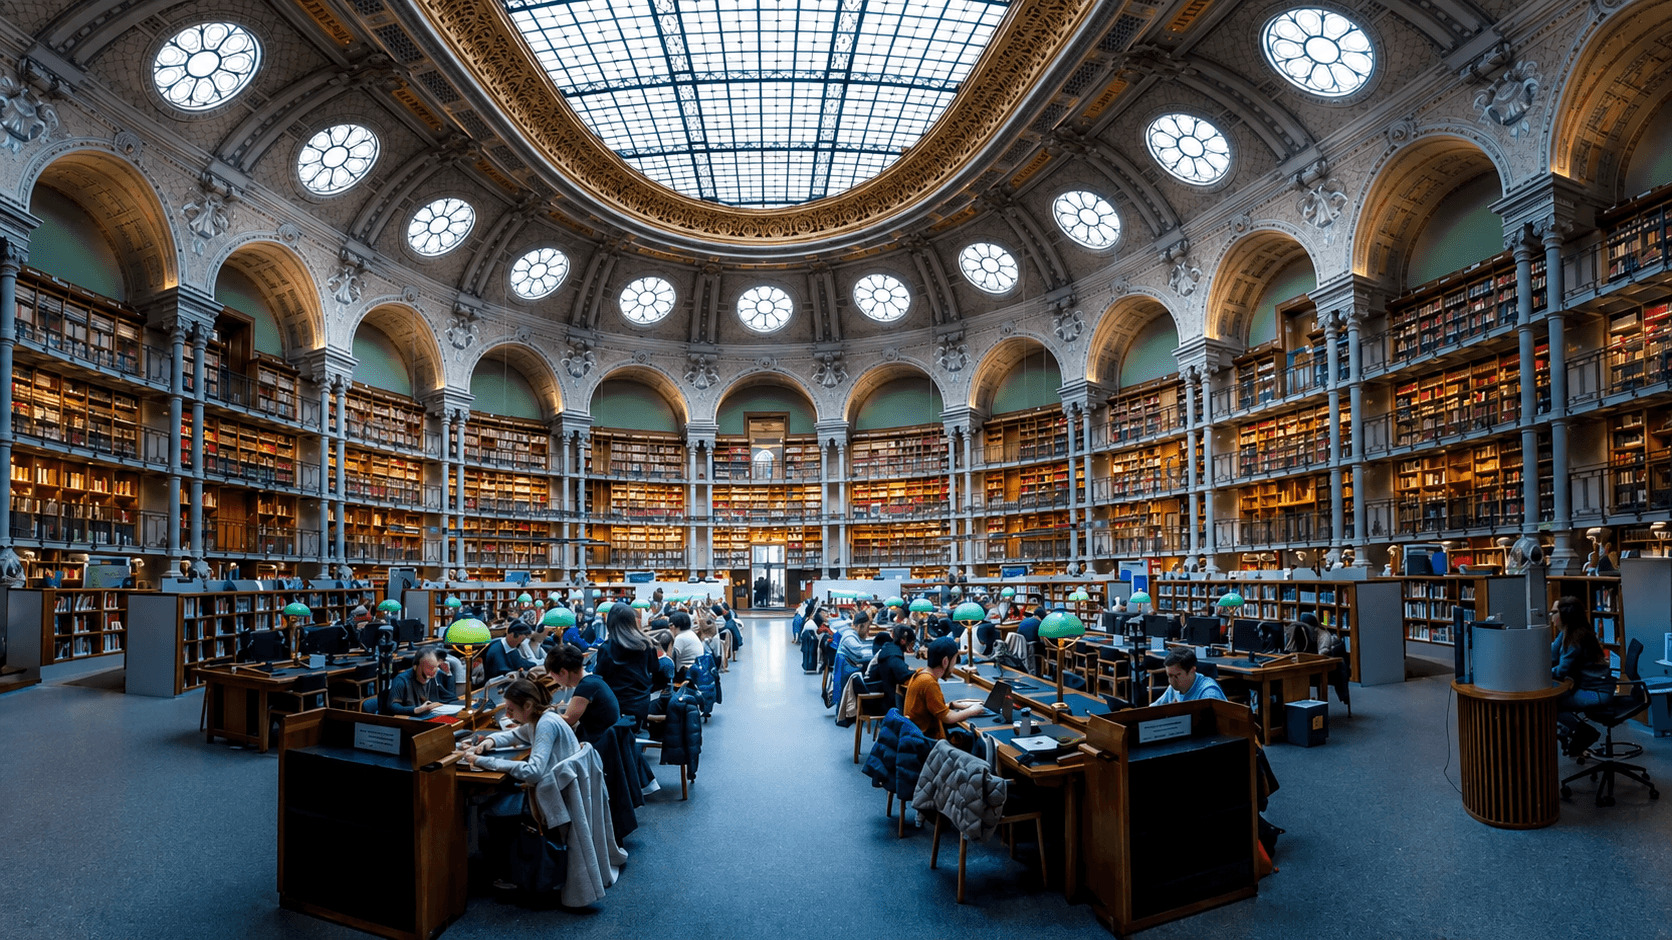
No fancy transition here. I'm at Richelieu's Library. I have to be quit. If Your Lens Isn’t Wide Enough, Do Pano !
Tip 12 — Shoot Very Long Exposures
Long exposures are a great way to bring a scene to life. Using an ND filter and a slow shutter speed can smooth the water, stretch the clouds, and create a more dramatic atmosphere.
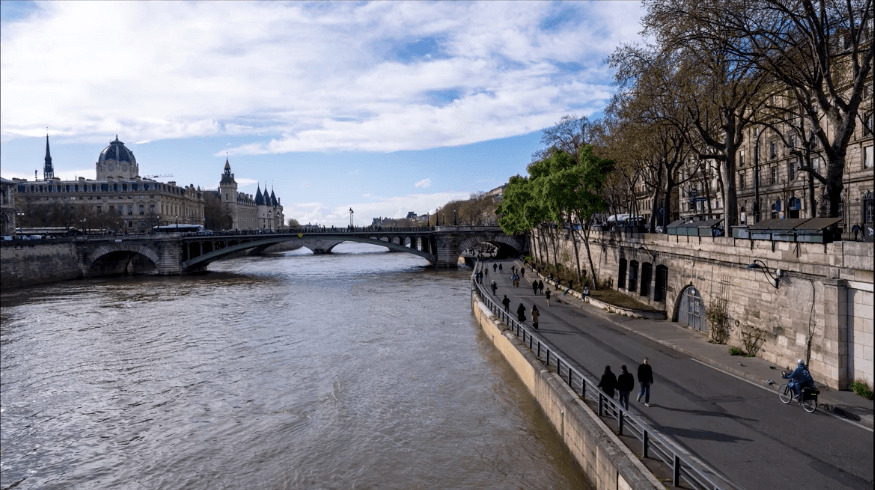
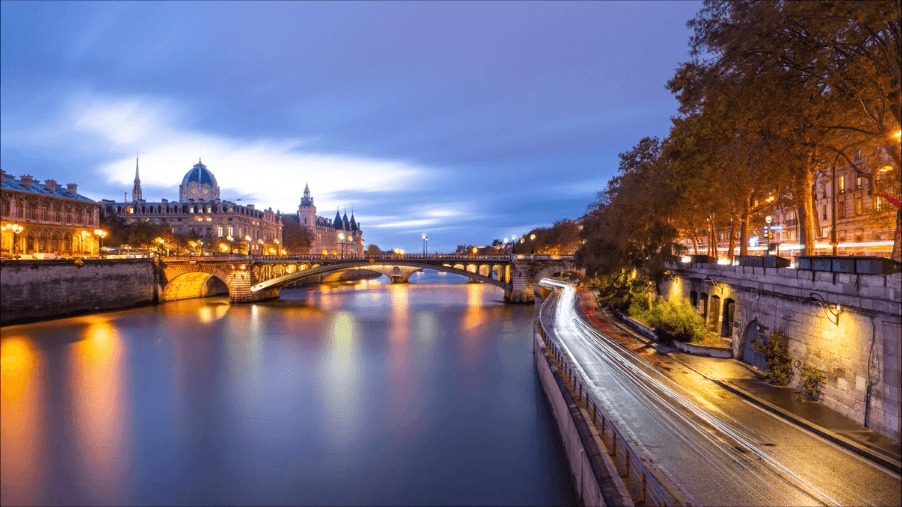
THE RULE: For cityscapes and landscapes with water or sky, a long exposure transforms the ordinary into the extraordinary. Use an ND10 filter, set your ISO to the lowest value (ISO 50 or 64), and expose for 2–5 minutes. The movement in the water and clouds becomes silky and painterly.
Tip 13 — Combine Long Exposure With Graphic Subjects
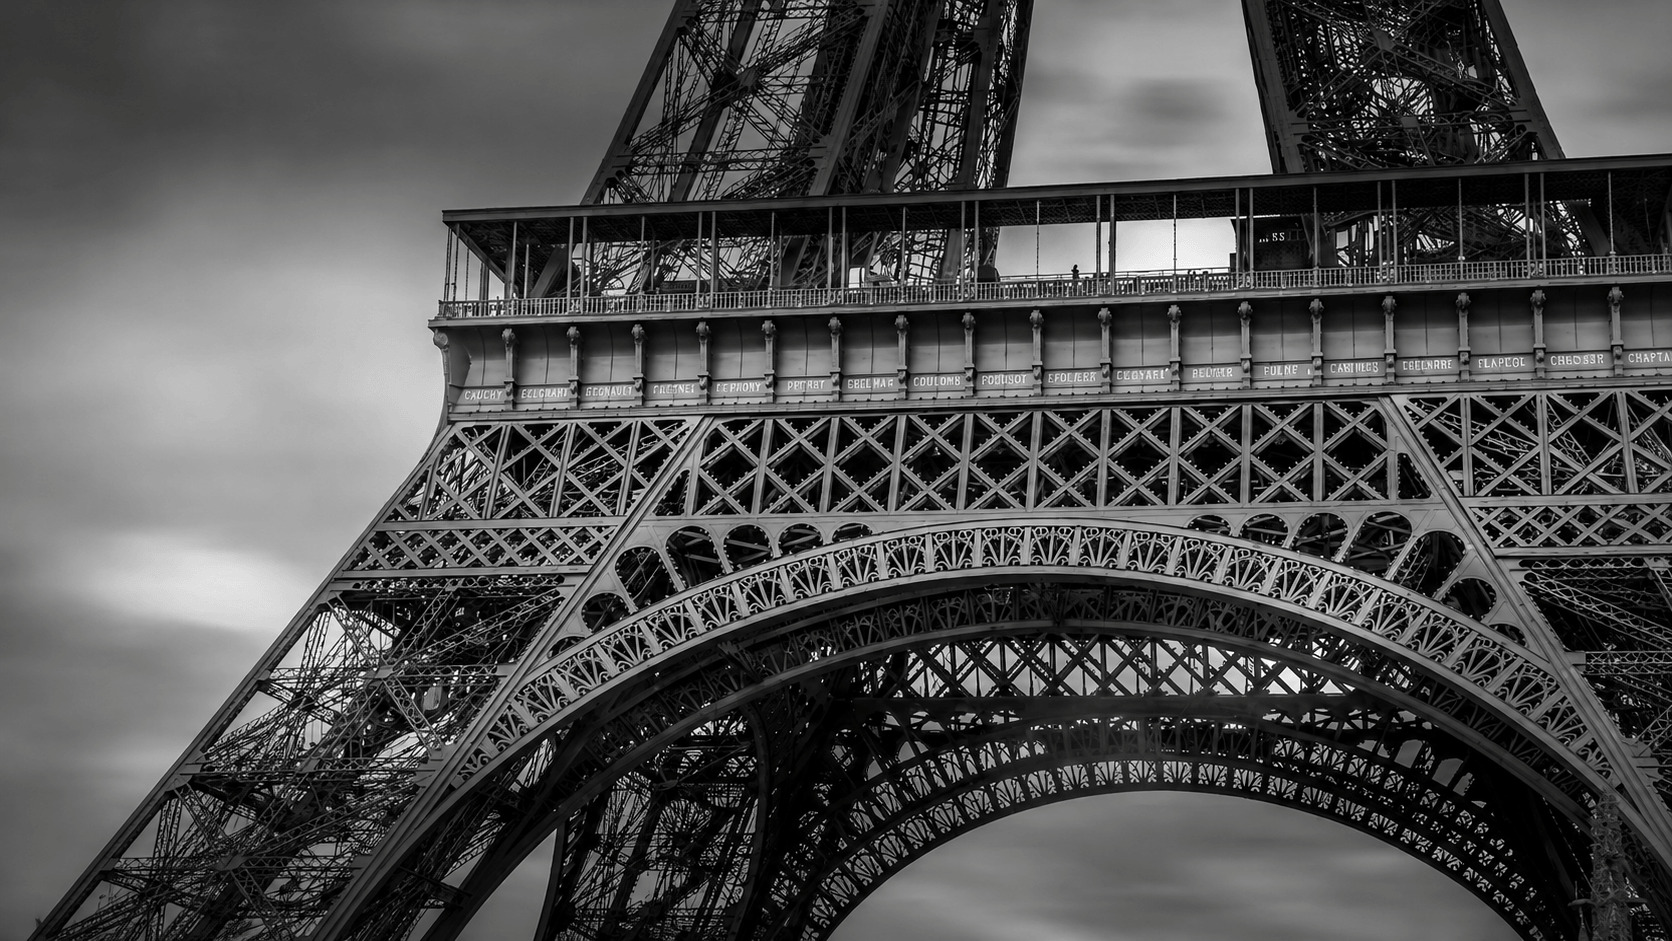
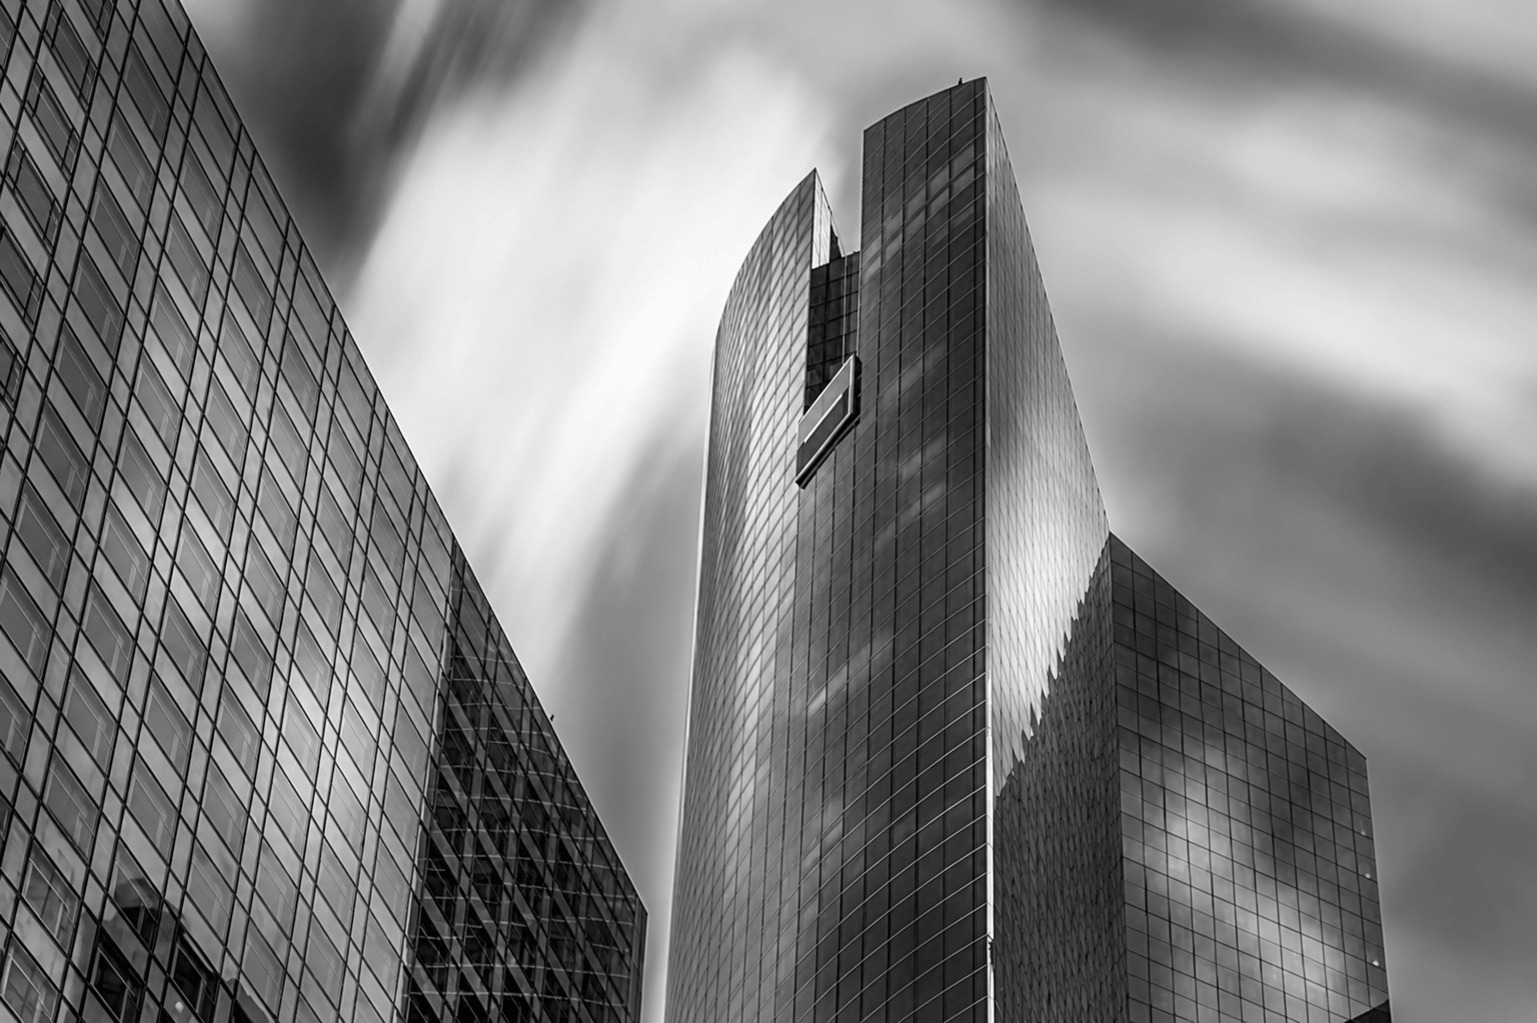
Long exposure with very graphical things. The Eiffel Tower is very sharp. You put on an ND10 filter, you get like a two or three minute exposure, you go to the lowest ISO you can — like ISO 50 — and boom, you get the stretchy clouds and the Eiffel Tower that's very sharp.
THE RULE: The contrast between a perfectly sharp, graphic subject (a tower, a bridge, an arch) and the silky motion of clouds or water is what makes these images so powerful. The stillness of the architecture against the movement of the sky creates a tension that draws the eye.
Tip 14 — Use Negative Space
Negative space is the empty area around your subject that helps draw attention to it. At the Louvre Pyramid, the sky was completely white and uninteresting. Instead of avoiding it, I used it as part of the composition by placing the pyramid at the very bottom of the frame. The large empty space creates a clean, minimalist image and makes the subject stand out even more.
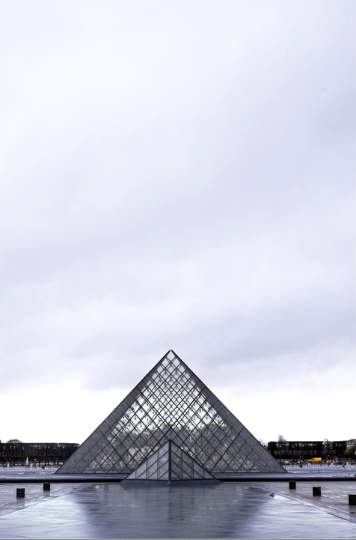
THE RULE: Negative space — the empty area around your subject — is not wasted space. It is breathing room. It makes your subject feel small, isolated, and powerful all at once. A white sky, a flat sea, a blank wall — these are your canvas. Place your subject deliberately within that emptiness.
Ready to get 1 on 1 support to master your tools and take photos that have that WOW factor? Apply to become a certified Master of Photography here.
Tip 15 — Hunt for Shadow and Light (The Alan Schaller Method)
Last tip: inspired by Alan Schaller, look for strong shadows on an old Paris street. Shoot in high-contrast black and white, underexpose the image, and wait for a person to walk through the light for a dramatic urban shot.
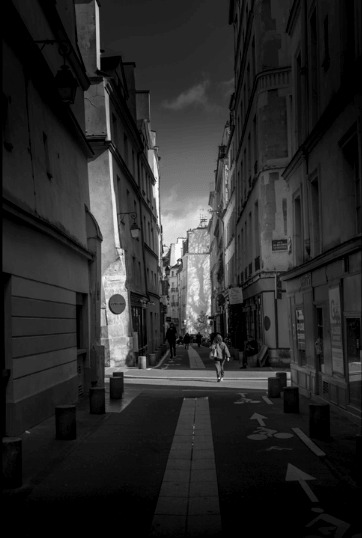
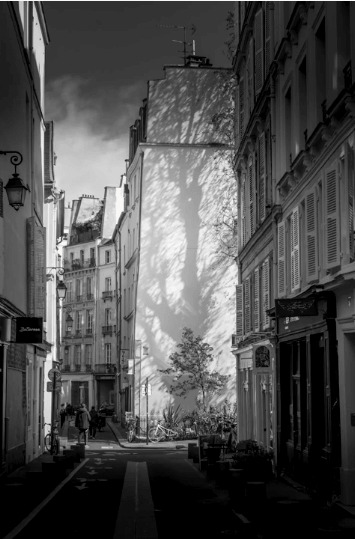
THE RULE: Find a street with strong directional light and deep shadows. Set your camera to black and white with maximum contrast. Underexpose. Wait. The moment a single person walks through the shaft of light, you have your shot. Patience is the technique.
Final Thoughts
Composition isn’t about following rules — it’s about telling a story. Every choice, from light to framing, should support the message you want to communicate.
Once you know that message, everything becomes clearer: what to include, what to remove, when to wait, and when to come back later. Keep practicing, stay intentional, and your photos will instantly become more powerful.
Serge Ramelli | Coaching photographers who are serious about getting to the next level.
Frequently Asked Questions
What is the most important composition rule for cityscape photography?
The rule of thirds: avoid centering your horizon, place it on the top or bottom third instead, and give two-thirds of the frame to whichever element matters most, the sky or the foreground.
What's the difference between golden hour and blue hour?
Golden hour is the warm, low light around sunrise and sunset that lasts 20-30 minutes. Blue hour is the roughly 10-minute window just before sunrise or after sunset when city lights and the sky are perfectly balanced.
How do I create depth in a flat cityscape photo?
Add a foreground element like a statue, rock, or flower to anchor the frame, use leading lines to guide the eye into the scene, or frame your subject within a natural frame like an archway or doorway.
What camera settings do I need for long exposure cityscapes?
Use an ND10 filter, set your ISO to its lowest value (50 or 64), and expose for 2-5 minutes. This smooths moving water and stretches clouds into a silky, painterly effect.
Explore More Composition & Photography Tips
Want to keep sharpening your eye? Here are more guides:
- 7 Composition Rules Every Beginner Photographer Should Know
- 10 Tips You Should Know About Photography Composition
- How to Train Your Eye Like a Professional Photographer
- Golden Hour vs Blue Hour: How to Choose the Right Light
- 10 Lightroom Secrets That Will Instantly Improve Your Photos
- How to Use Foreground Elements to Create Depth in Your Photos
