
7 Composition Rules Every Beginner Photographer Should Know
By Serge Ramelli-
You can have the most expensive camera in the world and still come home with flat, forgettable photos. The secret to images that stop people mid-scroll isn't gear — it's composition. These 7 rules are the foundation of every great photograph, and once you learn to see them, you'll never look at a scene the same way again.
1. The Rule of Thirds
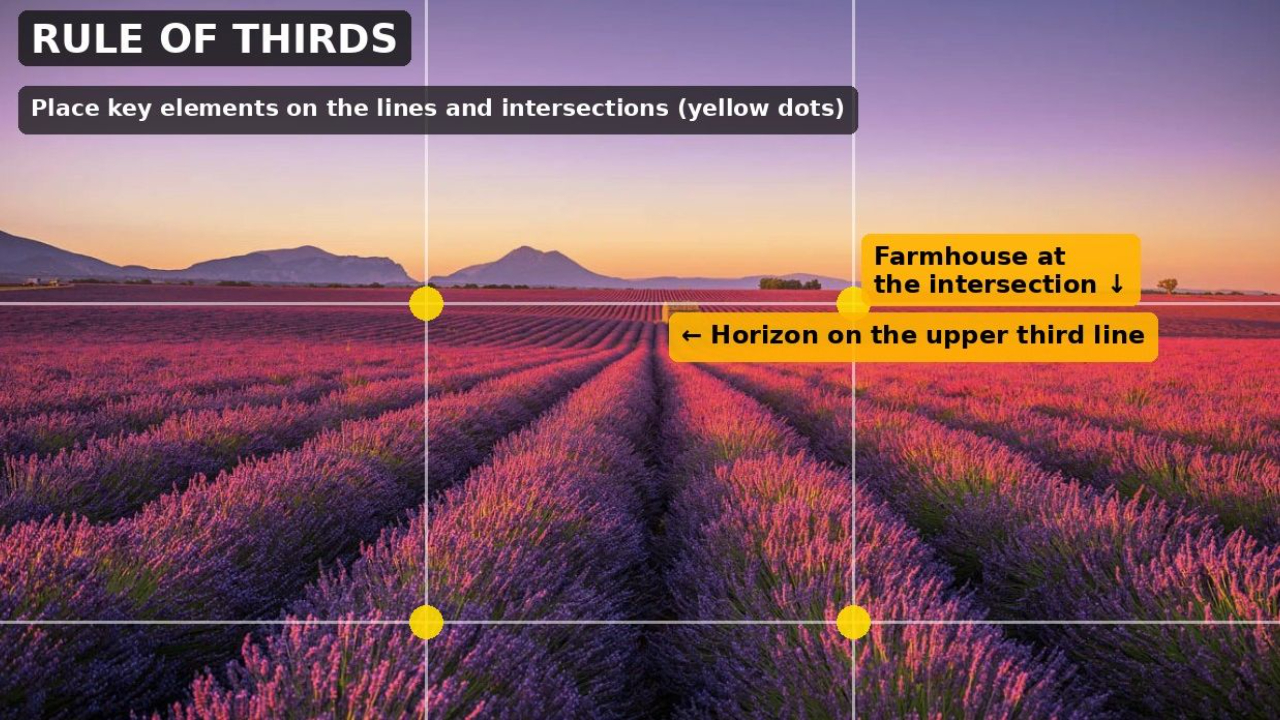
Divide your frame into a 3x3 grid — two horizontal lines and two vertical lines. The rule of thirds says your main subject or horizon should sit on one of these lines, not dead center. Even better: place your subject at one of the four intersection points where the lines cross. The eye naturally travels to these spots, making the image feel more dynamic and balanced.
Most cameras and smartphones let you display this grid directly in the viewfinder or screen. Turn it on and leave it on.
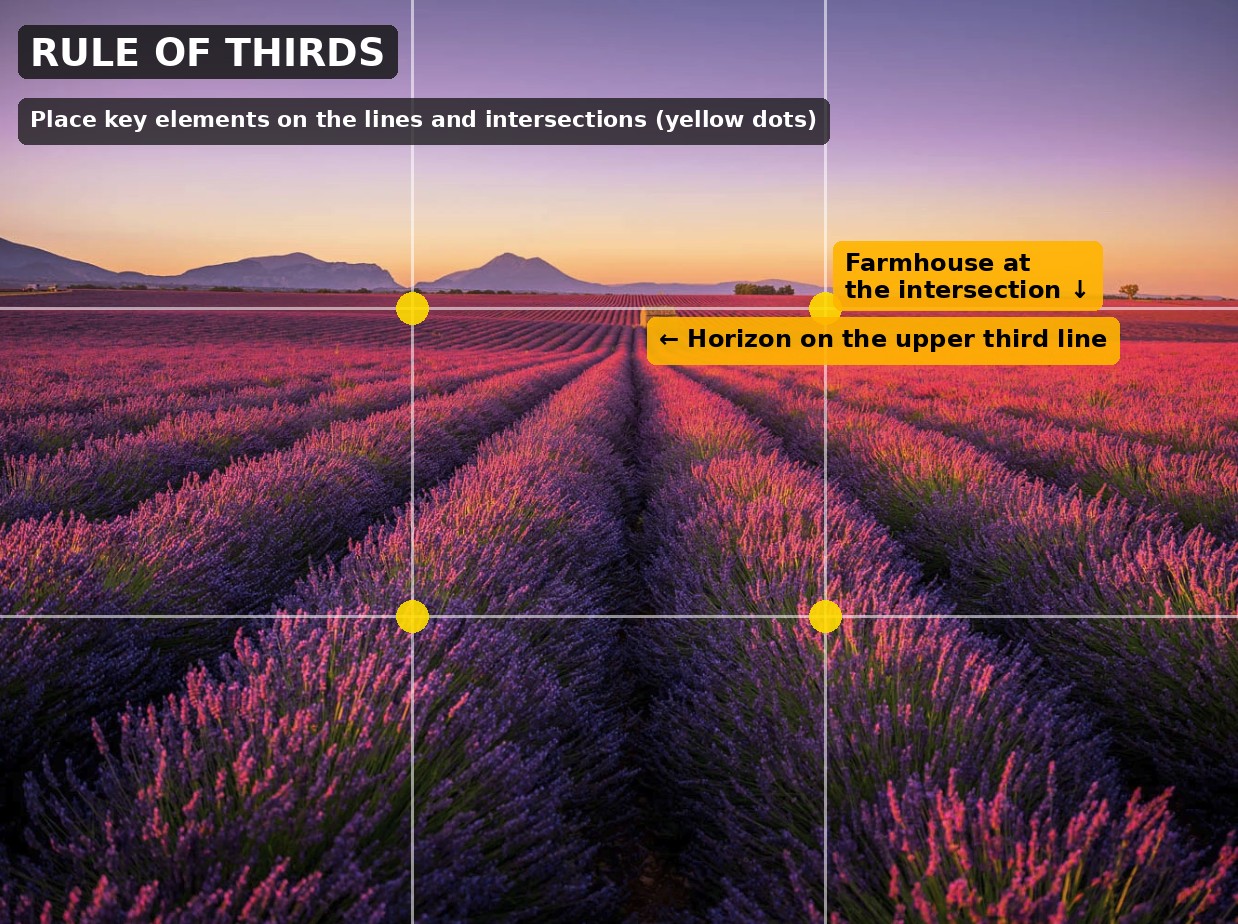
Provence lavender field: the horizon sits on the lower third line (yellow), and the farmhouse lands near a grid intersection. The large sky becomes intentional, not accidental.
PRO TIP: Avoid placing your horizon dead center — it splits the image in two equal halves and kills the visual tension.
2. Leading Lines
Leading lines are any lines in the scene that guide the viewer's eye from the foreground into the depth of the image — roads, rivers, fences, railway tracks, bridges, even rows of lavender. They create an instant sense of depth and movement, pulling the viewer into the photograph rather than leaving them on the outside looking in.
The most powerful leading lines converge toward a vanishing point in the distance. The stronger the convergence, the more dramatic the perspective.
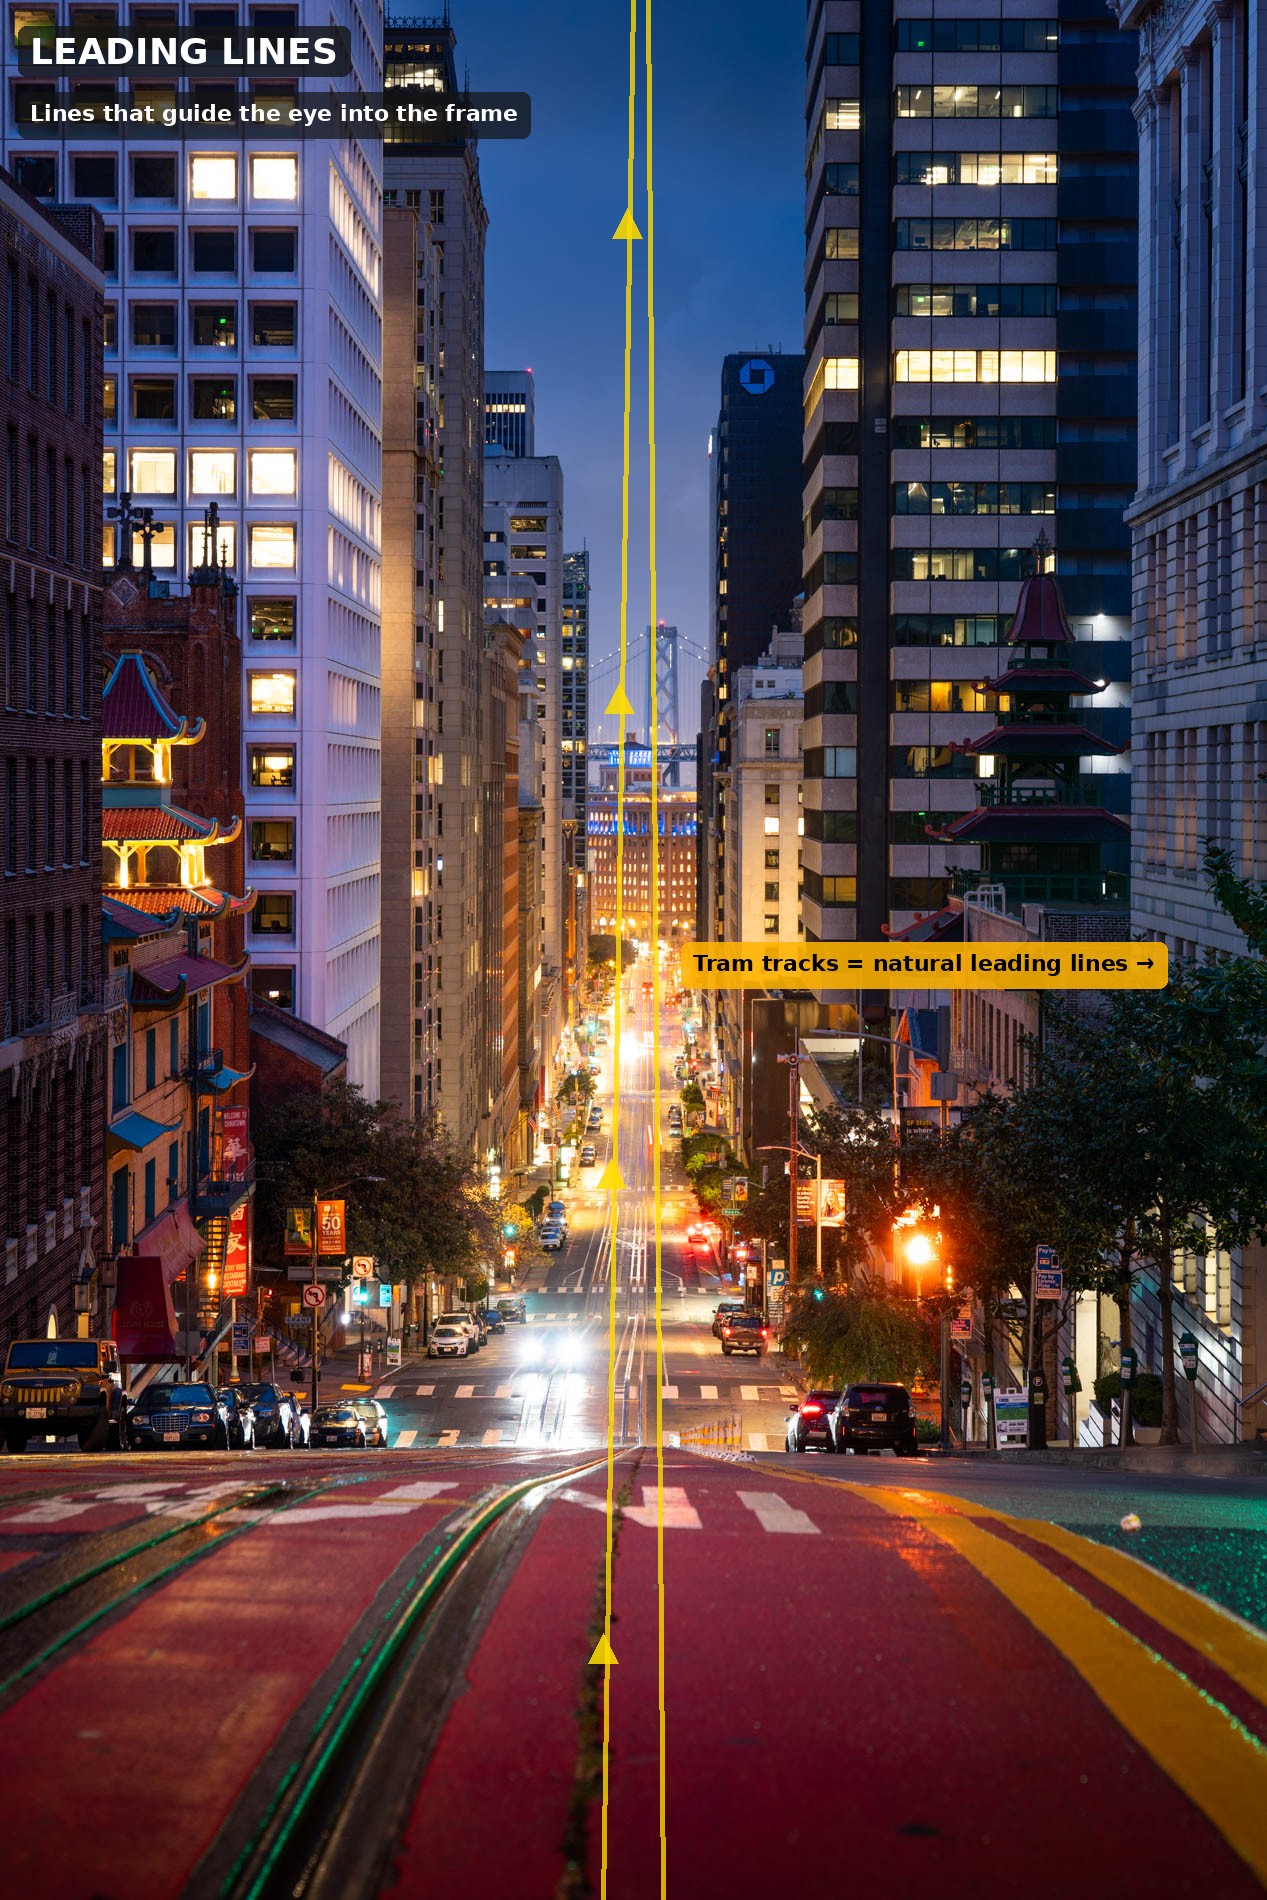
California Street, San Francisco: the tram tracks (highlighted in yellow) converge toward the Bay Bridge in the distance, pulling the eye all the way through the frame.
PRO TIP: Look for lines that lead TO something interesting. A road leading to an empty field is less compelling than one leading to a mountain, a bridge, or a glowing city.
3. Natural Framing
A natural frame is anything in the scene you can use to surround or partially surround your subject — an archway, a window, tree branches, a cave entrance, a doorway. Framing does two things: it draws attention to your subject by containing it, and it adds a sense of depth by placing one element in the foreground and another in the background.
You don't need to show the entire frame. Even a partial arch or branch in the corner of the image is enough to create the effect.

Venice: the Gothic arch of the Doge's Palace frames San Giorgio Maggiore perfectly in the center. The viewer's eye is directed straight to the subject without any effort.
PRO TIP: When scouting a location, don't just look at the main subject — look around you for potential frames. Doorways, bridges, and architecture are everywhere.
4. Symmetry
Symmetry is one of the most immediately satisfying compositions in photography. When a scene is perfectly mirrored — left and right, or top and bottom — the brain finds it visually pleasing almost instantly. Tunnels, corridors, bridges, and calm water reflections are natural sources of symmetry.
For symmetry to work, your camera needs to be perfectly centered. Take a moment to align the horizon and the vertical center line before shooting.
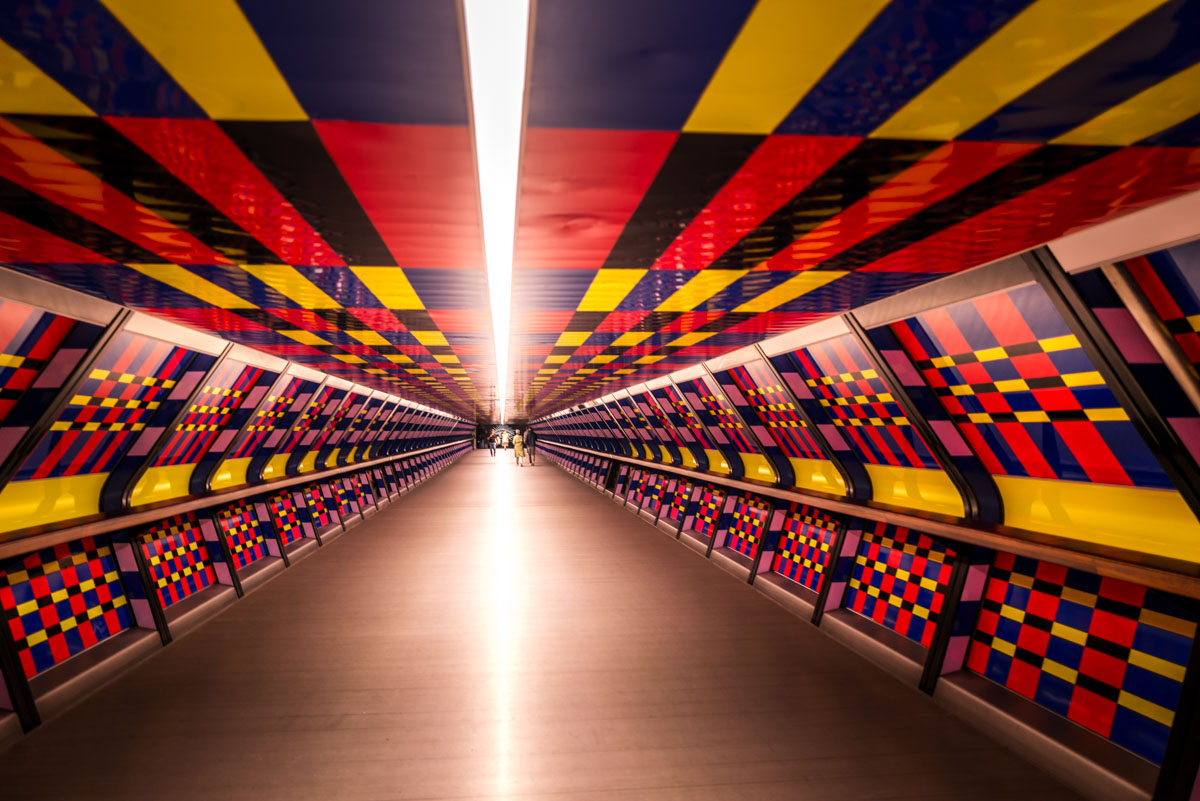
The Adams Plaza Bridge tunnel at Canary Wharf, London: a perfect left-right symmetry with a strong center vanishing point. The colourful patterns amplify the effect.
PRO TIP: Shoot from a low position for tunnels and corridors — it exaggerates the depth and makes the symmetry even more powerful.
5. Foreground Elements
An empty foreground is one of the most common beginner mistakes. When you include a strong element close to the camera, you create a sense of three-dimensional depth that flat shots simply cannot achieve. The viewer's eye enters the image through the foreground, travels through the midground, and arrives at the background — experiencing the scene rather than just viewing it.
Any object can serve as a foreground element: a lamppost, a rock, a flower, a fence, even a puddle reflecting the scene.
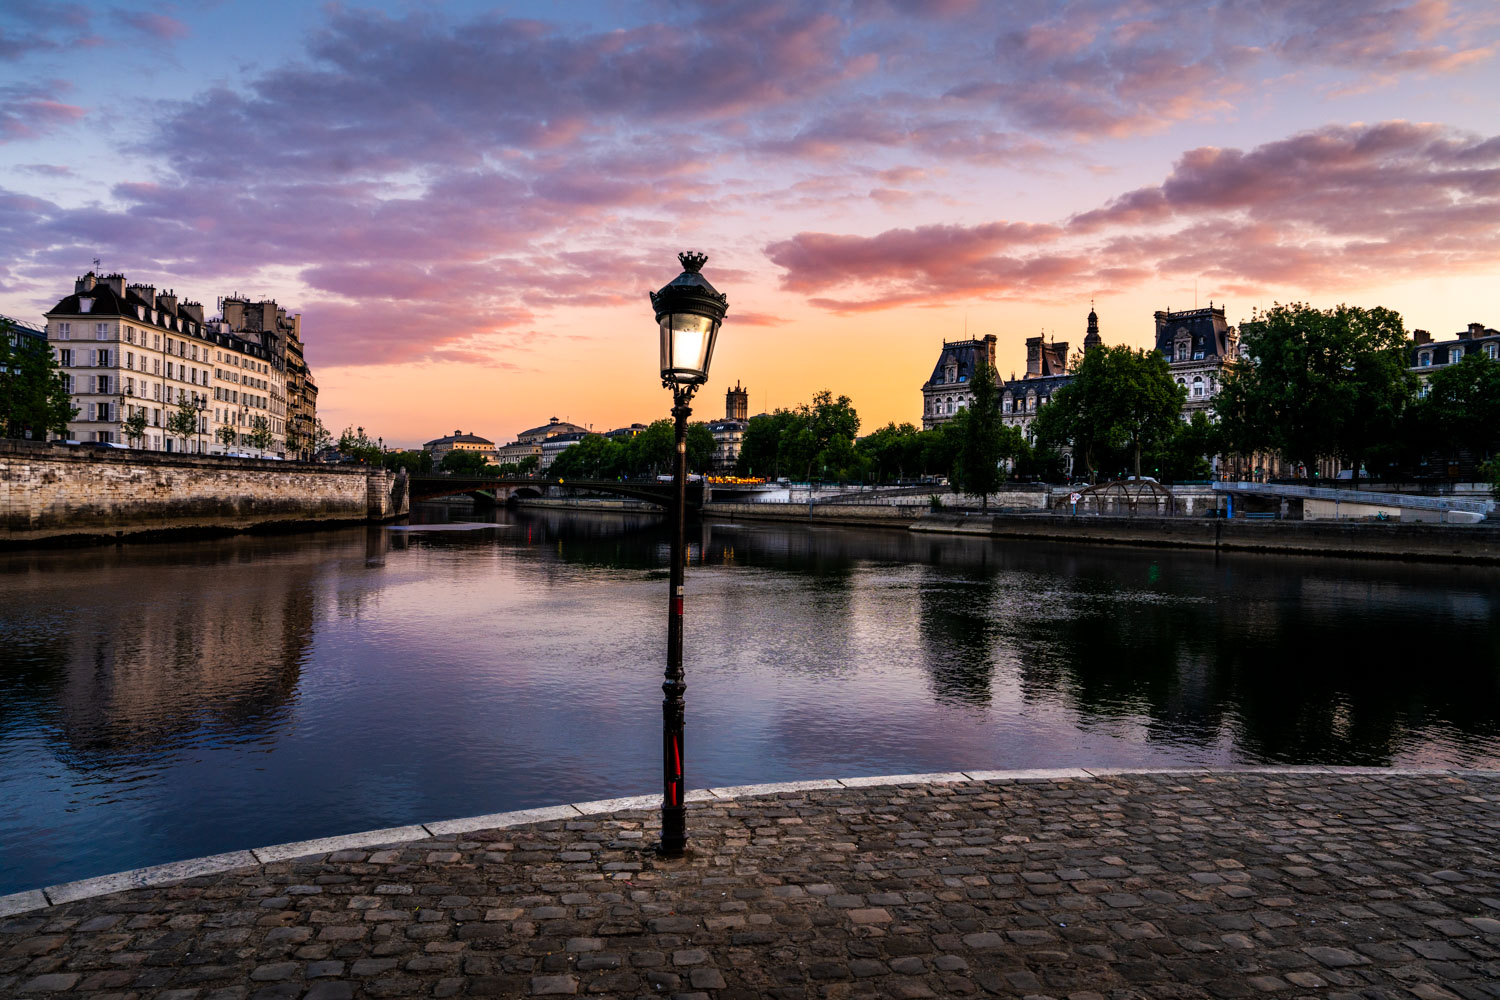
Paris, banks of the Seine: the lamppost in the foreground creates three distinct layers — foreground (cobblestones and lamp), midground (river and bridge), background (buildings and sky). Each layer adds depth.
PRO TIP: Get as low as possible when using a foreground element. A lower angle makes the foreground appear larger and the depth more dramatic.
6. Negative Space
Negative space is the empty area around your subject — a vast sky, a calm sea, a plain wall. Far from being wasted space, negative space gives your subject room to breathe and makes it stand out more powerfully than if it were surrounded by busy details. Minimalist compositions with strong negative space often have the most emotional impact.
This is a rule that beginners instinctively resist — the impulse is to fill the frame. Fight that impulse. Empty space is a deliberate creative choice, not a mistake.
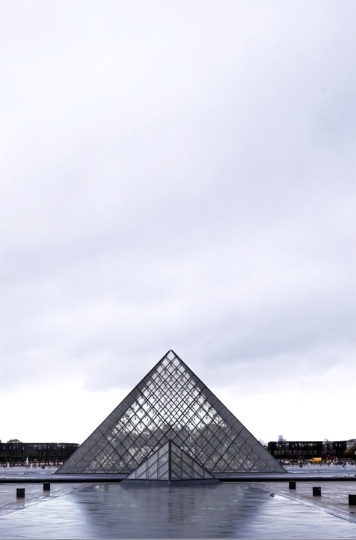
The Louvre Pyramid under a flat overcast sky, with the vast empty space above making the glass structure feel small, precise and deliberate. The grey silence around it is not emptiness — it's the whole point.
PRO TIP: Negative space works best when the subject itself is visually strong — a silhouette, a lone tree, a single figure. If the subject is weak, the empty space just looks empty.
7. Point of View
Most beginners photograph everything from standing eye level — and most beginners' photos look exactly the same as everyone else's. Changing your point of view is the single fastest way to transform an ordinary scene into something unexpected. Get low, climb high, shoot through something, lie on the ground. The same subject looks radically different from a different angle.
Low angles make subjects look larger and more imposing. High angles give context and scale. Shooting through an object creates depth and mystery.
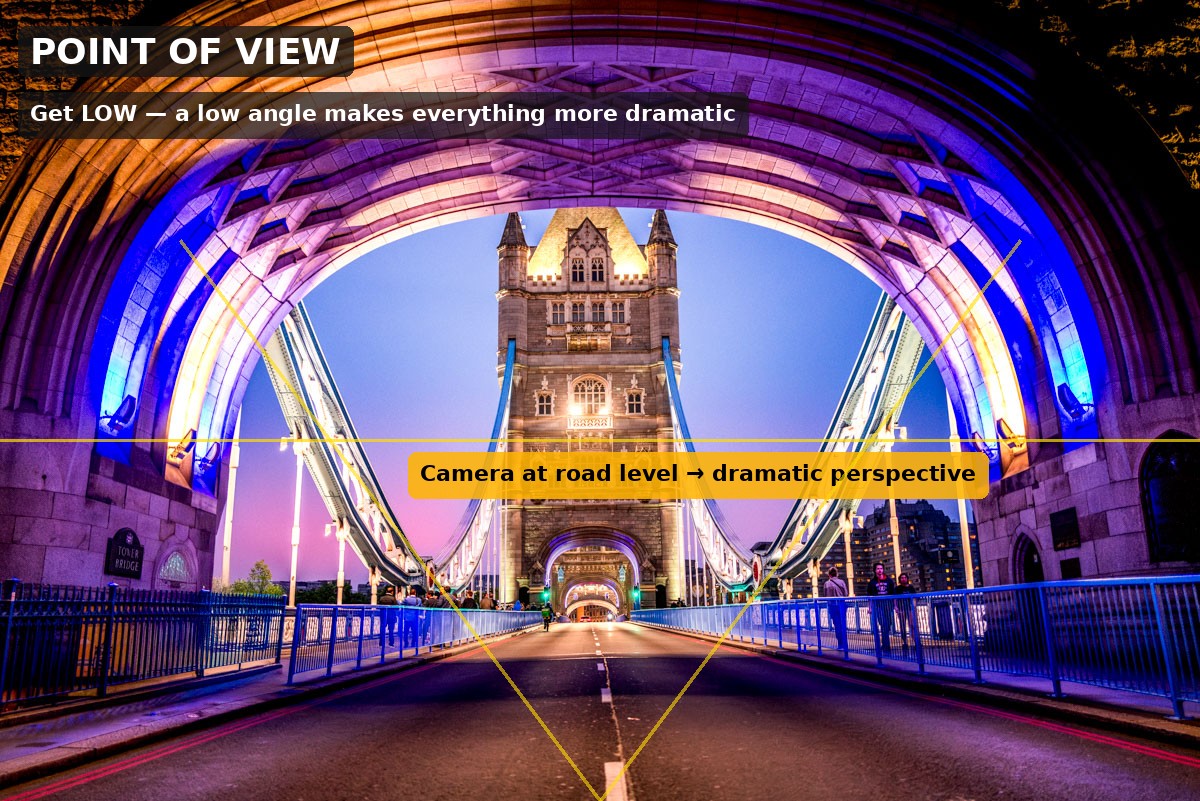
Tower Bridge, London: shot at road level from the middle of the bridge. The low angle transforms a familiar landmark into something cinematic and almost overwhelming in scale.
PRO TIP: Before you shoot, ask yourself: what does this scene look like from 30cm off the ground? From directly above? Through that arch over there? The best angle is rarely the obvious one.
The Most Important Rule: Break Them
These seven rules are not laws. They are starting points — ways of training your eye to see structure and balance in a scene. Once you understand why they work, you'll also know when to break them for effect. A perfectly centered subject can be just as powerful as one placed on a third. A completely empty frame can say more than a busy one.
Learn the rules. Shoot with the rules. Then, when you know them well enough to feel them without thinking, start breaking them deliberately.
