
How I Use Ansel Adams' Zone System to Transform Boring Photos into Stunning Black & White Images
By Serge Ramelli
Most photographers avoid shooting in the middle of the day.
Flat light, boring skies, and weak colors usually lead to disappointing photos.
But what if bad light wasn't a problem?
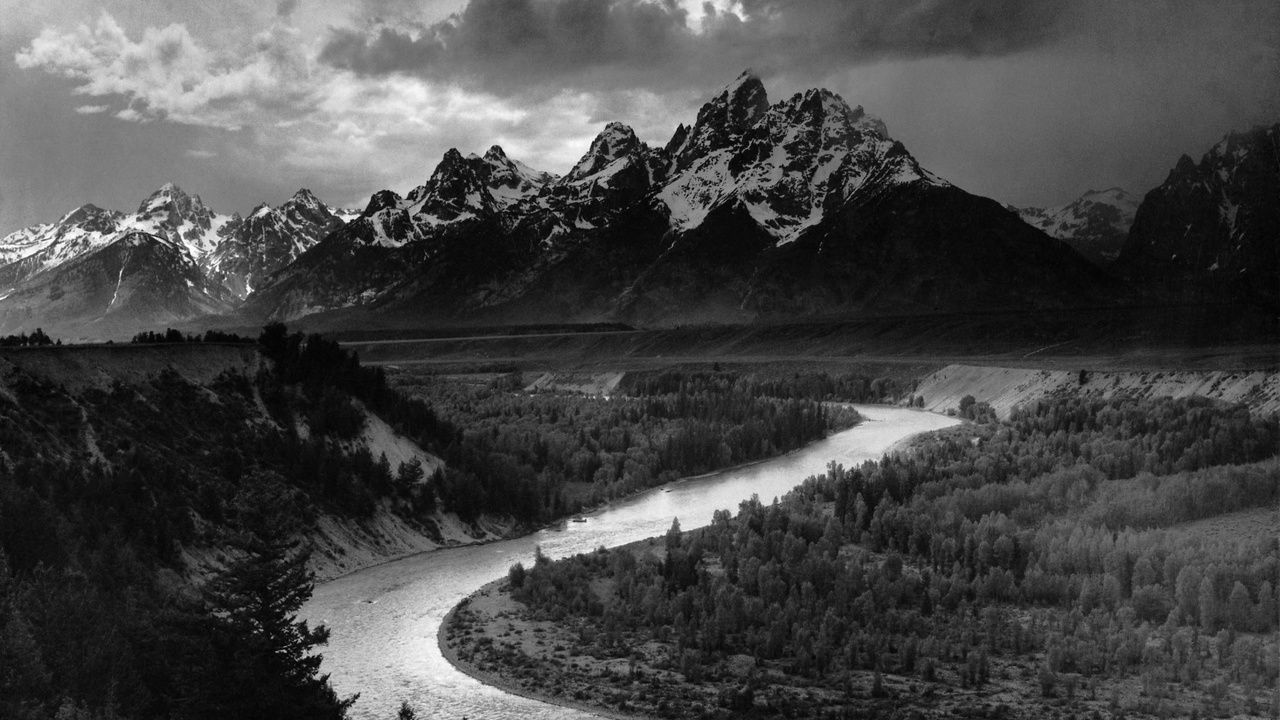
What if you could transform a dull image into a dramatic black-and-white masterpiece using the same principles developed by Ansel Adams?
That's exactly what the Zone System allows you to do.
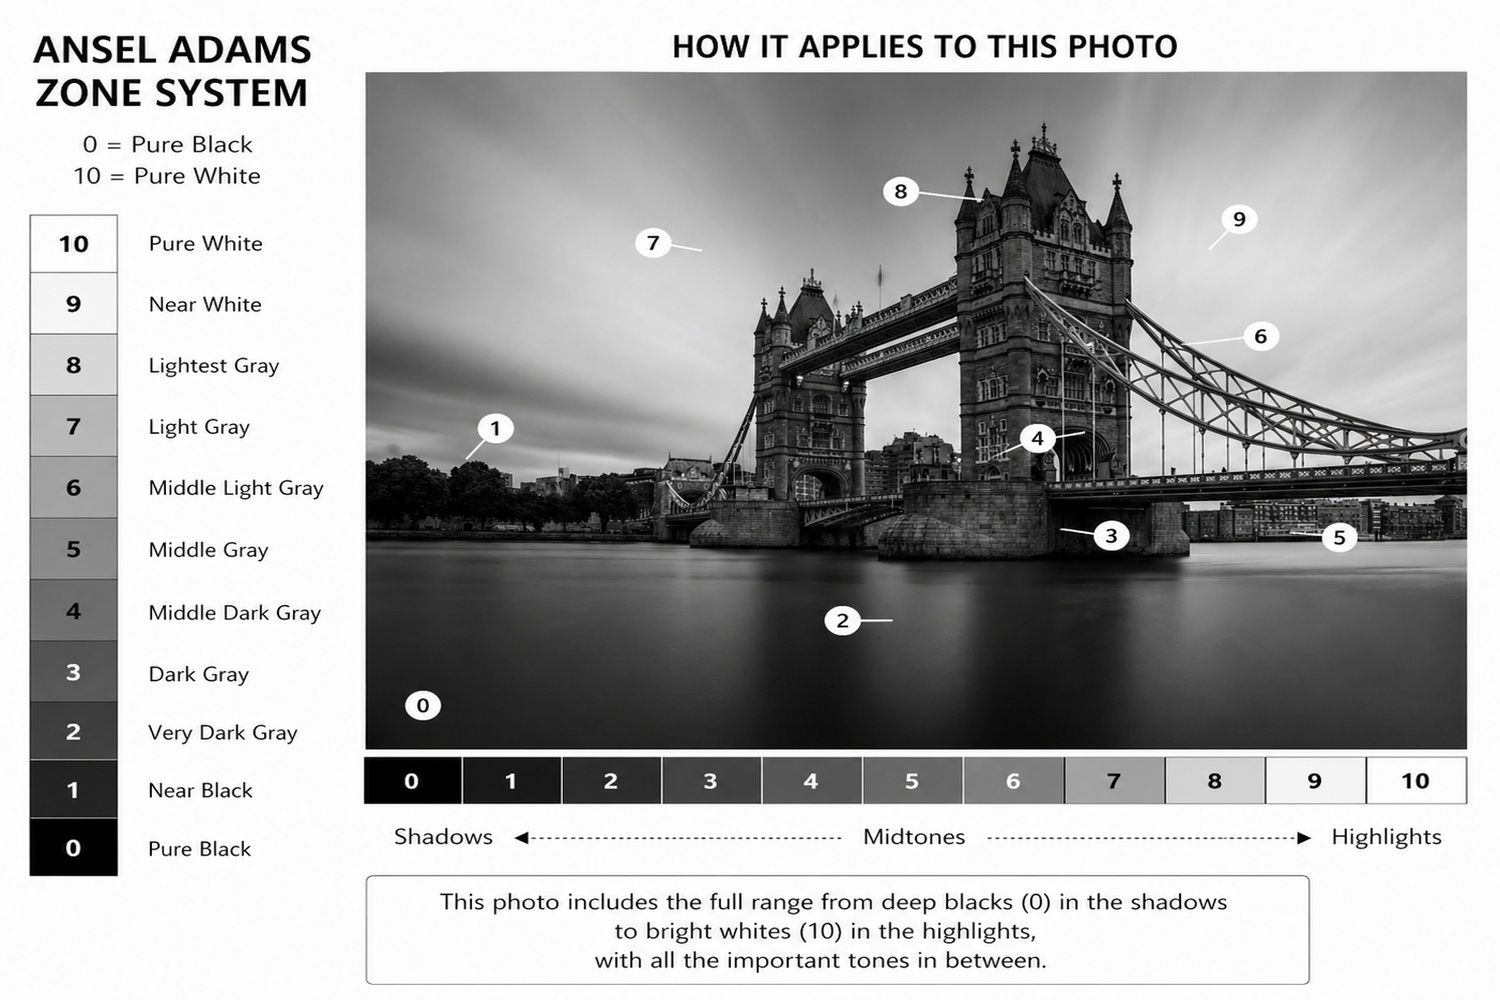
Understanding the Zone System
The Zone System divides an image into 11 tonal values:
- Zone 0 = Pure Black
- Zone 5 = Middle Gray
- Zone 10 = Pure White
The goal is simple:
Create a photograph that uses the full tonal range while guiding the viewer's eye to the subject.
Ready to get 1 on 1 support to master your tools and take photos that have that WOW factor? Apply to become a certified Master of Photography here.
Example 1: Tower Bridge, London
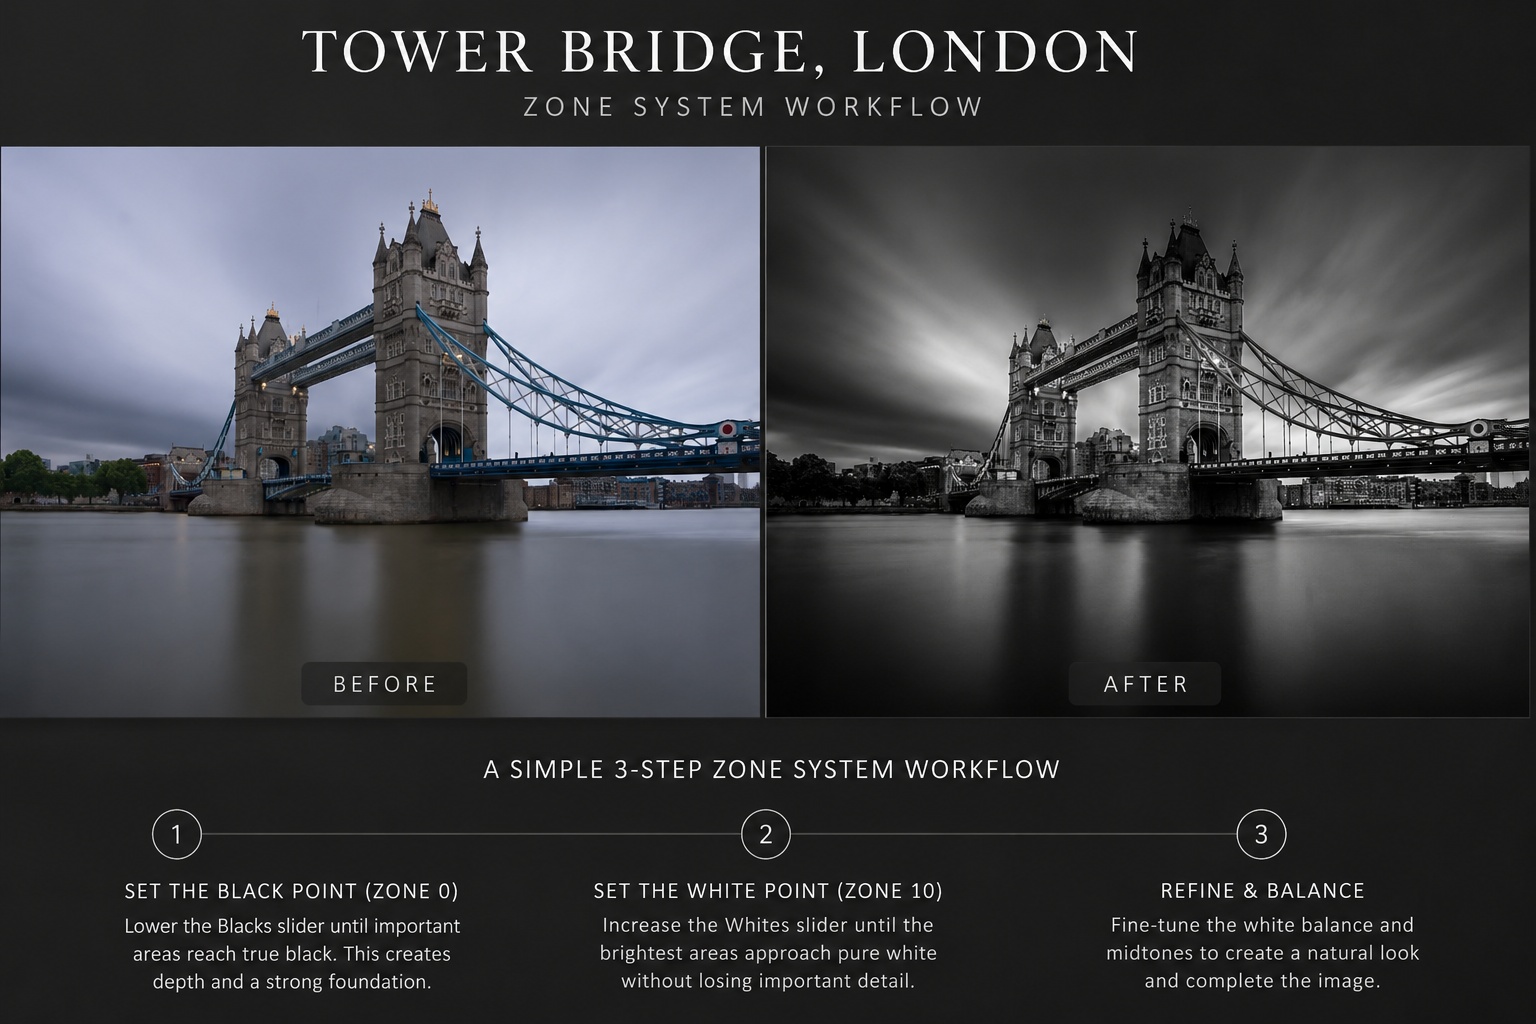
Before and after comparison showing how the Zone System was used to create stronger contrast, deeper blacks, and a more impactful black and white image of Tower Bridge.
One of the fastest ways to improve a photograph is to establish the full tonal range before making any creative adjustments.
Step 1: Set the Black Point (Zone 0)
Lower the Blacks slider until the darkest important areas in the image reach true black.
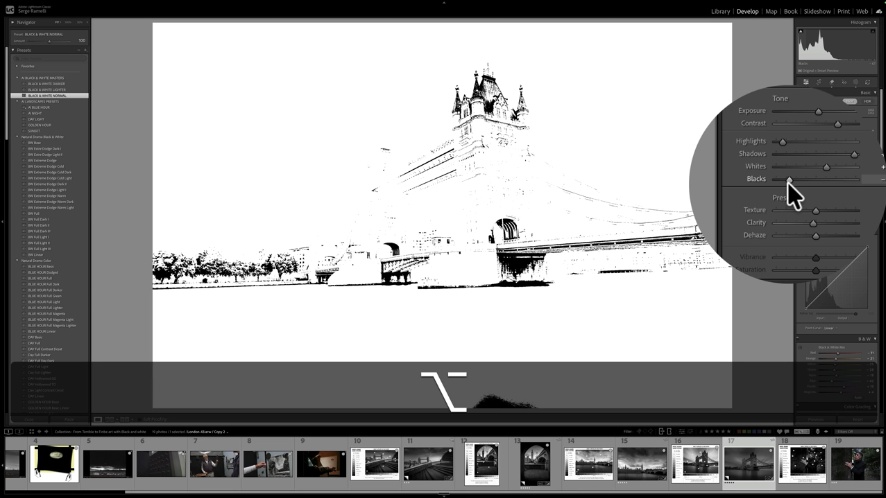
Tip: Hold down the Alt key (Windows) or Option key (Mac) while dragging the slider to visualize clipping.
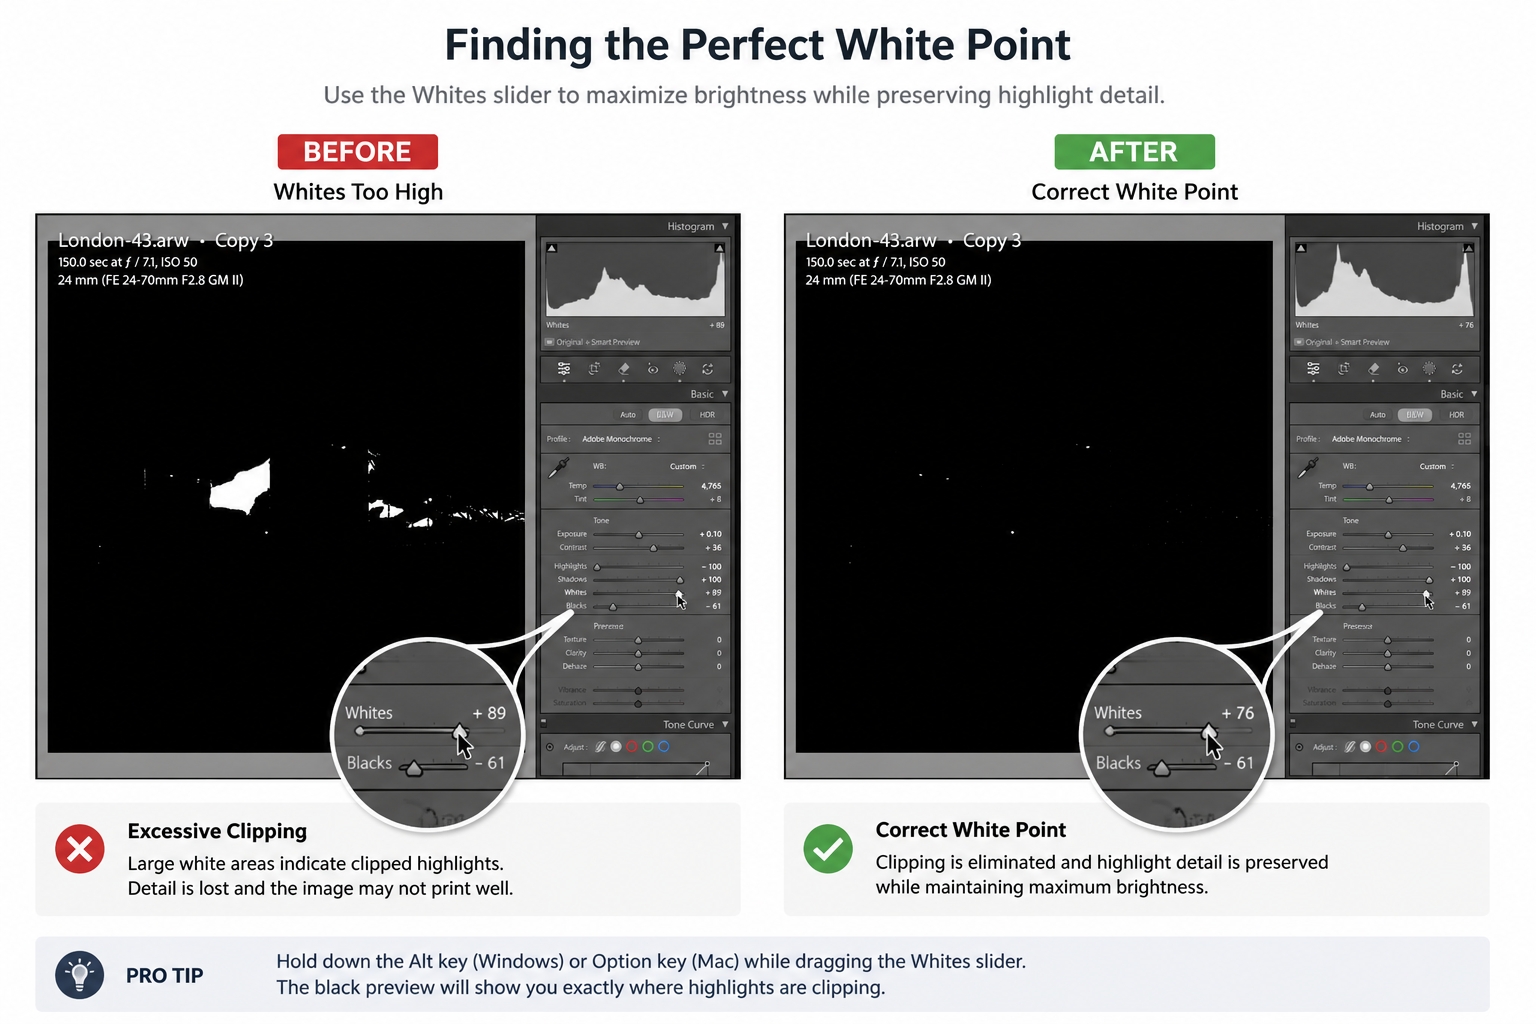
Step 2: Set the White Point (Zone 10)
Hold down the Alt (Windows) or Option (Mac) key while dragging the Whites slider.
As clipping appears, Lightroom displays pure white pixels against a black background.
Increase the slider until clipping first appears, then reduce it slightly until the clipped areas disappear. This ensures you preserve highlight detail while maximizing brightness.
Step 3: Fine-tune the white balance and midtones to create a natural and balanced look.
By defining Zone 0 and Zone 10 first, you create a strong tonal foundation. The result is a cleaner image, stronger contrast, and a more effective visual path that naturally guides the viewer toward Tower Bridge.
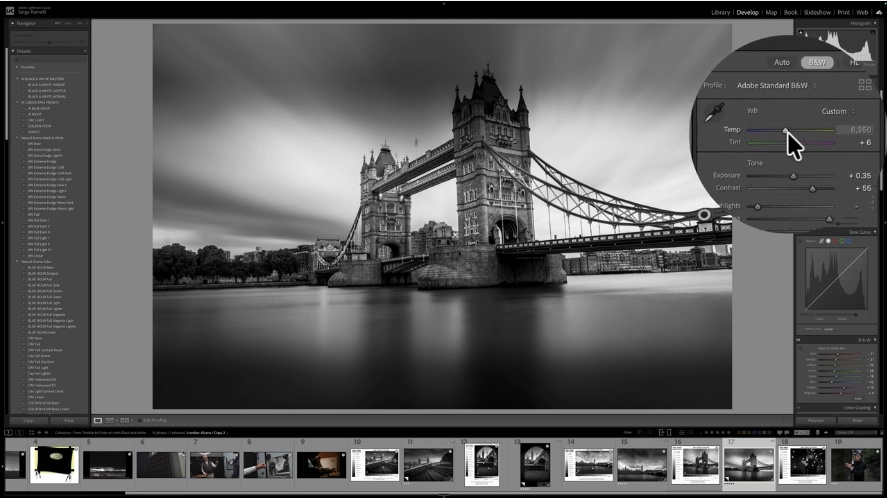
Final image after tonal refinements and white balance adjustments.
Ready to get 1 on 1 support to master your tools and take photos that have that WOW factor? Apply to become a certified Master of Photography here.
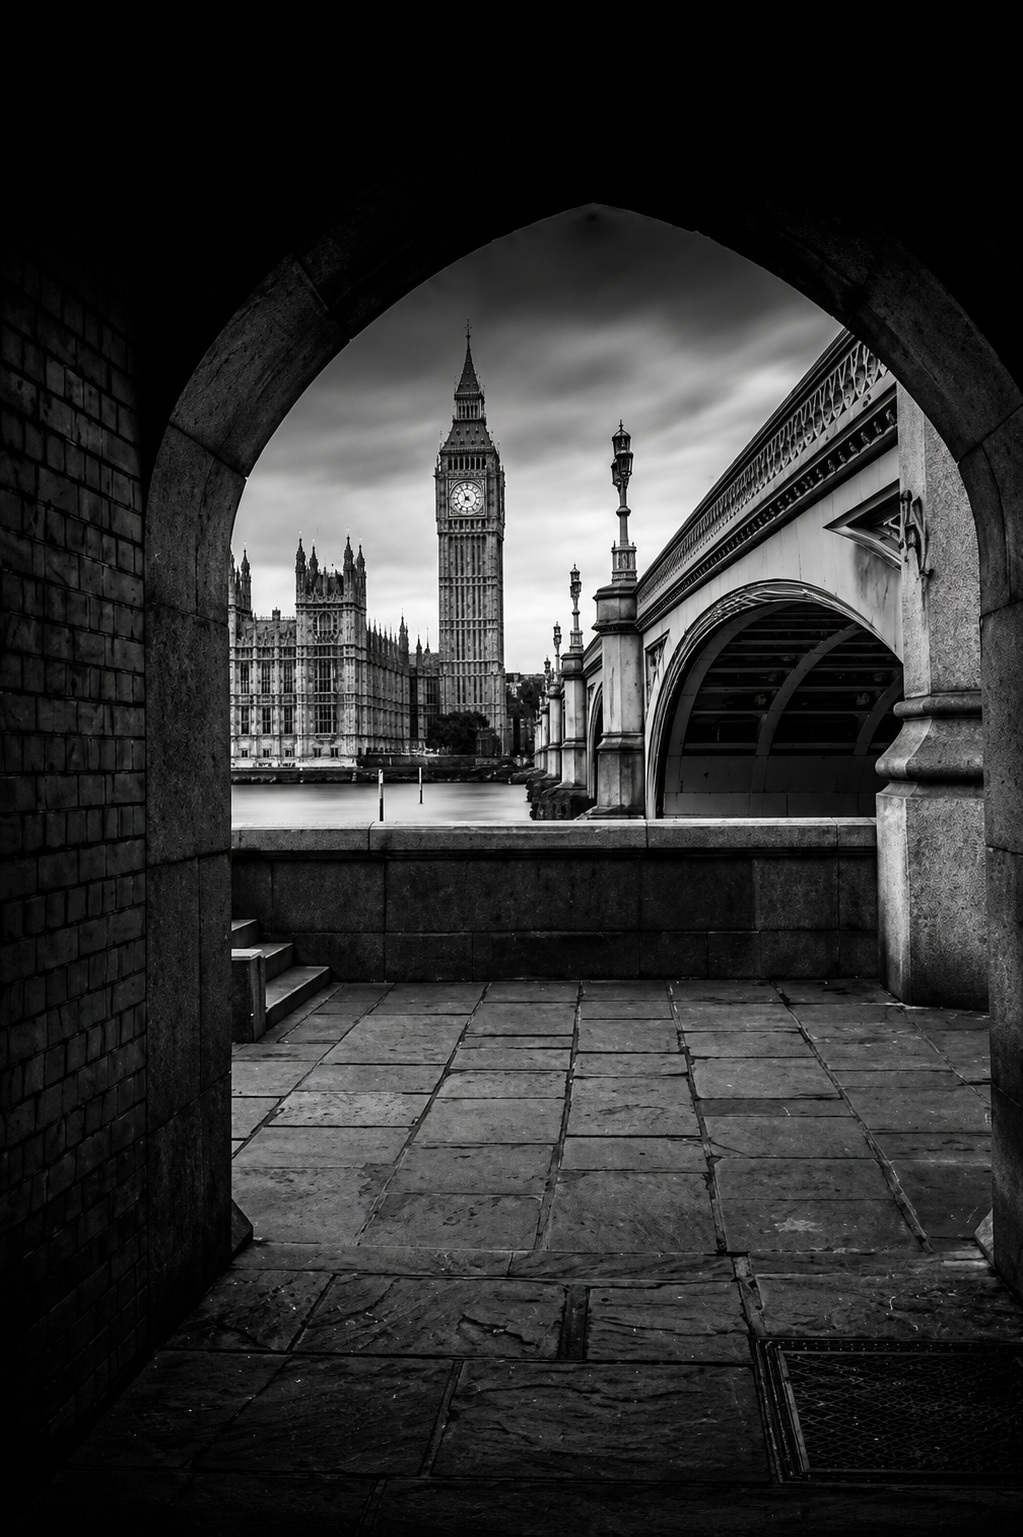
Example 2: Westminster
Notice how the darkest tones frame the image while the brightest tones remain concentrated on the subject.
This creates visual hierarchy and naturally guides the viewer's eye toward Big Ben.
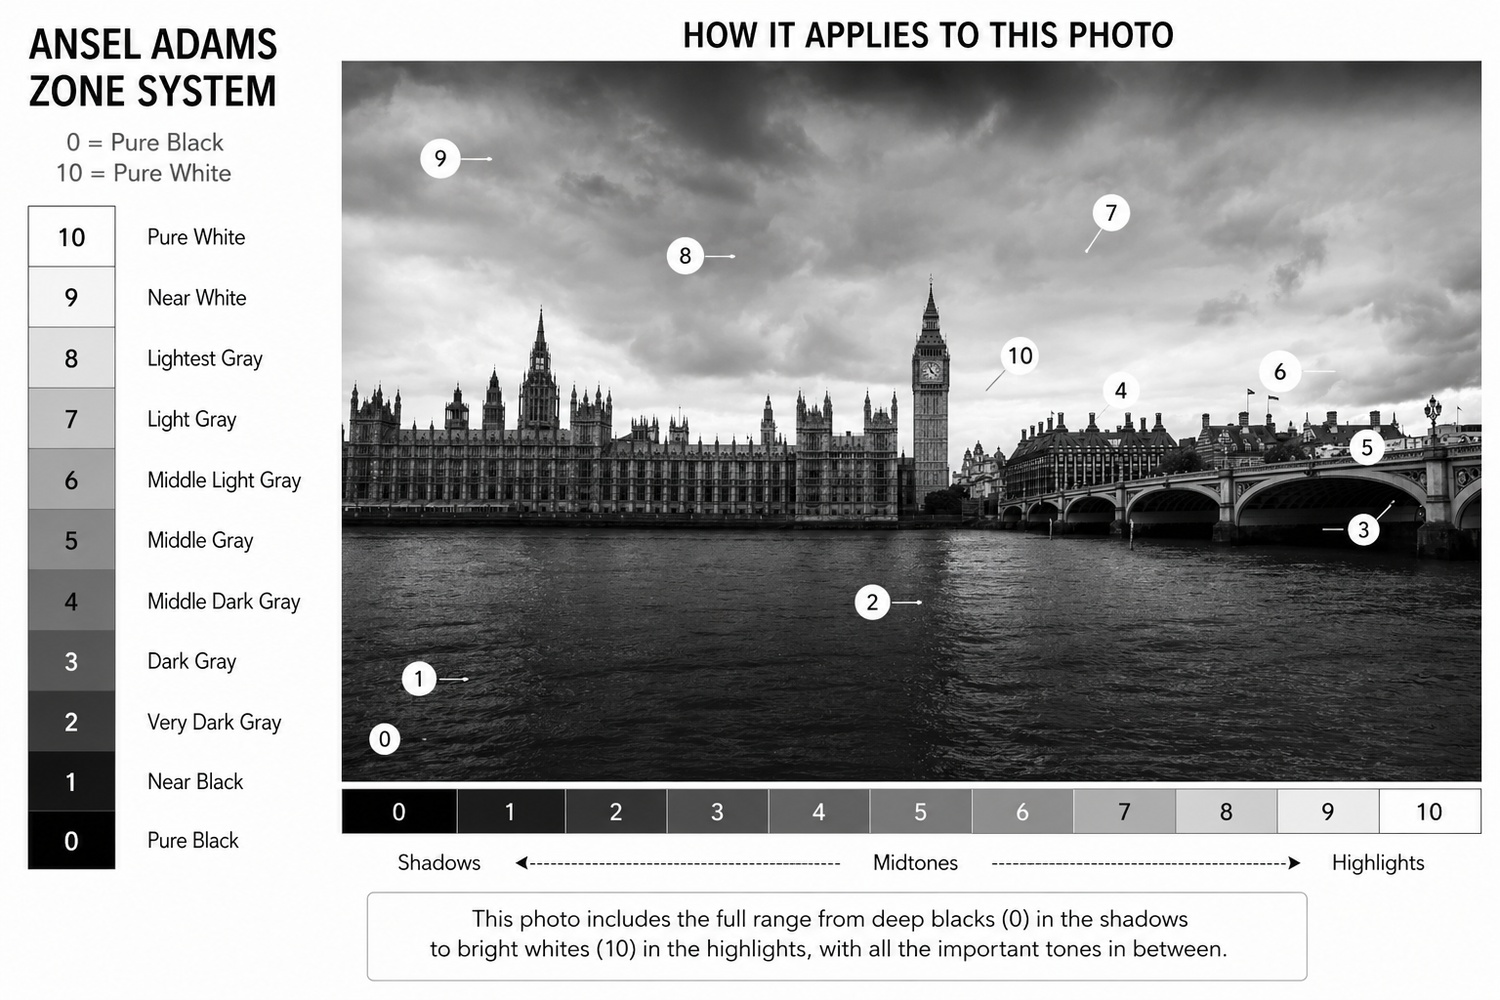
Figure 1. Mapping the tonal values throughout the image using Ansel Adams' Zone System.
The photograph spans nearly the entire tonal scale, from deep blacks (Zone 0) in the foreground shadows to bright highlights (Zone 10) around Big Ben and the sky. Because the most important subject occupies the brightest tonal range, it immediately attracts the viewer's attention.

Figure 2. Final black-and-white image after applying the Zone System principles.
By deliberately placing shadows, midtones, and highlights throughout the frame, the image gains depth, structure, and a clear visual path for the viewer.
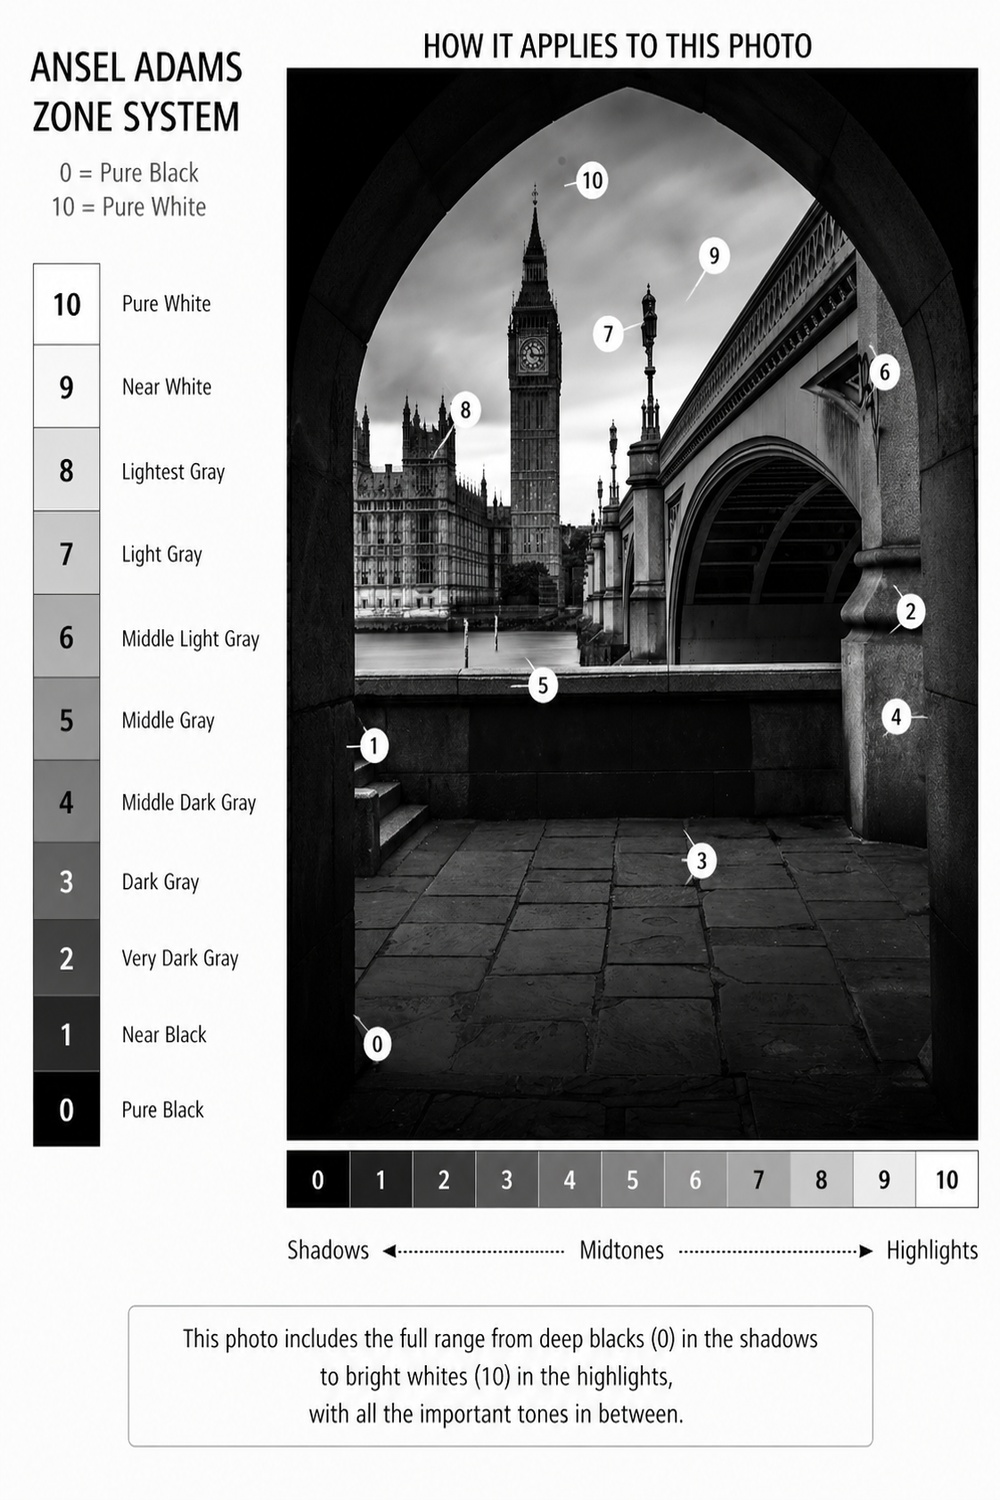
Example 3: Big Ben Framed by Shadows
One of the easiest ways to create impact in black and white photography is to surround your subject with darker tones.
The eye naturally moves toward the brightest part of the frame.
Ready to get 1 on 1 support to master your tools and take photos that have that WOW factor? Apply to become a certified Master of Photography here.
Why Every Photographer Should Learn the Zone System
Most photographers spend years chasing perfect sunsets.
Ansel Adams taught something different:
Light is important, but tonal control is everything.
Once you understand how to place blacks, grays, and highlights intentionally, even a boring daylight photo can become a striking black-and-white image.
Get my FREE Lightroom preset here: https://bit.ly/AIPresets
Serge — Photoserge | Coaching photographers who are serious about getting to the next level.
