
How to Make Your Photos Sharper Without Overprocessing
By Serge Ramelli
Every photographer wants sharp images. But there is a fine line between a crisp, professional photo and an overprocessed image filled with halos and unnatural details.
The good news? Most of the sharpness in a great photograph happens before editing even begins.
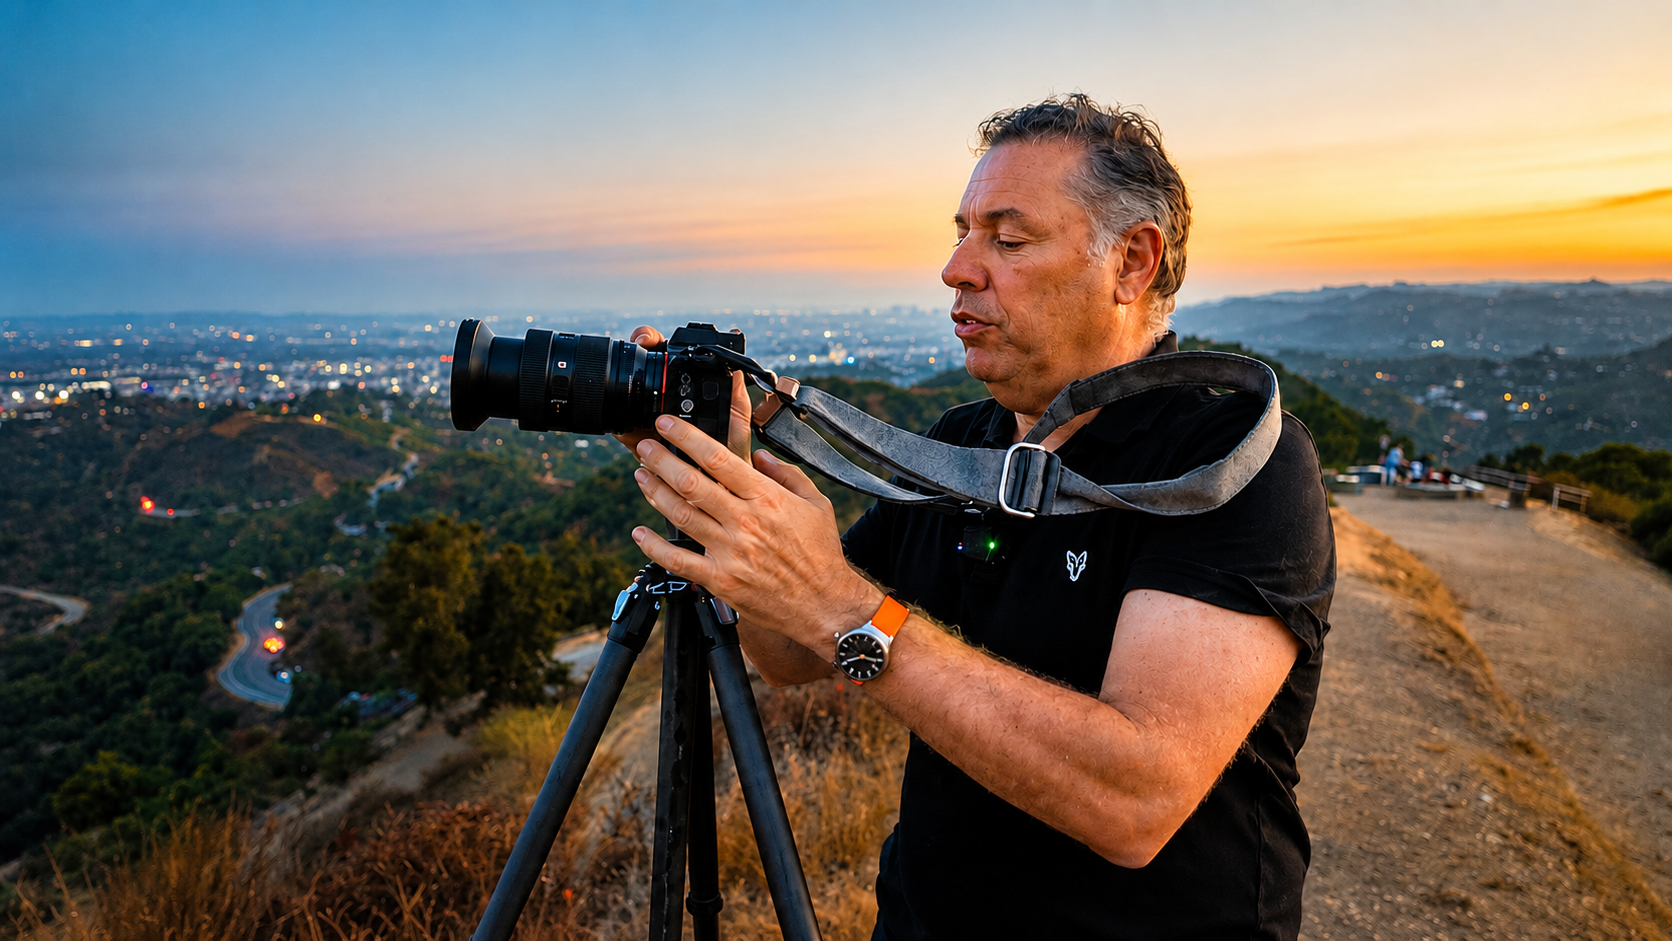
1. Start With a Stable Shot
Sharp photos begin with good shooting habits.
A tripod can dramatically improve image quality, especially in low light or when capturing detailed scenes. Even the slightest camera movement can reduce sharpness.
Ready to get 1 on 1 support to master your tools and take photos that have that WOW factor? Apply to become a certified Master of Photography here.
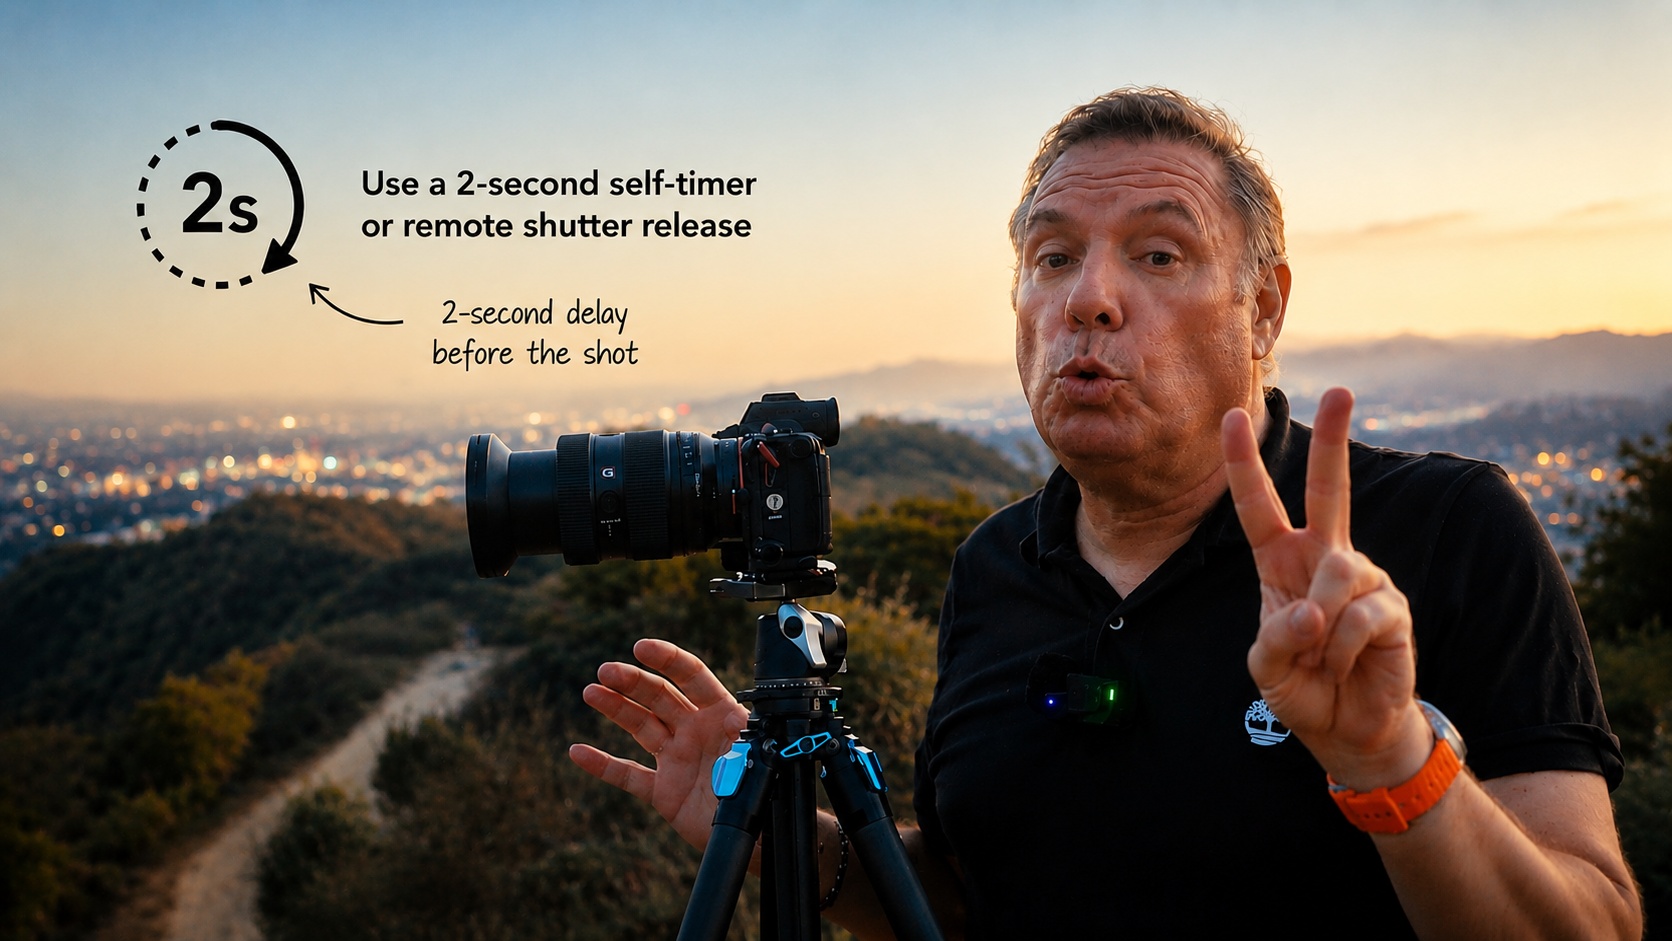
2. Use a Remote Shutter and Disable Stabilization
Use a remote shutter release or a 2-second self-timer to avoid camera shake. Once your camera is mounted on a tripod, avoid touching it during the exposure. Also, disable any image stabilization on your lens or camera, as it can introduce blur when the camera is already perfectly stable.
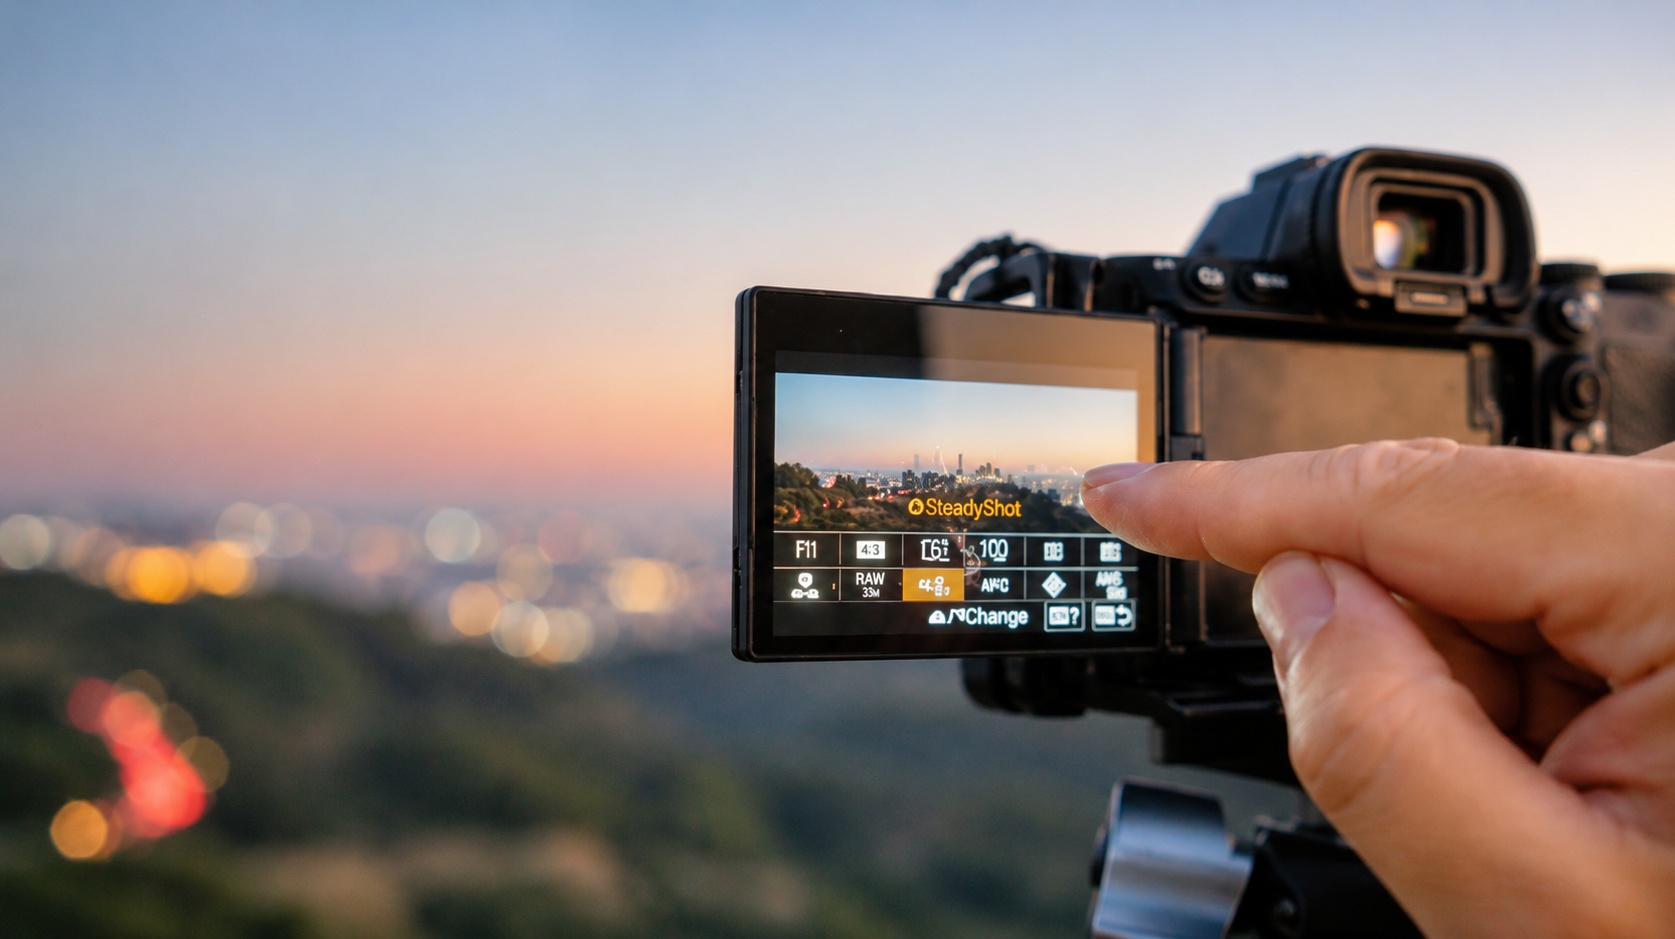
3. Disable Stabilization on a Tripod
When shooting with a tripod, it's best to disable image stabilization on both your camera and lens. Stabilization systems are designed to compensate for handheld movement, and when the camera is already stable, they can sometimes create unwanted blur or slight vibrations. Before taking your shot, make sure features such as Sony's SteadyShot are turned off. Assigning this setting to a custom button or the Function (Fn) menu can make it easy to switch stabilization on or off depending on your shooting situation.
Ready to get 1 on 1 support to master your tools and take photos that have that WOW factor? Apply to become a certified Master of Photography here.
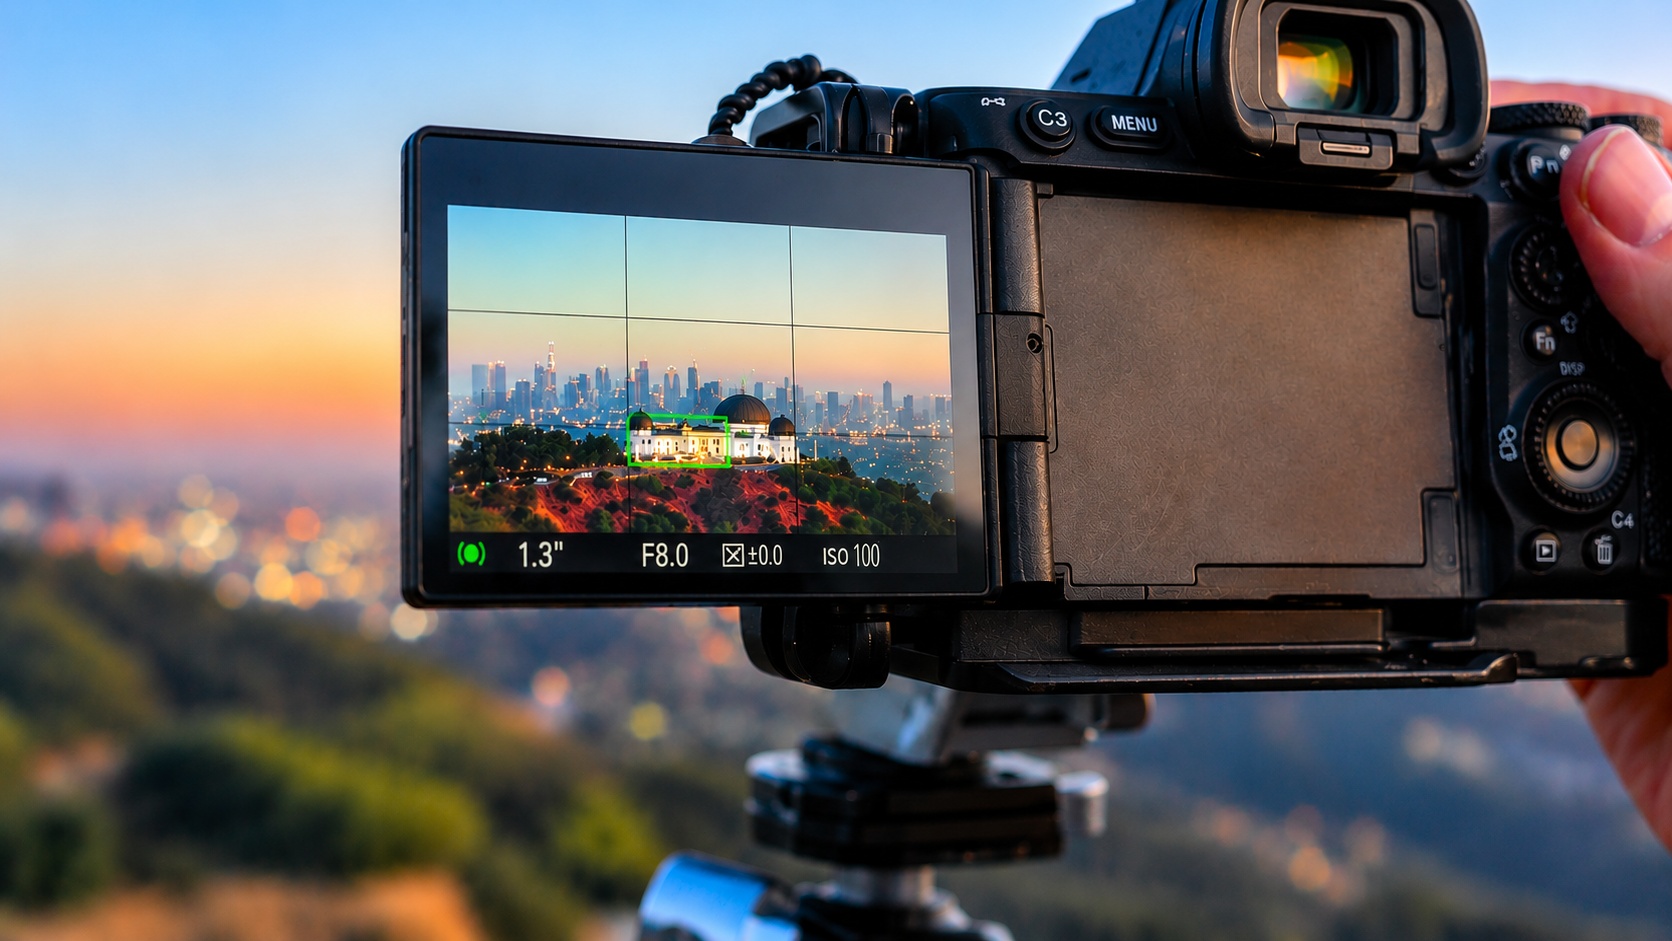
4. Use Spot Focus
Perfect sharpness starts with accurate focus.
Before moving to your next composition, take a moment to zoom in and check critical details. A few seconds spent verifying focus can save an otherwise great image from being ruined by a slight focusing error.
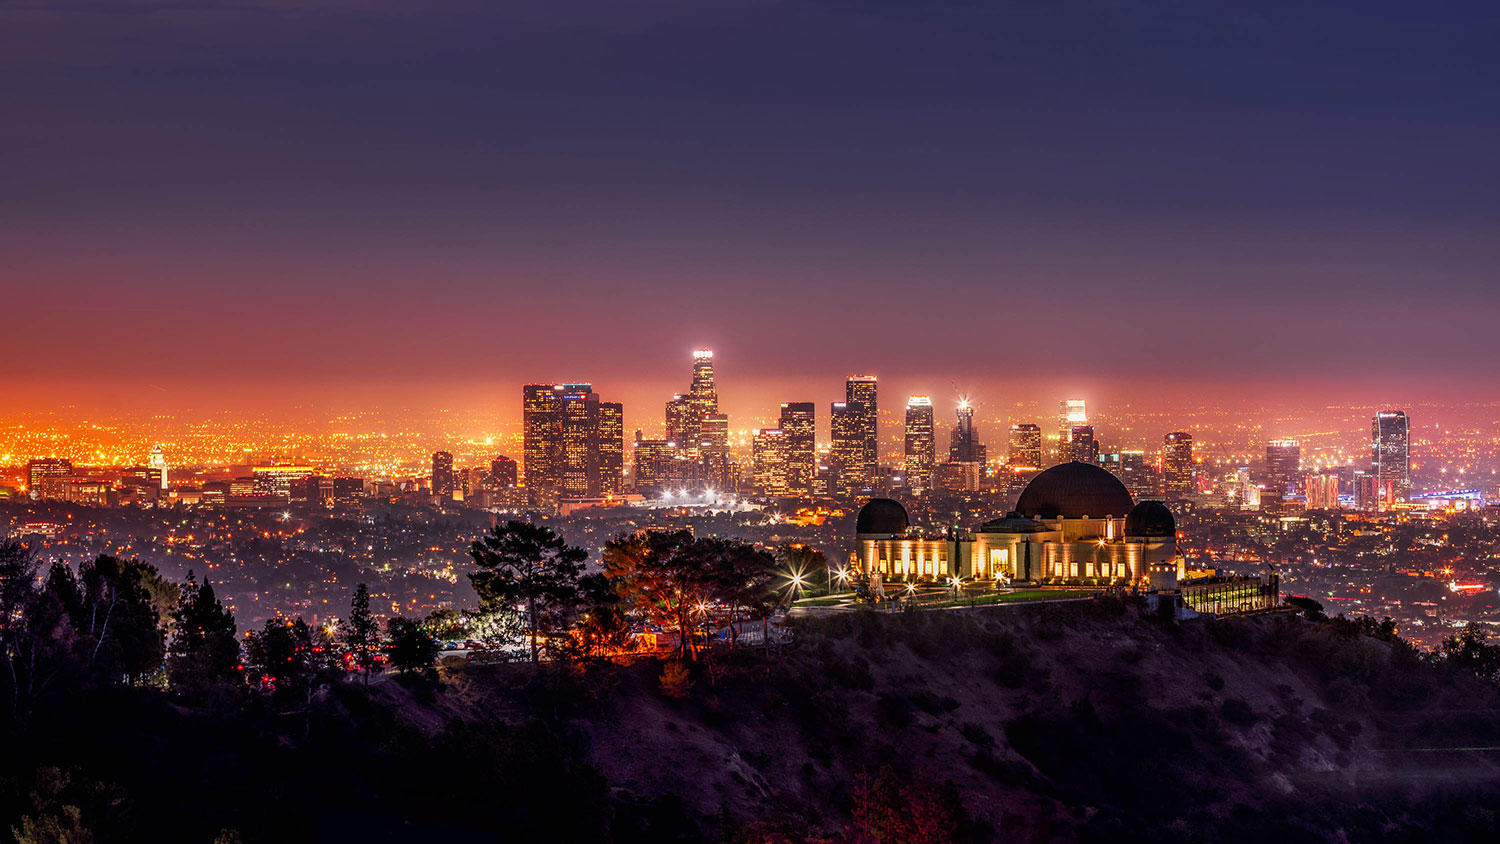
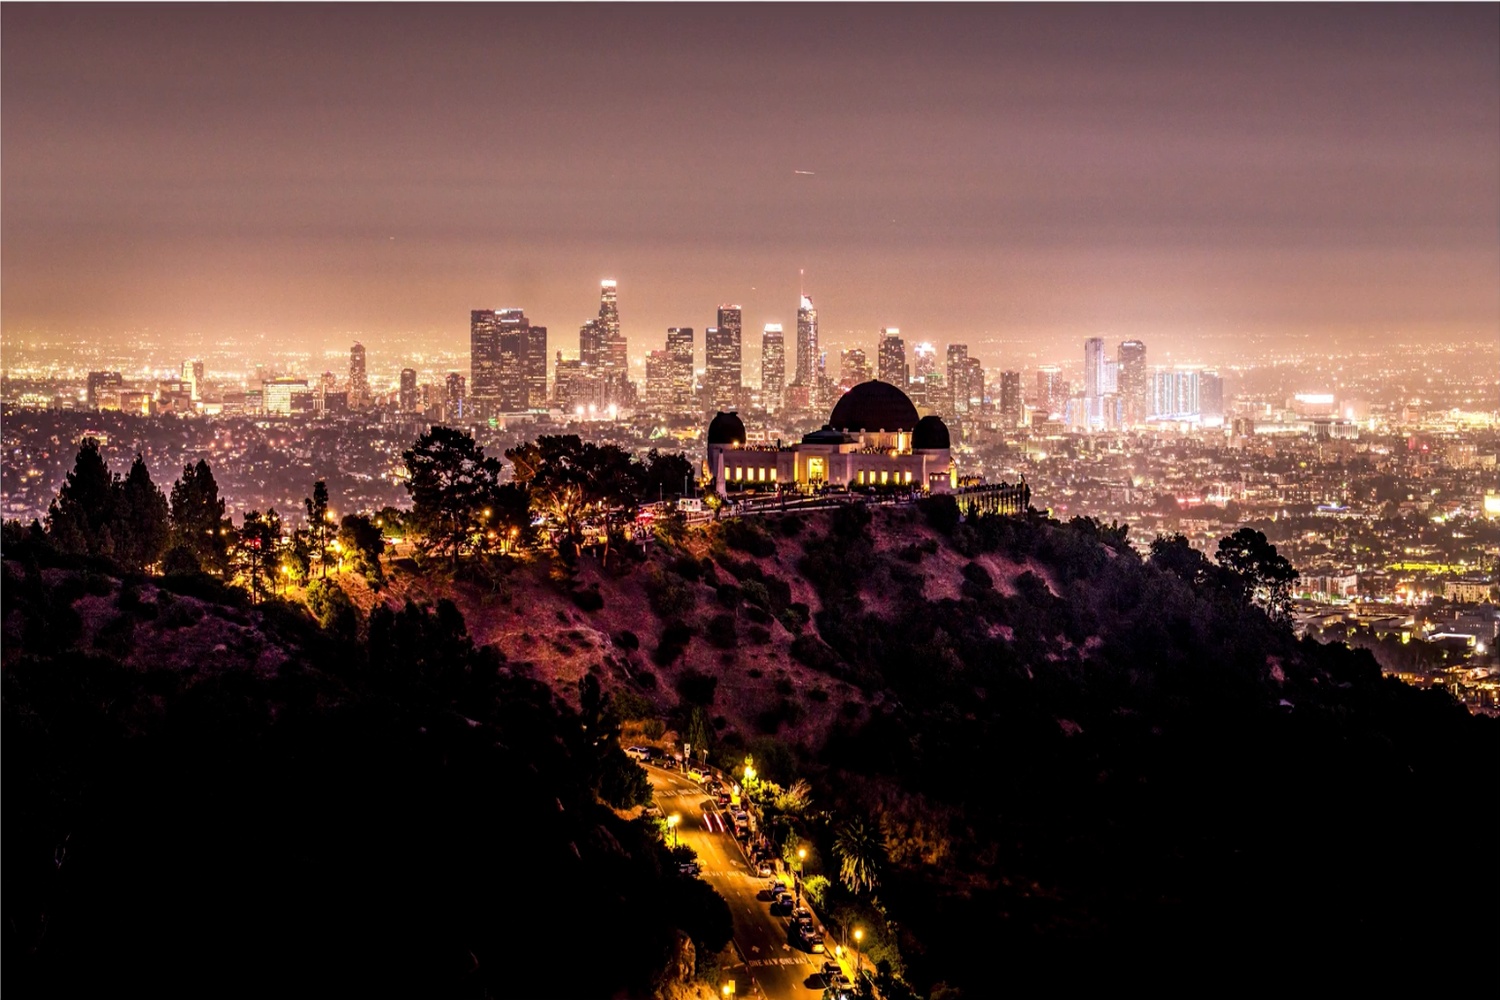
Enable Focus Magnification to ensure critical sharpness. Move the focus point to a high-contrast area—such as the observatory's rooftop or another well-defined edge—and magnify the scene. When the focus confirmation indicator turns green, you can be confident that the camera has locked onto the correct spot, helping you achieve the sharpest possible image.
Ready to get 1 on 1 support to master your tools and take photos that have that WOW factor? Apply to become a certified Master of Photography here.
6. Don't Sharpen Everything
One of the biggest editing mistakes is applying sharpening across the entire image.
Some areas benefit from extra detail, such as buildings, rocks, trees, and textures.
Other areas should remain soft, including skies, clouds, fog, and water.
The contrast between sharp and soft areas creates a much more professional result.
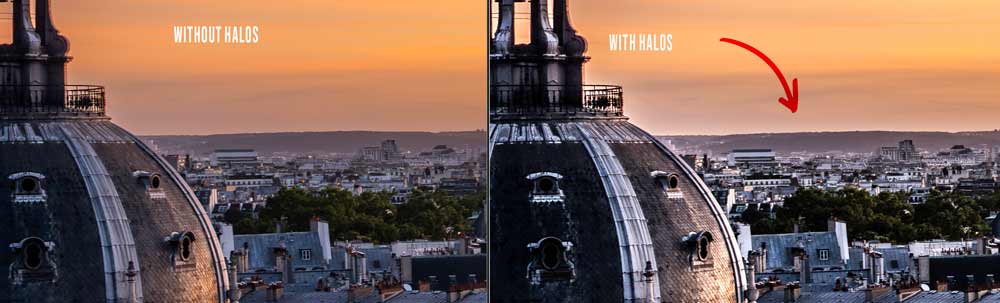
7. Watch Out for Halos
If you notice bright outlines around objects, you've probably added too much sharpening.
A good edit should feel natural. Viewers should notice the image—not the processing.
Ready to get 1 on 1 support to master your tools and take photos that have that WOW factor? Apply to become a certified Master of Photography here.
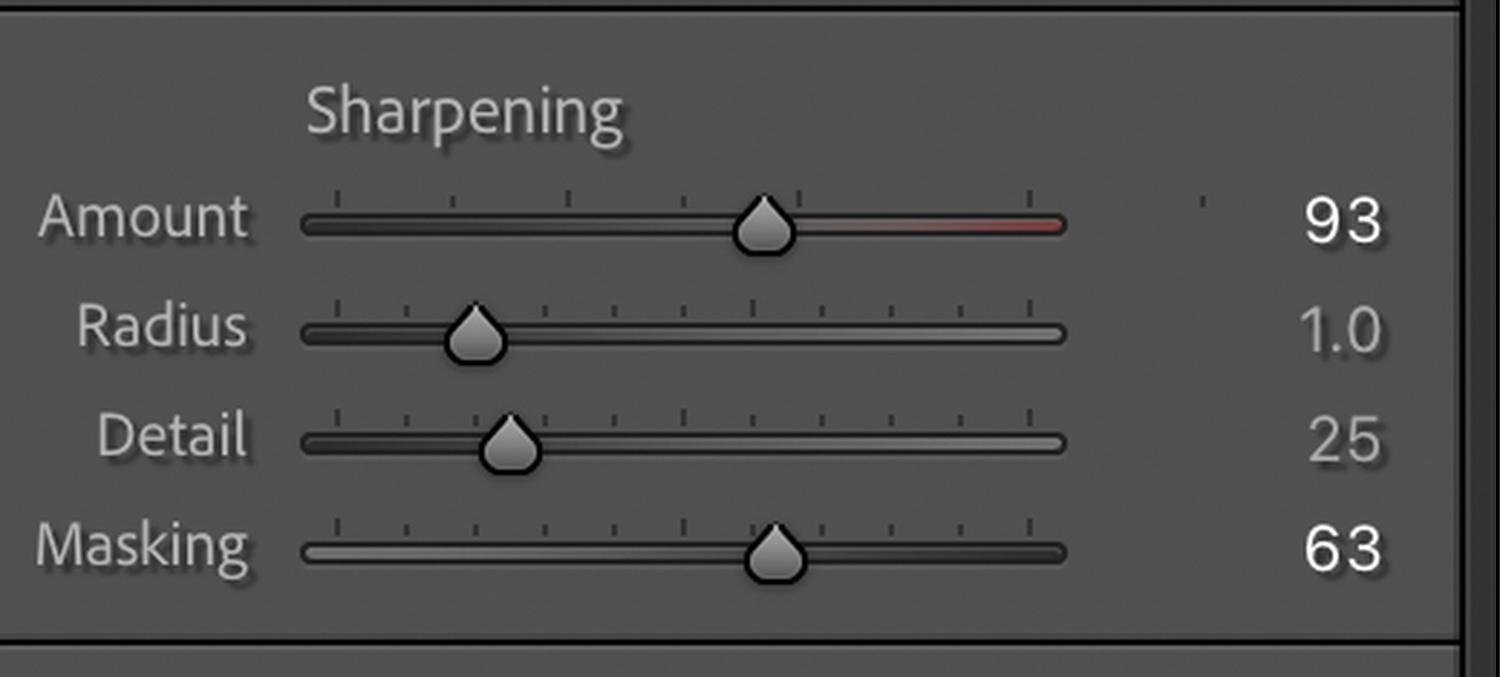
8. Use Selective Sharpening
Instead of increasing sharpening globally, target only the most important elements of the scene.
This technique adds impact where it matters while preserving a natural look throughout the image.
Use the masking feature in the sharpening settings to sharpen only the areas where there are edges.
Final Thoughts
Sharp photography is not about pushing sliders to the maximum.
It's about combining solid shooting techniques with thoughtful editing.
Focus accurately, keep your camera stable, sharpen selectively, and always aim for a natural result. Your images will look cleaner, more professional, and far more enjoyable to view.
Get my FREE Lightroom preset here: https://bit.ly/AIPresets
Serge — Photoserge | Coaching photographers who are serious about getting to the next level.
