
How to Remove Noise in Lightroom: Never Delete a Noisy Photo Again
One of my favorite photos ever was shot at 1250 ISO, handheld, at night. It sold in over 120 galleries around the world. And when you zoom in on the original file, it is full of noise.
A lot of people would delete that photo. Please don't. There is a feature in Lightroom that has been there for a while, but most people don't know about it, and it is pure magic. In this tutorial I am going to show you exactly how I use it, step by step.
Prefer to watch? Watch the full tutorial on YouTube.
The Story Behind This Photo
One night I was working in Venice and I wanted to shoot the Grand Canal from the Academy Bridge. One of the most stunning views in the world. But there were so many people I could not put a tripod down.
So what did I do? I shot the photo at 1250 ISO. The problem is this photo was for my galleries, and galleries need big prints. How do you make a big, clean print from a 1250 ISO file? Let me show you.
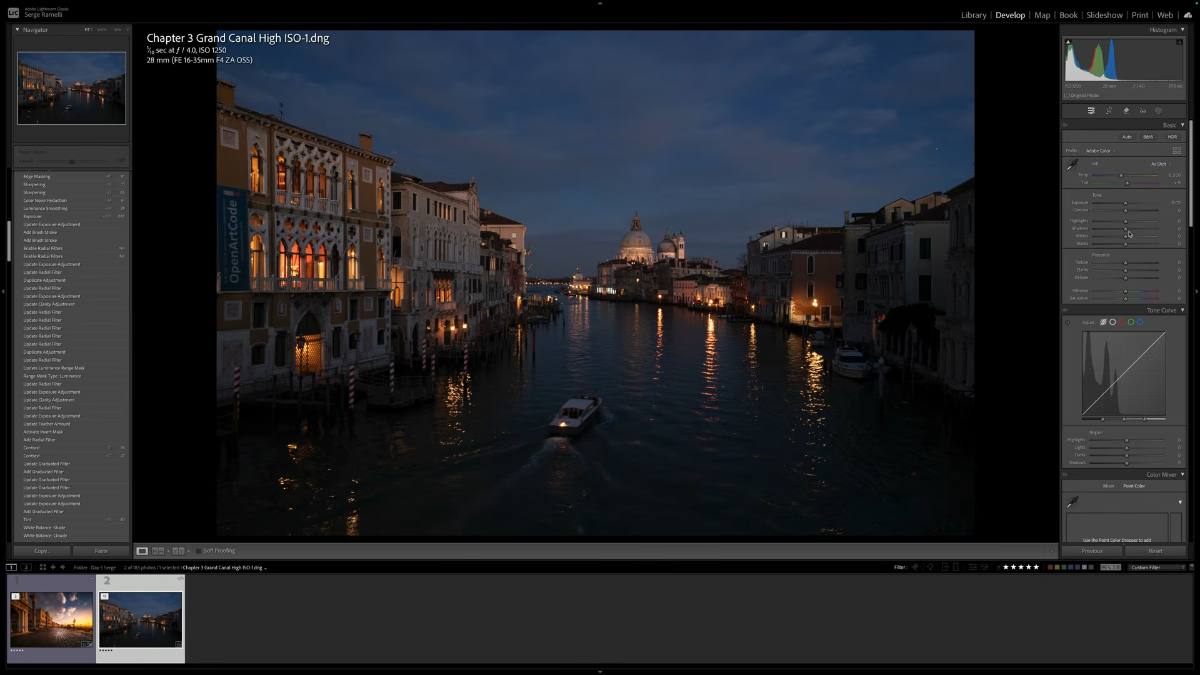
Step 1: Do Your Normal Retouch First
Before touching the noise, retouch the photo like you always would. I used my natural drama formula:
- Open the shadows and bring down the highlights. The photo looks weird at first, that's normal.
- Hold the Option key on Mac (Alt on Windows) while you drag the Blacks slider. What you see in black is pure black. Stop when just a few areas turn black.
- Tweak the white balance. On this photo I added a bit of magenta, it works really great for night scenes.
- Crop in 16:9 for that cinematic look.
- Add a linear gradient at the very top of the sky to darken the corner and focus the eye on the center of the photo.
That's it. I keep it simple, because I want the eyes on the photo, not the effects.
Step 2: Zoom In and Face the Noise
Now click on the photo to zoom in at 100%. At 1250 ISO, the sky is full of noise. Back in the day I would fight this with the manual noise sliders. Not anymore.
Step 3: The Magic Fix — AI Denoise
Here is the trick a lot of people don't know. Right-click on your photo and go to Enhance. You get this window with a feature called Denoise.
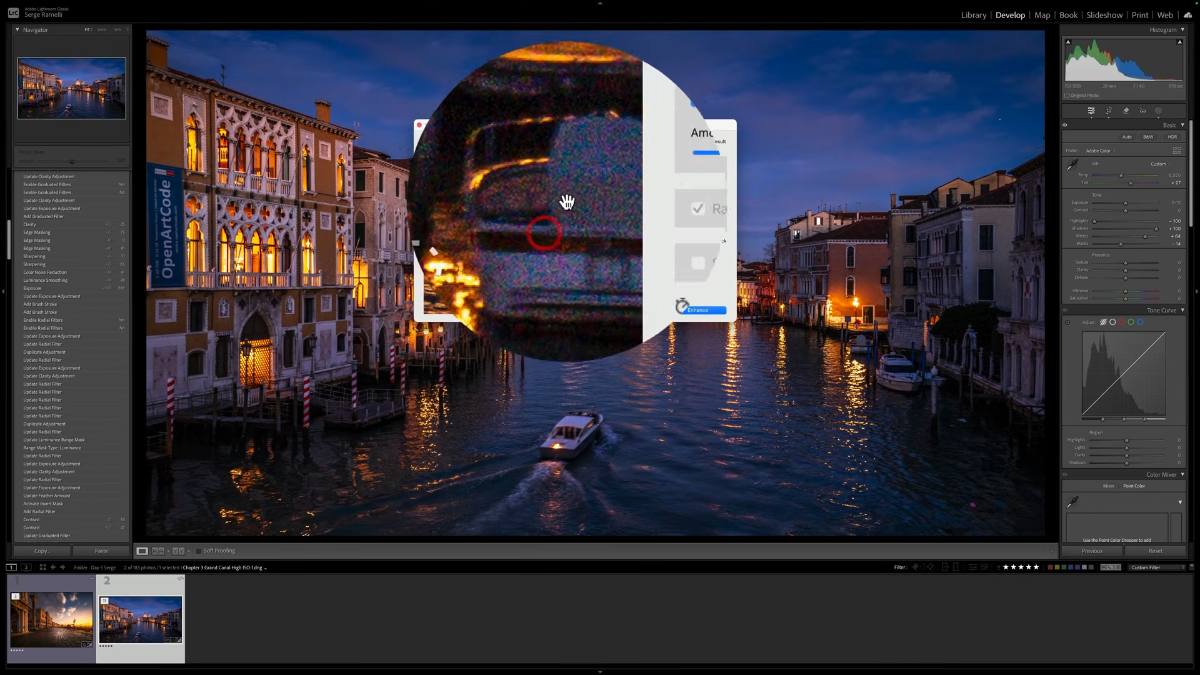
I usually put the amount around 40. Then click Enhance.
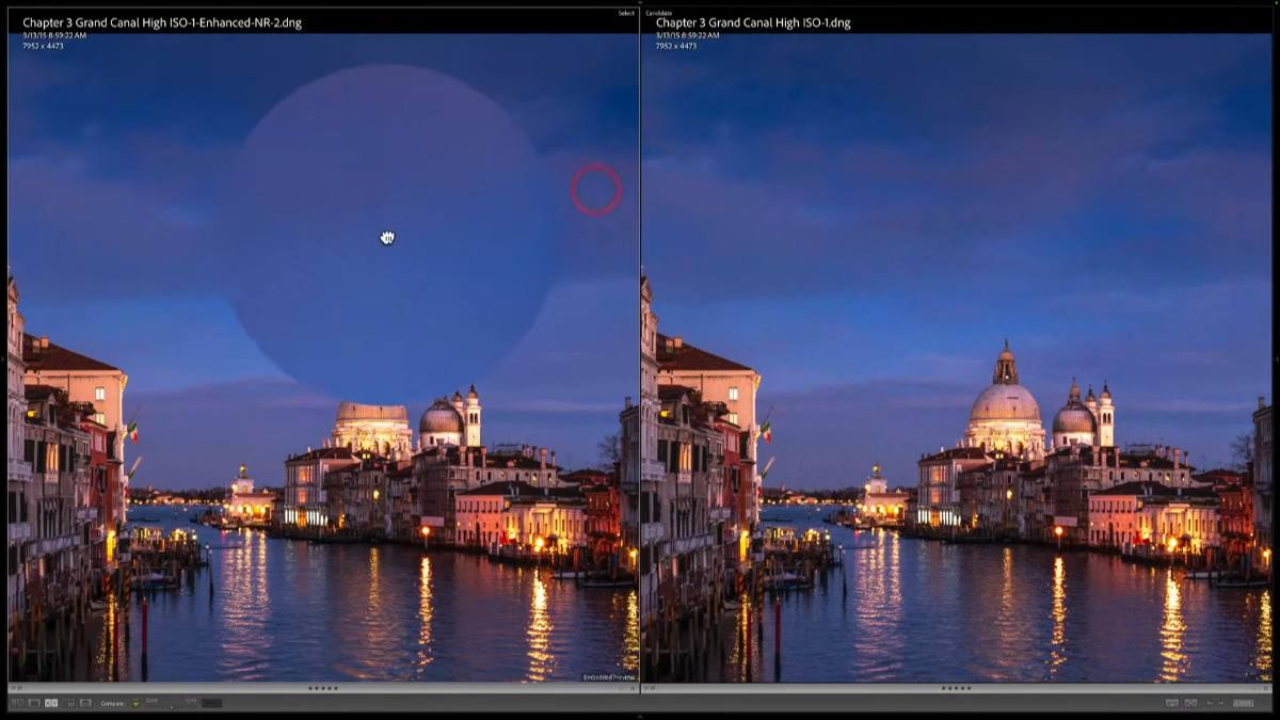
Step 4: Compare Before and After
Select both photos, the original and the new one with the word "Enhanced" in the name, and press C on your keyboard to compare them side by side.
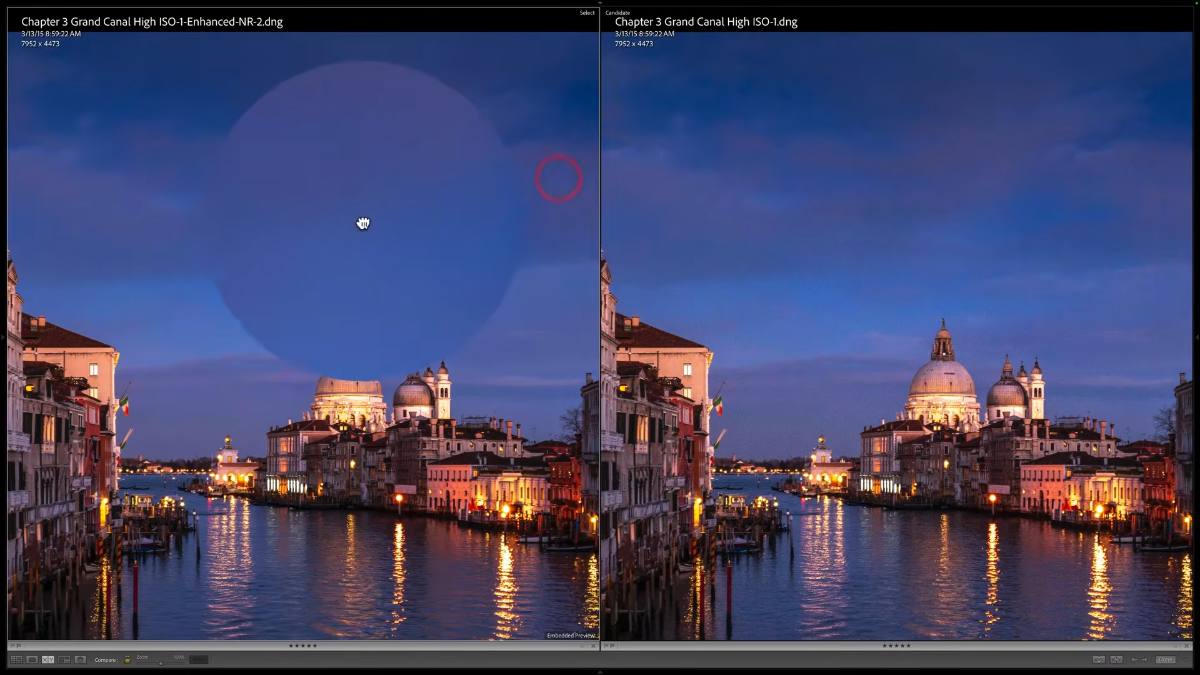
Look at the sky. On one side it is full of noise, on the other side it is completely clean. Is that insane? It is so much cleaner, it's not even close.
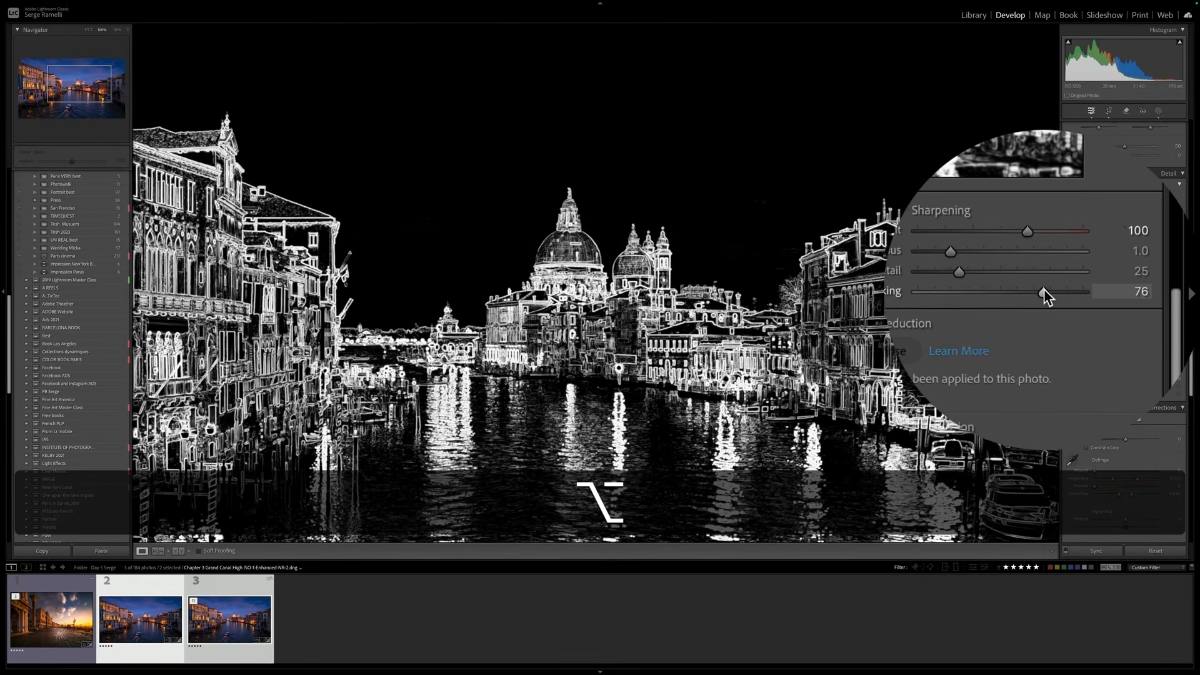
Bonus Trick: Sharpen Without Bringing the Noise Back
If you want to make the photo even sharper, here is my technique. Go to the Detail panel and push Sharpening to 100. But here is the problem: it brings some noise back into the sky and the water.
The fix is the Masking slider. Hold the Option key (Alt on Windows) and drag the Masking slider almost all the way to the right. Everything in white gets sharpened, everything in black stays smooth. So the buildings get sharp, and the sky and water stay perfectly clean.
Never Sharpen Globally: Use a Brush
To push it even further, never do your final sharpening globally. Take a small brush, add sharpness, texture and clarity, and paint only the buildings. Not the water, not the sky, just the buildings.
The buildings get really sharp, the sky stays really clean, and the whole photo pops.
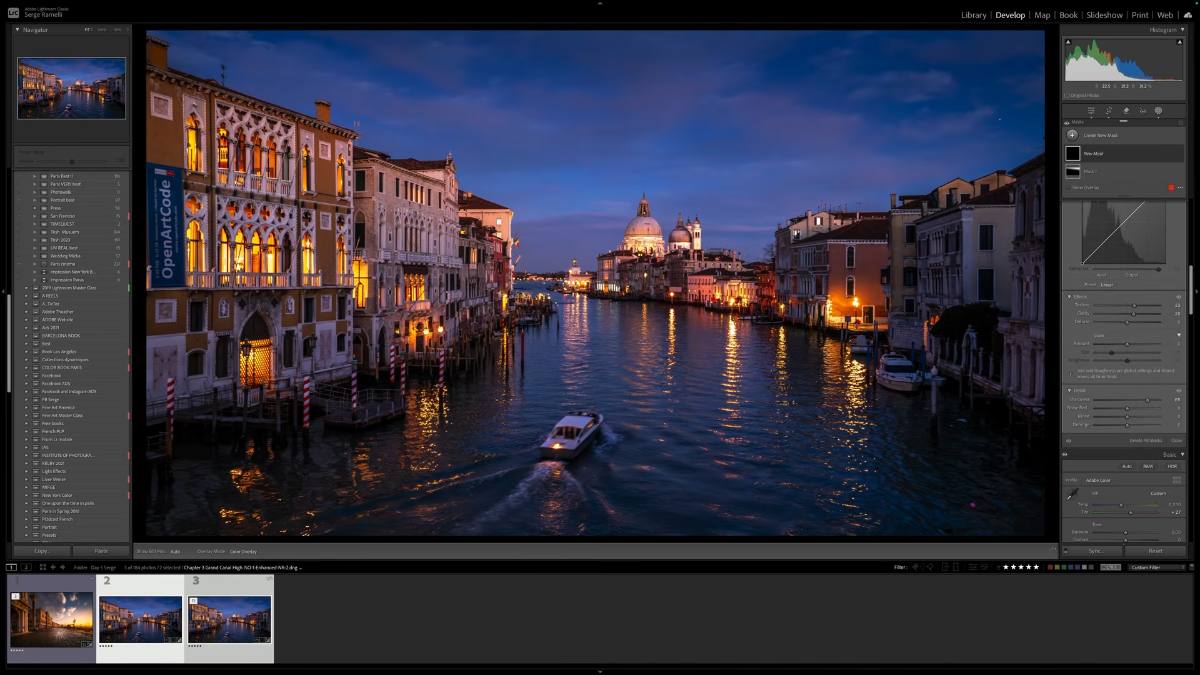
The Result
My galleries could not believe it. This 1250 ISO photo became one of my best selling photos ever. So the next time you shoot at high ISO because you have no tripod, do not delete the photo. Retouch it, run AI Denoise around 40, sharpen with masking, and make a print you are proud of.
Watch the full video tutorial here to see every step live.
I have a movie coming out called From Paris to Hollywood. I am trying to get 3,000 copies pre-sold, and to thank you I am doing free photo walks in Los Angeles (El Matador, Griffith Park, Downtown LA, Rodeo Drive) with a game where you can win a Fuji camera or a MacBook Air. Learn more here.
