
The Best Photography Locations in Antelope Canyon and Monument Valley
If you photograph landscapes, this corner of Arizona is one of the most rewarding places on Earth. In one short road trip around Page and the Navajo Nation, you get glowing slot canyons, the most famous desert view in the world, and one of the best sunrises I have ever shot. These are my best photos from Antelope Canyon and Monument Valley, with the exact locations, the best time of day, and my camera tips for each spot.
One important thing before we start: all of these locations are on Navajo land. You cannot visit Antelope Canyon on your own; you must book a tour with a Navajo guide. The guides are fantastic. They know exactly where the light falls at every hour, and they are the ones who named the rock formations you will see in this article.
Antelope Canyon: Upper vs Lower
Antelope Canyon is actually two separate slot canyons a few minutes apart, just outside Page, Arizona.
Upper Antelope Canyon is the famous one. It is shaped like an "A": narrow at the top, wide at the bottom, so you walk on a flat sandy floor. Because the opening at the top is so narrow, this is where you get the famous light beams, roughly from late March to early October, around midday (about 10:30 am to 1:00 pm).
📍 Google Maps: https://maps.google.com/?q=Upper+Antelope+Canyon
Lower Antelope Canyon is shaped like a "V": wide at the top, narrow at the bottom. You climb down stairs and ladders to get in. There are no big light beams here, but the reflected light bouncing between the walls creates incredible oranges, reds and purples. It is usually less crowded and cheaper, and honestly, some of my favorite photos come from Lower.
📍 Google Maps: https://maps.google.com/?q=Lower+Antelope+Canyon
Practical tips for both canyons:
- Tripods and bags are not allowed on the standard tours, so plan to shoot handheld.
- Raise your ISO (800 to 3200 is normal in there) and keep your shutter speed at 1/60s or faster. Do not be afraid of noise; Lightroom's AI Denoise will clean it up beautifully.
- Shoot RAW. The dynamic range between the glowing walls and the dark corners is huge.
- Point your camera up. The best compositions are almost always above your head.
- White balance is where the magic happens in post: warm it up and the walls turn to fire.
The Named Rock Formations of Antelope Canyon
The Navajo guides have given names to the rock formations, and once they point them out, you cannot unsee them. Ask your guide to show you these. I go into the full retouching side of these exact photos — the relight and light-depth work — in my Luminar Neo review.
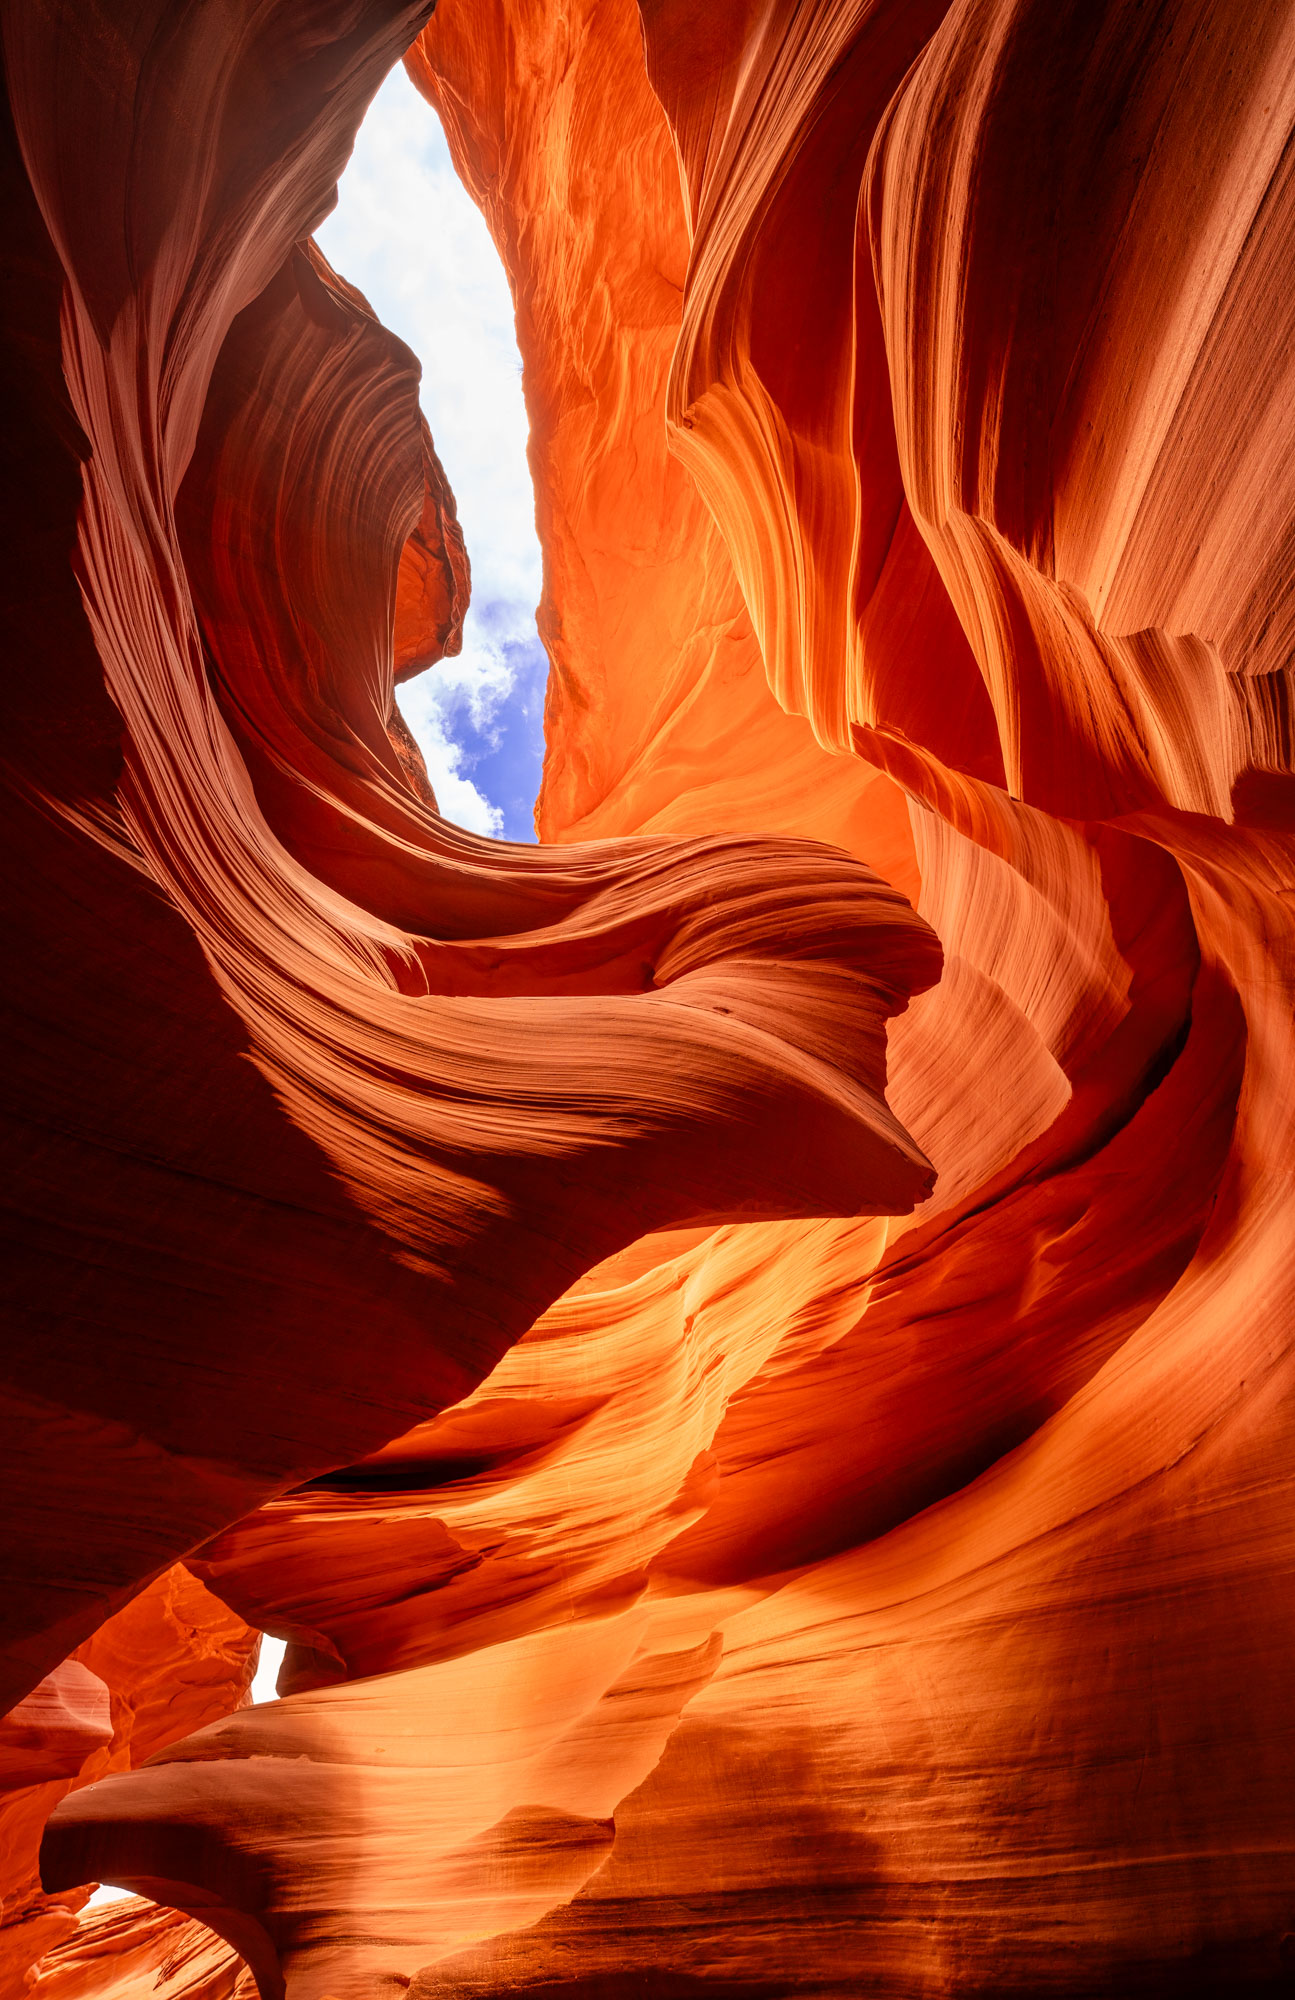
🖼️ Want this as a print, for your website, or for a campaign? License it here — ref. AZ-01
The Lady in the Wind (Lower Antelope Canyon). Look up and you will see her: a woman with her hair flowing in the wind, carved by centuries of flash floods. This is a vertical composition; get low and include the sky opening at the top.
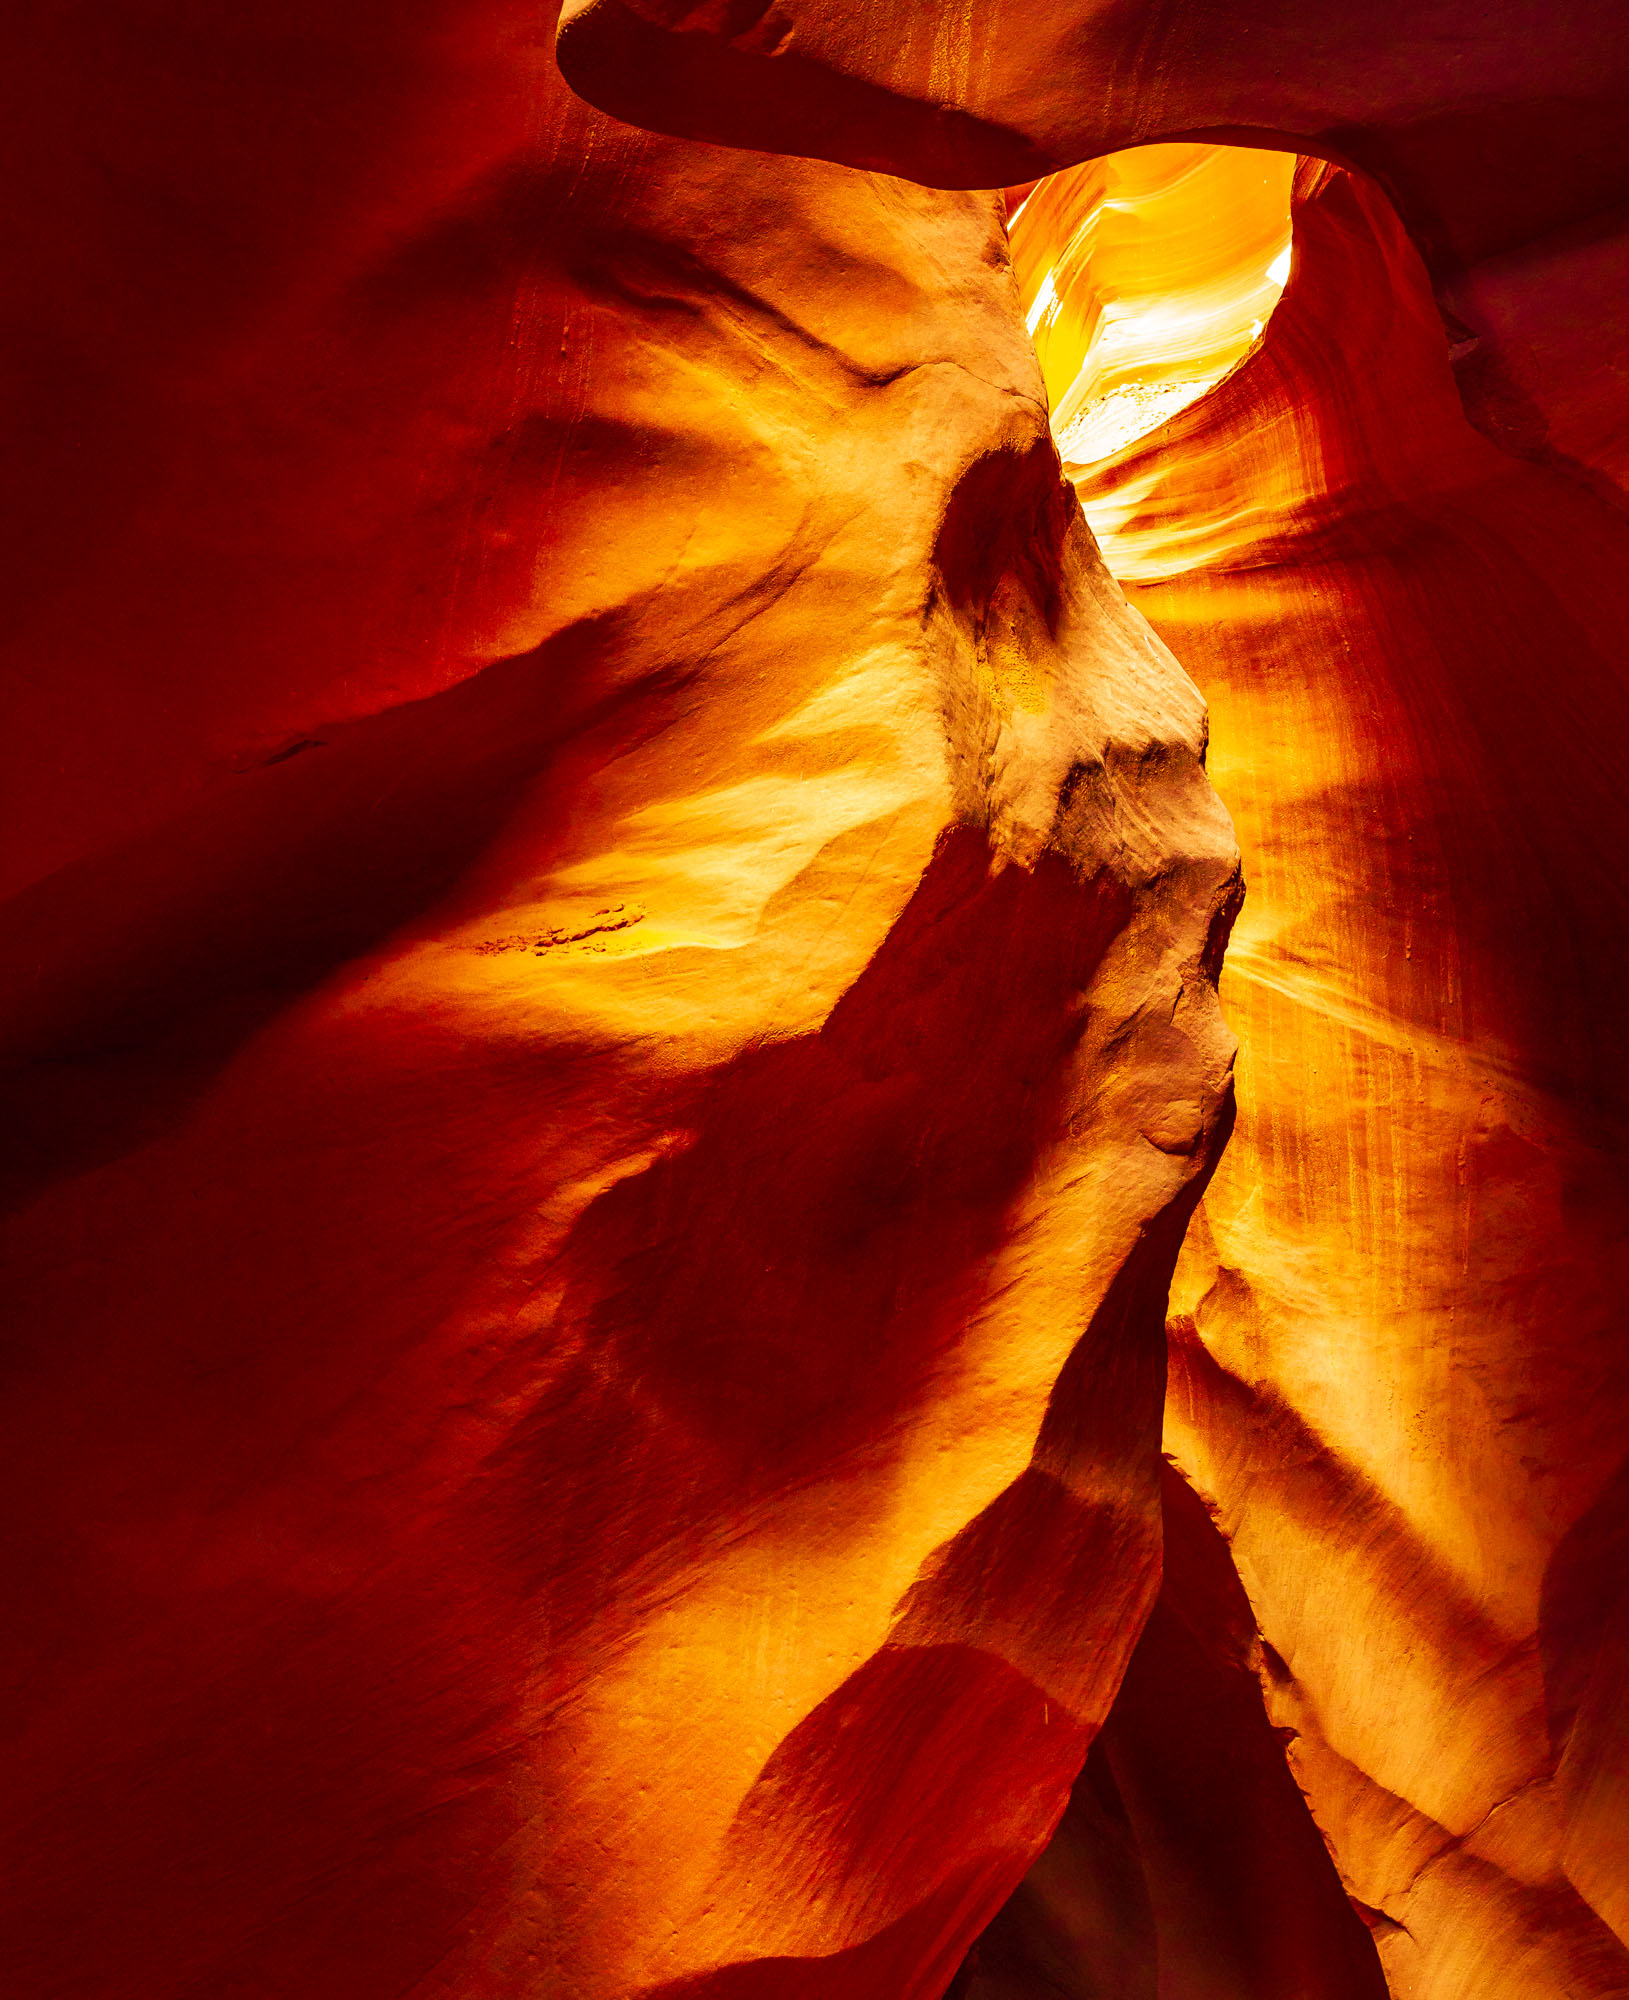
🖼️ Want this as a print, for your website, or for a campaign? License it here — ref. AZ-02
The Chief (Lower Antelope Canyon). A profile of a face in the stone. The trick here is to expose for the brightest part of the rock and let the shadows go dark; that contrast is what makes the face appear.
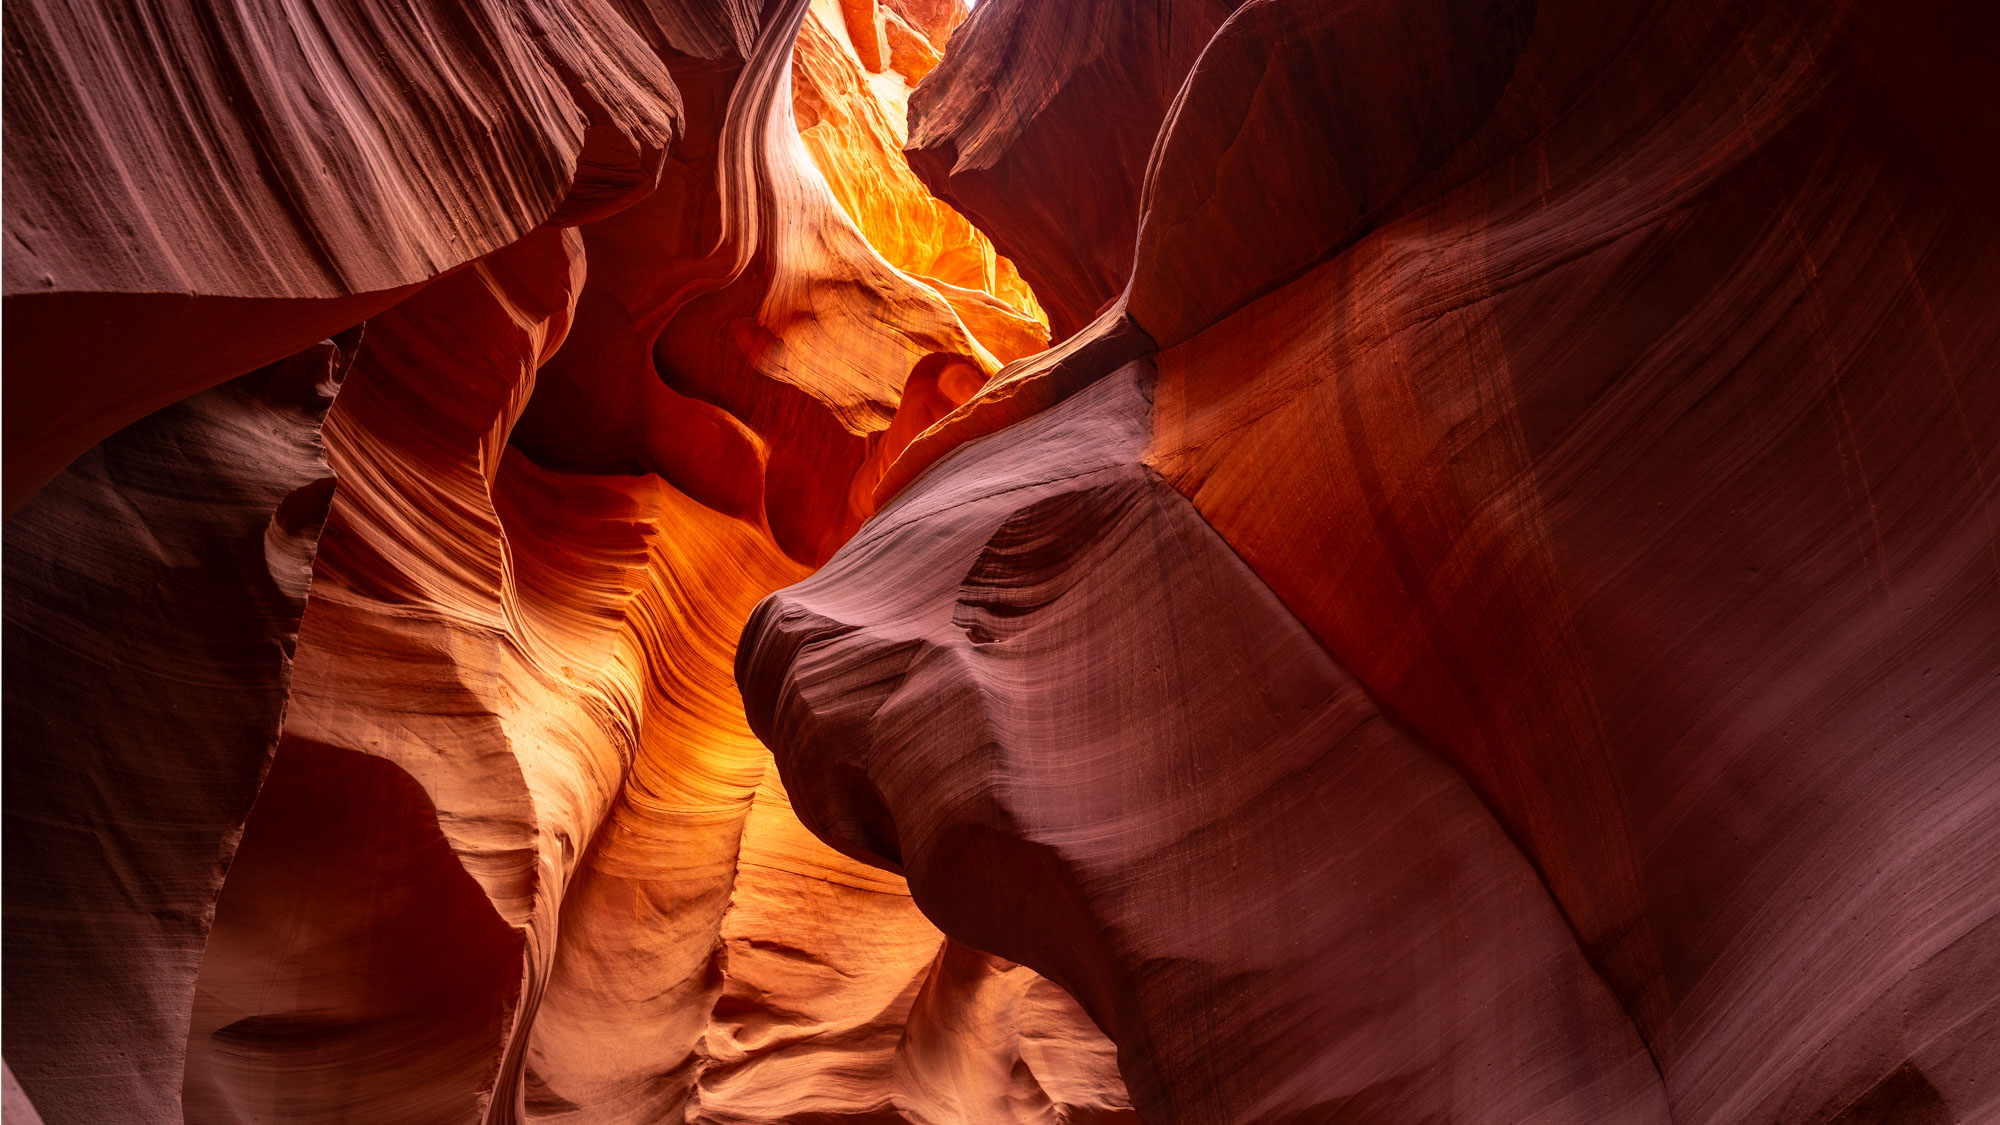
🖼️ Want this as a print, for your website, or for a campaign? License it here — ref. AZ-03
The Buffalo (Lower Antelope Canyon). When the light comes through at the right angle, the whole formation glows like fire.
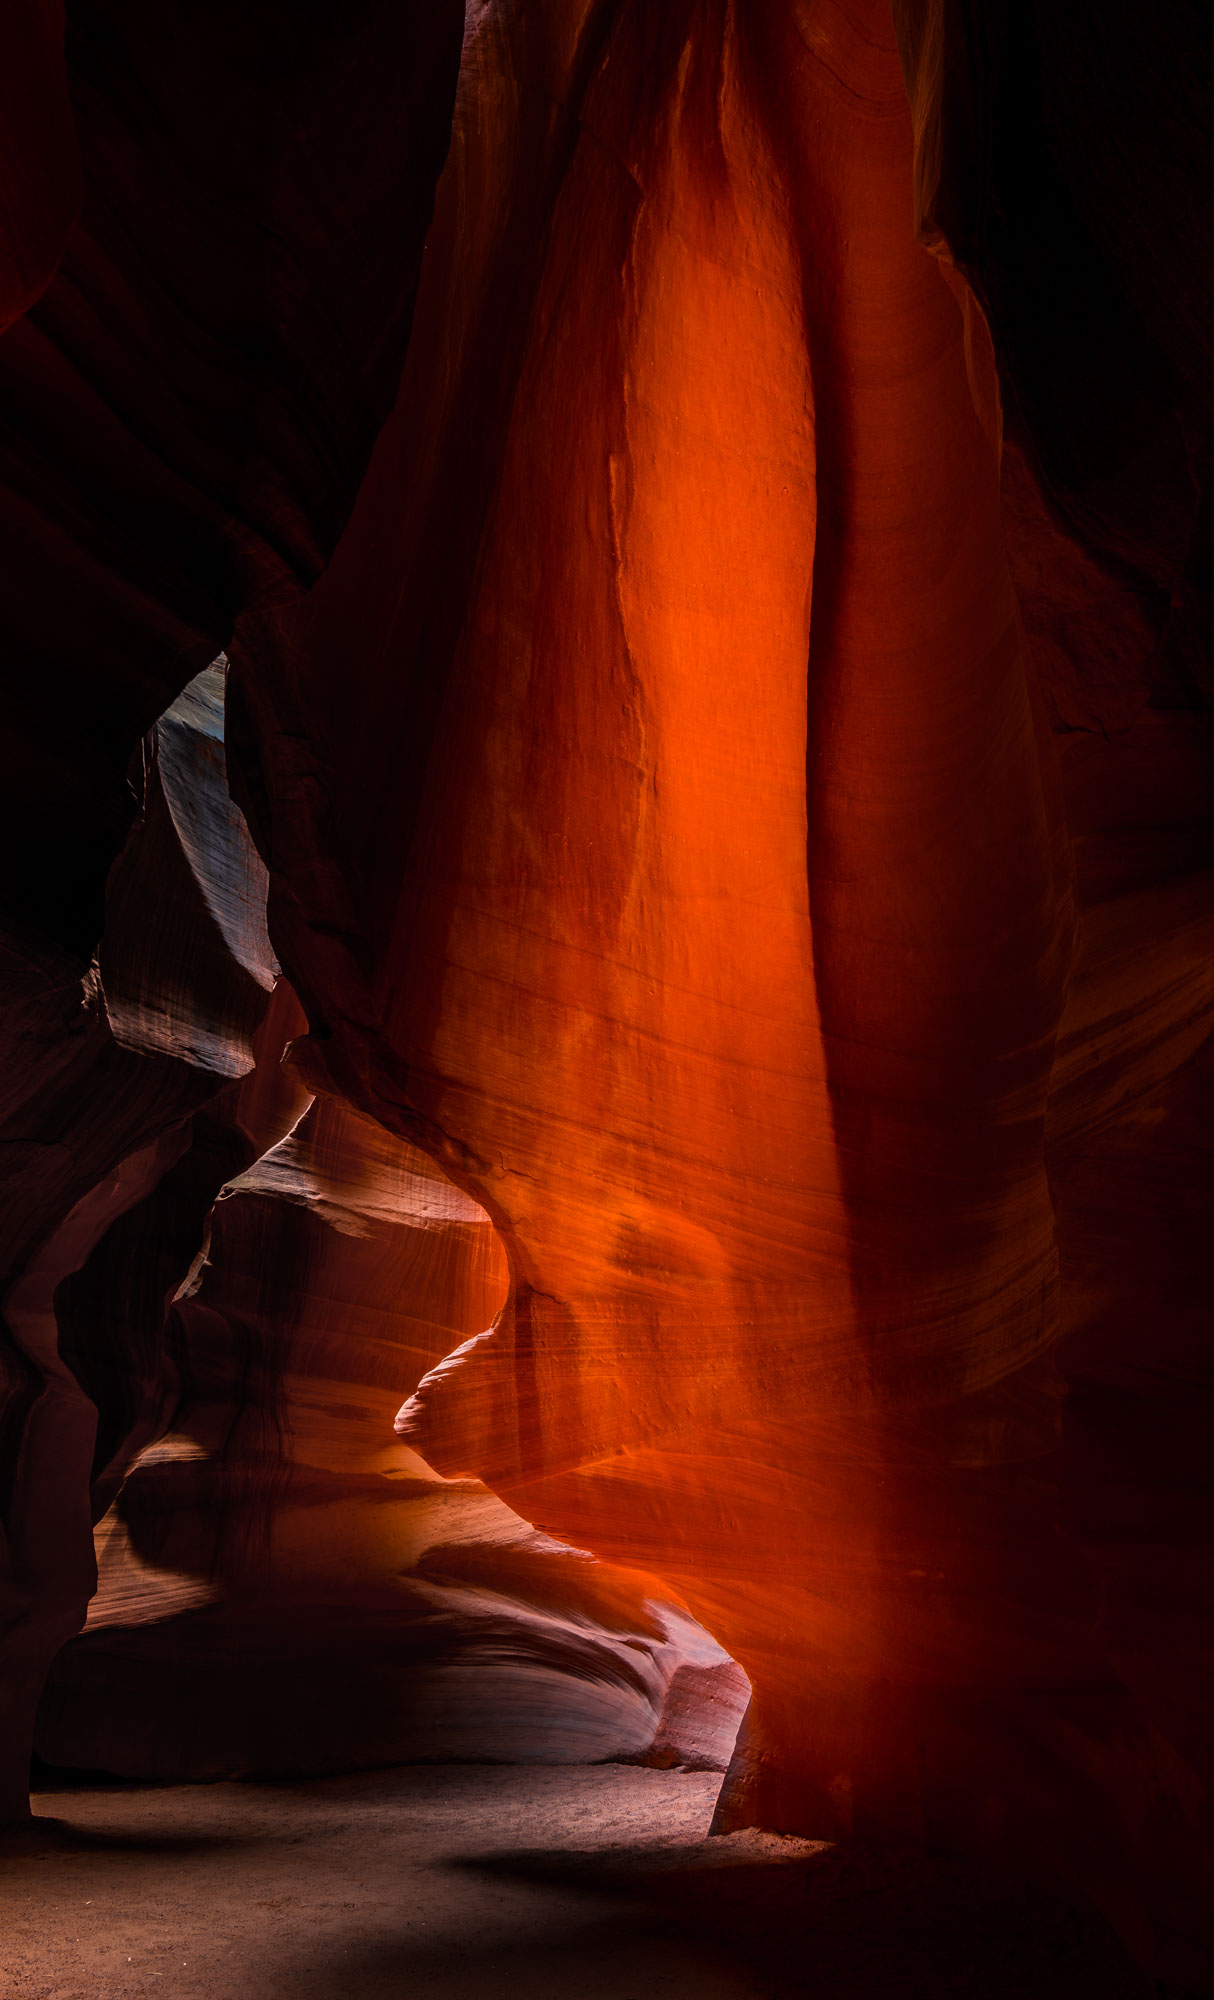
🖼️ Want this as a print, for your website, or for a campaign? License it here — ref. AZ-04
The Falcon (Upper Antelope Canyon). The reflected light in Upper Antelope is softer and more golden than in Lower. This is where slightly underexposing saves your highlights.
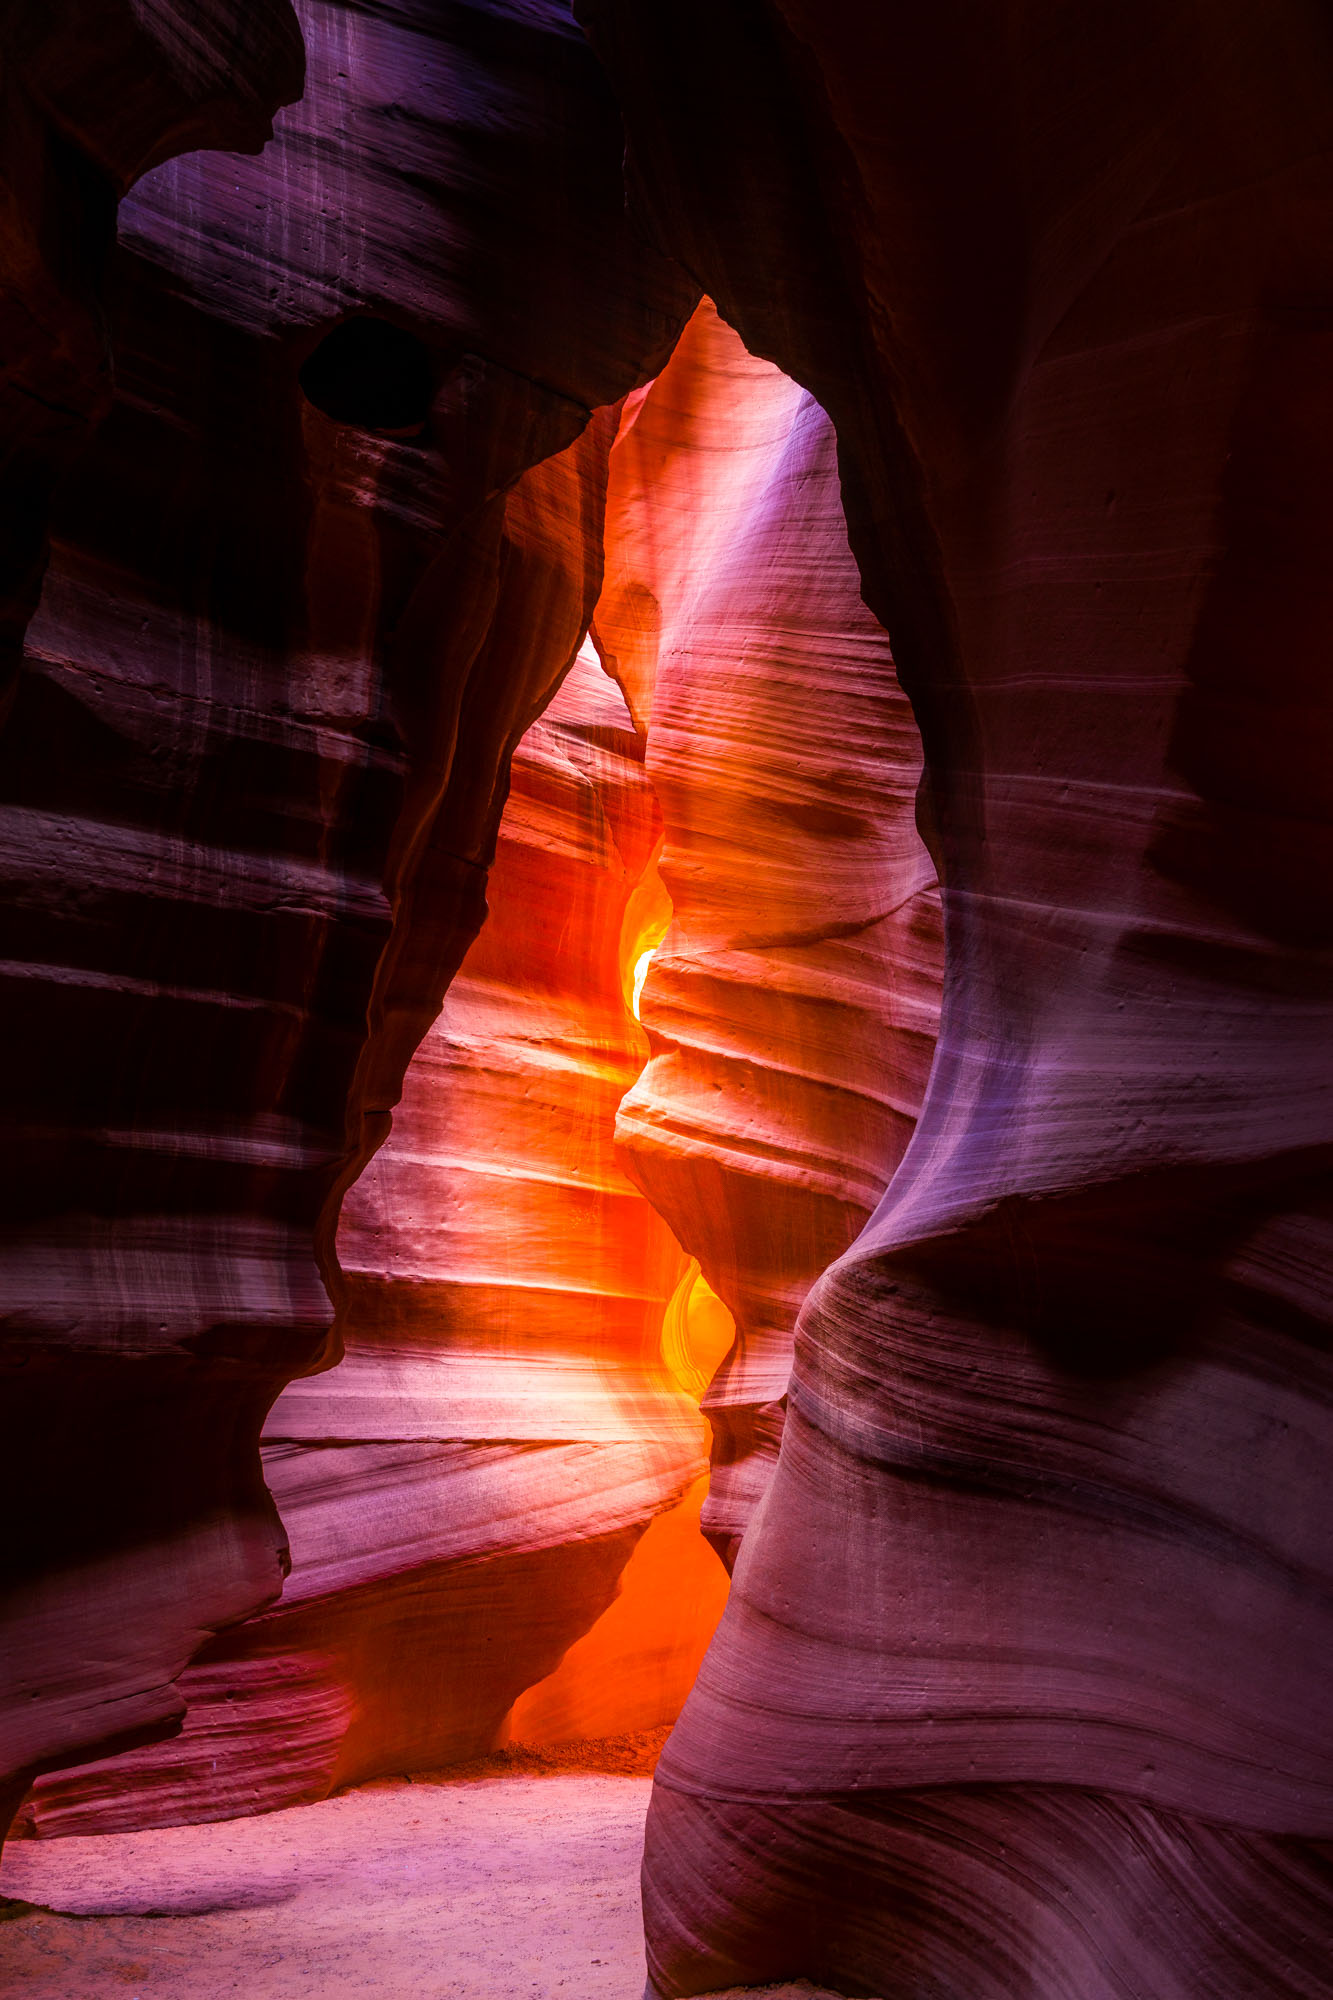
🖼️ Want this as a print, for your website, or for a campaign? License it here — ref. AZ-05
The Bear (Upper Antelope Canyon). Deeper in the canyon, the light shifts from orange to purple. Do not correct this in post; those purples are real and they are gorgeous.
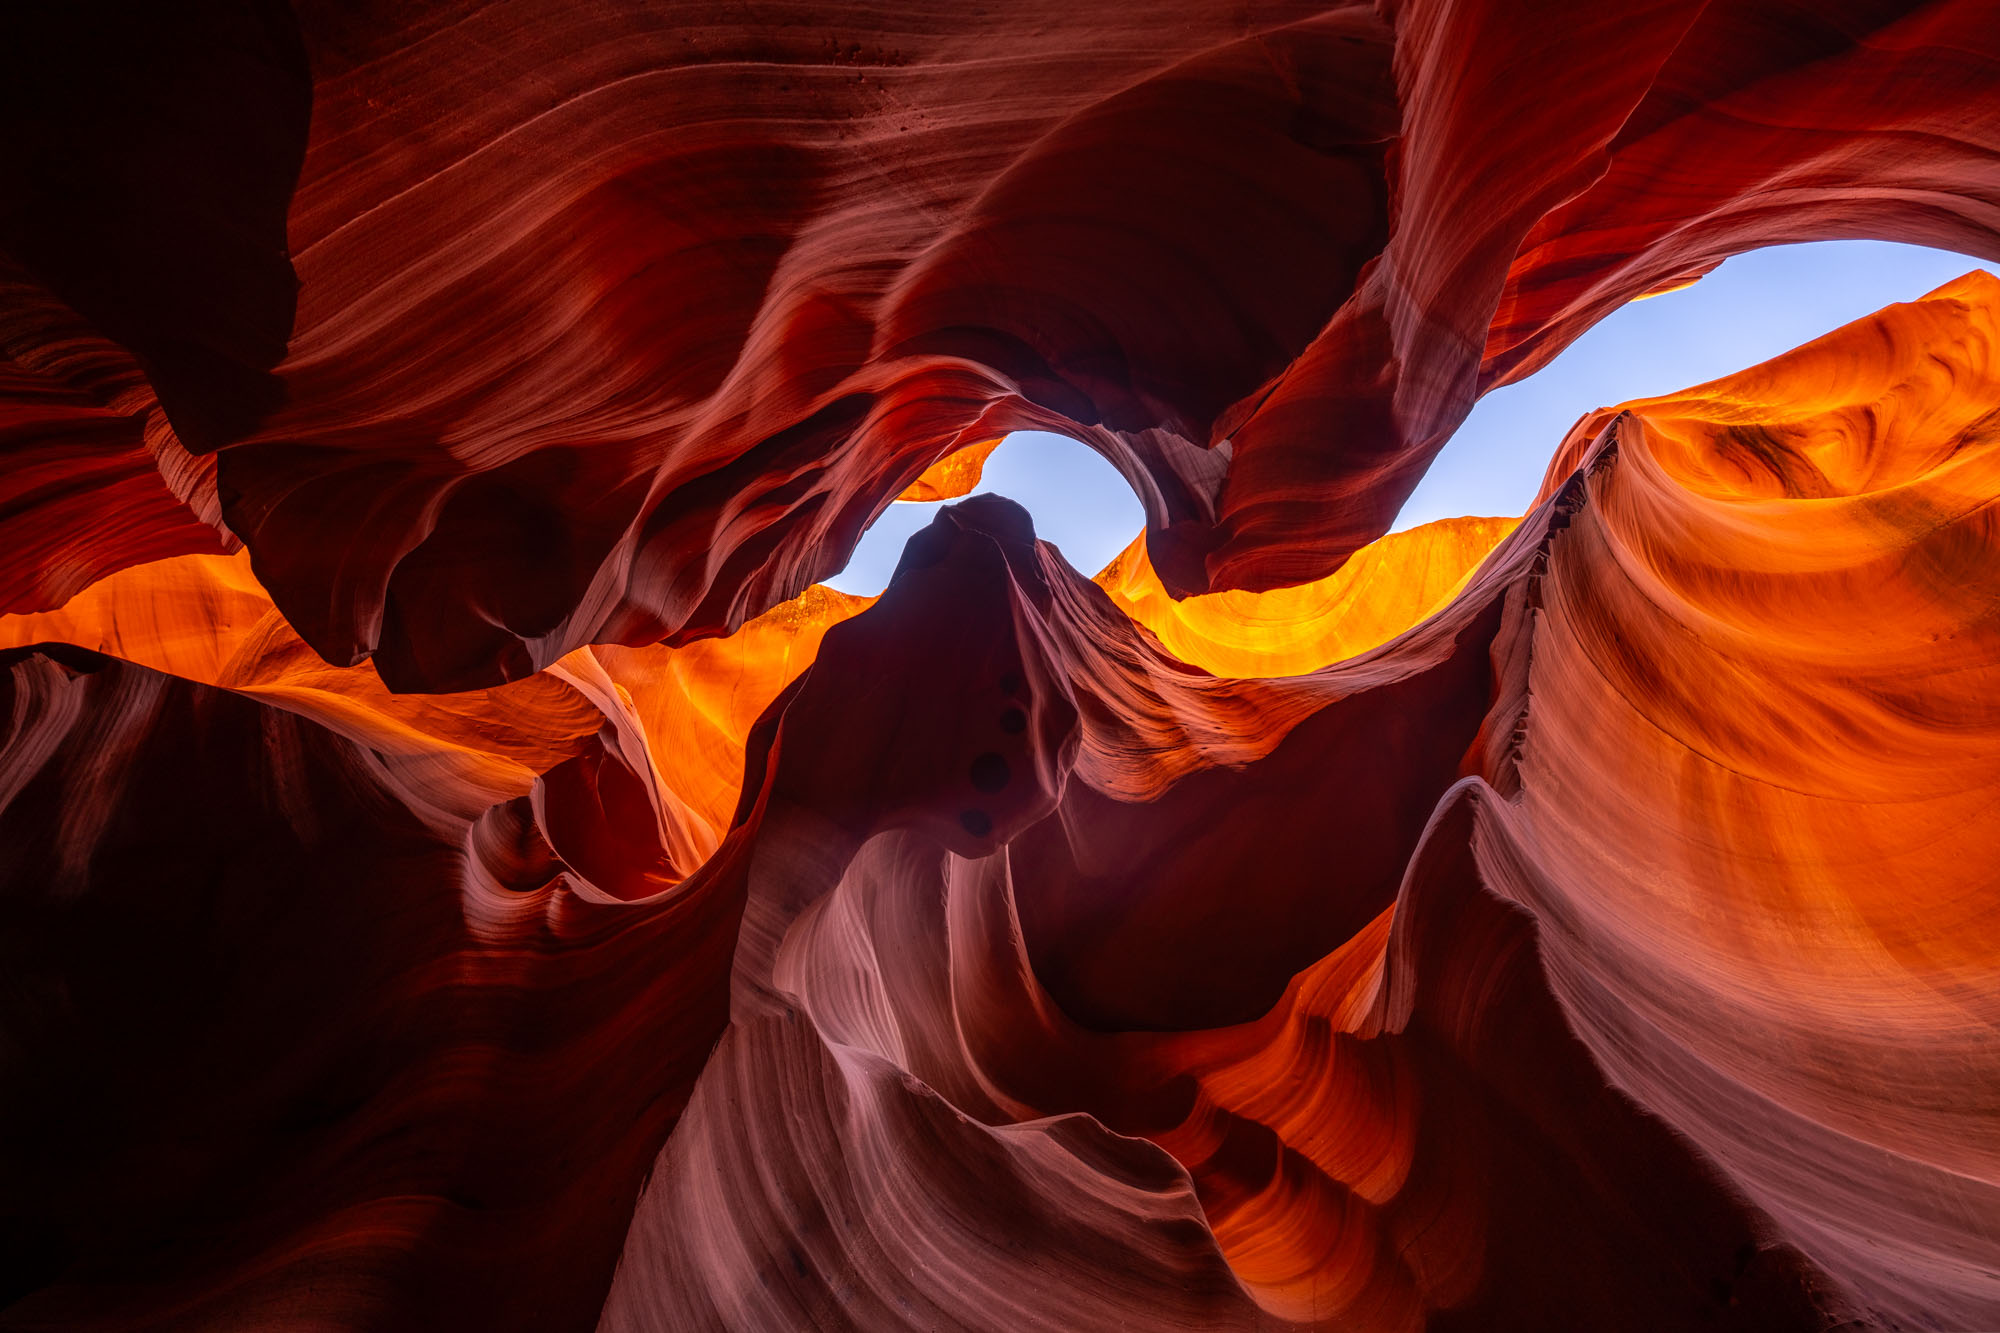
🖼️ Want this as a print, for your website, or for a campaign? License it here — ref. AZ-06
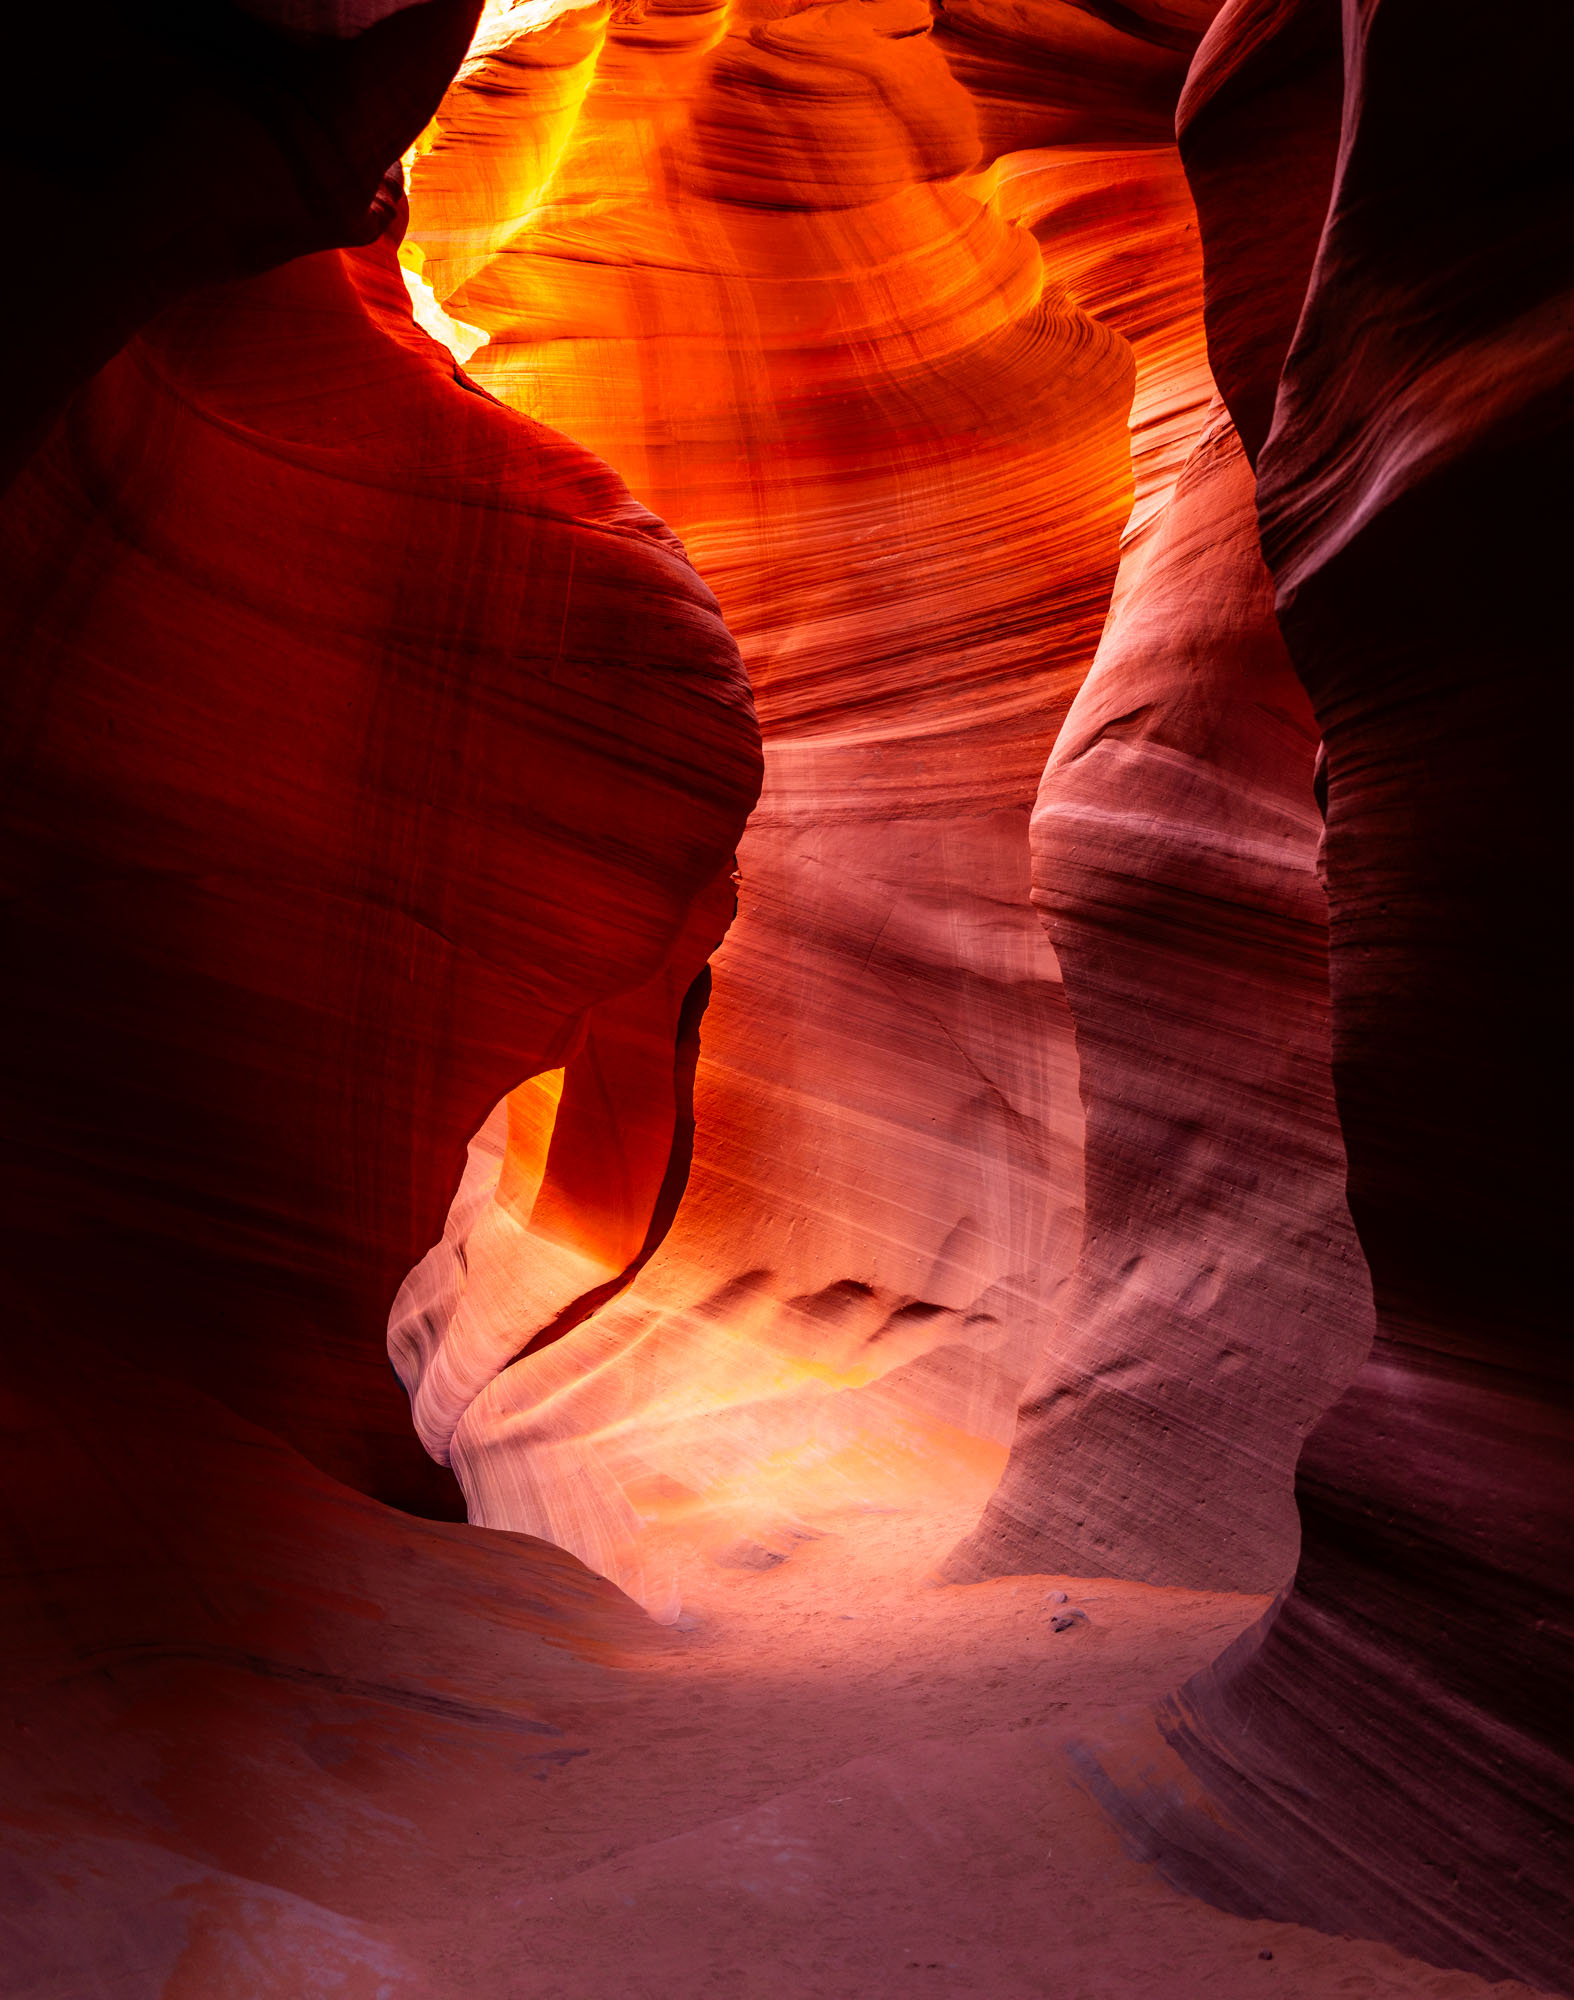
🖼️ Want this as a print, for your website, or for a campaign? License it here — ref. AZ-07
The swirling walls themselves are the subject. Follow the leading lines of the sandstone layers; they will guide the eye through your composition naturally.
Bonus: Lake Powell at Sunset
You are already in Page, so do not leave without shooting Lake Powell at sunset. The Wahweap Overlook gives you a wide view of the lake, the buttes, and if you are lucky, a sky like this one.
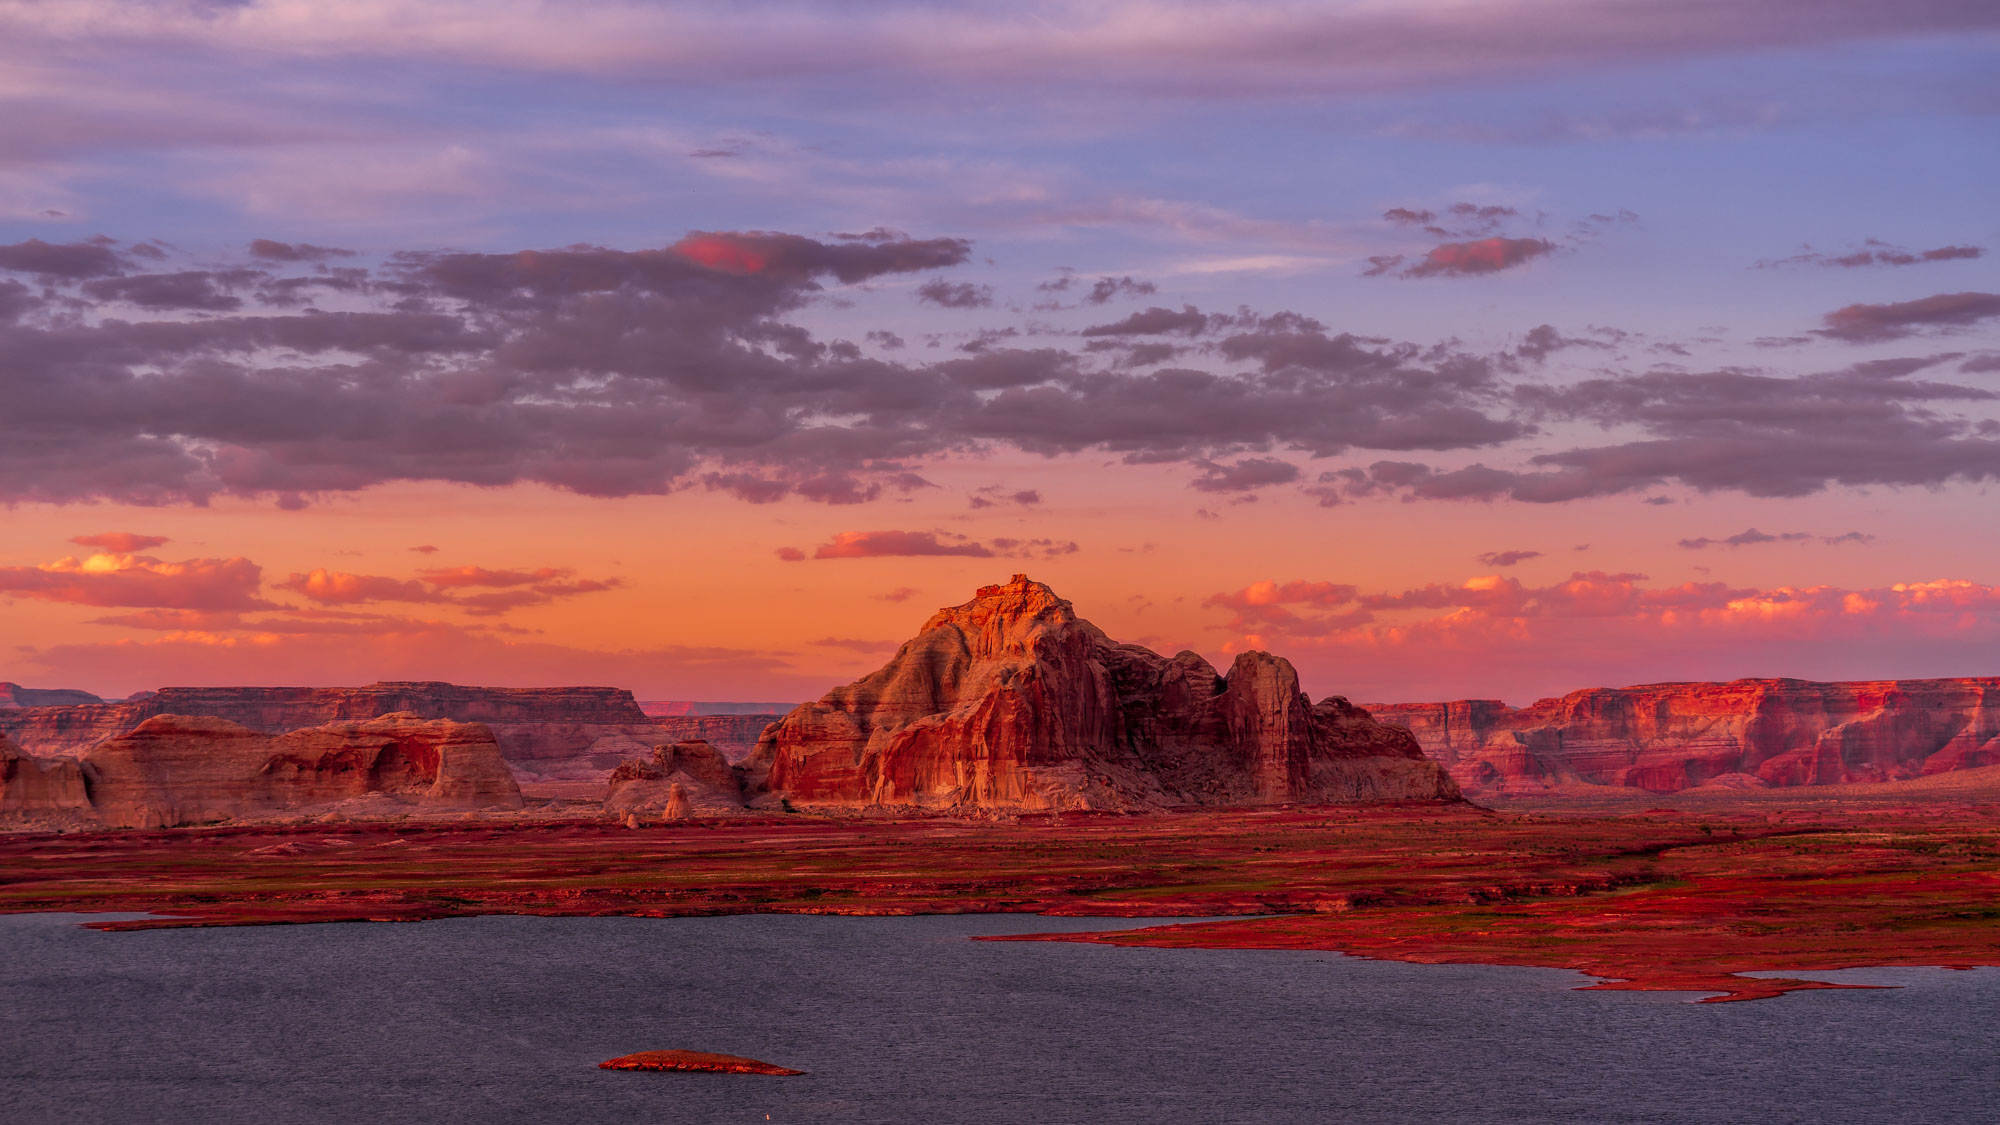
🖼️ Want this as a print, for your website, or for a campaign? License it here — ref. AZ-08
📍 Google Maps: https://maps.google.com/?q=Wahweap+Overlook
Monument Valley: The Mittens at Sunrise
From Page, it is about a two-hour drive to Monument Valley Navajo Tribal Park. The classic view of the West Mitten, East Mitten and Merrick Butte is right at the visitor center and The View Hotel. If you can, sleep at The View: you wake up, walk out, and the sunrise is in front of you. I waited fifteen years to get the shot I wanted here — the full story, and exactly how I got it, is in this article.
📍 Google Maps: https://maps.google.com/?q=The+View+Hotel+Monument+Valley
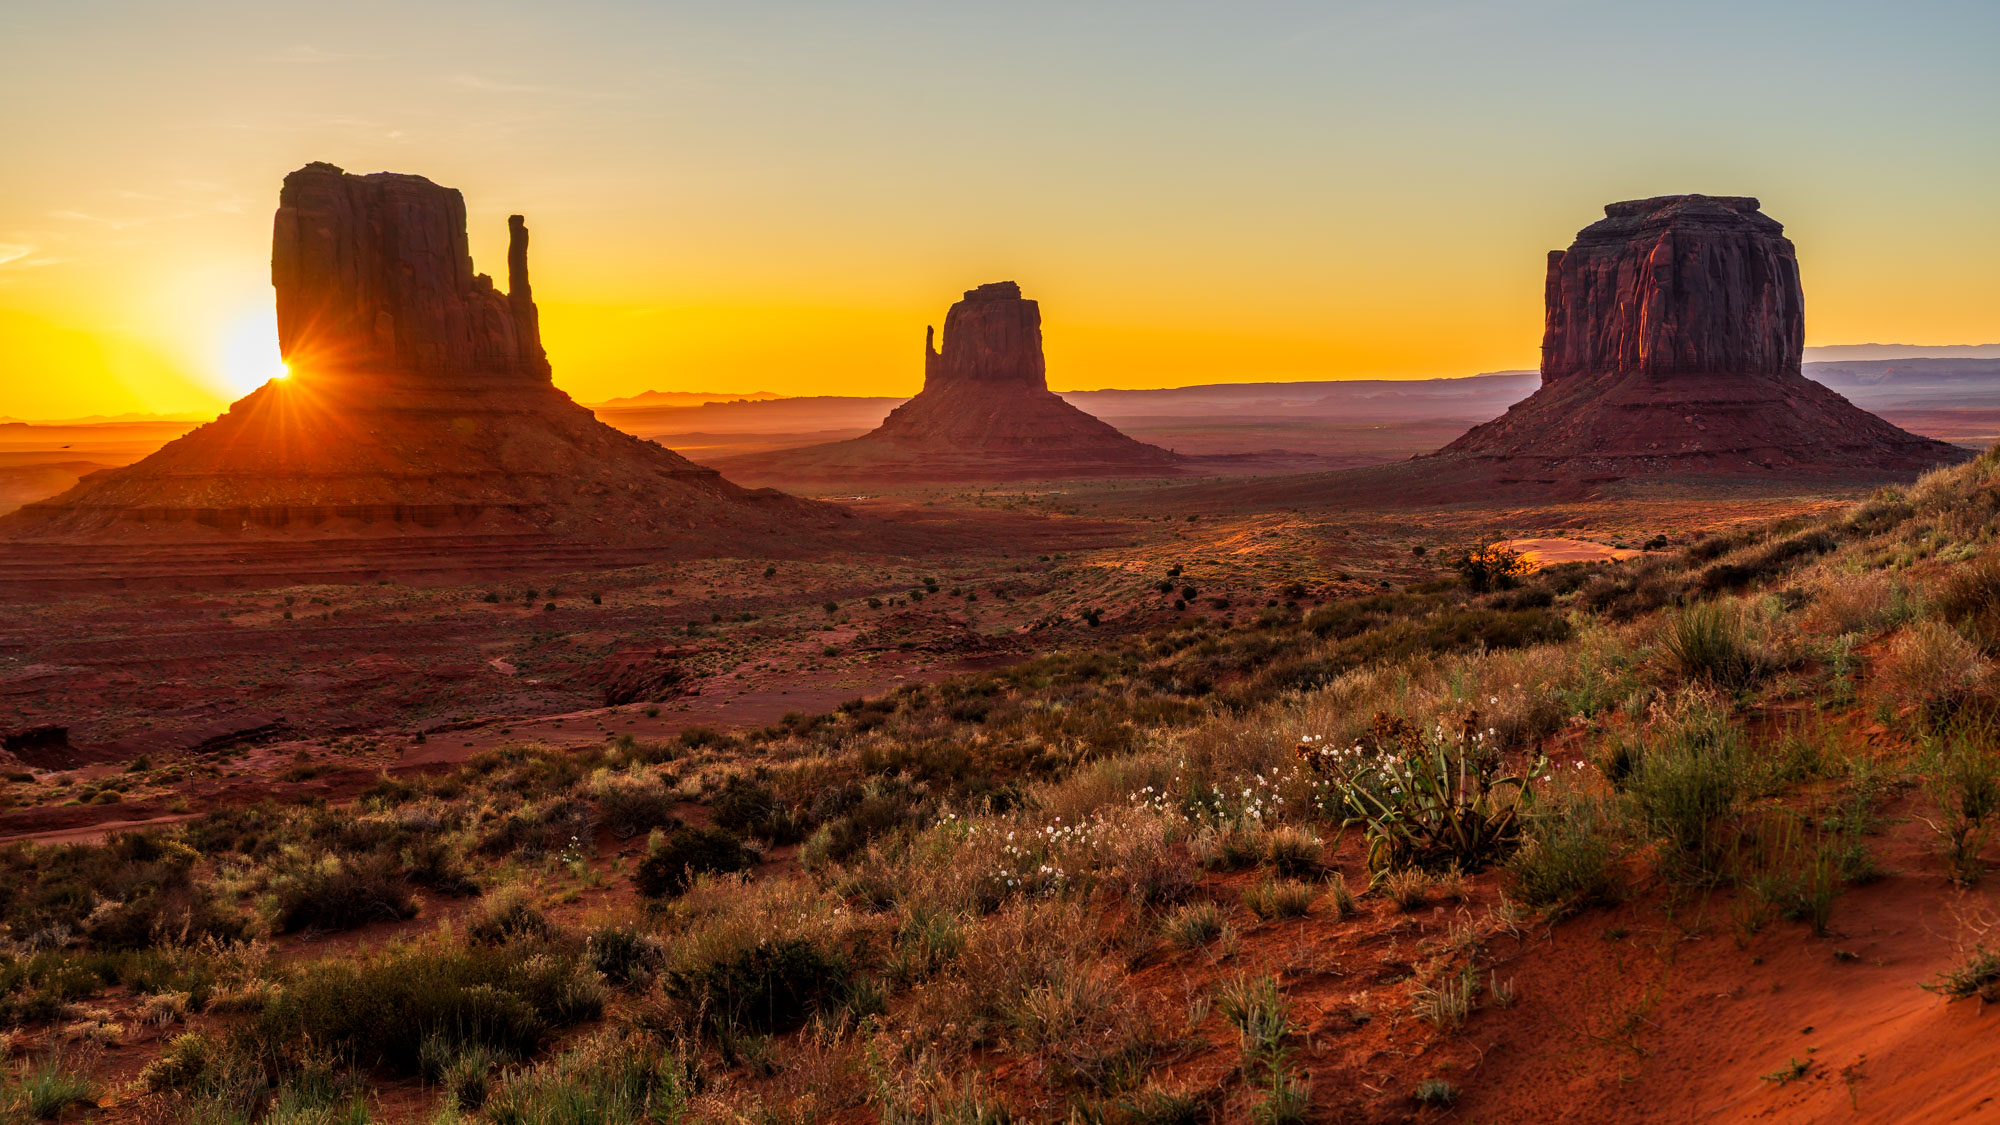
🖼️ Want this as a print, for your website, or for a campaign? License it here — ref. AZ-09
Arrive at least 45 minutes before sunrise. The sun comes up right between the buttes, and if you wait for it to touch the edge of the West Mitten, you get a sunburst. Close your aperture to f/16 for those clean sun rays.
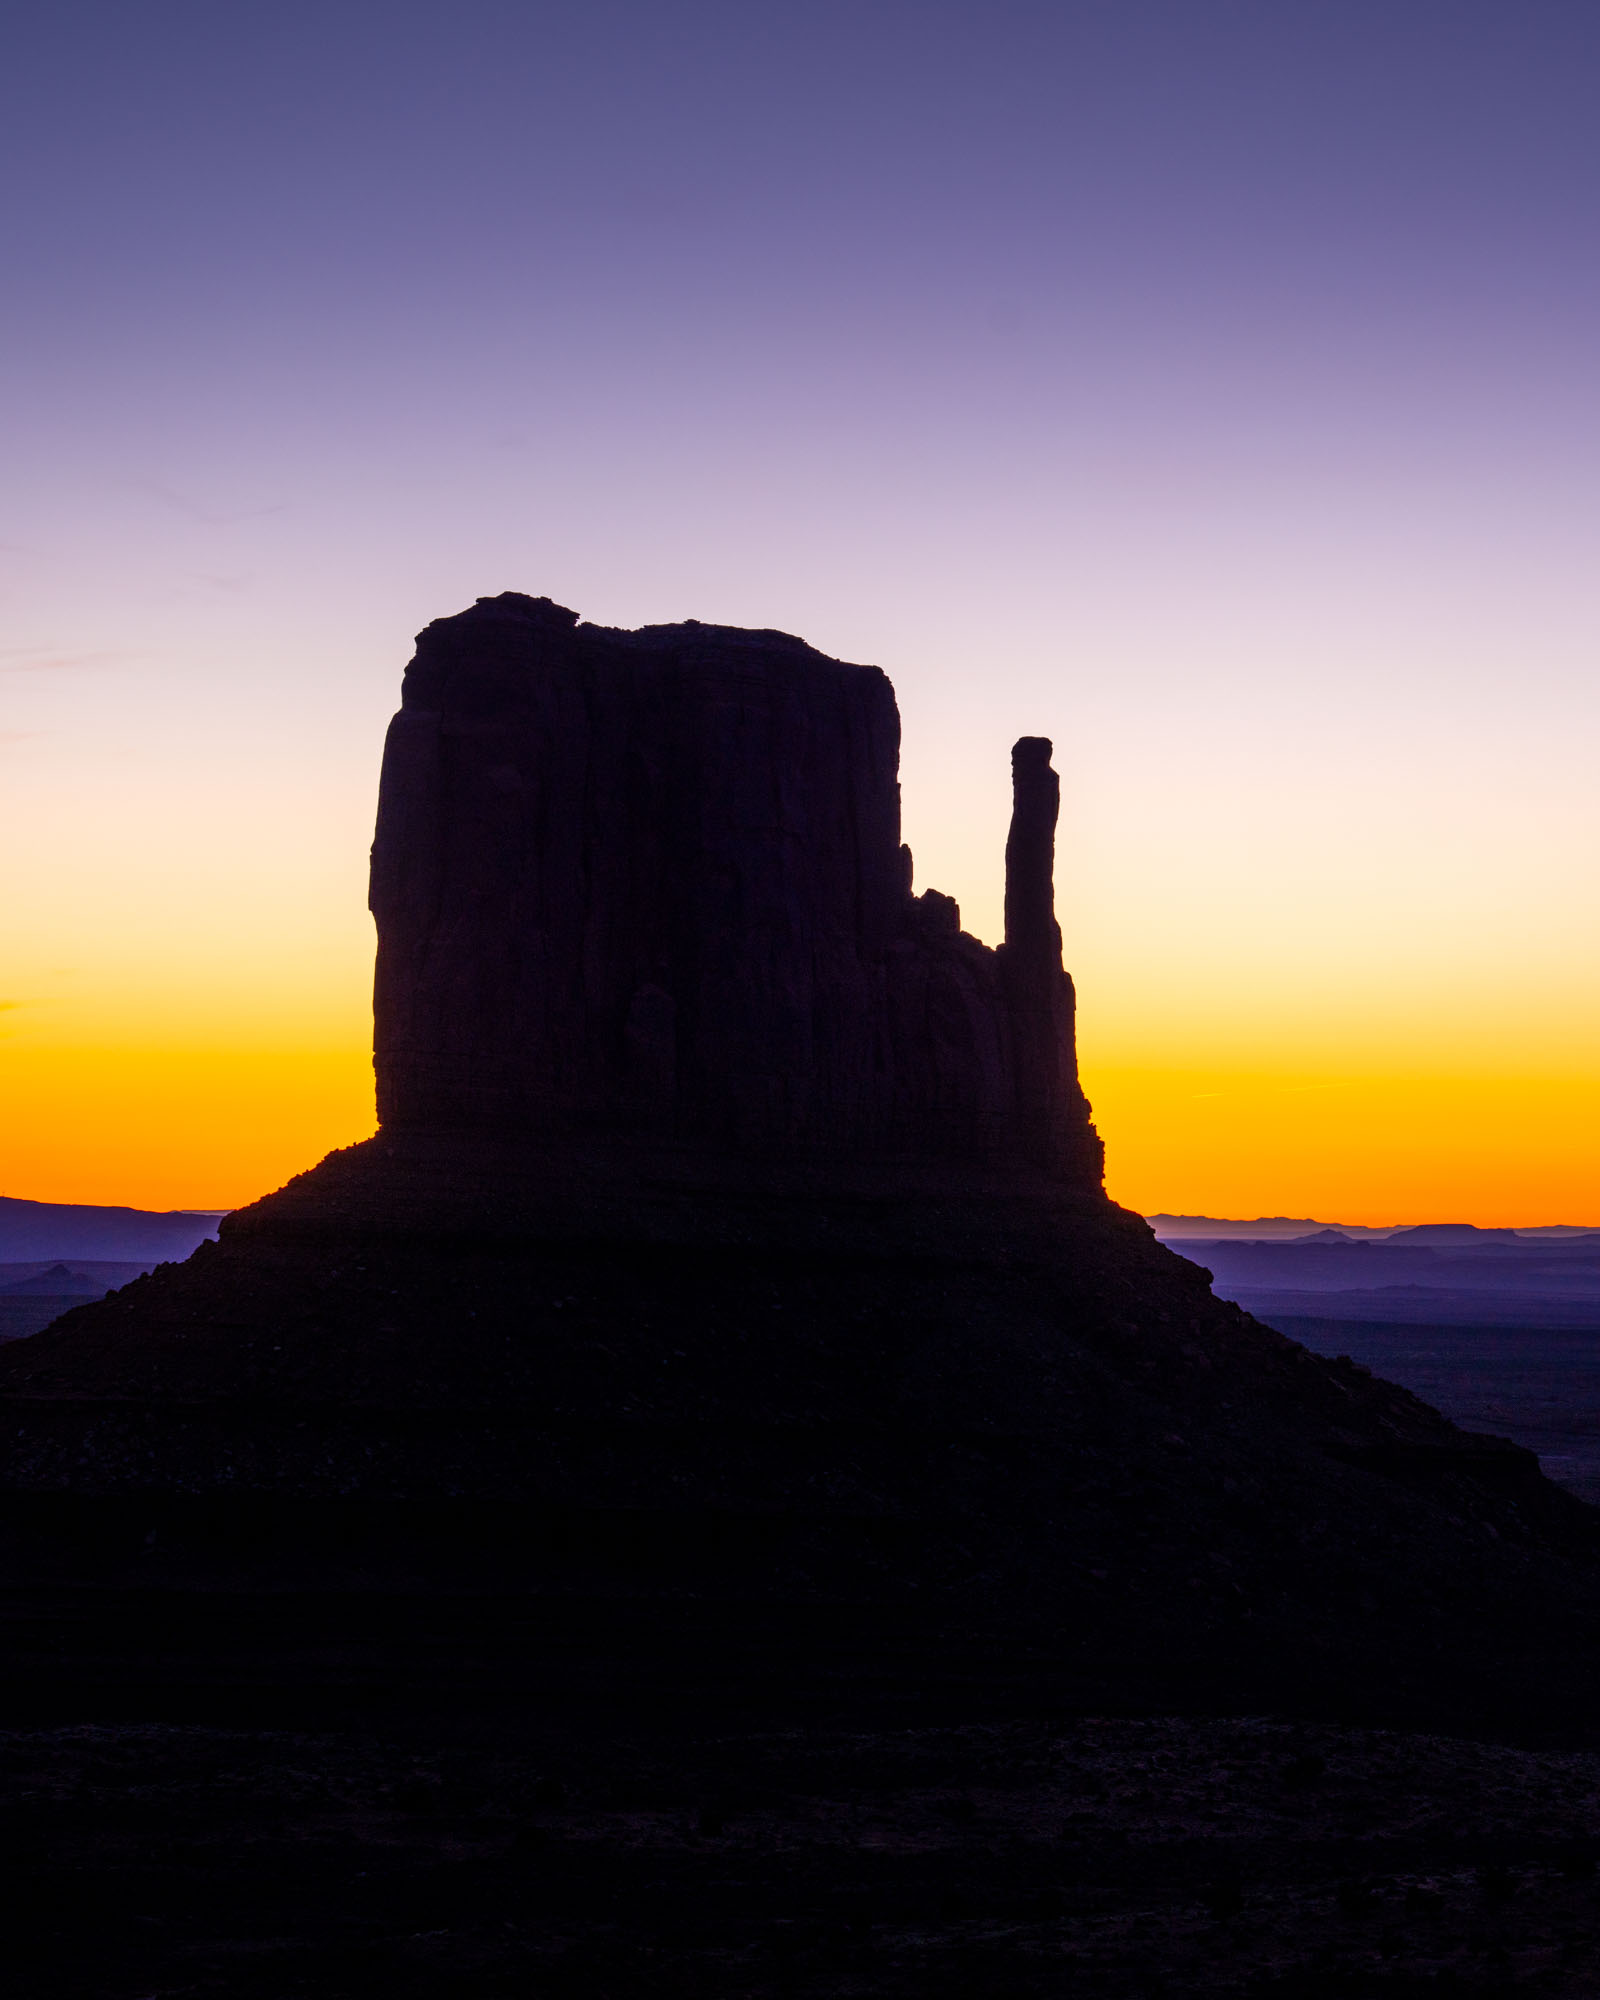
🖼️ Want this as a print, for your website, or for a campaign? License it here — ref. AZ-10
Before the sun appears, shoot the silhouette. Expose for the sky, let the butte go completely black, and you get this gradient from purple to orange that needs almost no retouching.
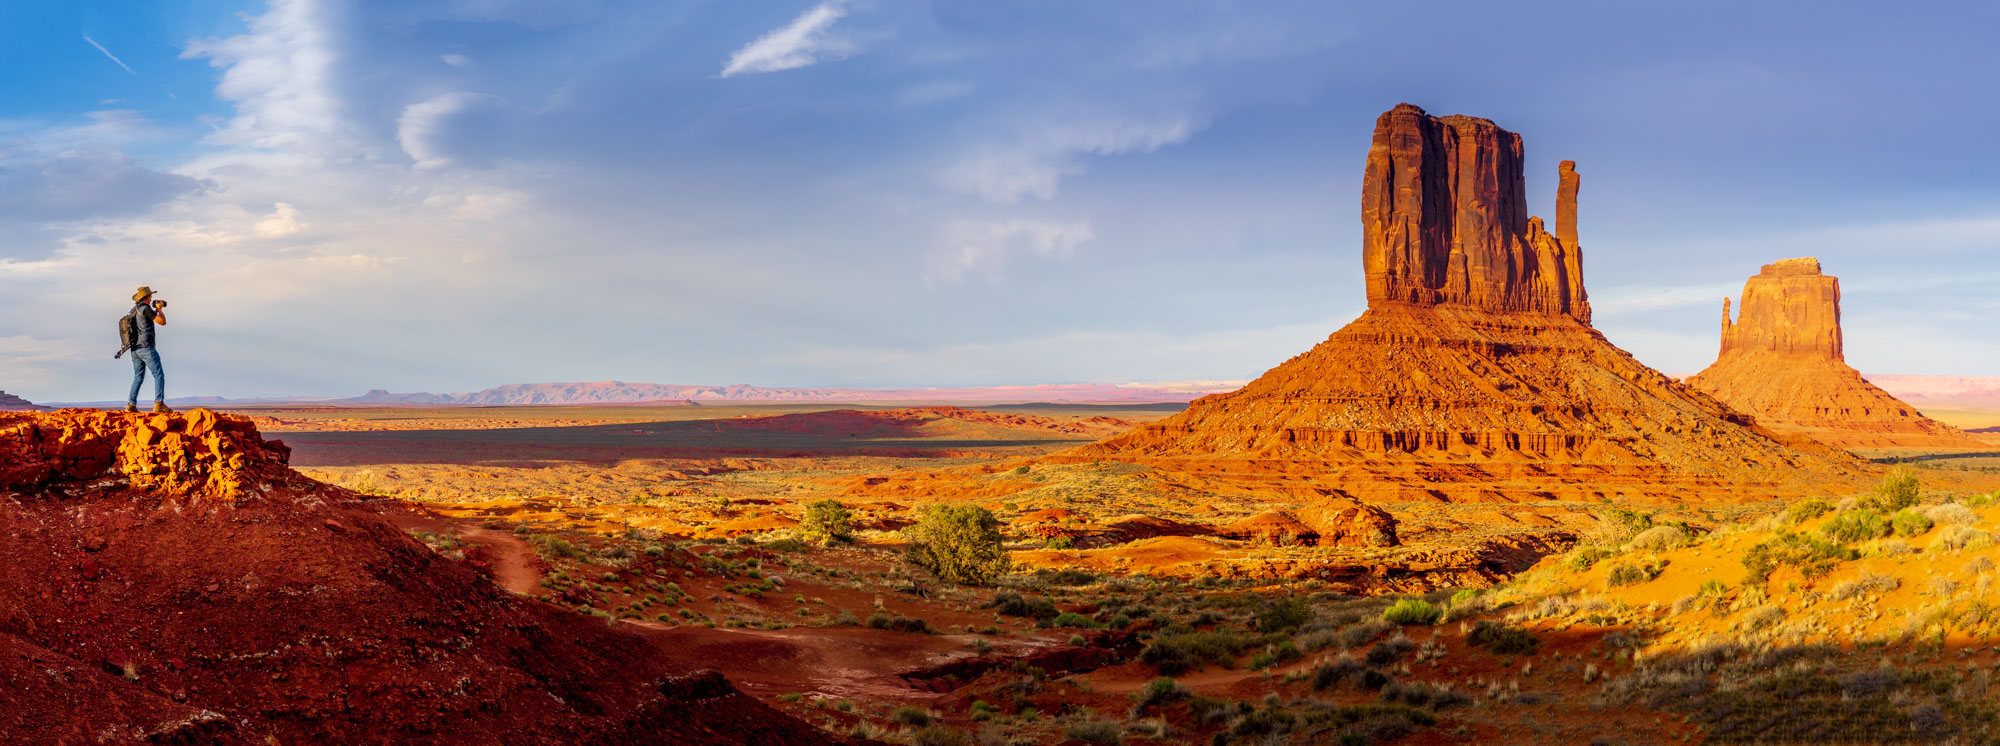
🖼️ Want this as a print, for your website, or for a campaign? License it here — ref. AZ-11
Add a human element for scale. A panorama of several vertical shots stitched in Lightroom gives you this cinematic wide format.
The Wildcat Trail
Most visitors never leave their car. The Wildcat Trail is the only self-guided hike in the park, a loop of about 6 kilometers (3.8 miles) around the West Mitten. In spring you get wildflowers in the red sand, which gives you the perfect foreground for sunset.
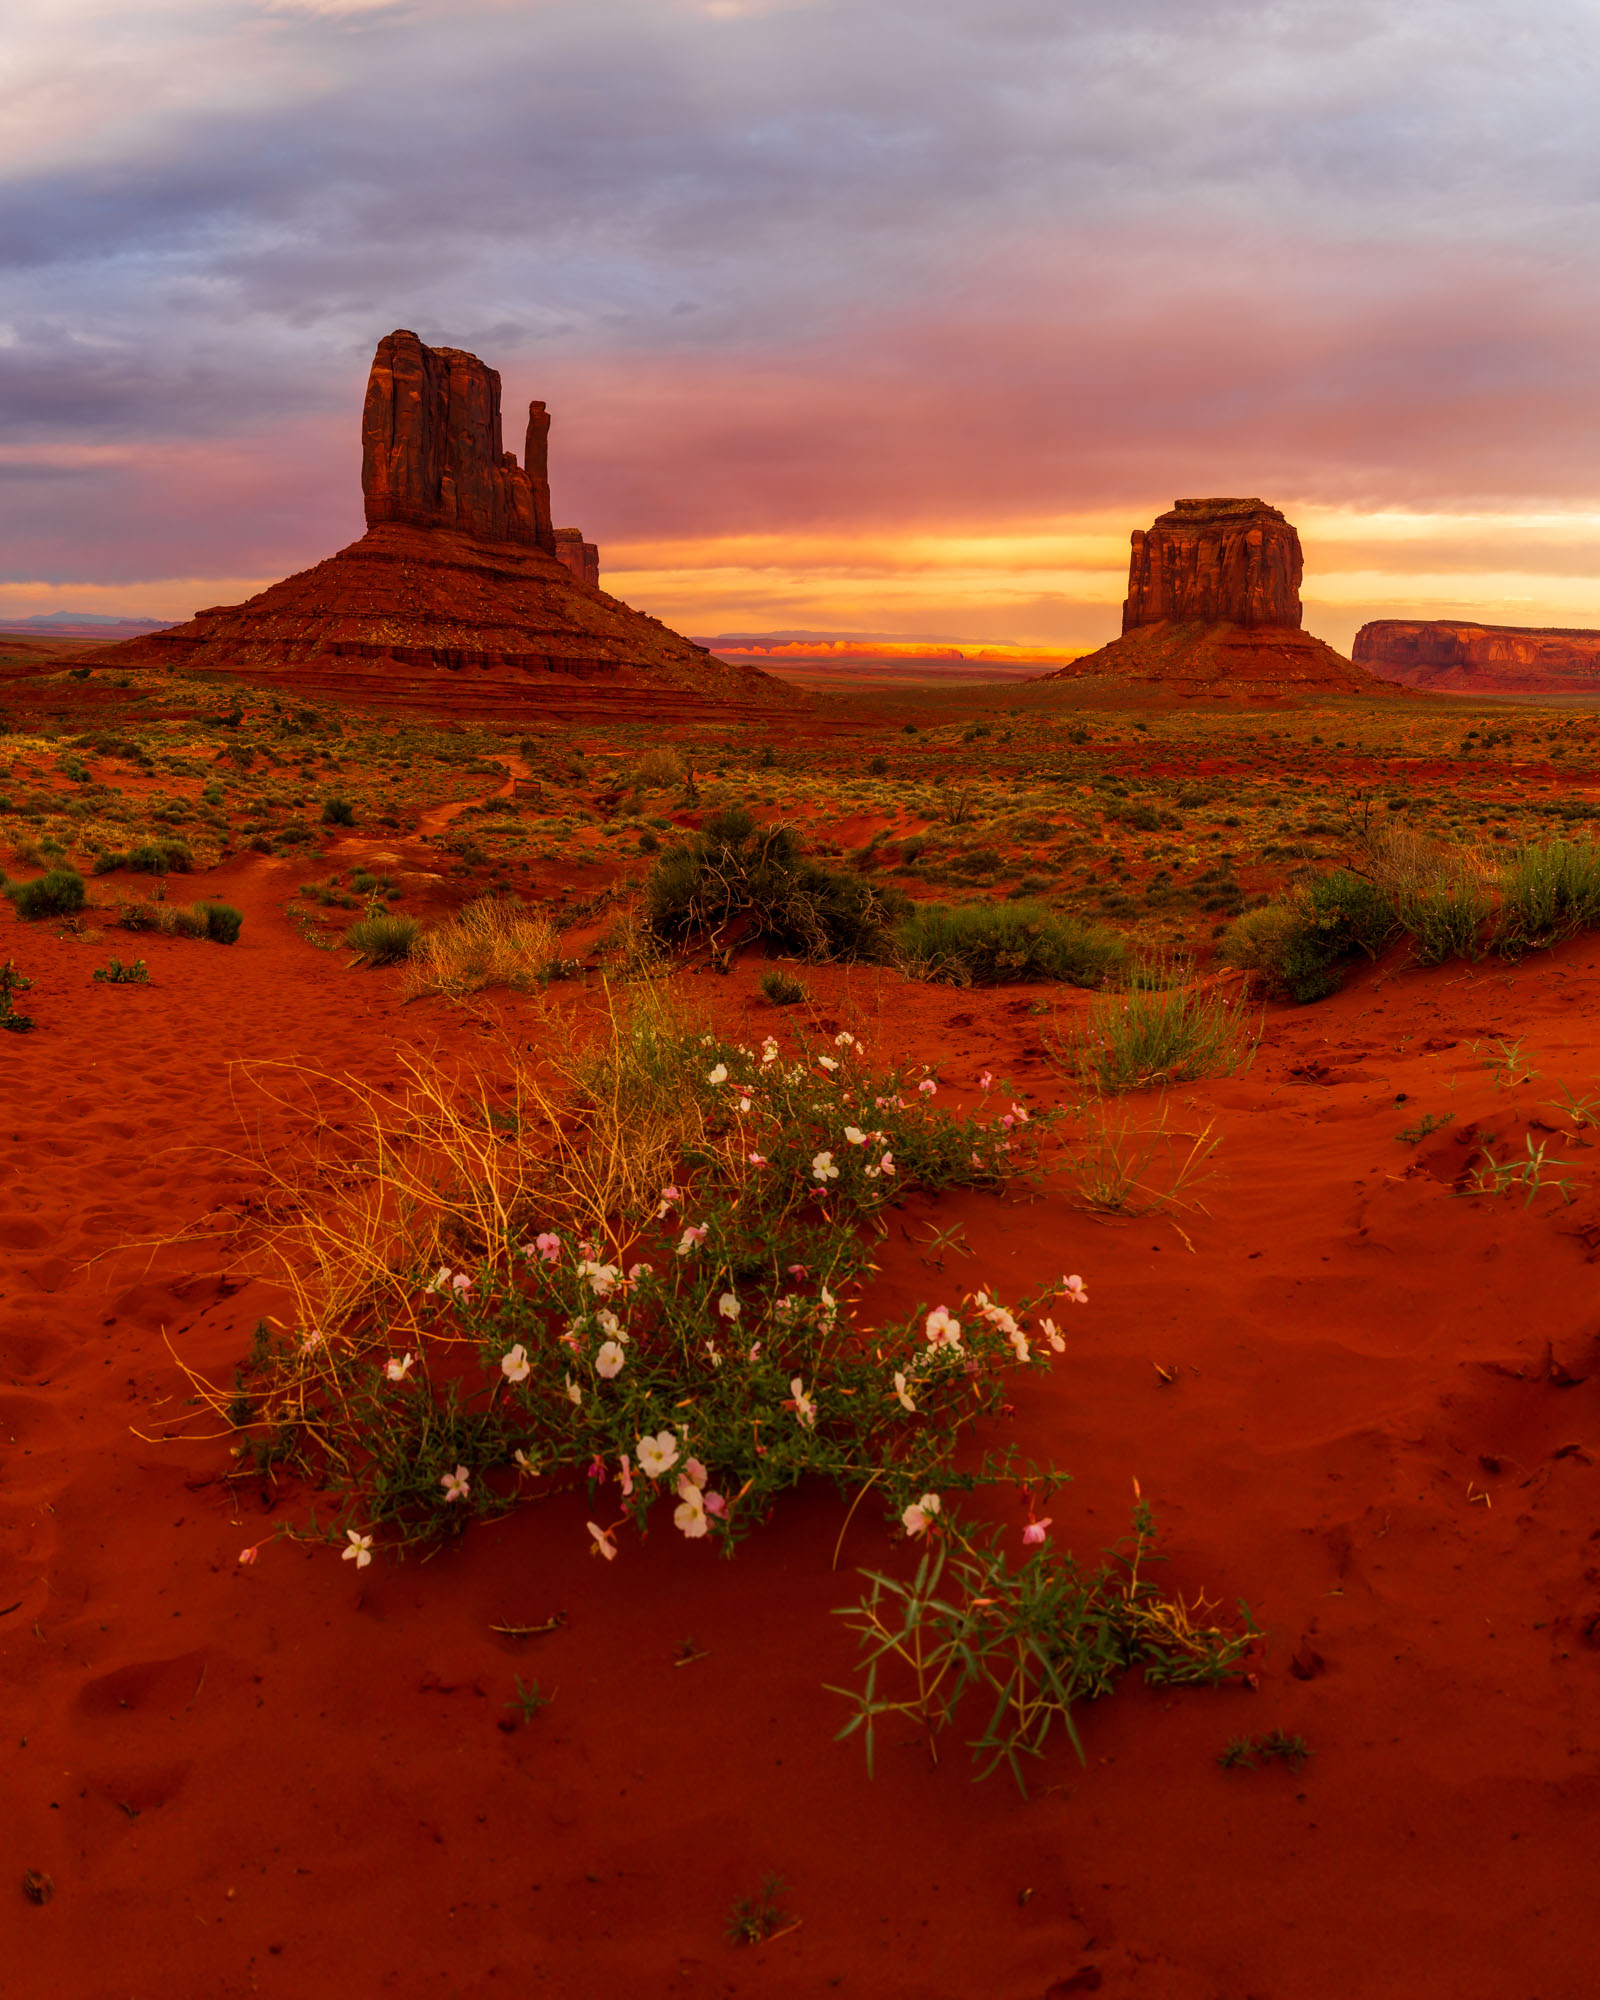
🖼️ Want this as a print, for your website, or for a campaign? License it here — ref. AZ-12
📍 Google Maps: https://maps.google.com/?q=Wildcat+Trail+Monument+Valley
The Totem Pole
The Totem Pole is a rock spire on the scenic loop drive, and it is best at golden hour when the low sun turns the sand dunes deep red. Use a bush or the ripples in the sand as your foreground.
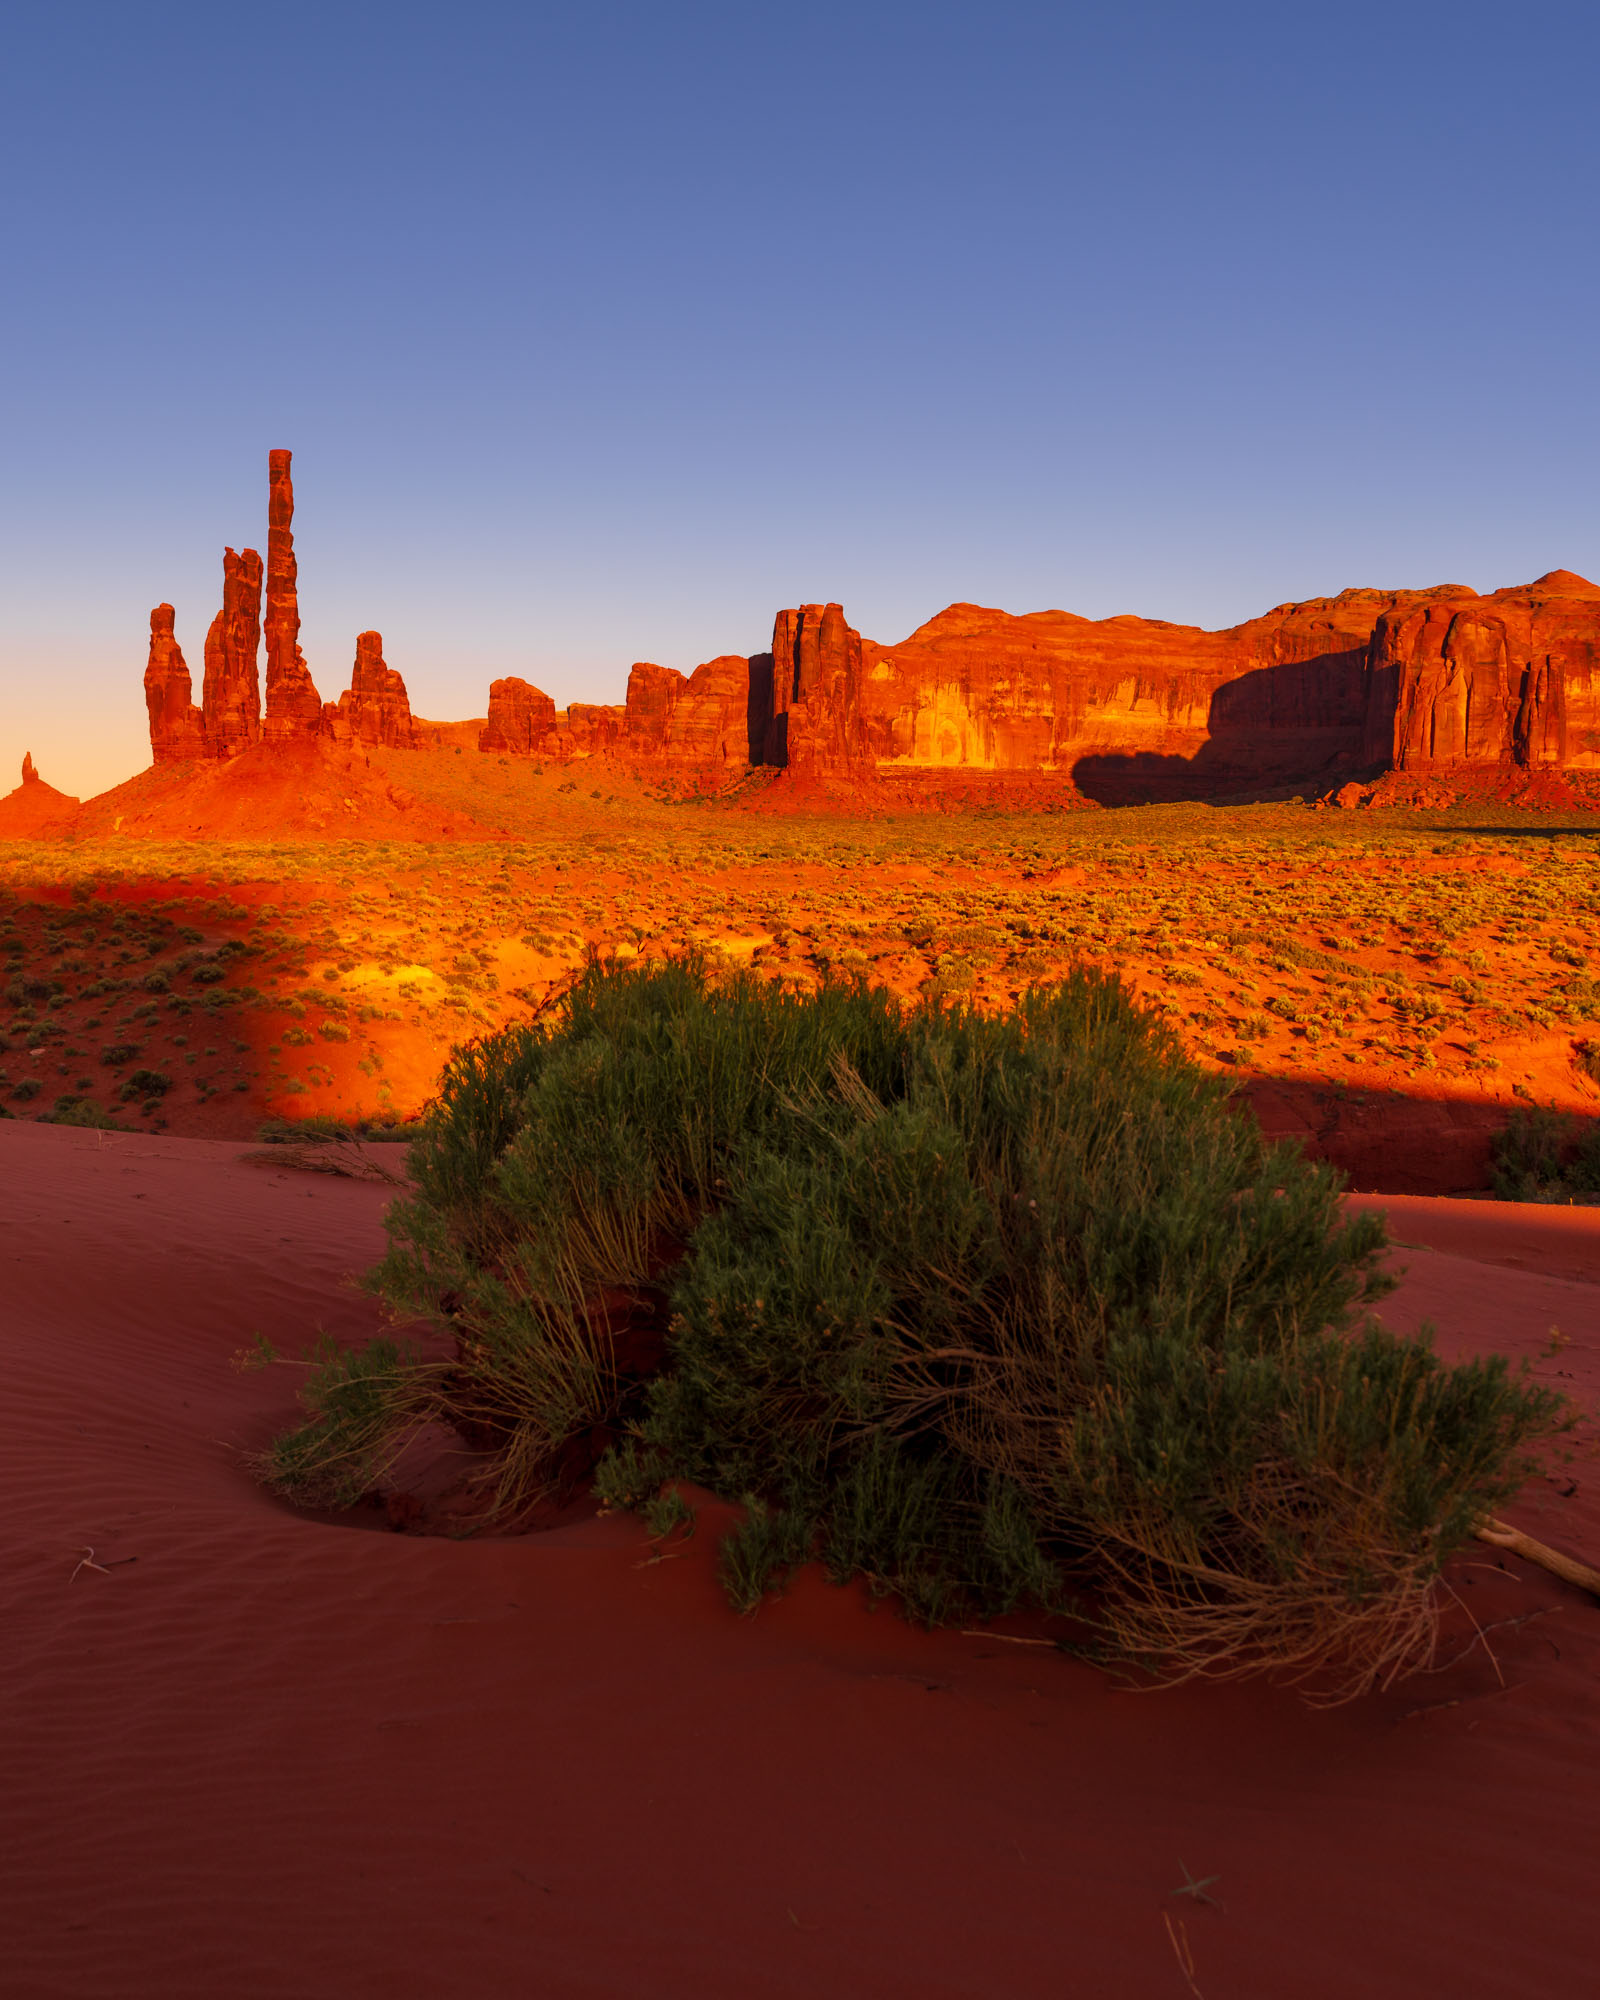
🖼️ Want this as a print, for your website, or for a campaign? License it here — ref. AZ-13
📍 Google Maps: https://maps.google.com/?q=Totem+Pole+Monument+Valley
Hunts Mesa: The View Almost Nobody Sees
This is the secret one. Hunts Mesa is a viewpoint on top of the mesa at the south end of the valley, and you can only get there with a Navajo guide on an overnight or sunrise tour. From up there, you see the whole of Monument Valley laid out below you like a movie set.
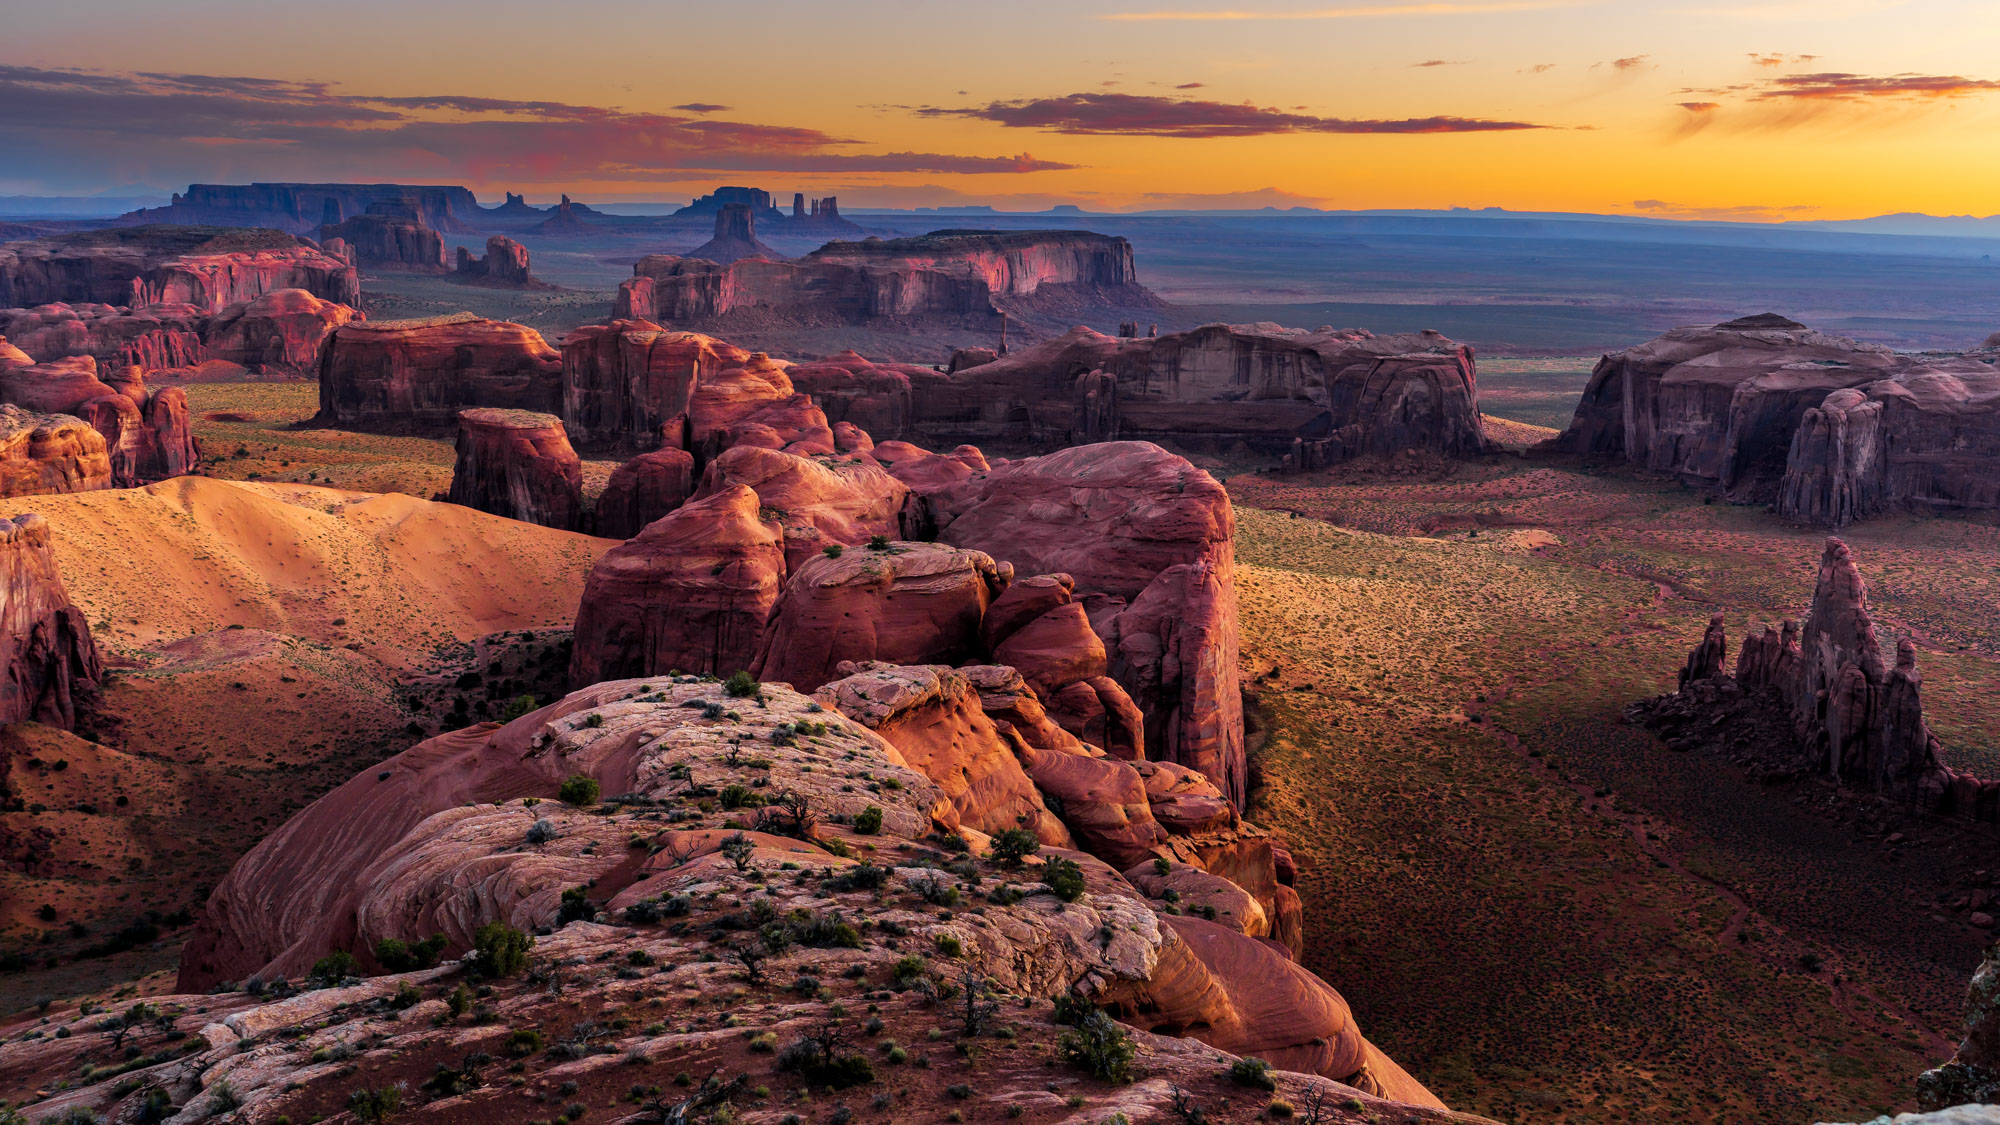
🖼️ Want this as a print, for your website, or for a campaign? License it here — ref. AZ-14
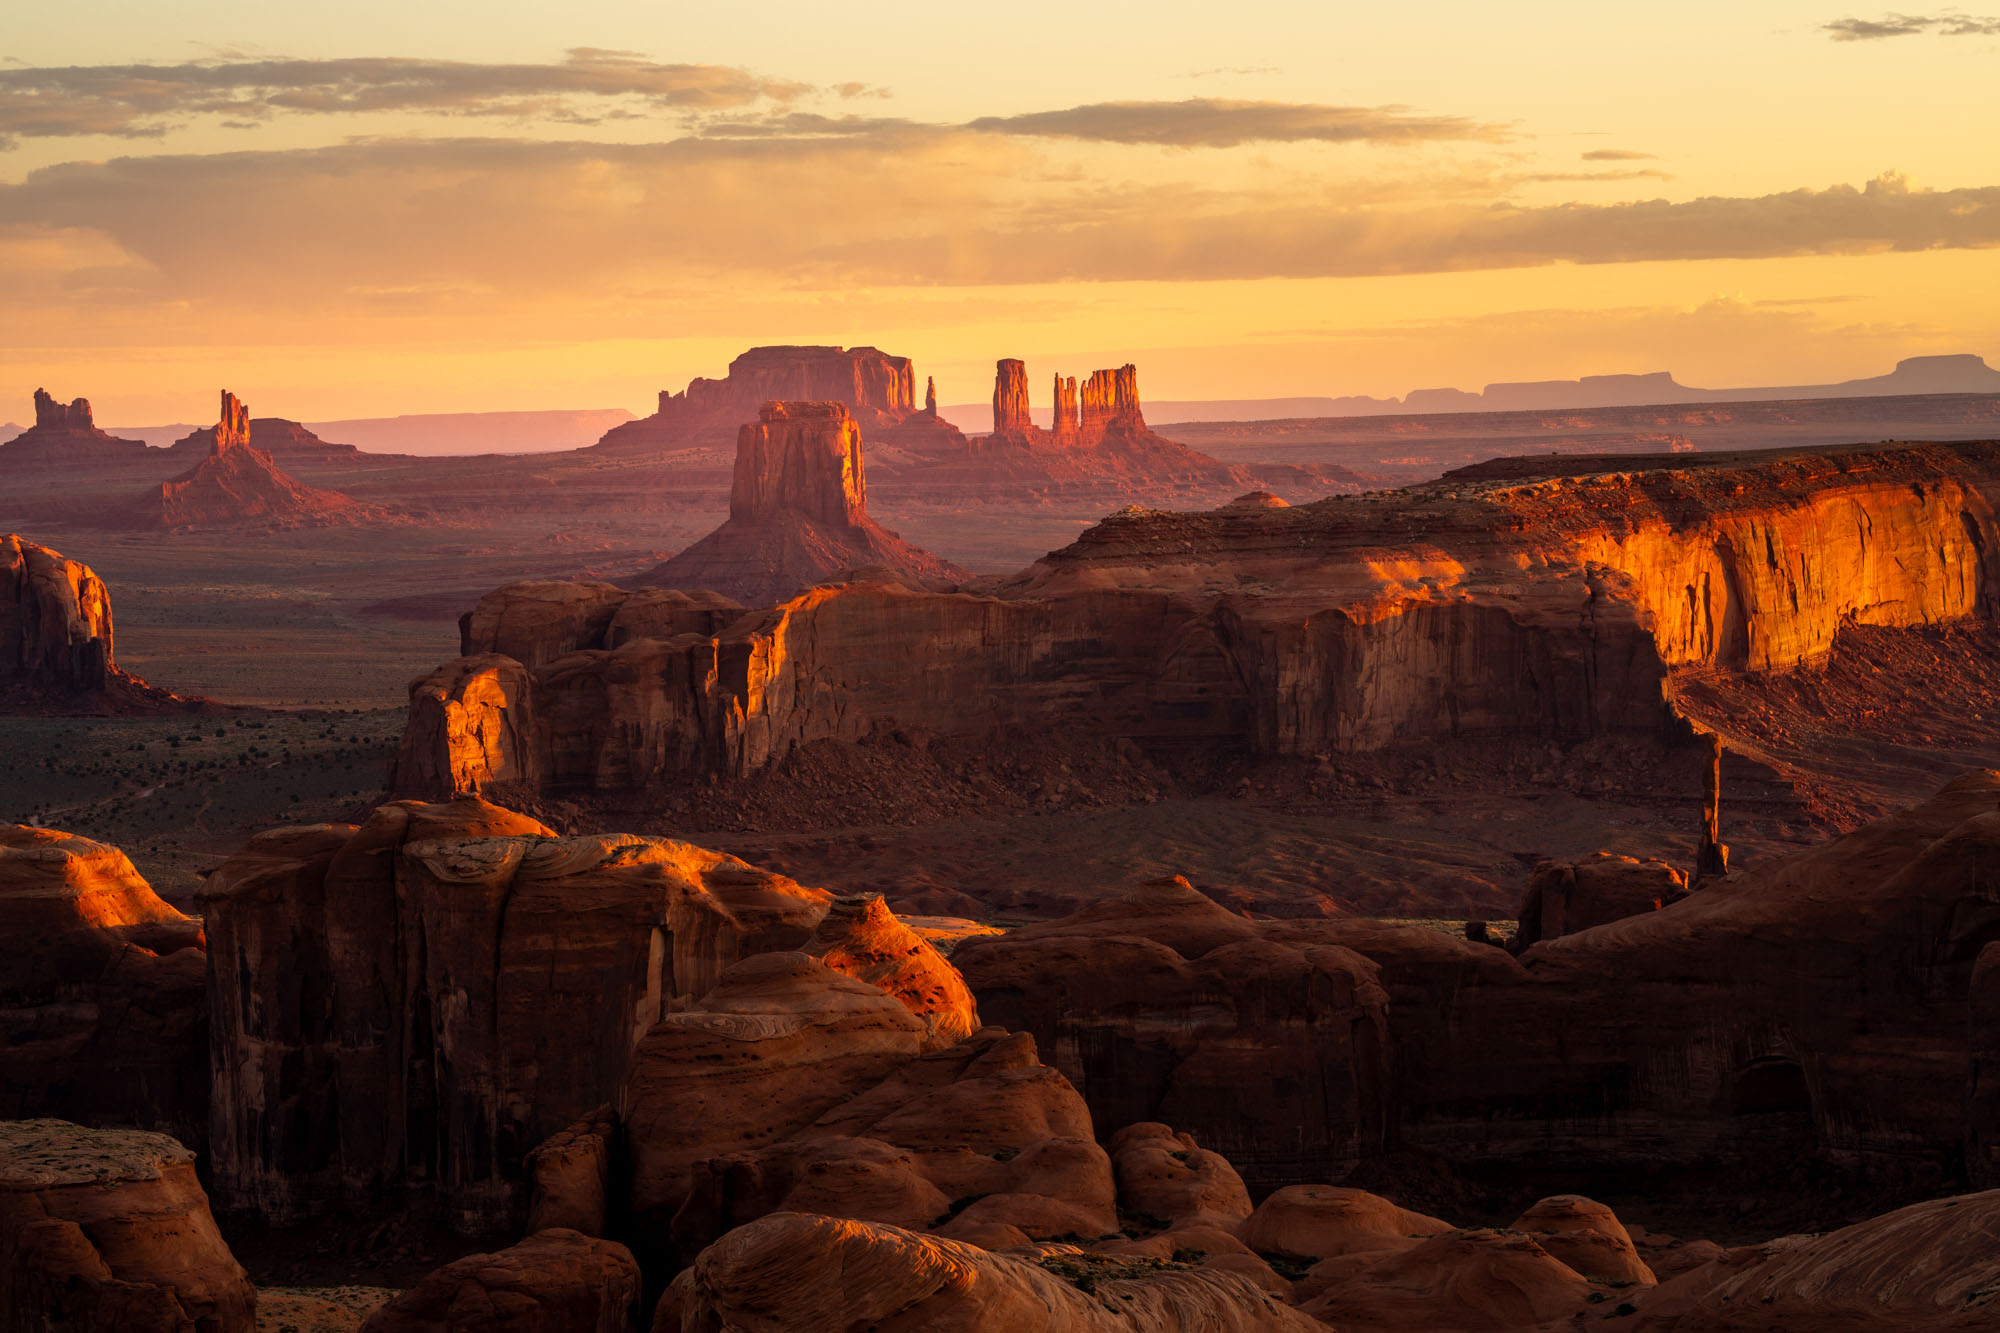
🖼️ Want this as a print, for your website, or for a campaign? License it here — ref. AZ-15
📍 Google Maps: https://maps.google.com/?q=Hunts+Mesa
It is worth every dollar and every bump of the jeep ride. Use a telephoto lens (70-200mm) to compress the buttes in the distance, and a wide angle for the foreground rocks at your feet.
My Camera Settings Cheat Sheet
If you are still shooting on auto and want the reasoning behind these numbers, start with my beginner's guide to landscape camera settings. For this trip specifically:
- Antelope Canyon (handheld): ISO 800-3200, f/5.6-f/8, shutter 1/60s or faster, RAW, no tripod allowed
- Monument Valley sunrise: tripod, ISO 100, f/11-f/16, bracket 3 exposures for the high dynamic range
- Hunts Mesa: tripod, ISO 100, telephoto for compression, shoot from 45 minutes before sunset to blue hour
Frequently Asked Questions
Do I need a guide to photograph Antelope Canyon?
Yes. Both Upper and Lower Antelope Canyon are on Navajo land, and you cannot enter without booking a tour with a Navajo guide. There is no independent access, and it is worth it — the guides know exactly where the light falls each hour and point out formations you would otherwise walk straight past.
Should I photograph Upper or Lower Antelope Canyon?
If you want the famous light beams, go to Upper Antelope Canyon around midday, roughly late March to early October. If you want richer color from reflected light, fewer crowds, and a lower price, Lower Antelope Canyon is usually the better photographic choice.
What is the best time to photograph the Mittens in Monument Valley?
Sunrise. Arrive at least 45 minutes early at the visitor center or The View Hotel, shoot the silhouette before the sun appears, then wait for it to rise between the buttes for a sunburst at f/16.
Explore More Photography Locations
Planning your next photo trip? Here are more of my location guides:
- The Best Photography Locations in New York City
- The Best Photography Locations in Las Vegas
- The Best Photography Locations in Yosemite
- The Best Photography Locations in Iceland
- The Best Photography Locations in San Francisco
- The Best Photography Locations in London
- The Best Photography Locations in Florence & Tuscany
- The Best Photography Locations in Venice
Final Word
Every photo in this article was retouched in Lightroom, and most of the magic is in the white balance, the dodge and burn, and knowing exactly what to enhance. If you want to learn my complete retouching workflow, that is exactly what I teach.
All photos © Serge Ramelli. All rights reserved.
