
The Best Masking Tool in Lightroom: A Step-by-Step AI Masking Guide
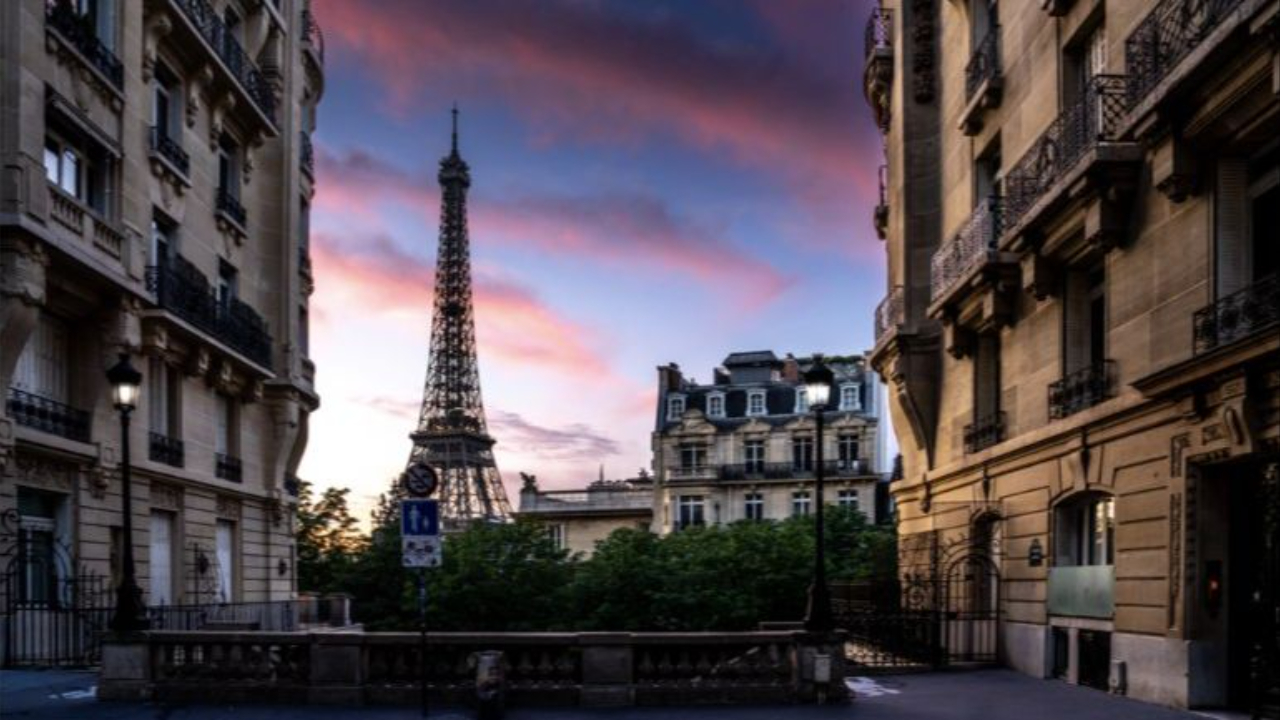
Featured image — the finished shot: a Paris street framing the Eiffel Tower at sunset, fully edited with Lightroom's AI masking tools. From Serge's personal photo library.
By Serge Ramelli
If there's one skill that separates a good photo from a great one in post-production, it's masking. A clean global edit gets you 80% of the way there — but the last 20%, the part that makes people stop scrolling, almost always comes from working on specific areas of the image individually. In this tutorial, I'm going to walk you through exactly how I used Lightroom's AI masking tools on a real photo: a quiet Paris street framing the Eiffel Tower at sunset, shot between two Haussmannian buildings.
We'll go from a flat base edit to a dramatic final image using the AI Landscape mask, a couple of gradient tricks most people never learn, and a simple technique to make streetlamps glow like they're actually lit.
Step 1: Start With a Solid Base Edit
Before touching any mask, I always get my global edit right first. On this photo, that meant opening up the shadows a little and bringing down the highlights so the sky and the buildings would both hold detail. Then I set my black point and white point using the Alt/Option key trick: hold Alt while dragging the Blacks slider and you'll see clipping appear in the preview — I stop once I see about 3% of the frame clipping, which keeps my blacks rich without crushing shadow detail. I do the same thing on the Whites slider to anchor the highlights.
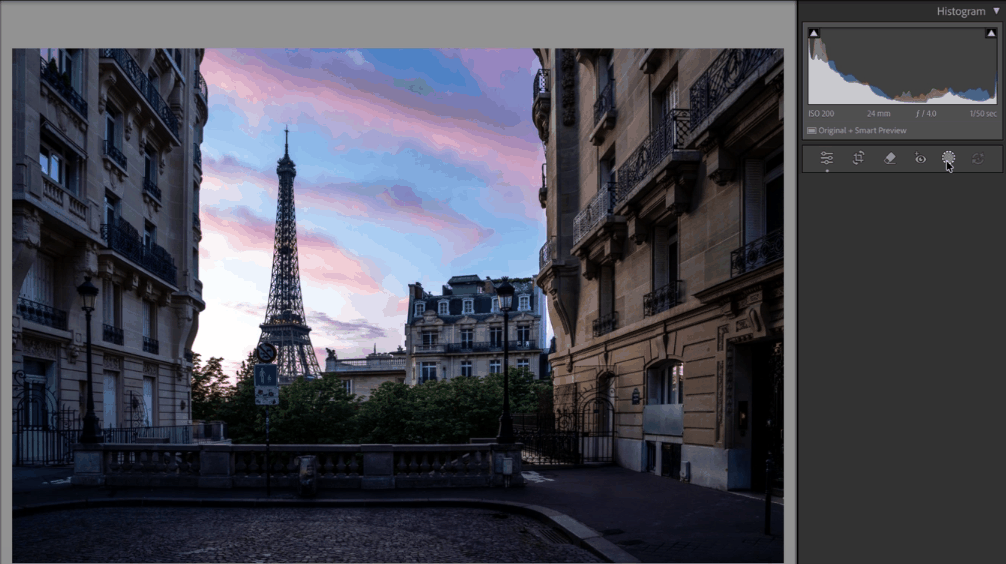 The photo after the basic global edit: shadows opened, highlights controlled, black and white points set with the Alt/Option-key method.
This gives me a clean, well-balanced foundation. It's a good photo at this point — but it's still flat, because every part of the image received the exact same treatment. That's exactly the problem masking solves.
Step 2: Let Lightroom's AI Find Your Sky, Buildings, Vegetation & Ground
This is where it gets fun. Instead of manually brushing in selections, I click Create New Mask and choose the Landscape option. Lightroom's AI scans the photo and offers checkboxes for Sky, Architecture, Vegetation, and Artificial Ground — and it's remarkably accurate at telling them apart, even in a tricky, narrow street scene like this one.
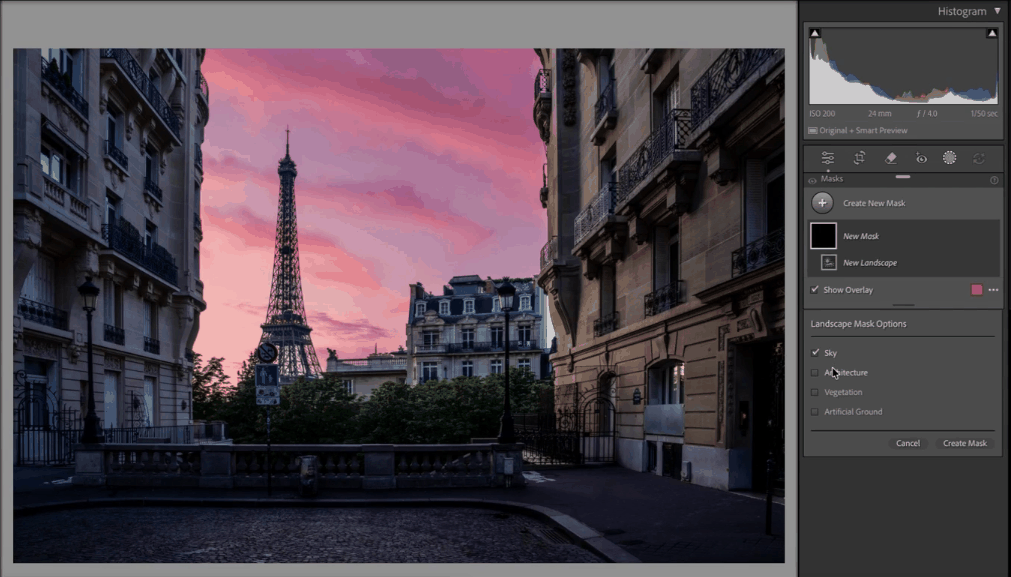 Opening the masking panel and selecting the AI Landscape mask options.
I turn on Sky first, and the AI immediately outlines the visible sky between the buildings in red.
 The AI accurately isolates only the sliver of sky visible between the two buildings.
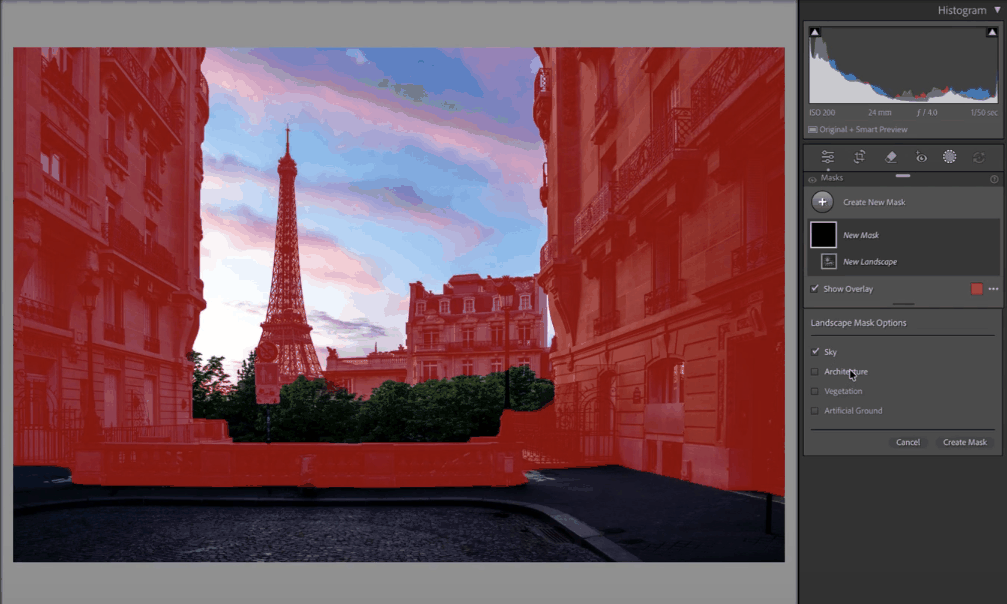
Then I add Architecture, and it wraps around every rooftop, wall and balcony without touching the sky or the trees.
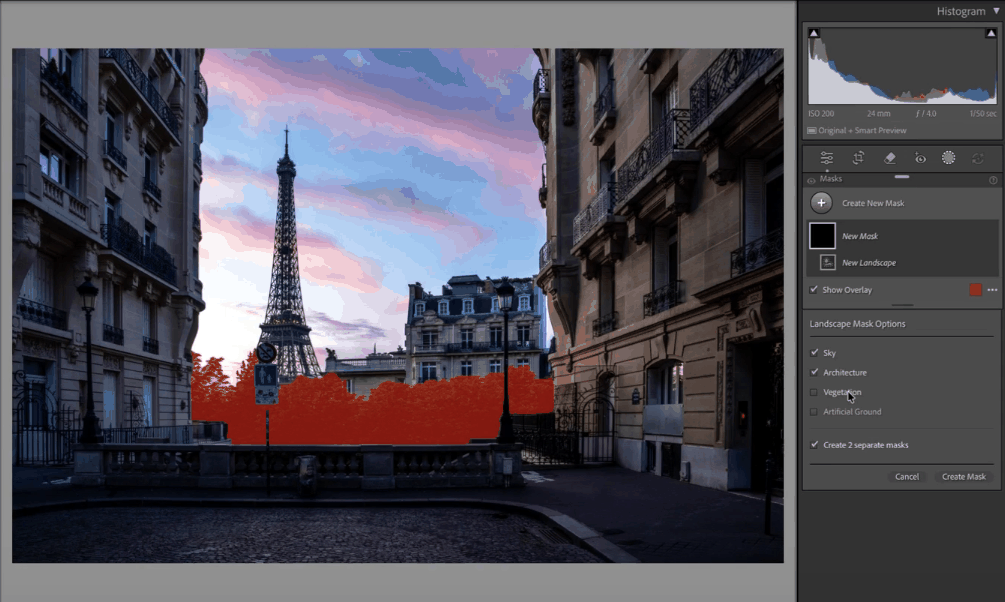 Architecture added to the selection — Lightroom's AI separates the buildings from the sky automatically.
Next, Vegetation picks out the row of trees at street level.
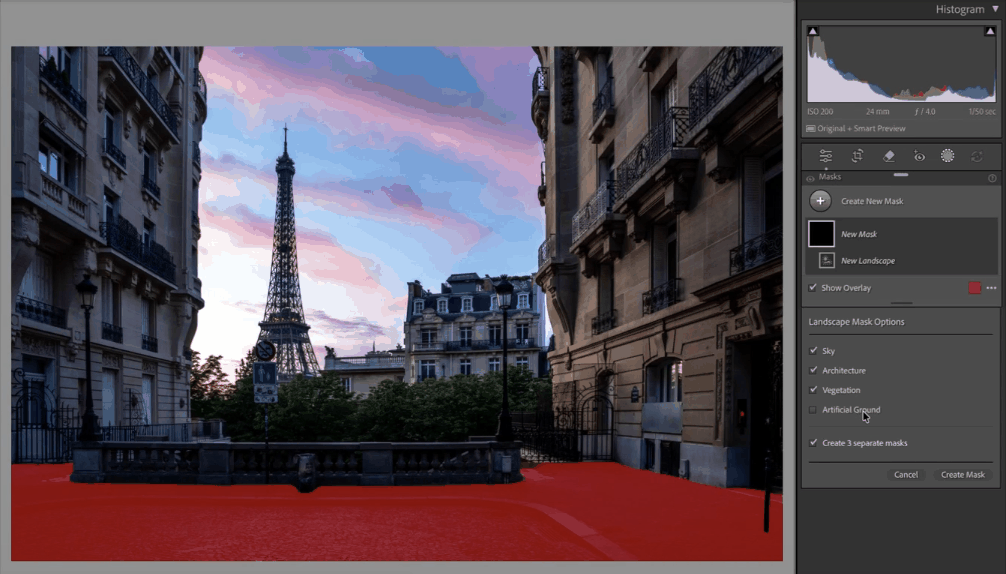 Vegetation added — the trees lining the street are now isolated from the buildings above.
Finally I add Artificial Ground for the cobblestone street, and I make sure Create 4 Separate Masks is switched on before clicking Create Mask. This is the key step: it turns one AI selection into four independent masks I can adjust separately.
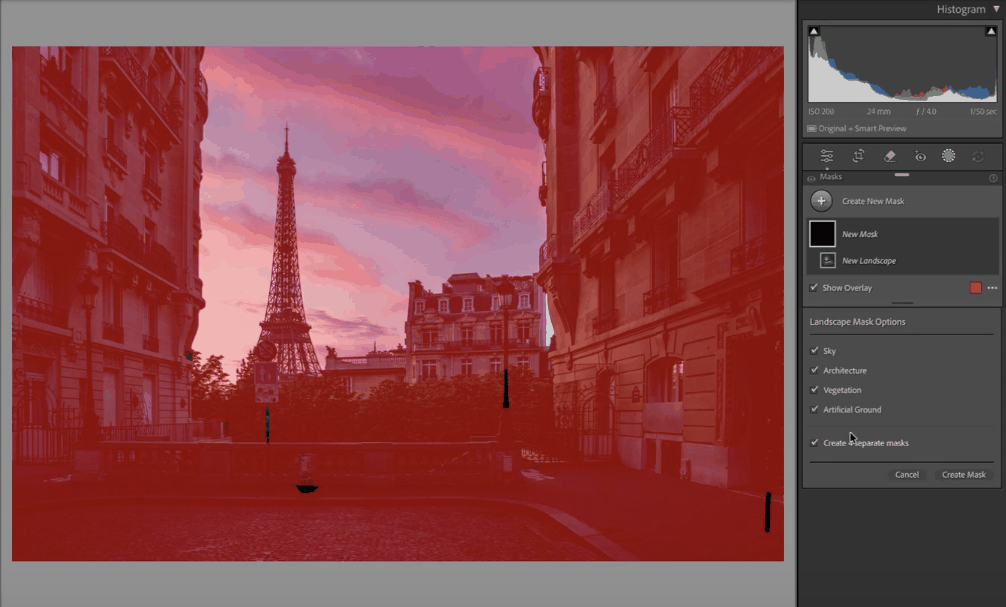 All four zones selected — Sky, Architecture, Vegetation, and Artificial Ground — ready to become four separate, independently editable masks.
Fine-Tuning Each Mask
With four masks sitting in my mask list, I go through them one by one:
- Sky — I push the color a bit more yellow and magenta, and darken it slightly to make the sunset feel richer and more saturated.
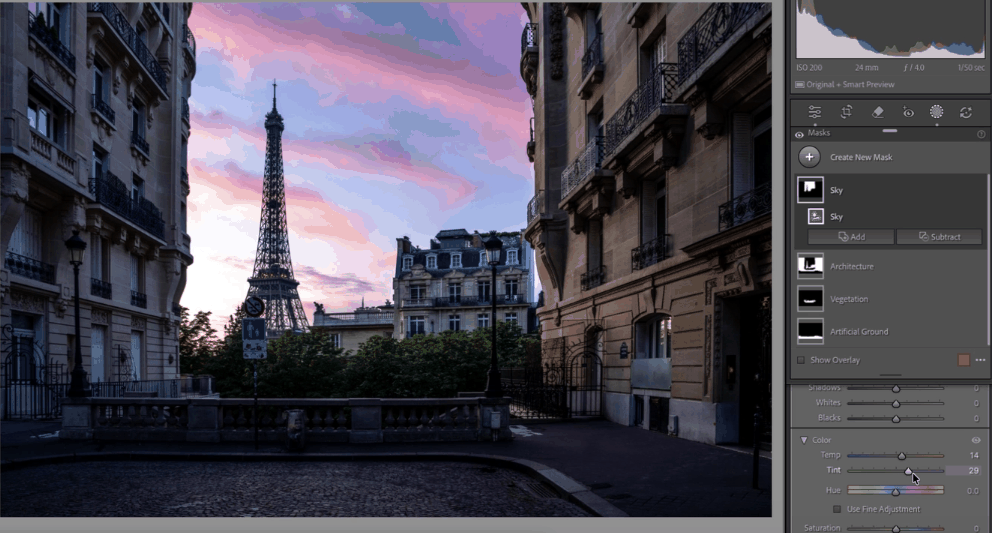 Adjusting the Sky mask: warmer temperature, added magenta in the tint, and a touch darker for a more dramatic sunset.
- Architecture — I add Clarity to bring out the texture in the stone facades, and a little yellow to warm the buildings against the cooler sky.
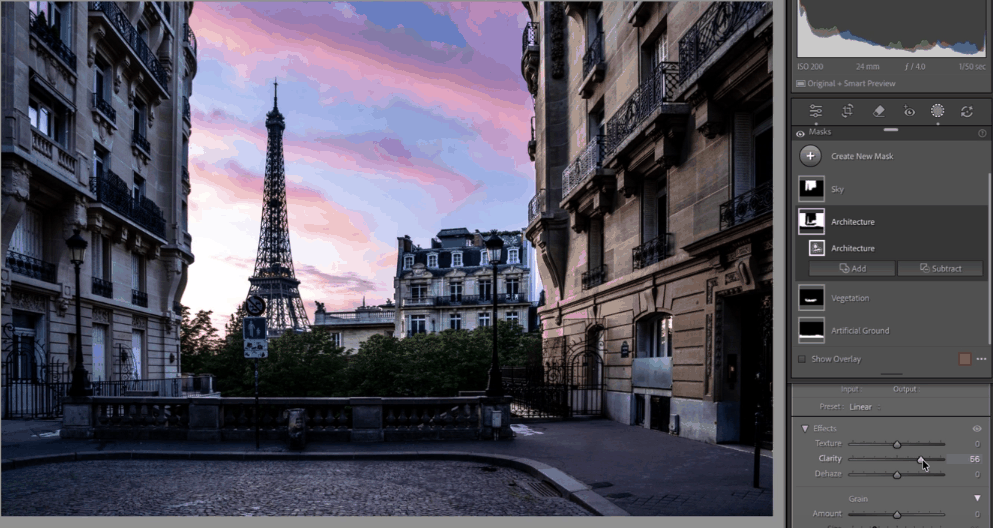 The Architecture mask gets a Clarity boost, which makes the stonework and window details pop.
- Vegetation — left untouched here; the trees were already reading well.
- Artificial Ground — brightened slightly so the cobblestones don't disappear into shadow at the bottom of the frame.
Notice how each area now gets exactly the treatment it needs, instead of one compromise setting applied to everything.
Ready to get 1-on-1 support to master your tools and take photos that have that WOW factor? Apply to become a certified Master of Photography here.
Step 3: Combine a Linear Gradient With an AI Mask (the Intersect Trick)
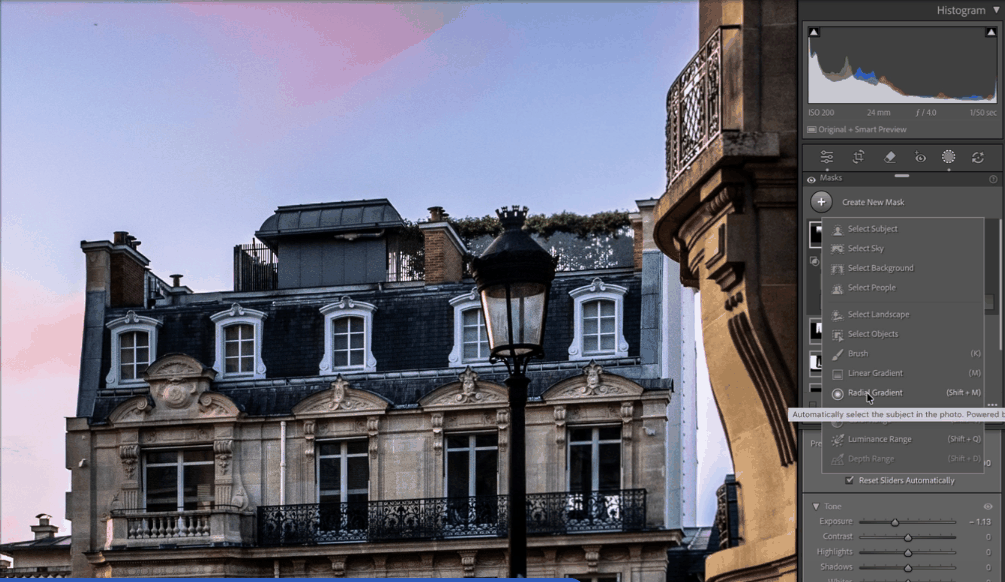
The AI masks get you most of the way, but sometimes you want an effect a mask can't give you on its own — like a smooth gradient darkening just the top of the sky. If I grab the Linear Gradient tool and drag it down from the top of the frame, it darkens everything in its path, including the buildings behind it. That's not what I want.
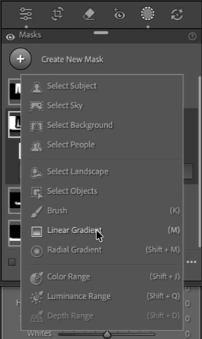
Selecting the Linear Gradient tool from the mask menu.
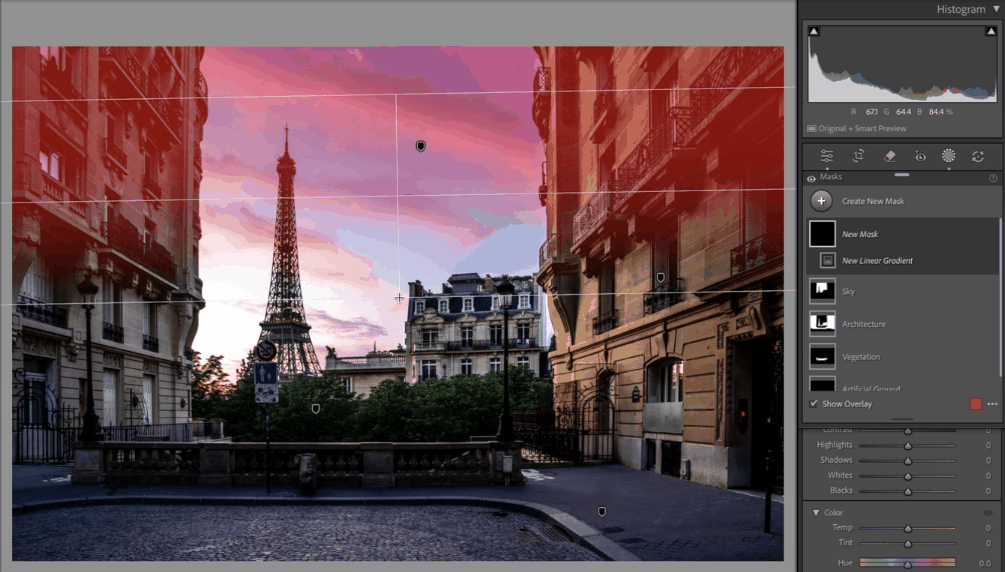 The problem: a plain linear gradient darkens the buildings along with the sky, which looks unnatural.
The fix is a trick a lot of Lightroom users never discover: right-click the new gradient mask, choose Intersect Mask With, and select Sky. This tells Lightroom to only apply the gradient where it overlaps with the sky — the buildings are left completely alone.
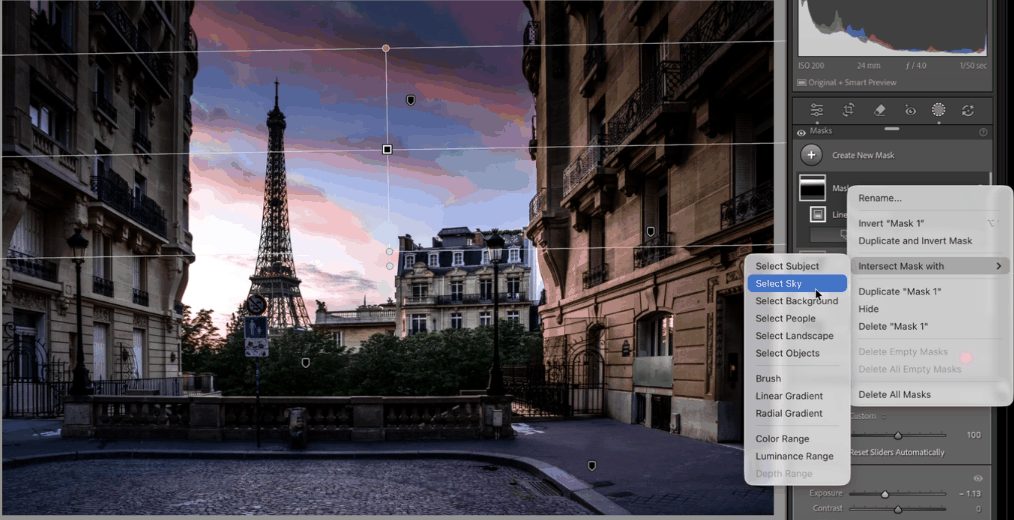 Right-click the gradient mask and choose Intersect Mask With → Select Sky to constrain the gradient to the sky only.
This intersect technique works with any two masks, not just gradients and Sky — it's one of the most useful moves in the whole masking panel once you know it exists.
Step 4: Use a Radial Gradient to "Turn On" the Streetlamps
The last touch is a small one that makes a big difference: the two ornate streetlamps on either side of the frame. In the original shot they're dark and lifeless. To fix that, I zoom in, select the Radial Gradient tool, and draw a small circle centered on the lamp's glass.
 Zooming in on the streetlamp and selecting the Radial Gradient tool.
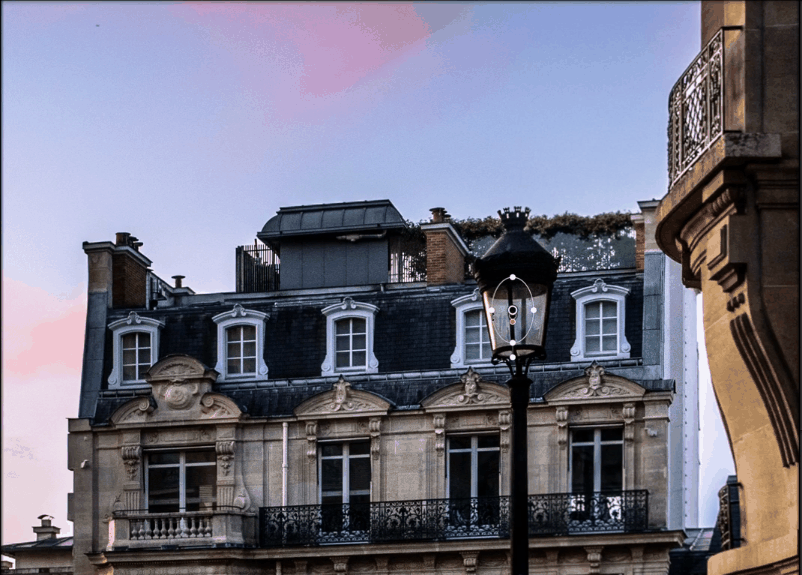 The lamp before any adjustment — correctly exposed for the sky, but visually dead.
Inside that small radial mask, I boost the Exposure all the way up, which makes the glass glow as if the lamp were actually lit. Then I simply right-click, duplicate the mask, and drag the copy onto the second lamp on the other side of the street — no need to redraw it from scratch.
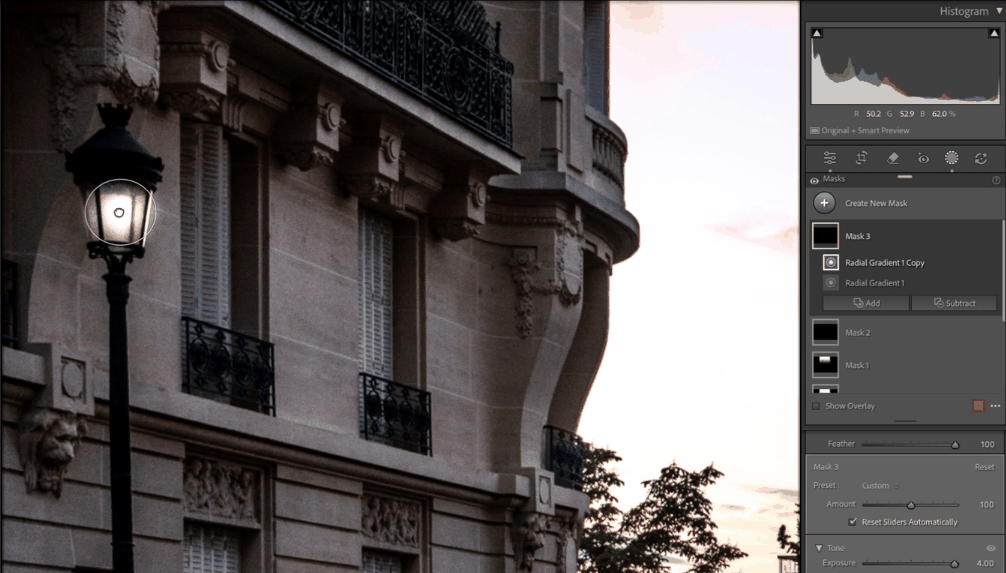 A duplicated Radial Gradient mask lights up both streetlamps with a boosted exposure, adding a warm focal point on each side of the frame.
Before & After
Here's the full transformation, from base edit to finished image:
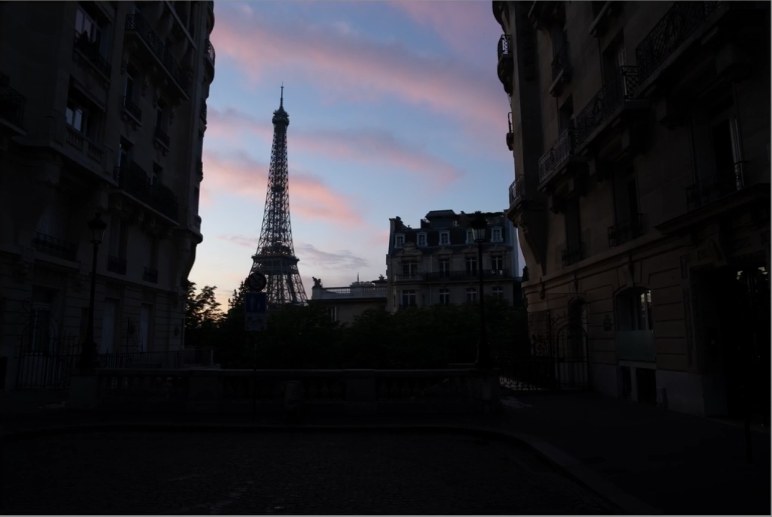 Before: correct exposure, but flat — every part of the image treated the same way.
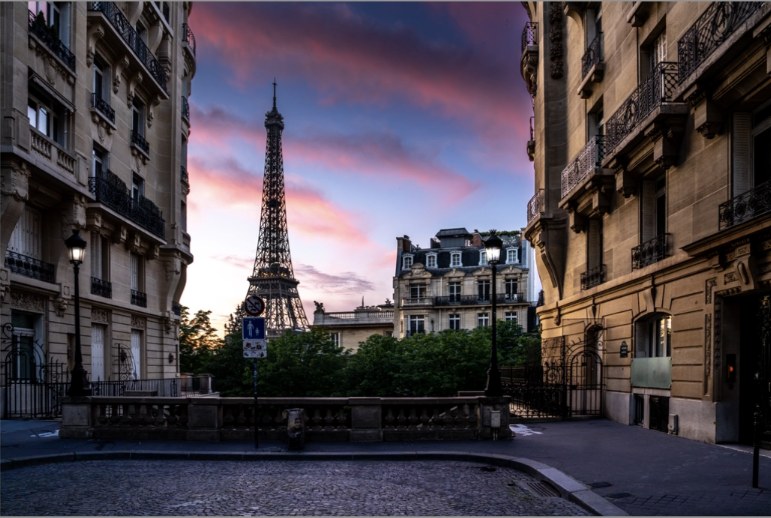 After: AI Landscape masks, an intersected gradient, and two glowing streetlamps bring the whole scene to life.
None of these moves are complicated on their own. What makes the difference is combining Lightroom's automatic AI selections with a couple of manual gradient tricks — letting the AI do the tedious selection work while you focus on the creative decisions.
FAQ
What is the best masking tool in Lightroom for landscapes?
For landscape and cityscape photography, the AI Landscape mask is the fastest starting point. It automatically separates sky, architecture, vegetation, and ground into individual masks you can then fine-tune.
Why does my linear gradient affect areas I don't want it to?
A linear or radial gradient always affects everything within its area, regardless of content. To restrict it to a specific region, right-click the gradient mask, choose Intersect Mask With, and select an AI mask like Sky, Subject, or Background.
Can I duplicate a mask in Lightroom and move it to another area?
Yes. Right-click any mask in the Masks panel and choose Duplicate and Invert Mask, or simply duplicate it and drag the resulting mask to a new position in the photo — useful for symmetrical elements like the two streetlamps in this tutorial.
How do I set an accurate black and white point before masking?
Hold the Alt (Windows) or Option (Mac) key while dragging the Blacks and Whites sliders. The preview will show clipping in the shadows or highlights as you drag — aim for a small amount of clipping, around 3%, to anchor your contrast without losing detail.
Wrap-Up
Masking is what turns a technically correct photo into an image with mood. Start with a clean base edit, let the AI Landscape mask do the heavy lifting on separating your scene, then reach for gradients and the intersect trick whenever you need something more precise. Happy shooting!
Want more? Explore 10 Lightroom secrets to instantly improve your photos and the best photography locations in Paris. Love a shot? You can license my prints here.
Get my FREE Lightroom preset here: https://bit.ly/AIPresets
Serge — Photoserge | Coaching photographers who are serious about getting to the next level.
By Serge Ramelli
