
10 Lightroom Secrets That Will Instantly Improve Your Photos
By Serge Ramelli
Most photographers spend years learning Lightroom.
The truth? A handful of techniques create 90% of the results.
After more than 15 years of editing photos professionally, these are the Lightroom tricks I use most often to transform an ordinary image into something memorable.
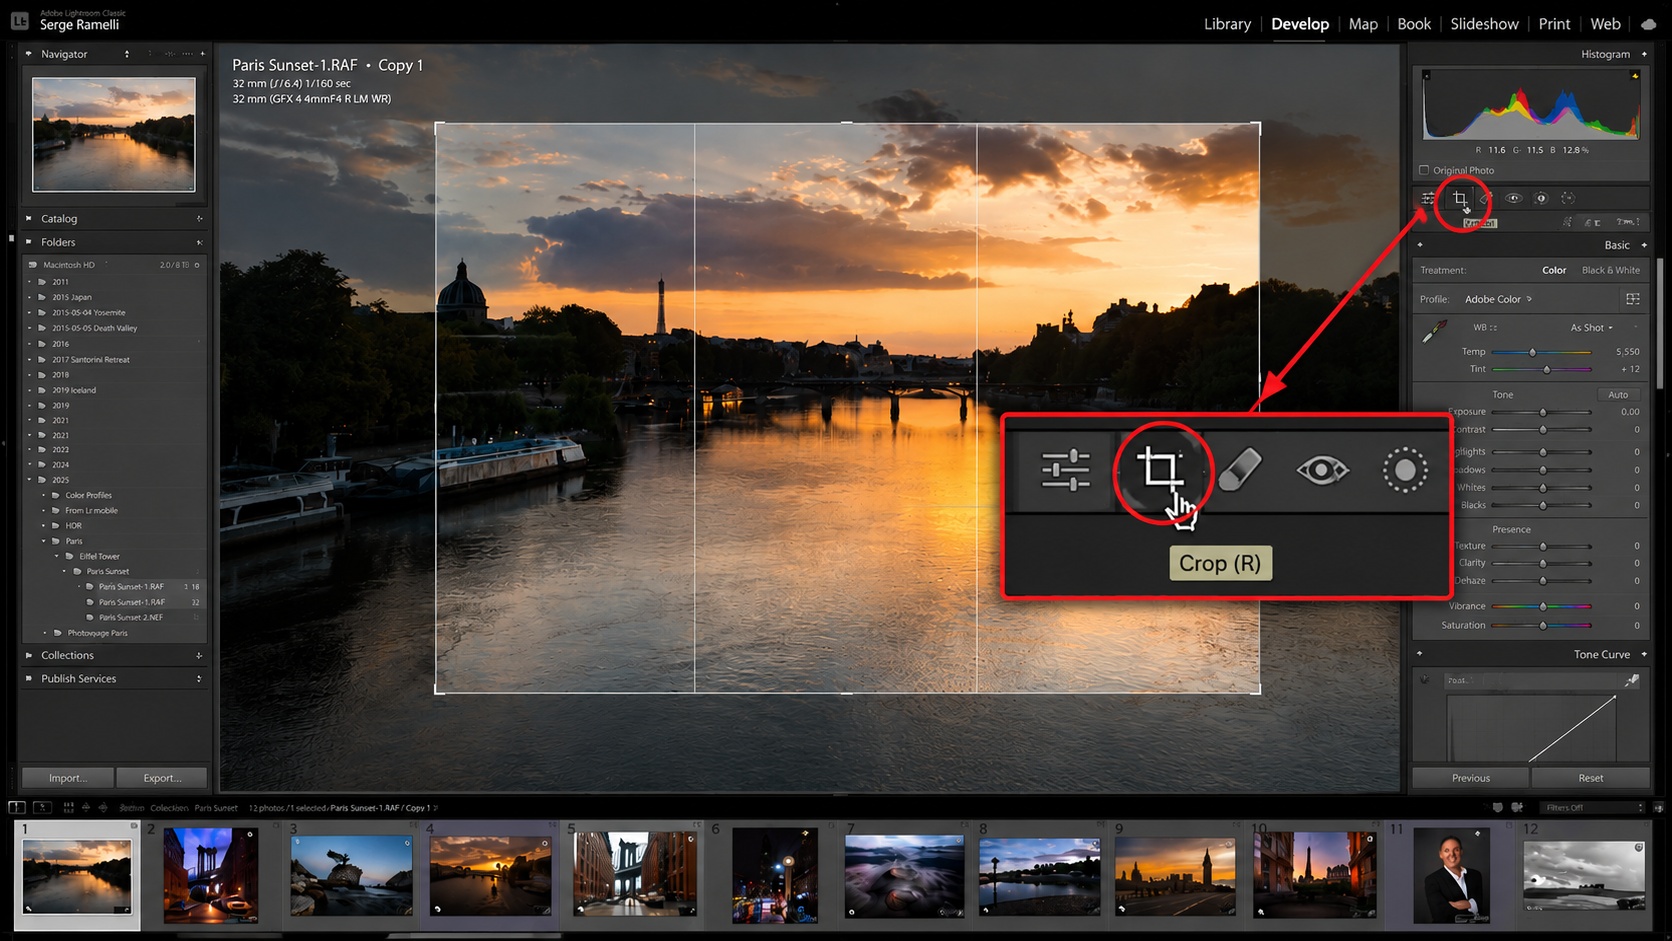
1. Start With the Crop
Before touching exposure or color, improve your composition.
A stronger crop can completely change the impact of a photo.
I often use a 16:9 ratio for landscapes because it works beautifully on modern screens, while a 4:5 crop is ideal for Instagram.
Ask yourself:
- Does the image need more sky?
- More foreground?
- Would a vertical crop tell a stronger story?
2. Fix Exposure Before Color
One of the biggest editing mistakes is adjusting color too early.
If your image is too dark or too bright, it's impossible to judge white balance accurately.
My workflow is always:
- Recover shadows
- Reduce highlights
- Set black and white points
- Adjust white balance
Only then do I start working on color.
Ready to get 1 on 1 support to master your tools and take photos that have that WOW factor? Apply to become a certified Master of Photography here.
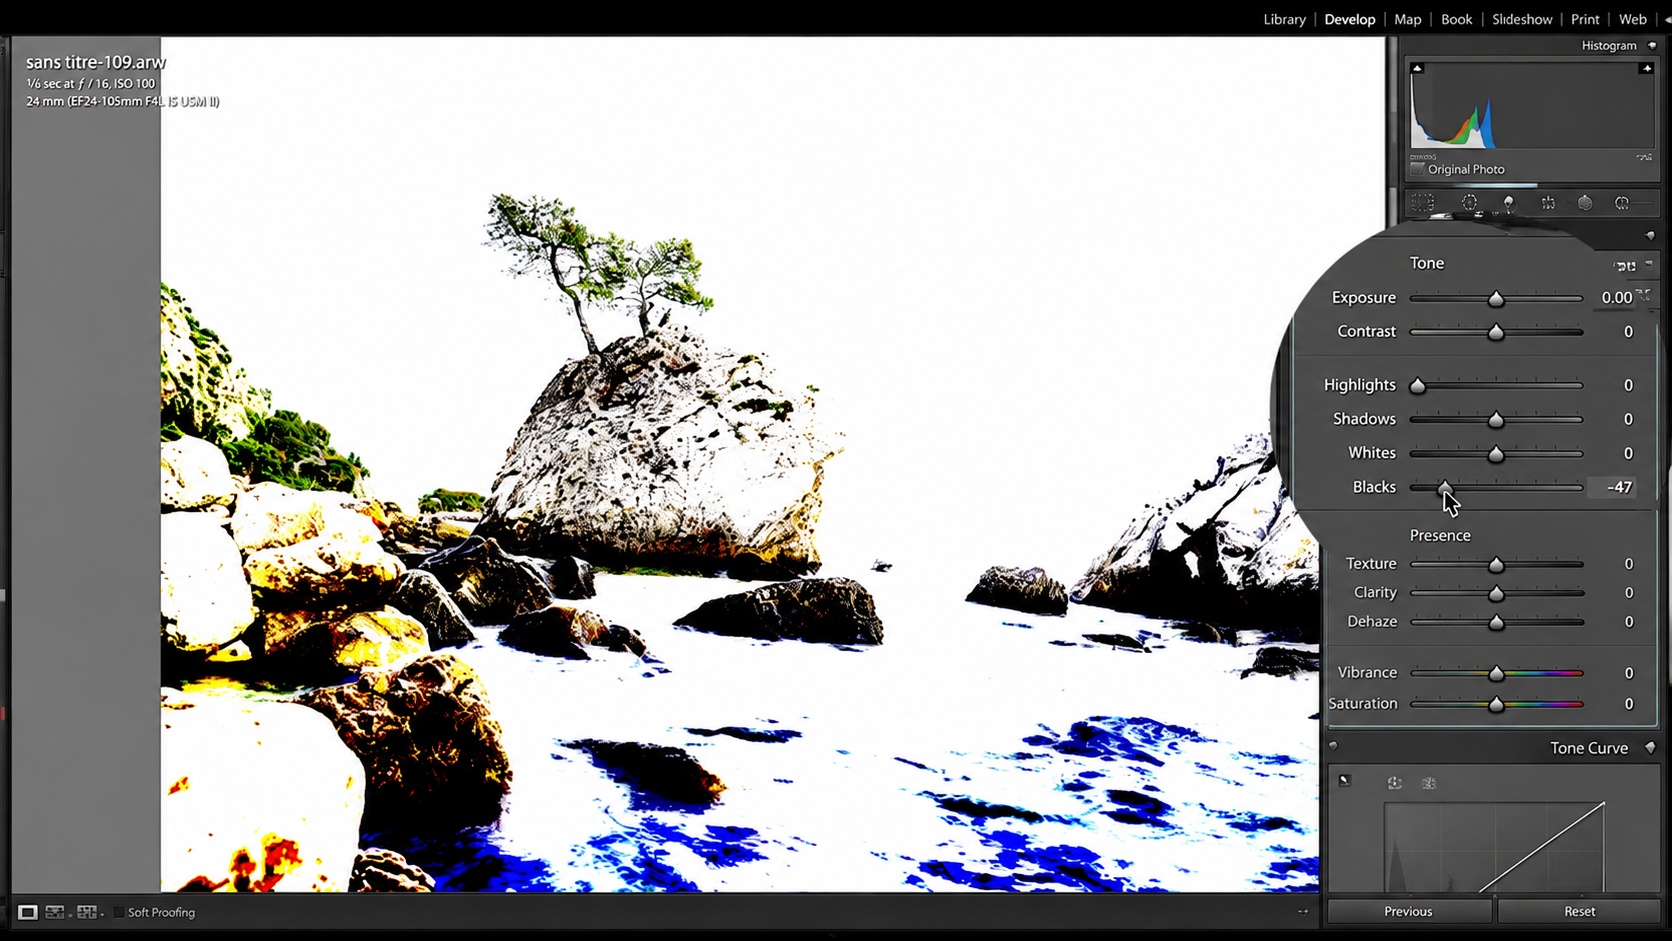
Hold Alt (Option on Mac) while dragging the Blacks slider left and stop when only a small amount of clipped black pixels appears on the screen—roughly 1–2% of the image area.
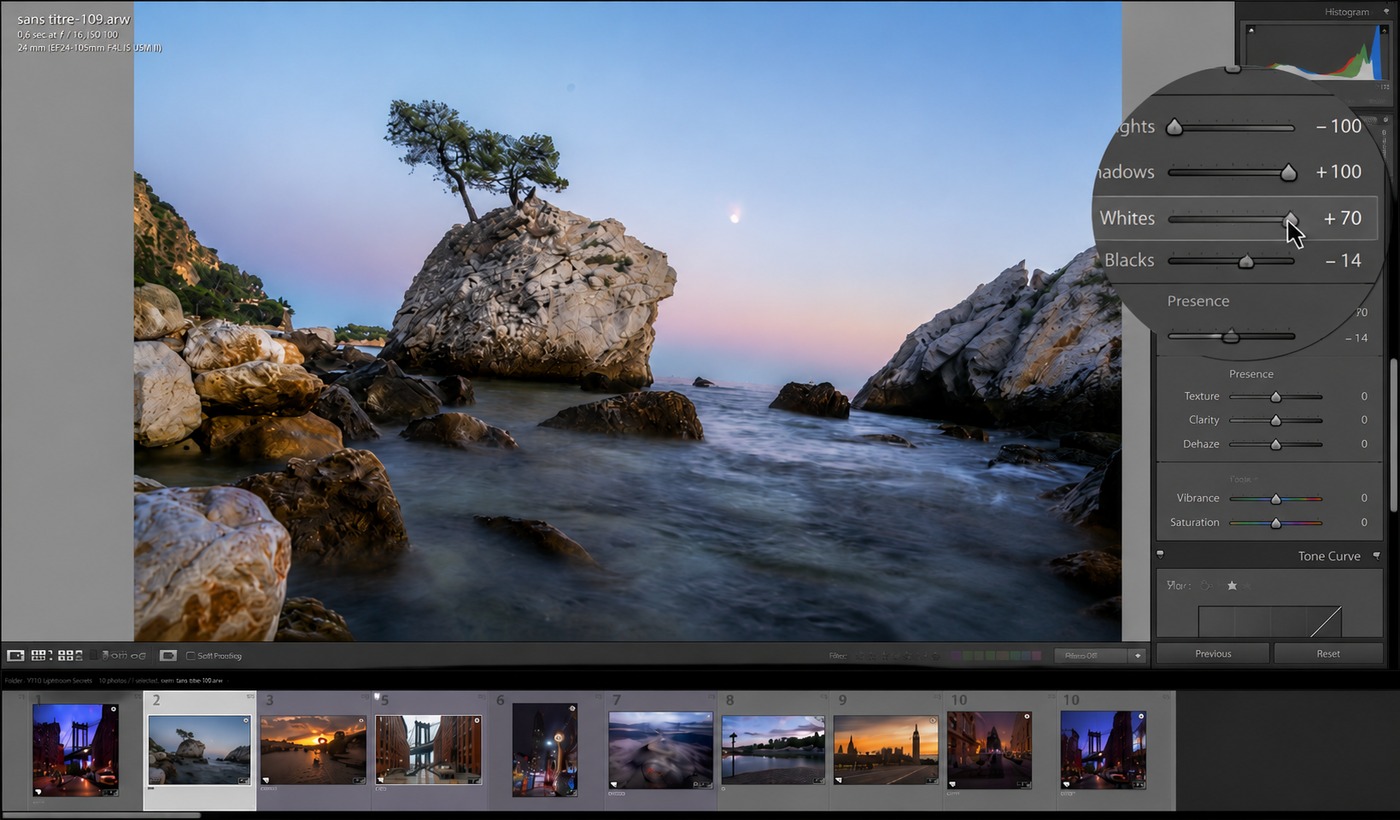
Always fix exposure before adjusting white balance. Once the image is properly exposed, color corrections become much more accurate.
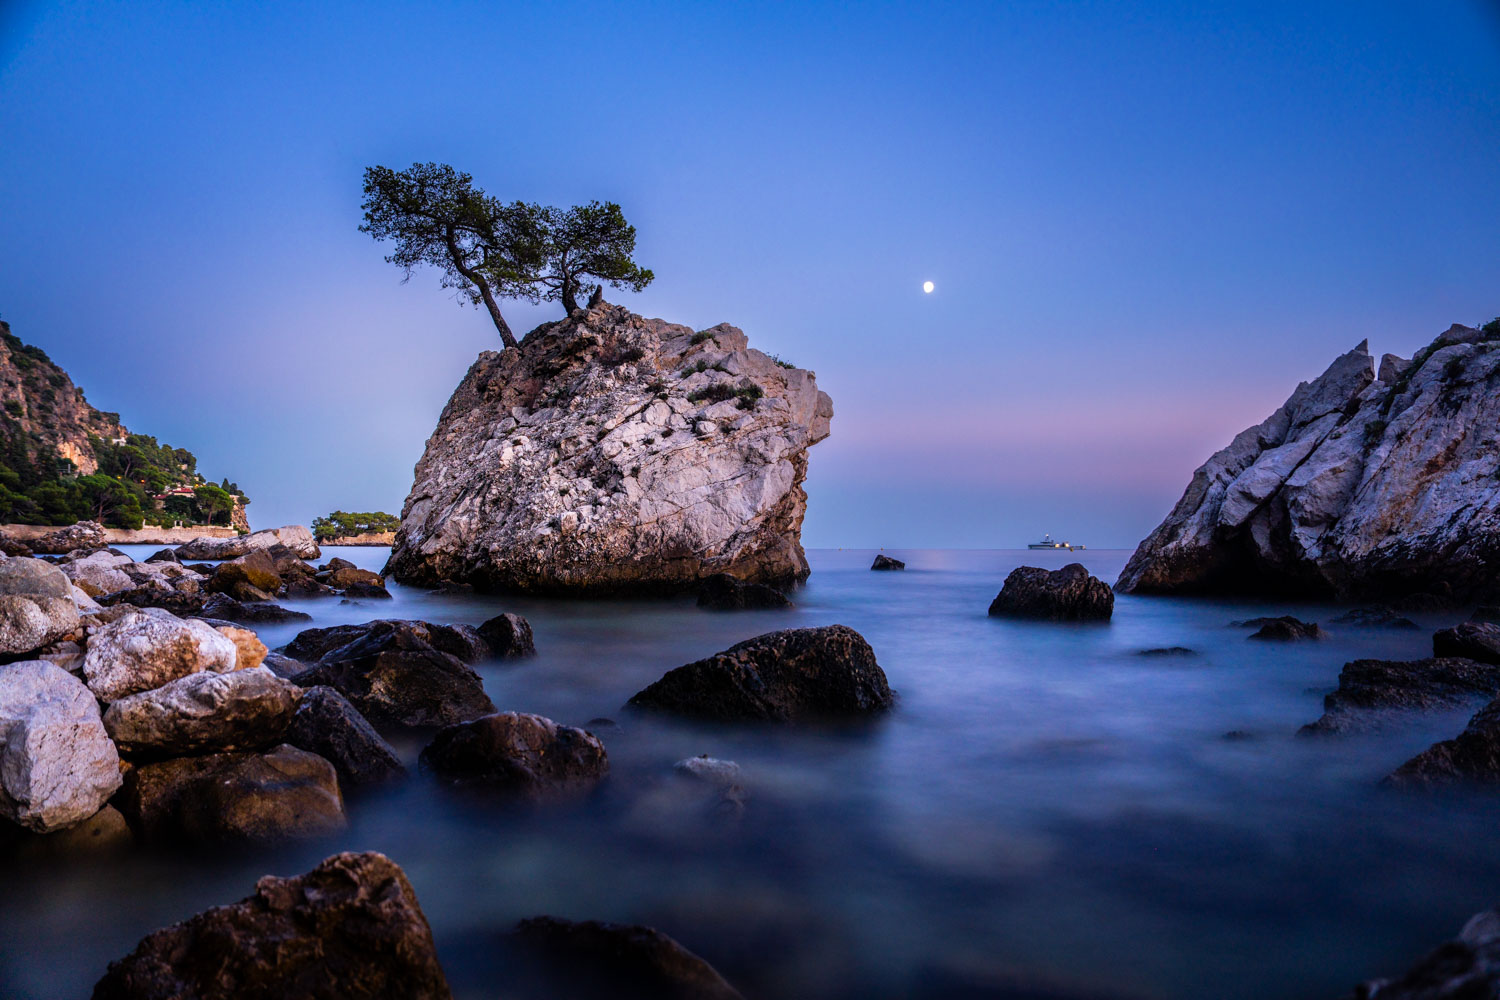
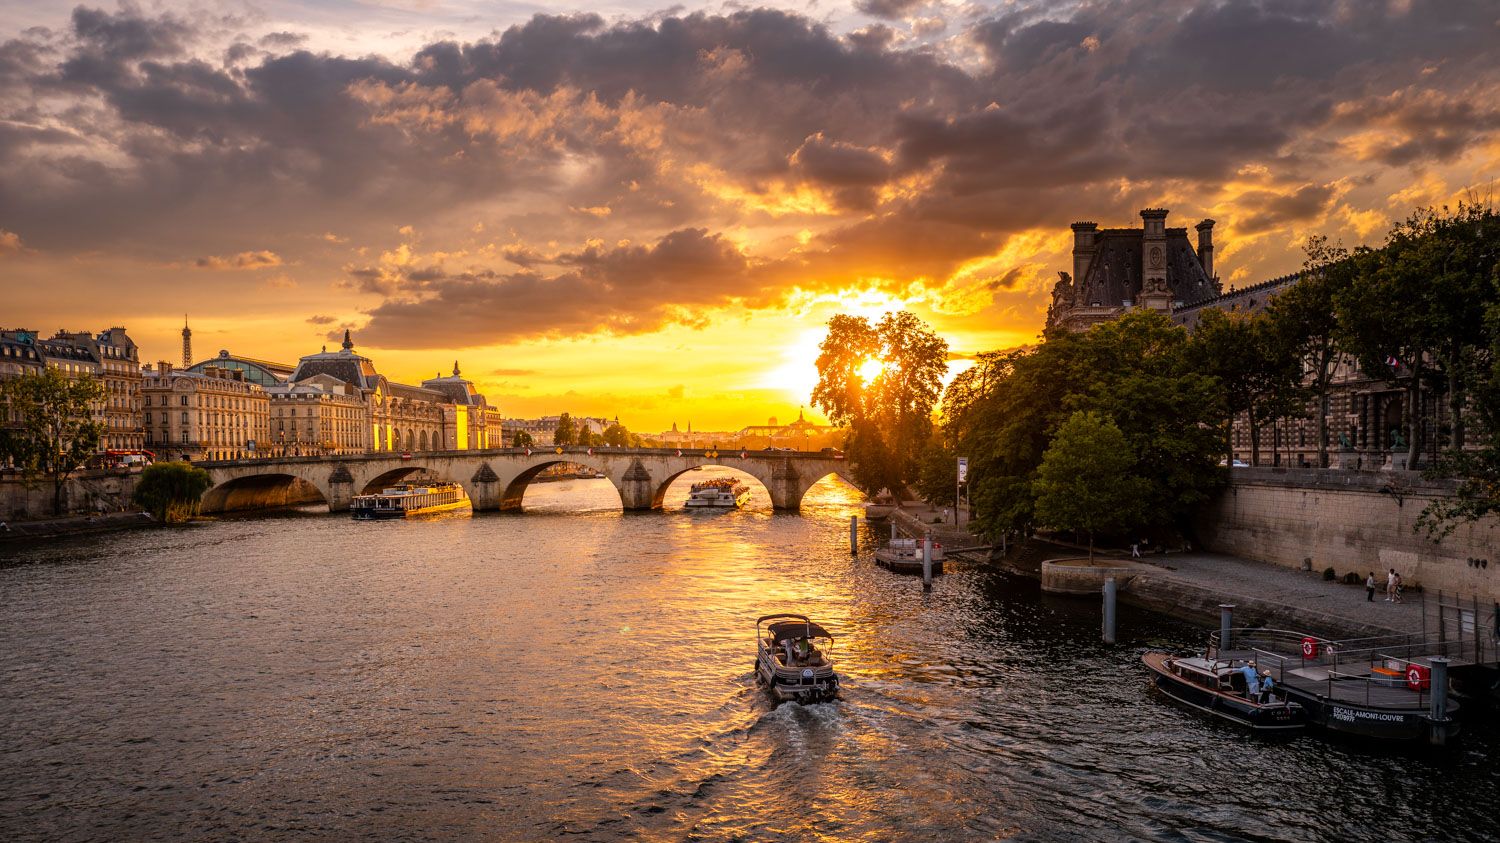
Here is the final photo with color corrected.
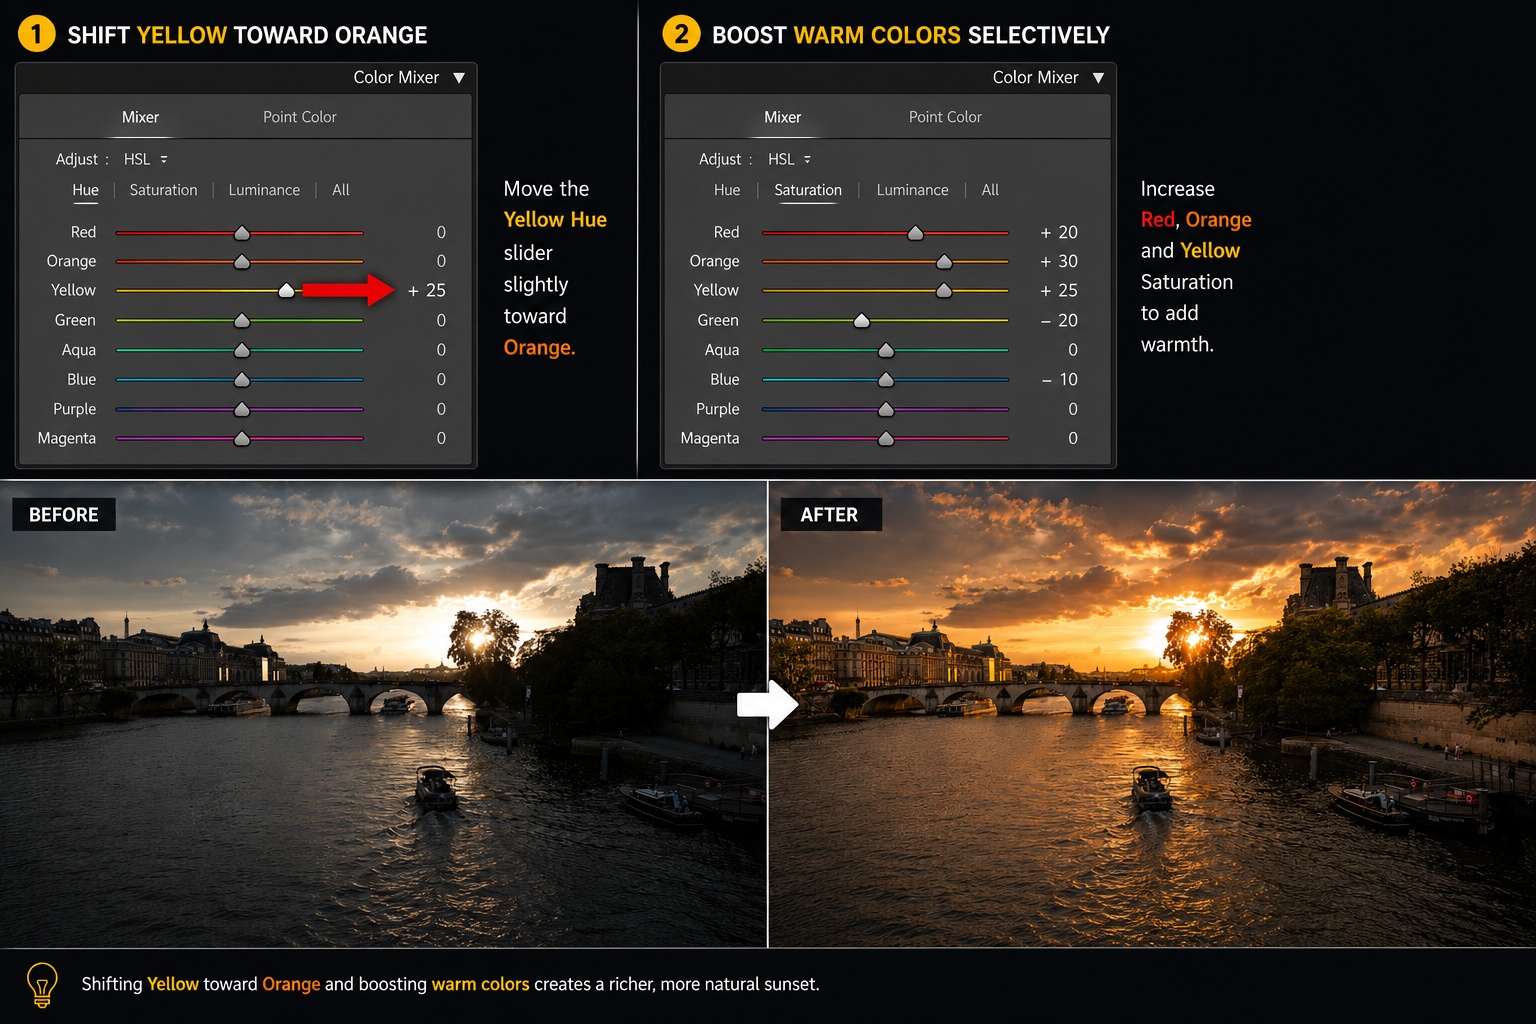
3. Make Sunsets Look Like Sunsets
Cameras often capture sunsets with unwanted green or yellow tones.
Instead of increasing saturation everywhere, use Lightroom's Color Mixer.
Slightly shift yellows toward orange and boost warm colors selectively.
The result feels richer, more natural, and much closer to what you actually saw.
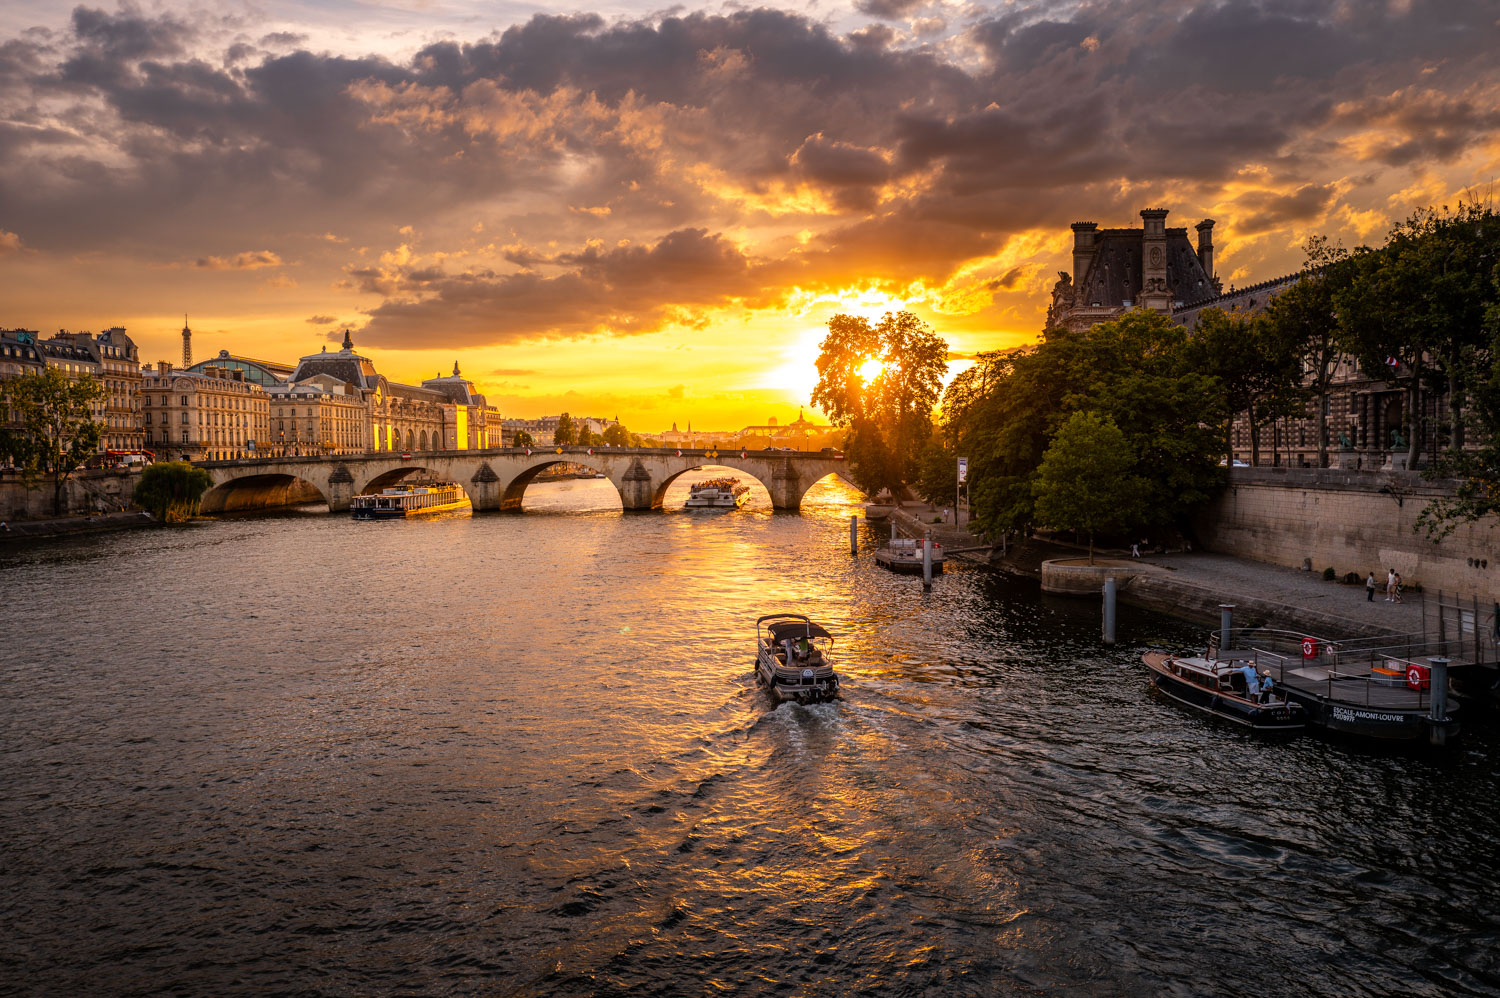
4. Create a Cinematic Color Palette
Want a more dramatic look?
Ready to get 1 on 1 support to master your tools and take photos that have that WOW factor? Apply to become a certified Master of Photography here.
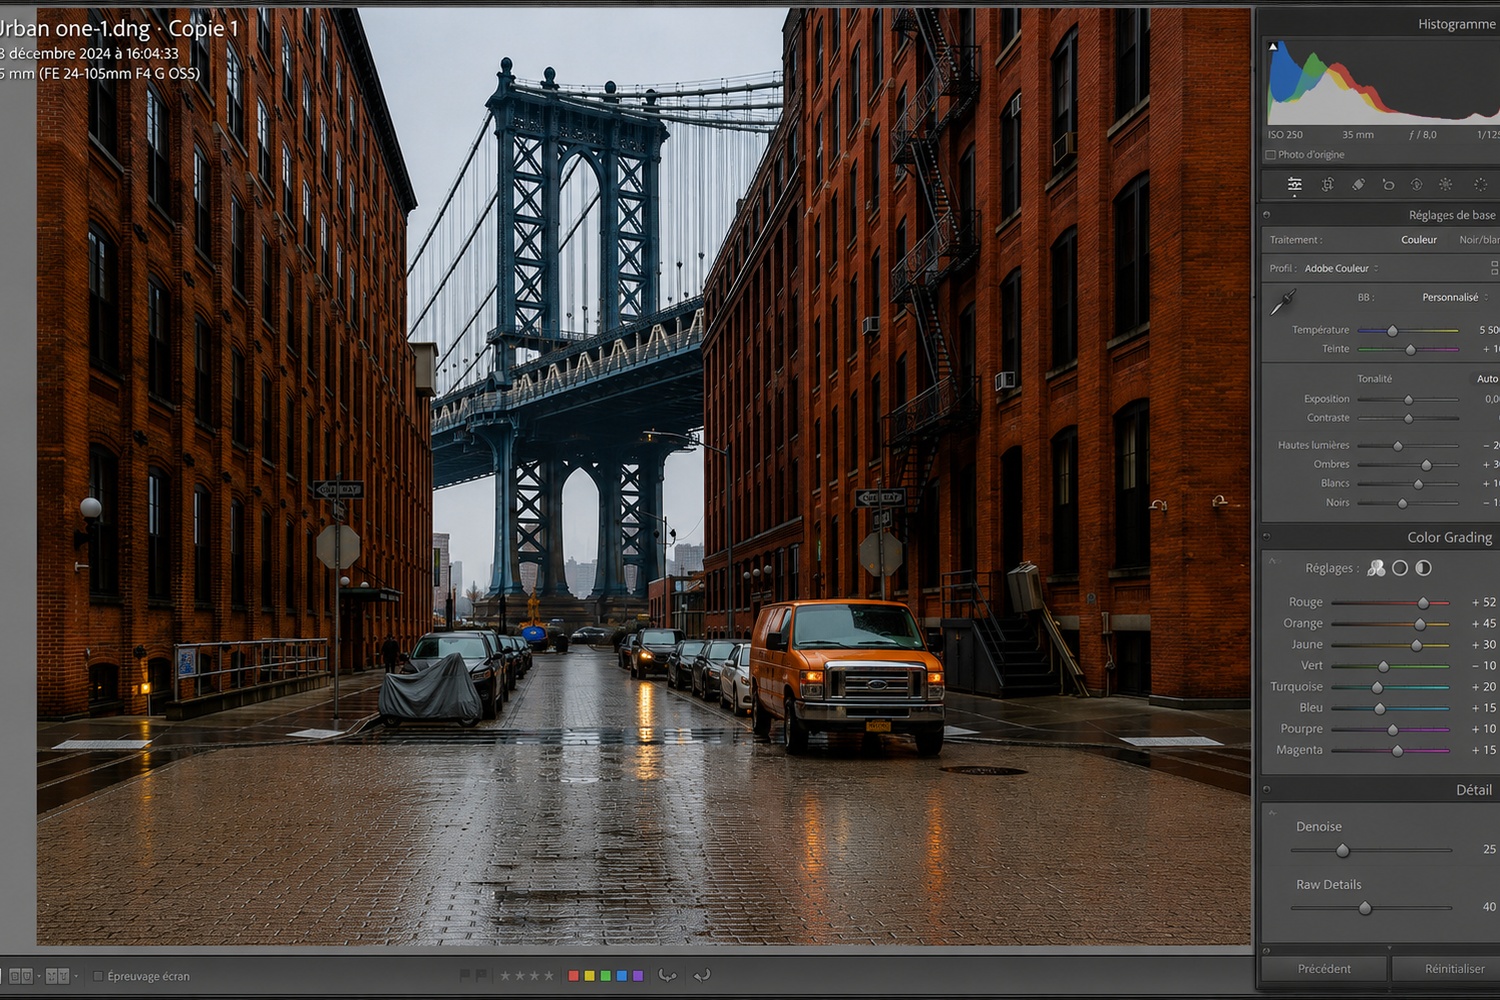
Increase the saturation of:
- Reds
- Oranges
- Yellows
Then reduce saturation in cooler colors such as greens and blues.
This simple adjustment creates a warm cinematic style that instantly adds mood to a photograph.

Then add contrast and vibrance to make the colors pop.
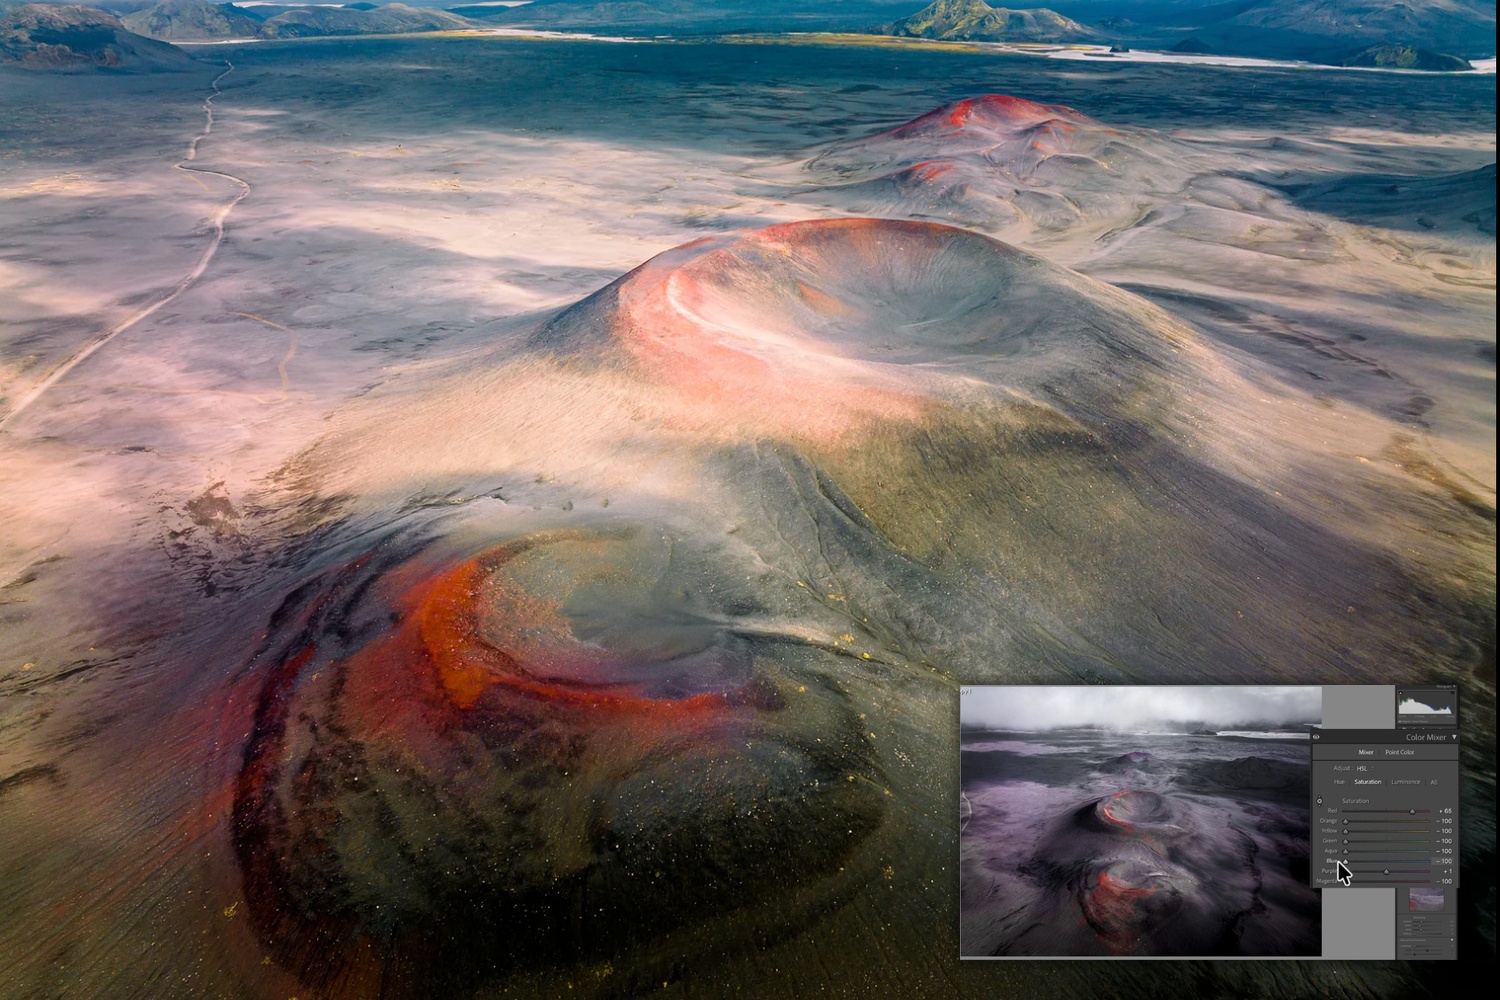
5. Use Selective Color to Guide Attention
The human eye is naturally drawn to color.
If one element of your image is important, make it stand out.
Keep that color vibrant while reducing saturation elsewhere.
Used carefully, this technique creates a powerful focal point without looking artificial.
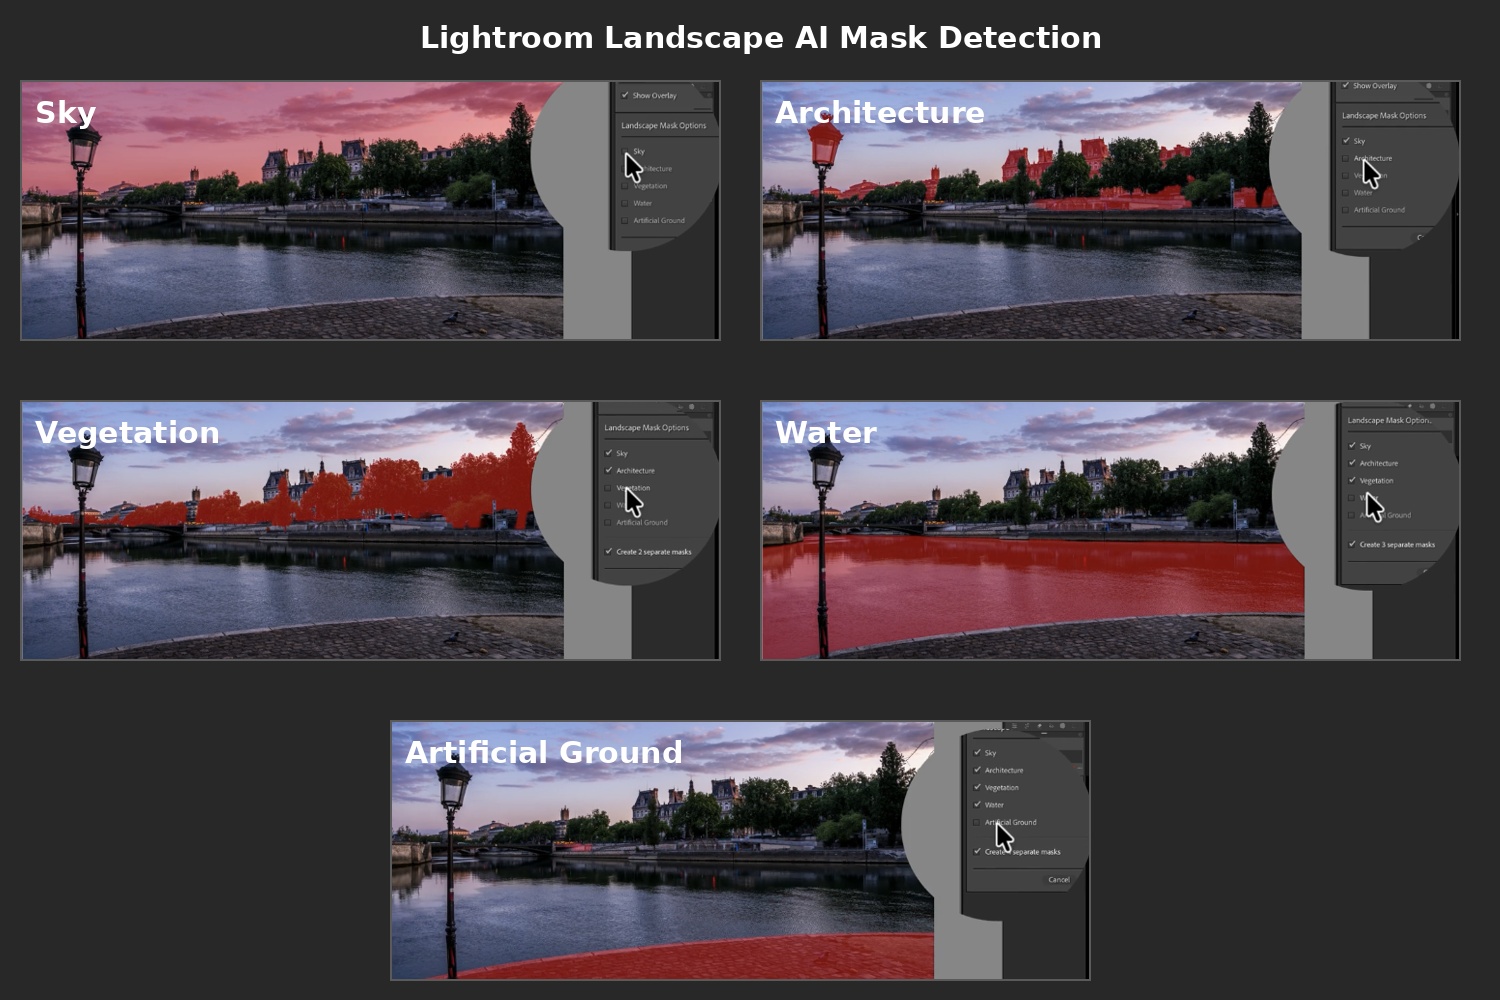
6. Use Lightroom's Landscape AI Masks
After making your basic exposure and white balance adjustments, open the Masking panel and select Landscape. Lightroom will automatically detect elements such as the sky, buildings, vegetation, water, and artificial surfaces.
You can then adjust each area independently. Darken the sky for more drama, add clarity to buildings, enhance vegetation, or soften water to create a more natural look.
By targeting specific parts of the image instead of applying global adjustments, Landscape AI Masks give you greater control and help create a more polished final image in just a few clicks.
Ready to get 1 on 1 support to master your tools and take photos that have that WOW factor? Apply to become a certified Master of Photography here.

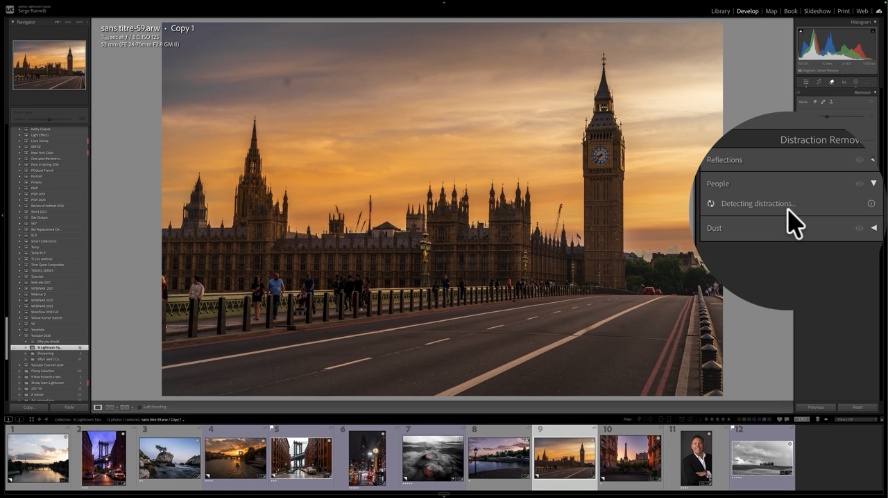
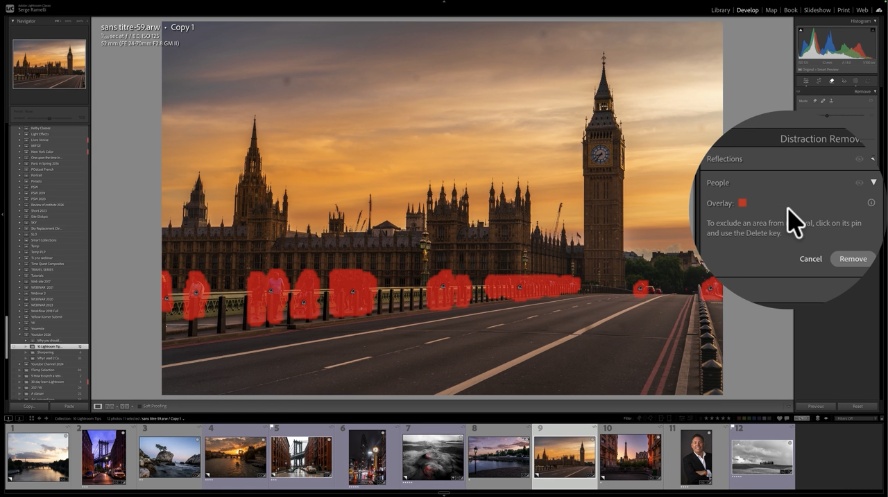
7. Remove Distractions
Great photography is often about what you remove.
People in the background, sensor dust, clutter, or unwanted objects can weaken a strong composition.
Before exporting an image, ask yourself:
Does every element contribute to the story?
If not, remove it.
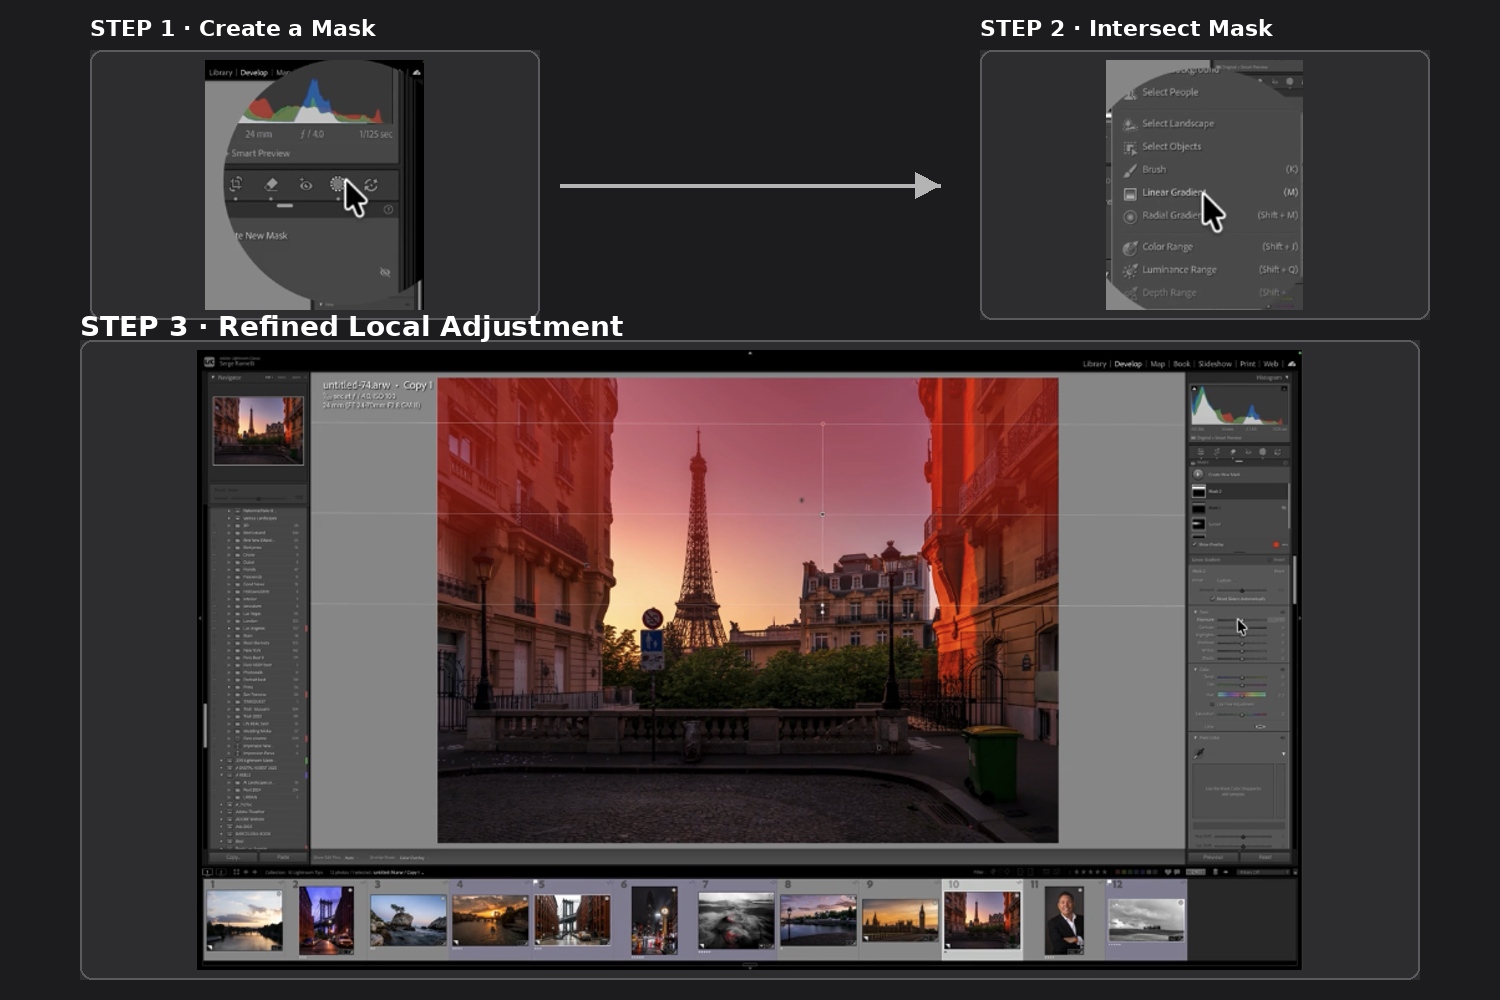
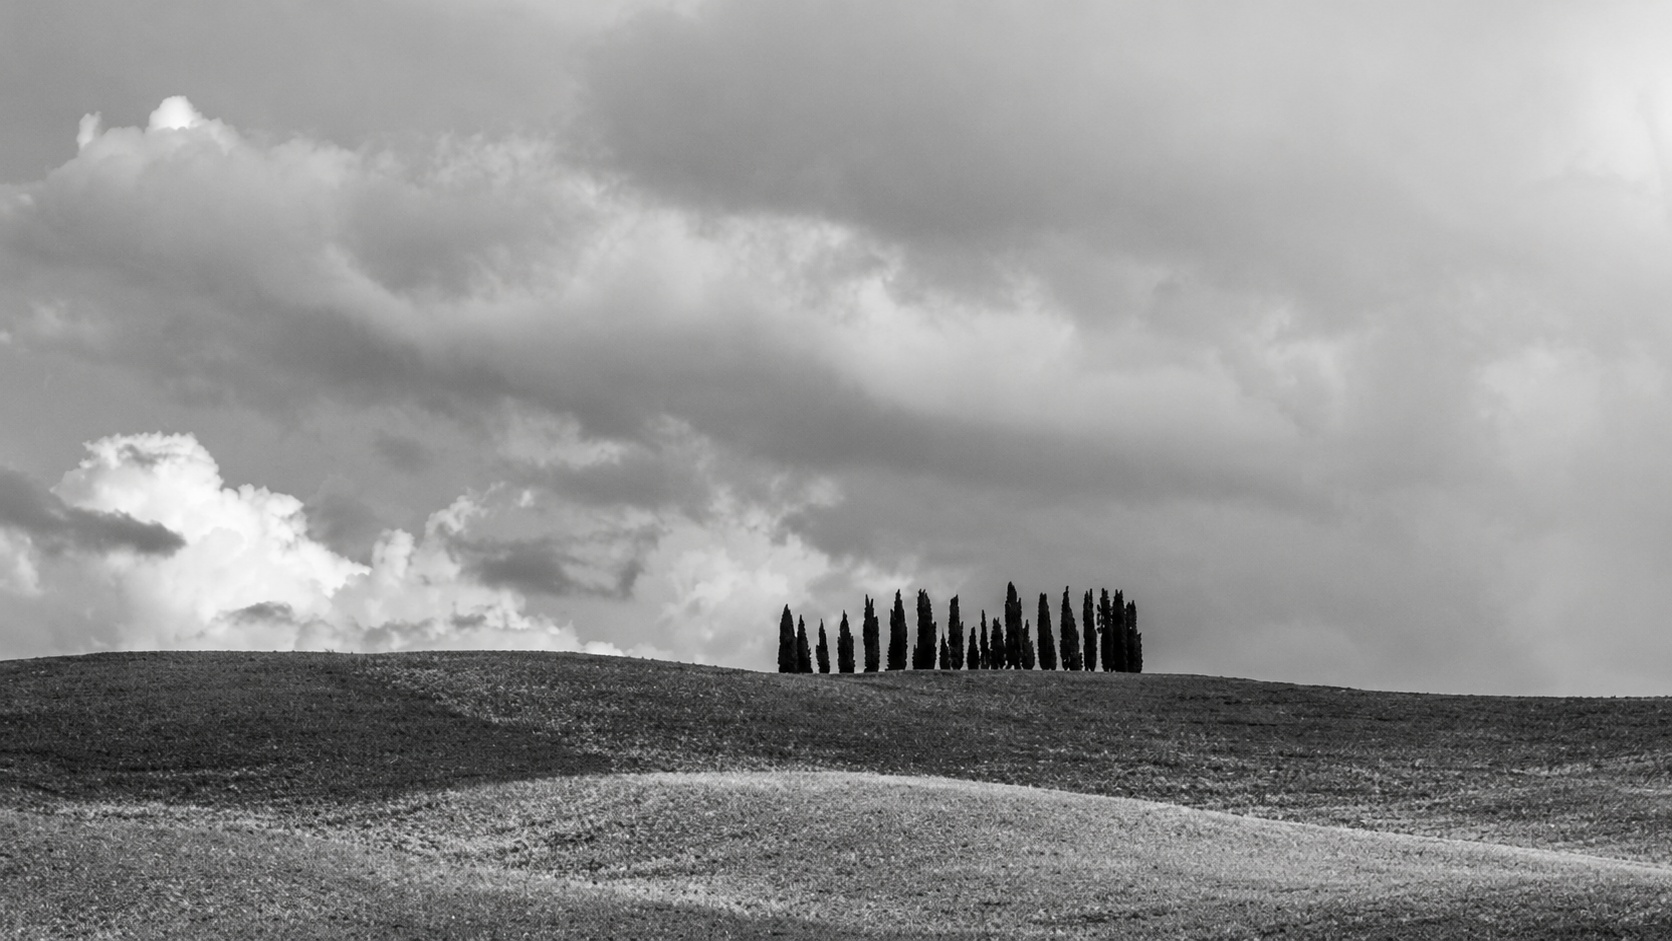
8. Use Mask Intersections for Better Local Adjustments
A hidden Lightroom trick is combining gradients with AI masks.
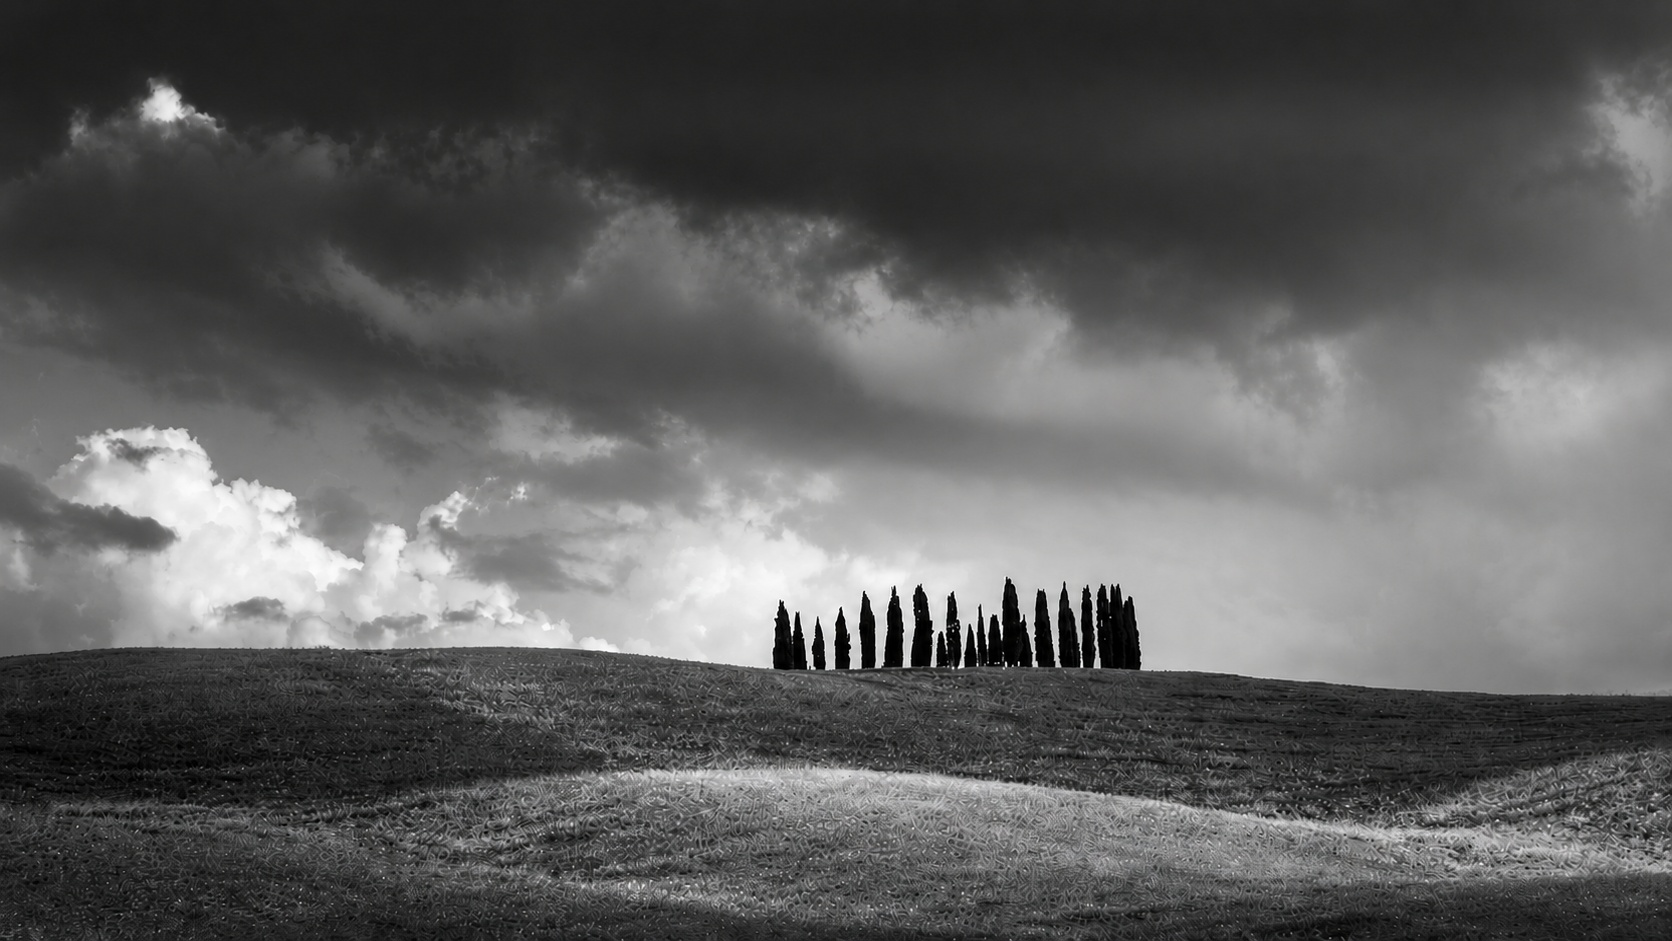
For example, you can darken a sky without affecting buildings, mountains, or trees.
The result looks cleaner, more natural, and far more professional.
Ready to get 1 on 1 support to master your tools and take photos that have that WOW factor? Apply to become a certified Master of Photography here.
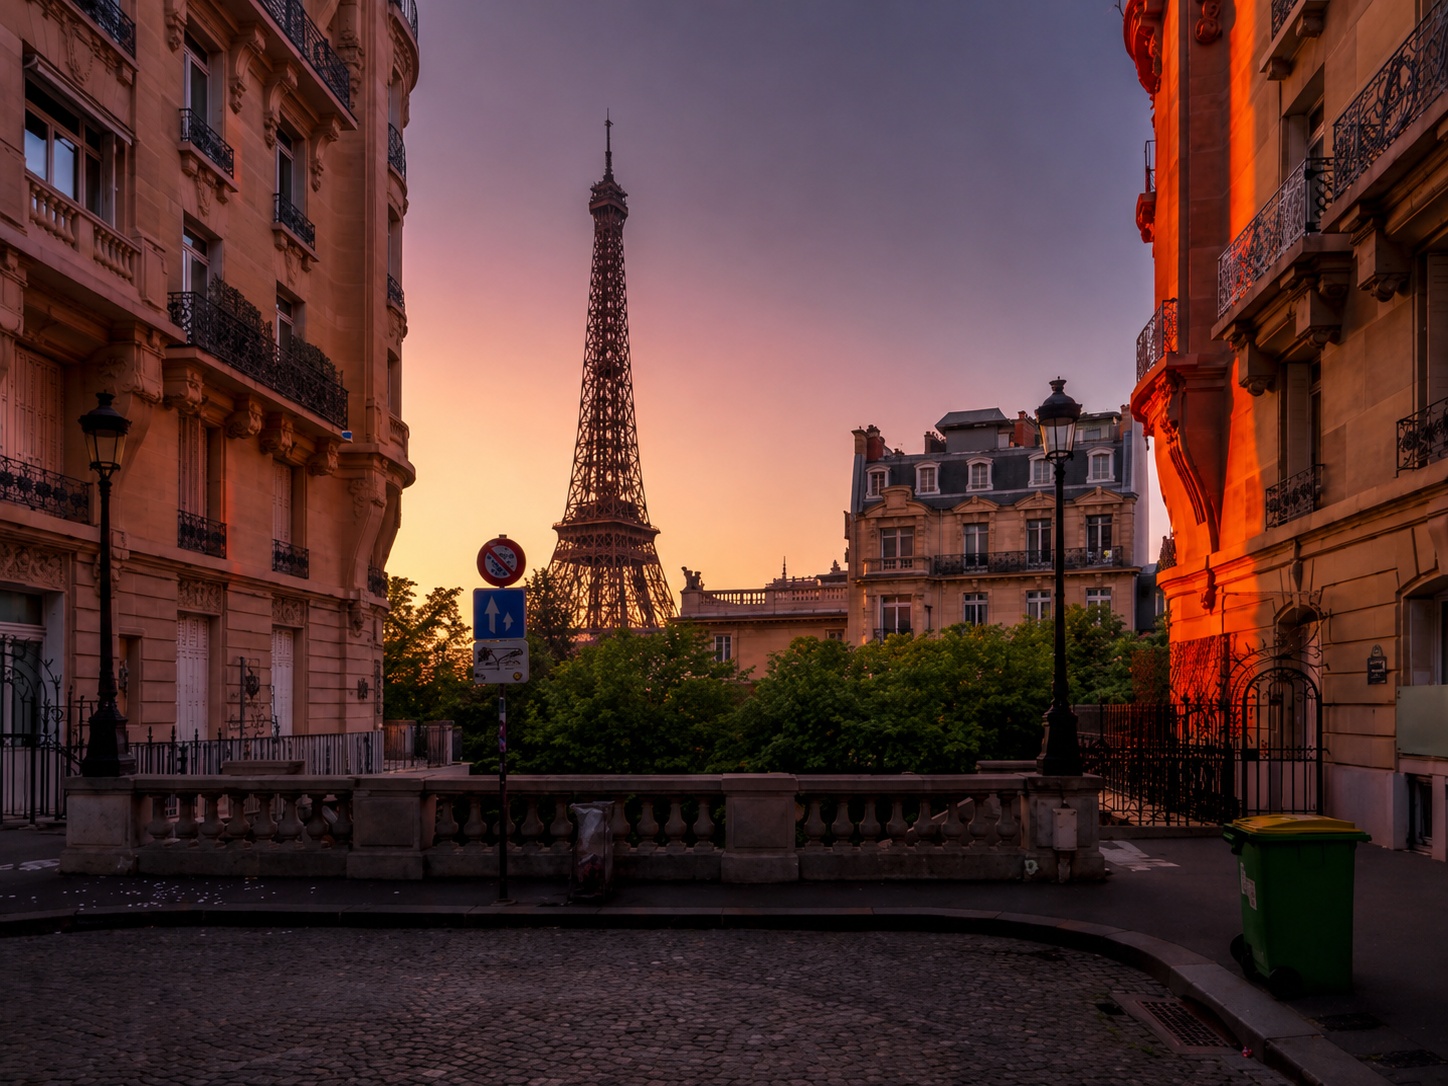
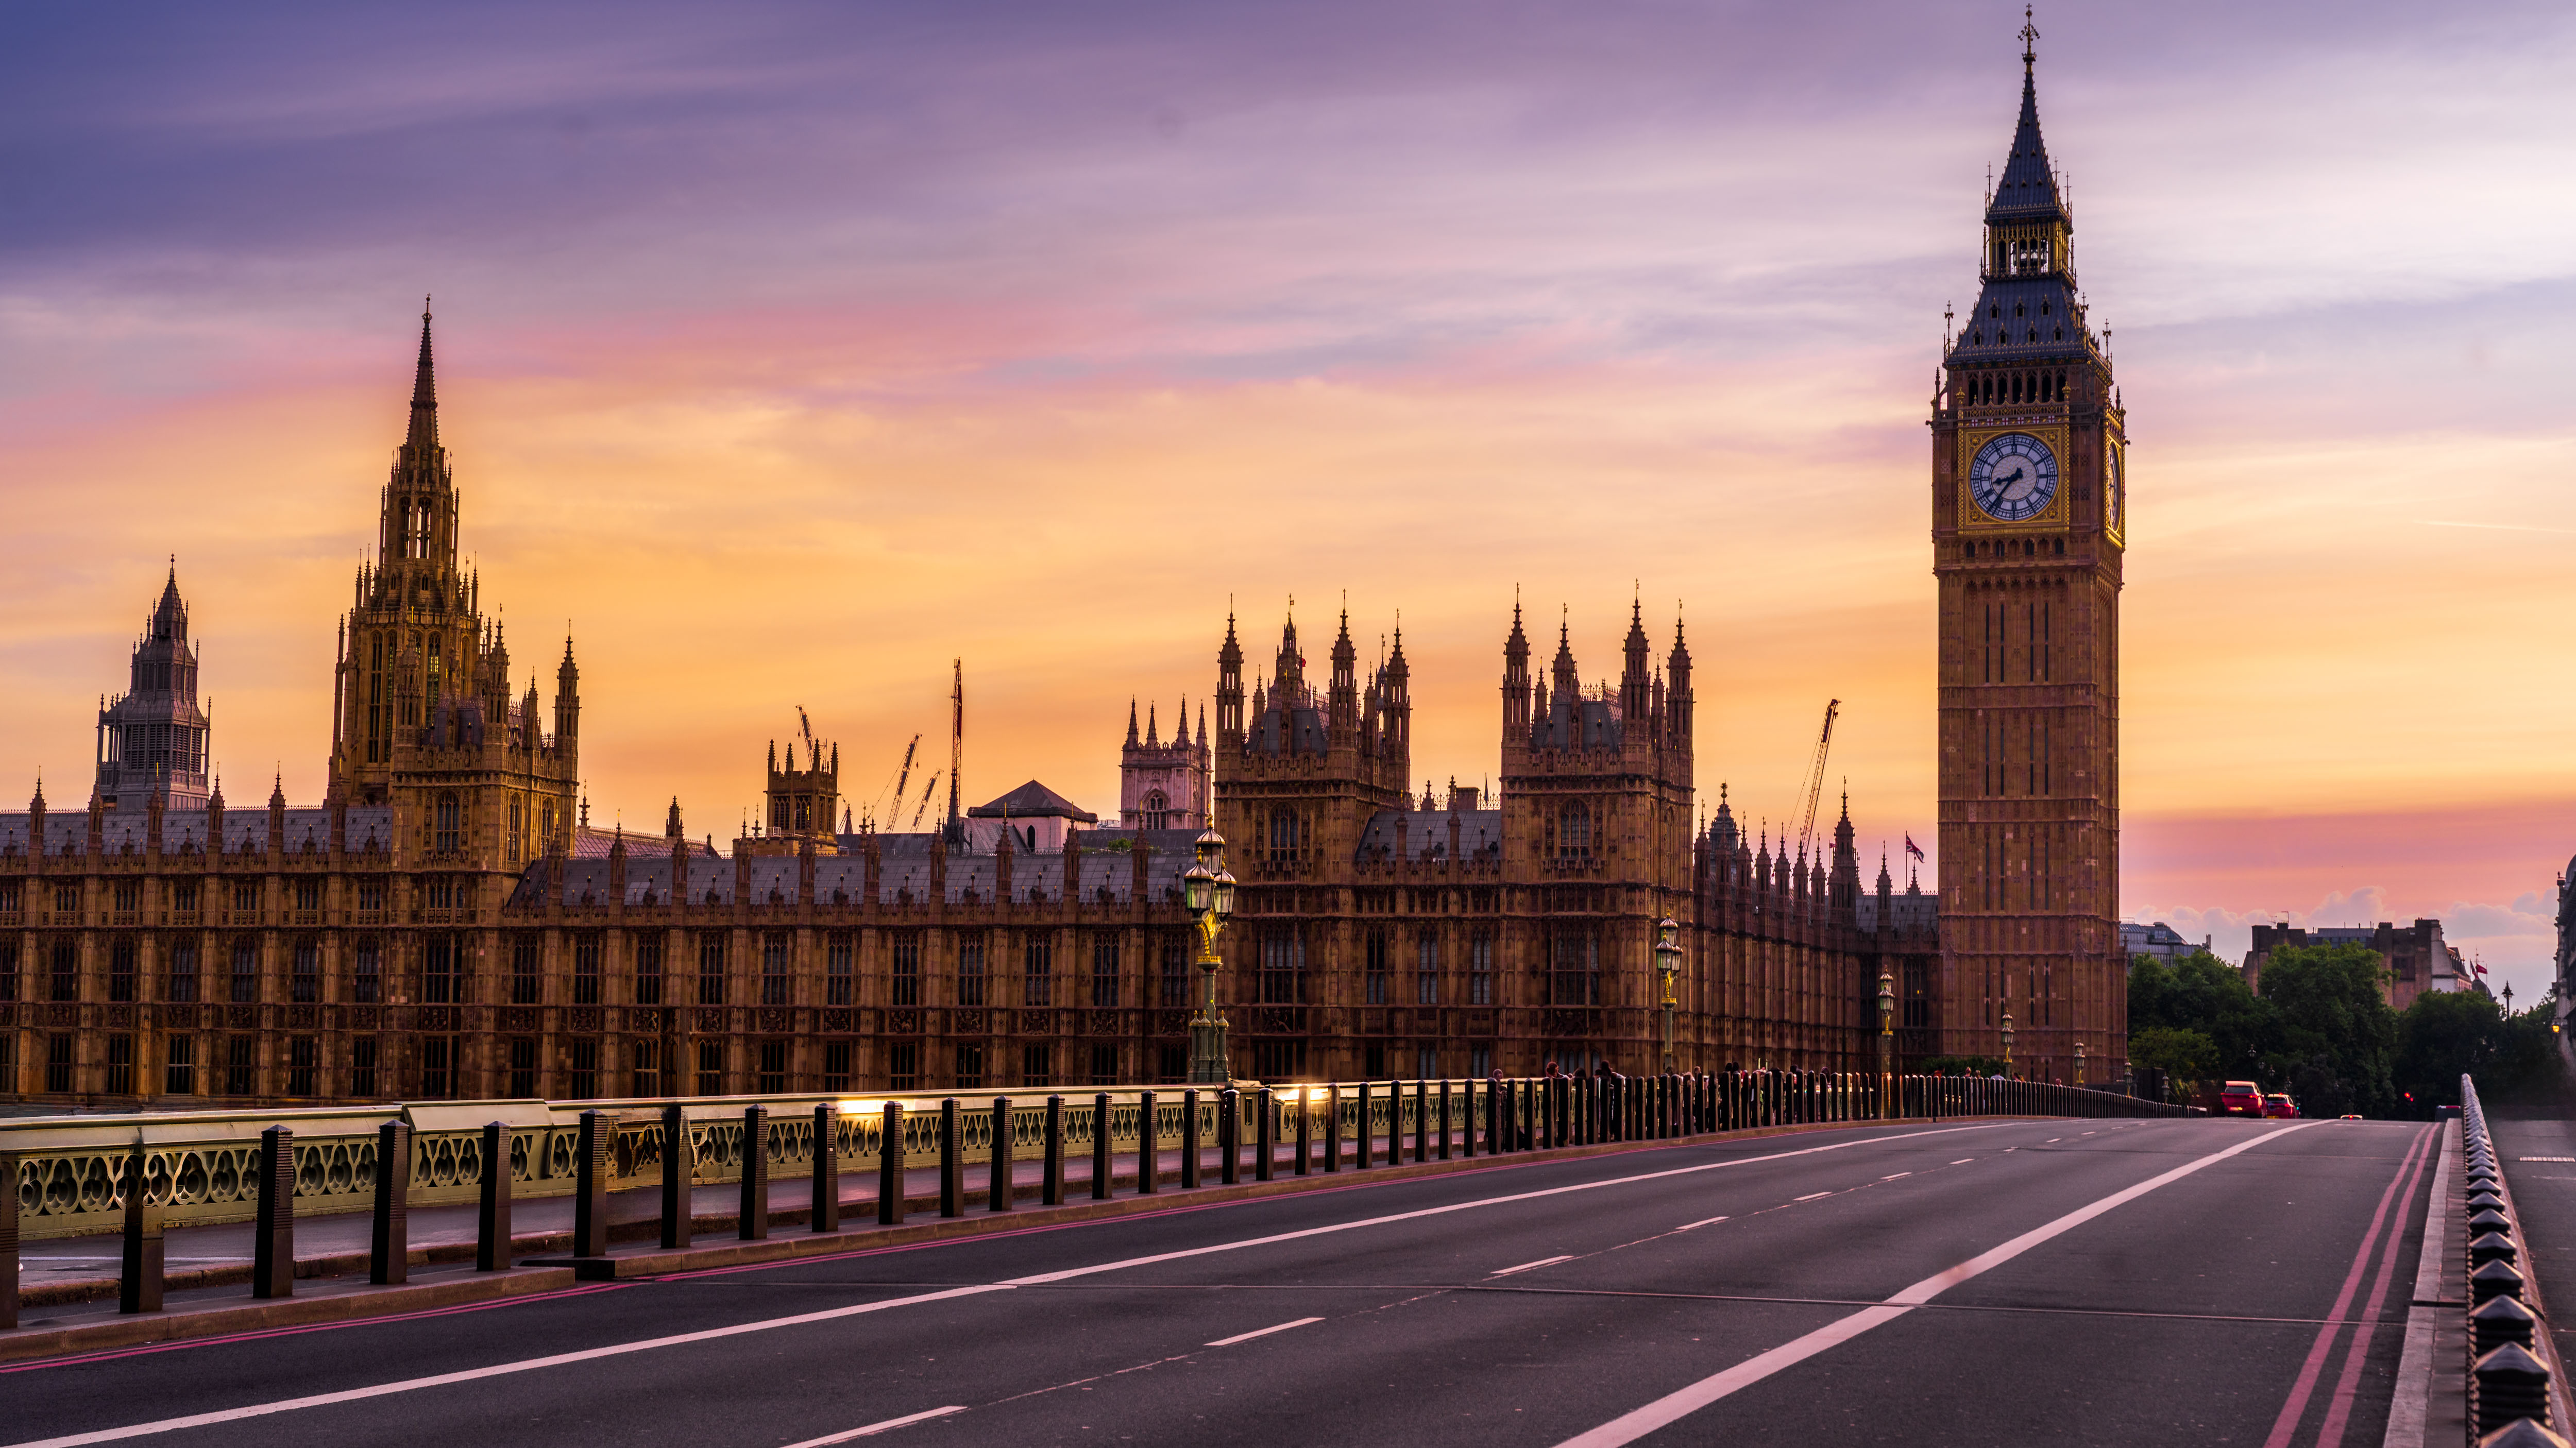
Here is the result.
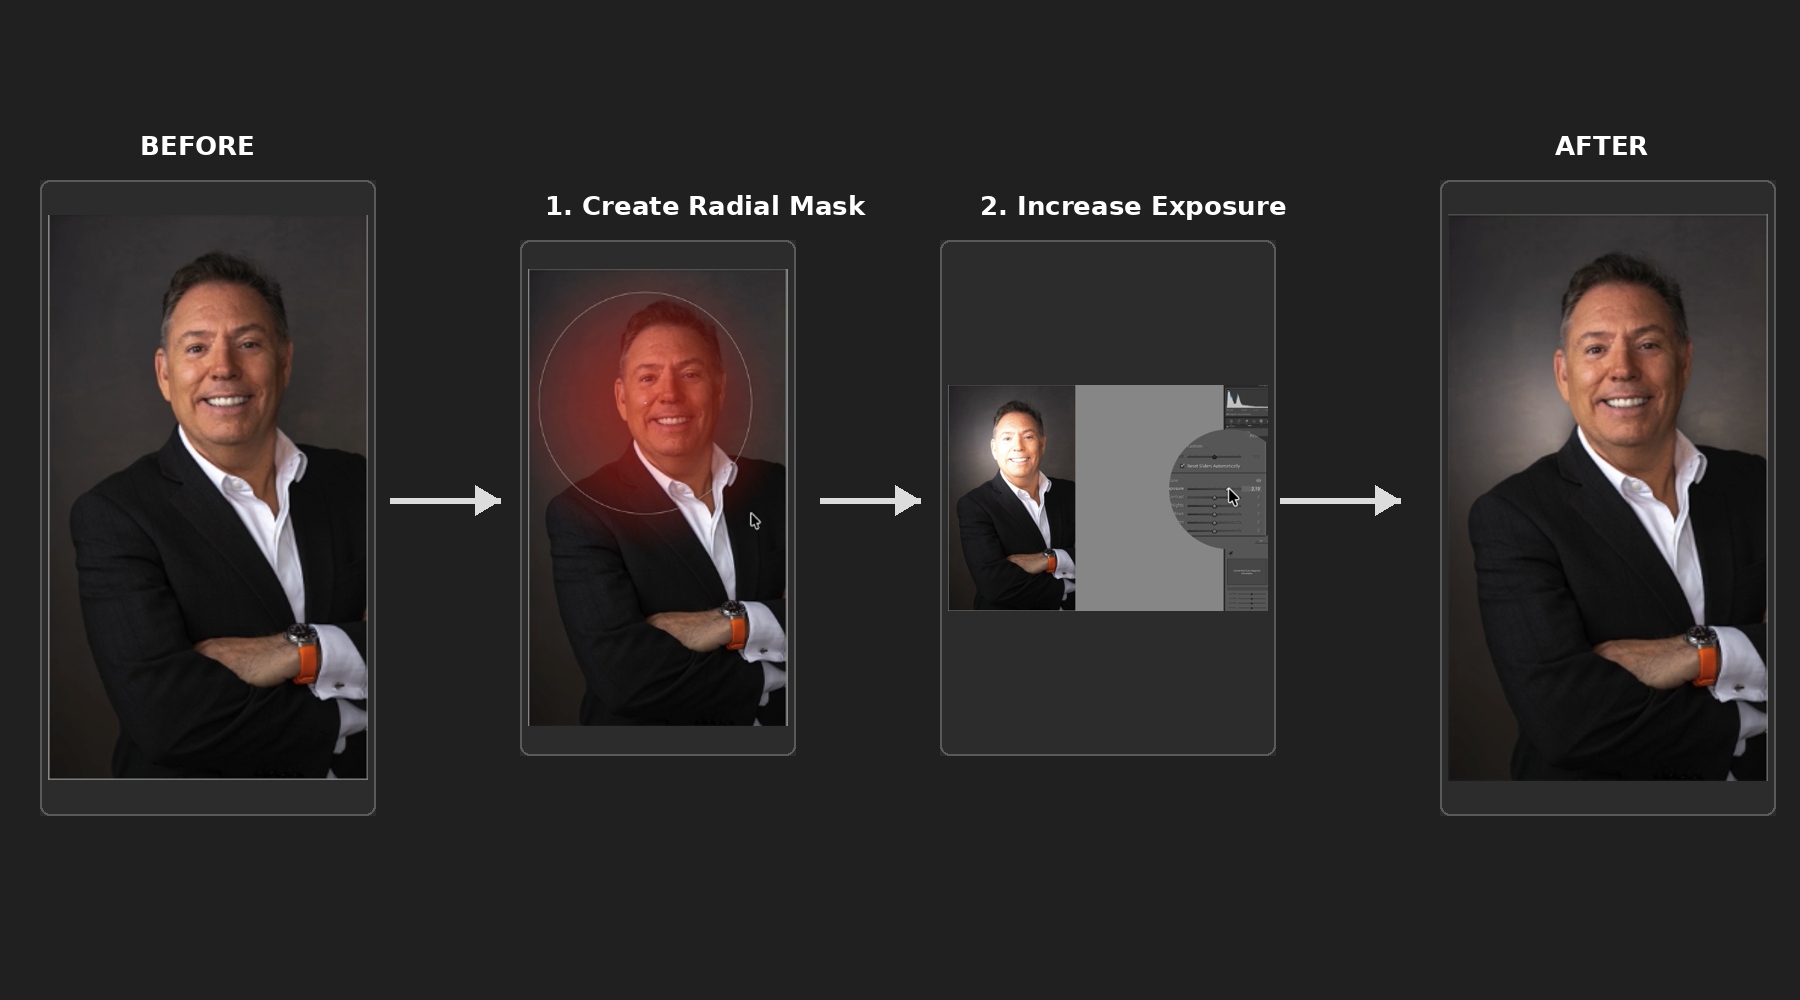
9. Add Light Where You Want Attention
Our eyes naturally move toward bright areas.
Instead of increasing exposure globally, selectively brighten the most important part of the image.
A subtle glow behind a subject can completely change how a viewer experiences the photograph.
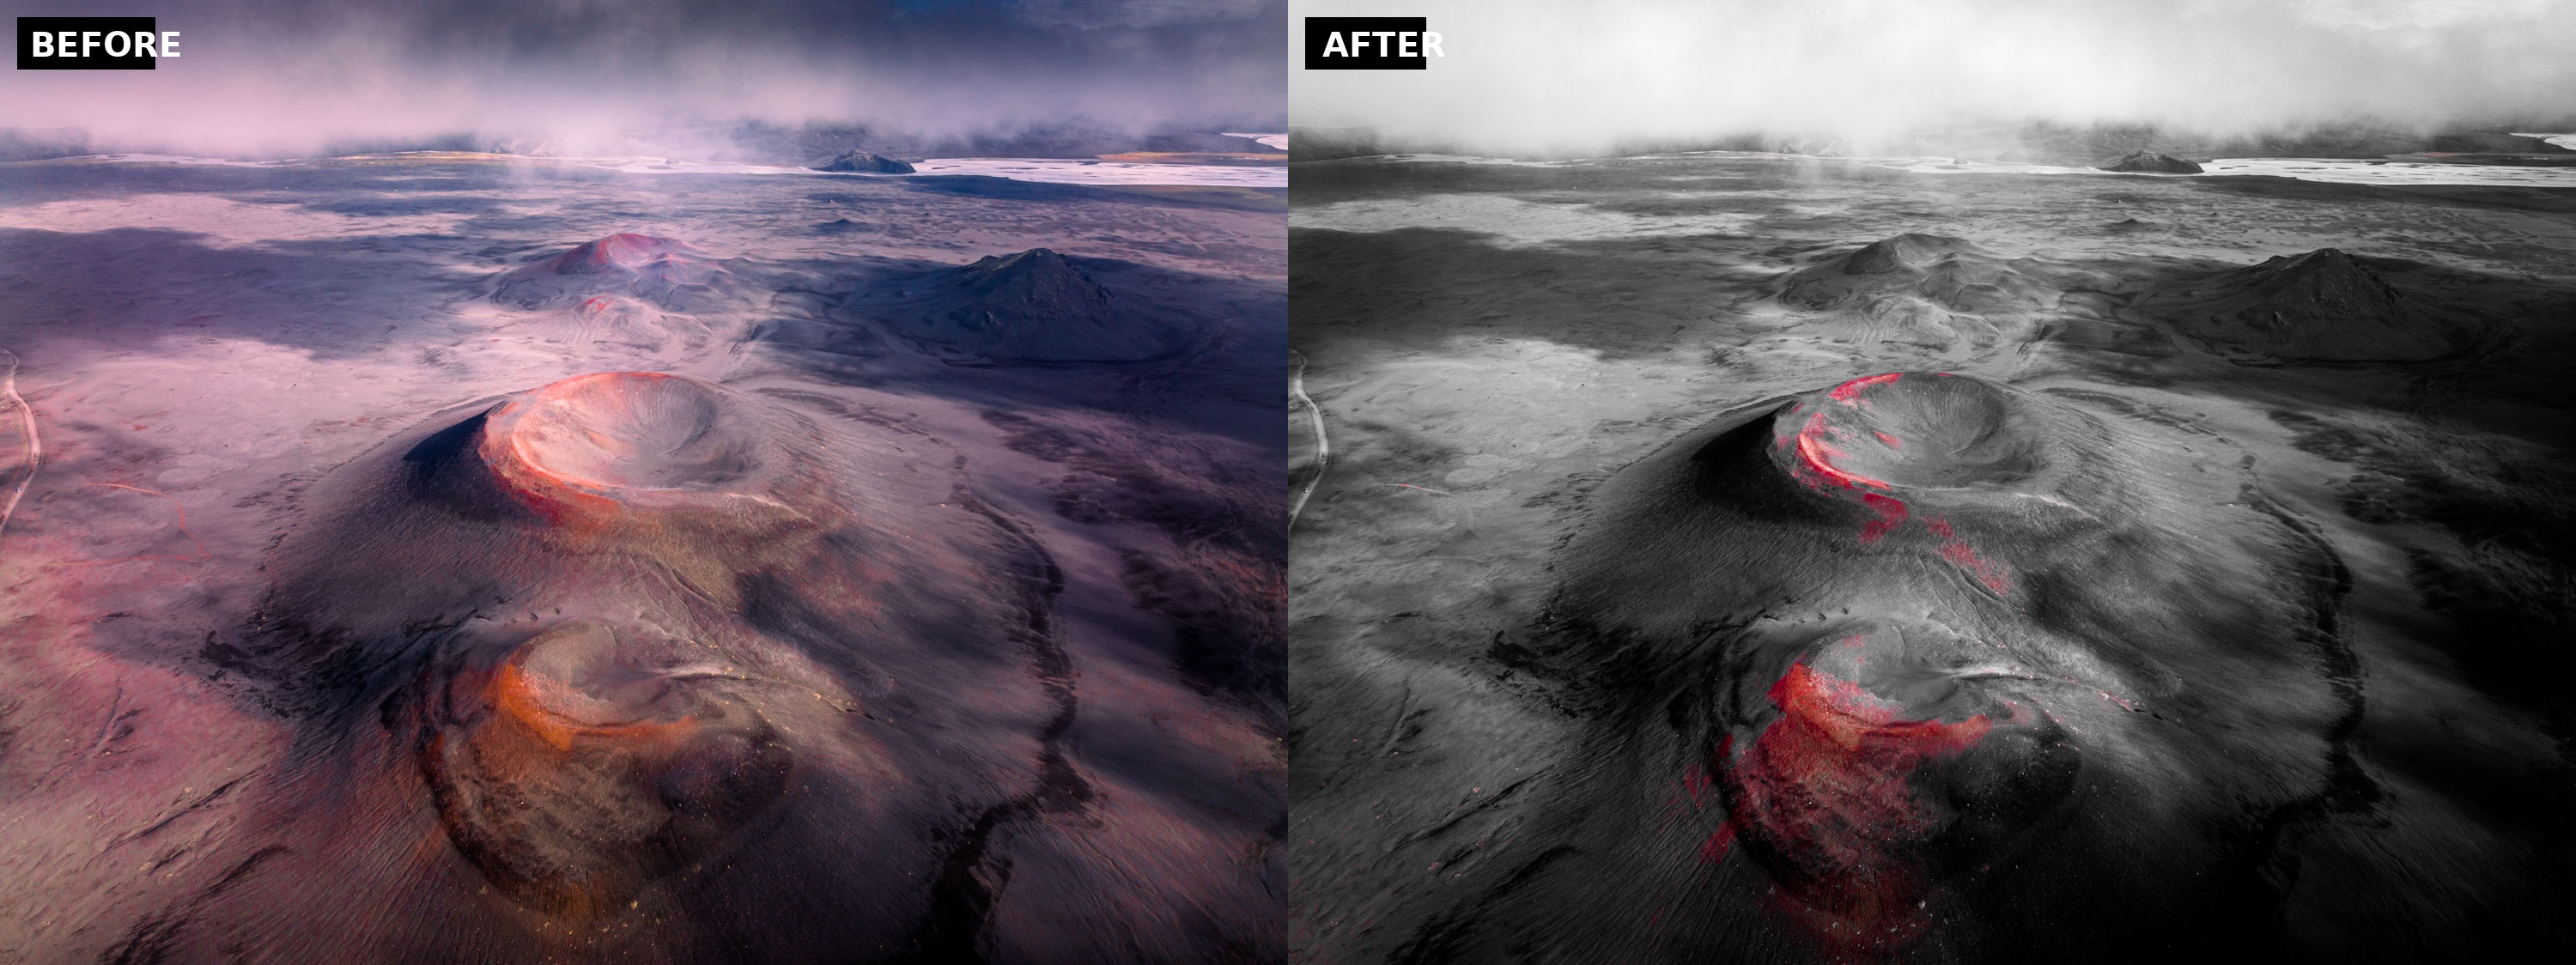
10. Master Dodge and Burn
If I could only keep one editing technique, this would be it.
Dodge and Burn allows you to:
- Add depth
- Increase contrast
- Direct the viewer's eye
- Create a stronger visual hierarchy
The secret is subtlety.
When done correctly, nobody notices the editing.
They simply notice that the image feels more powerful.
Ready to get 1 on 1 support to master your tools and take photos that have that WOW factor? Apply to become a certified Master of Photography here.
BEFORE
AFTER
Final Thoughts
The best Lightroom edits are rarely the most complicated.
Focus on composition, exposure, color control, and local adjustments.
Master these fundamentals and you'll improve your photography far faster than by chasing presets or complicated effects.
Get my FREE Lightroom preset here: https://bit.ly/AIPresets
Serge — Photoserge | Coaching photographers who are serious about getting to the next level.
Struggling To Get Good Results With Your Photos?
Apply now to finally master your tools and capture photos that have that 'WOW' factor using the Natural Drama Formula
