
How to Create a Selective Black and White Photo in Lightroom
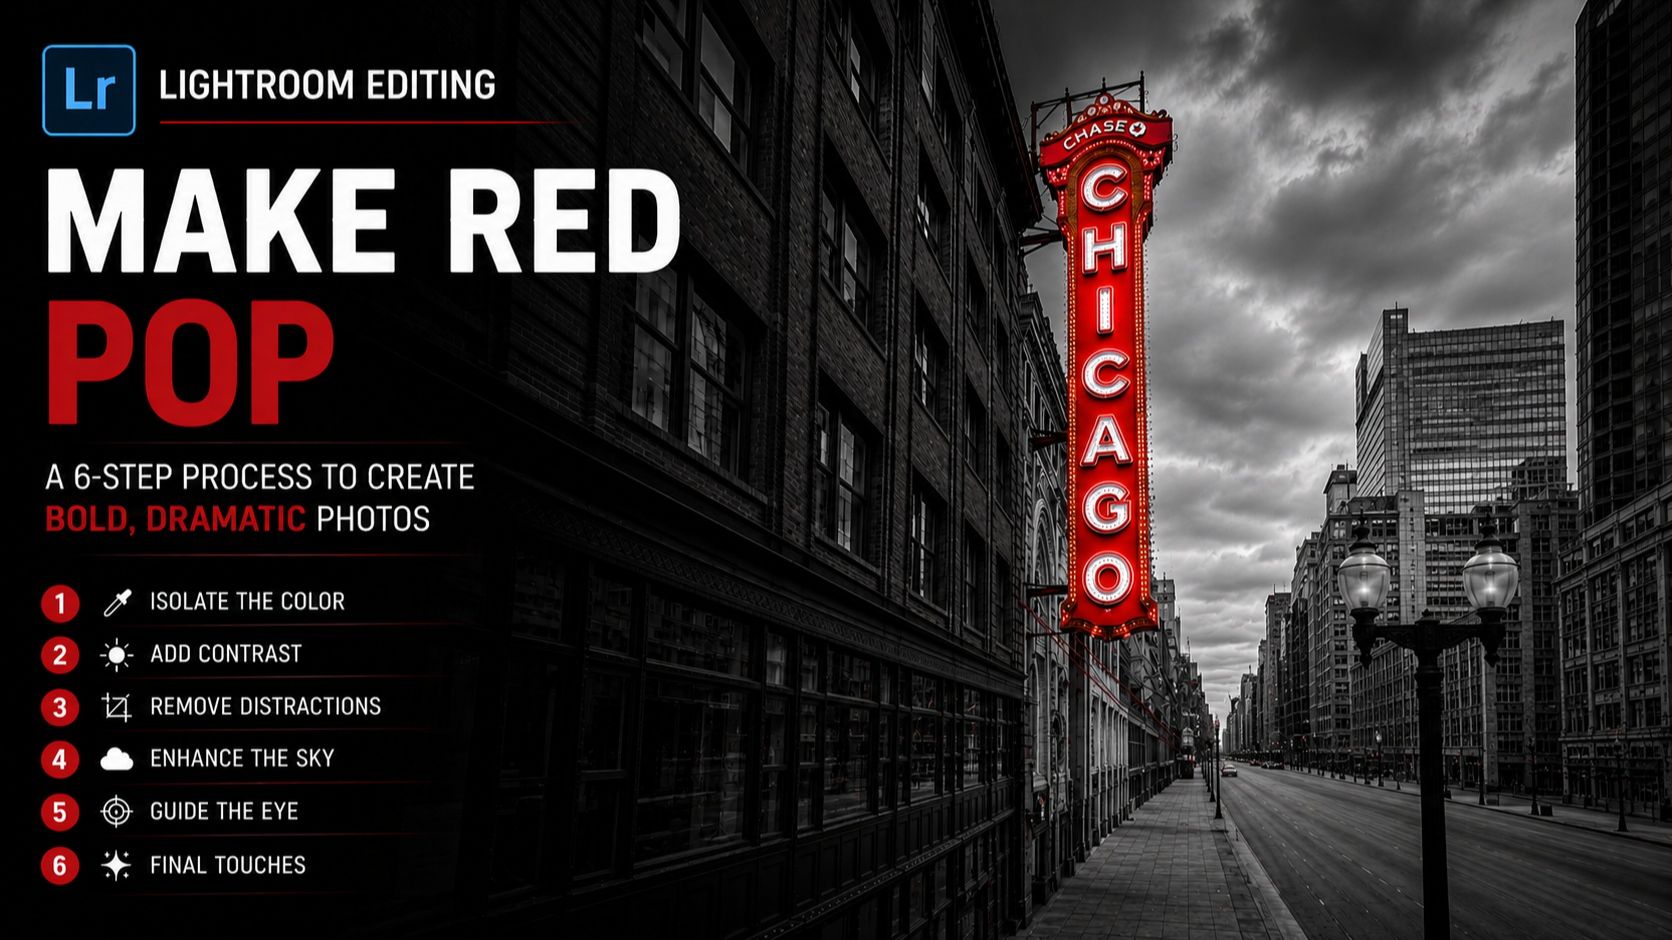
How to Create a Selective Black and White Photo in Lightroom
By Serge Ramelli
Want to make your subject stand out instantly?
Selective black and white photography does exactly that. By keeping one color and turning the rest of the image monochrome, you create a powerful focal point that grabs attention.
Why It Works
Our eyes naturally follow color. When only one color remains in a black and white photo, it becomes impossible to ignore.
That's why selective color is such an effective technique for simplifying a scene and creating stronger, more impactful images.
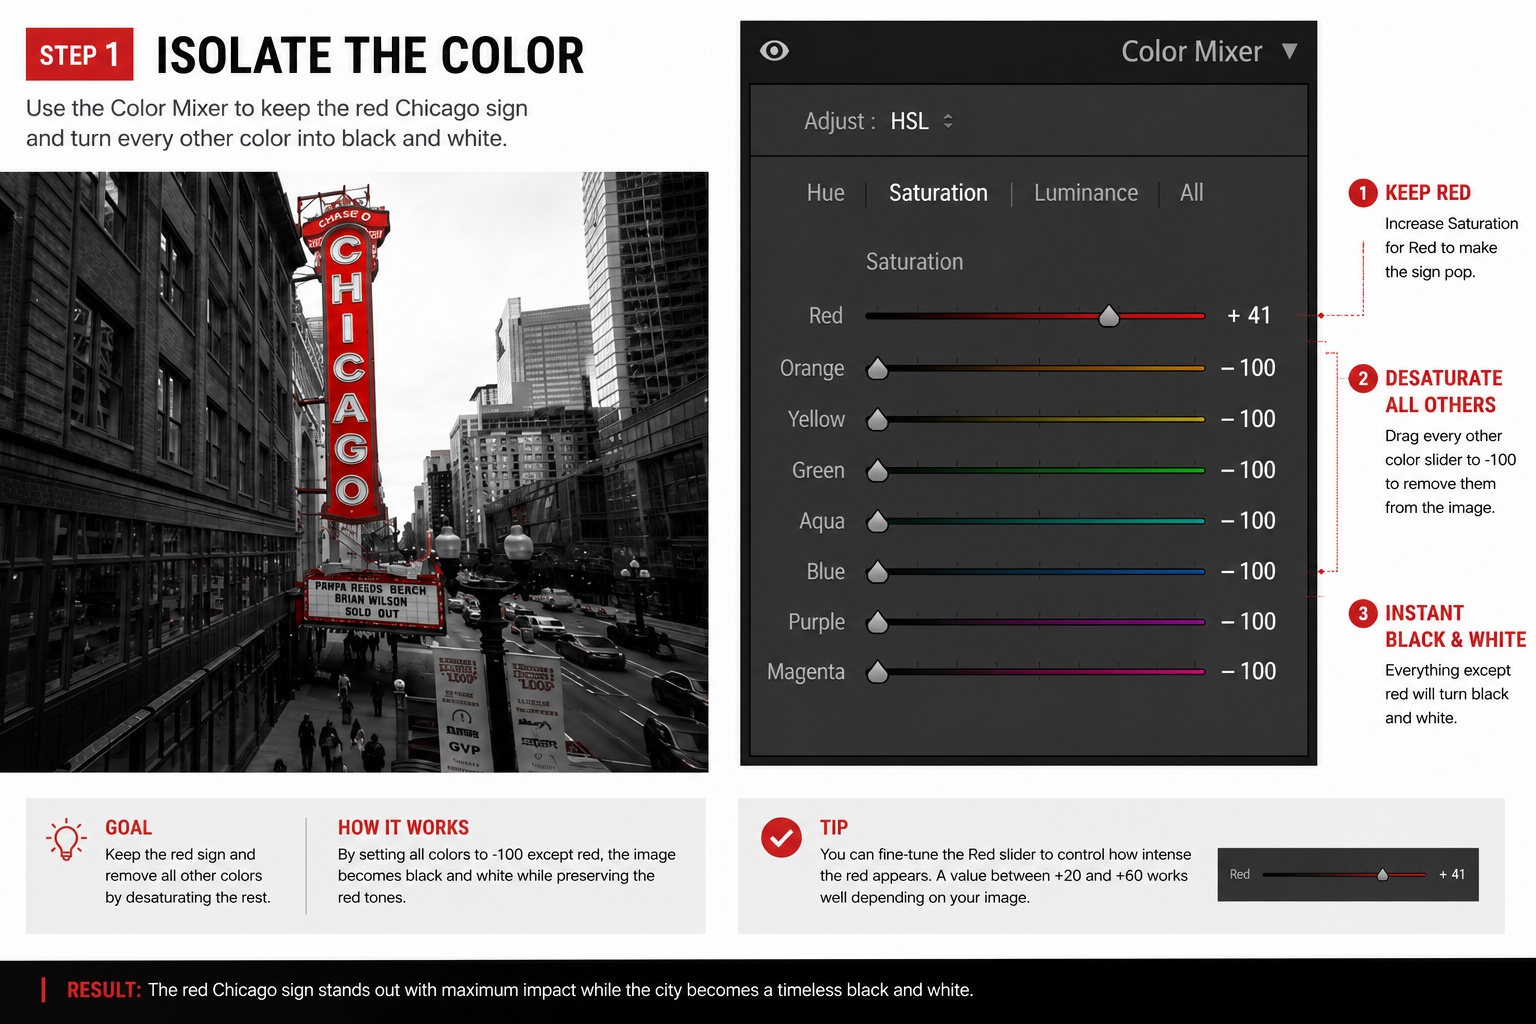
Step 1: Isolate the Main Color in Lightroom
Start by opening the Color Mixer panel in Lightroom.
Use the Targeted Adjustment Tool to select the dominant color in your image. Increase its saturation slightly, then reduce the saturation of all other colors.
The goal is simple: keep one color and turn everything else into black and white.
This works best when your image contains a strong visual element, such as a red sign, a colorful car, or bright clothing.
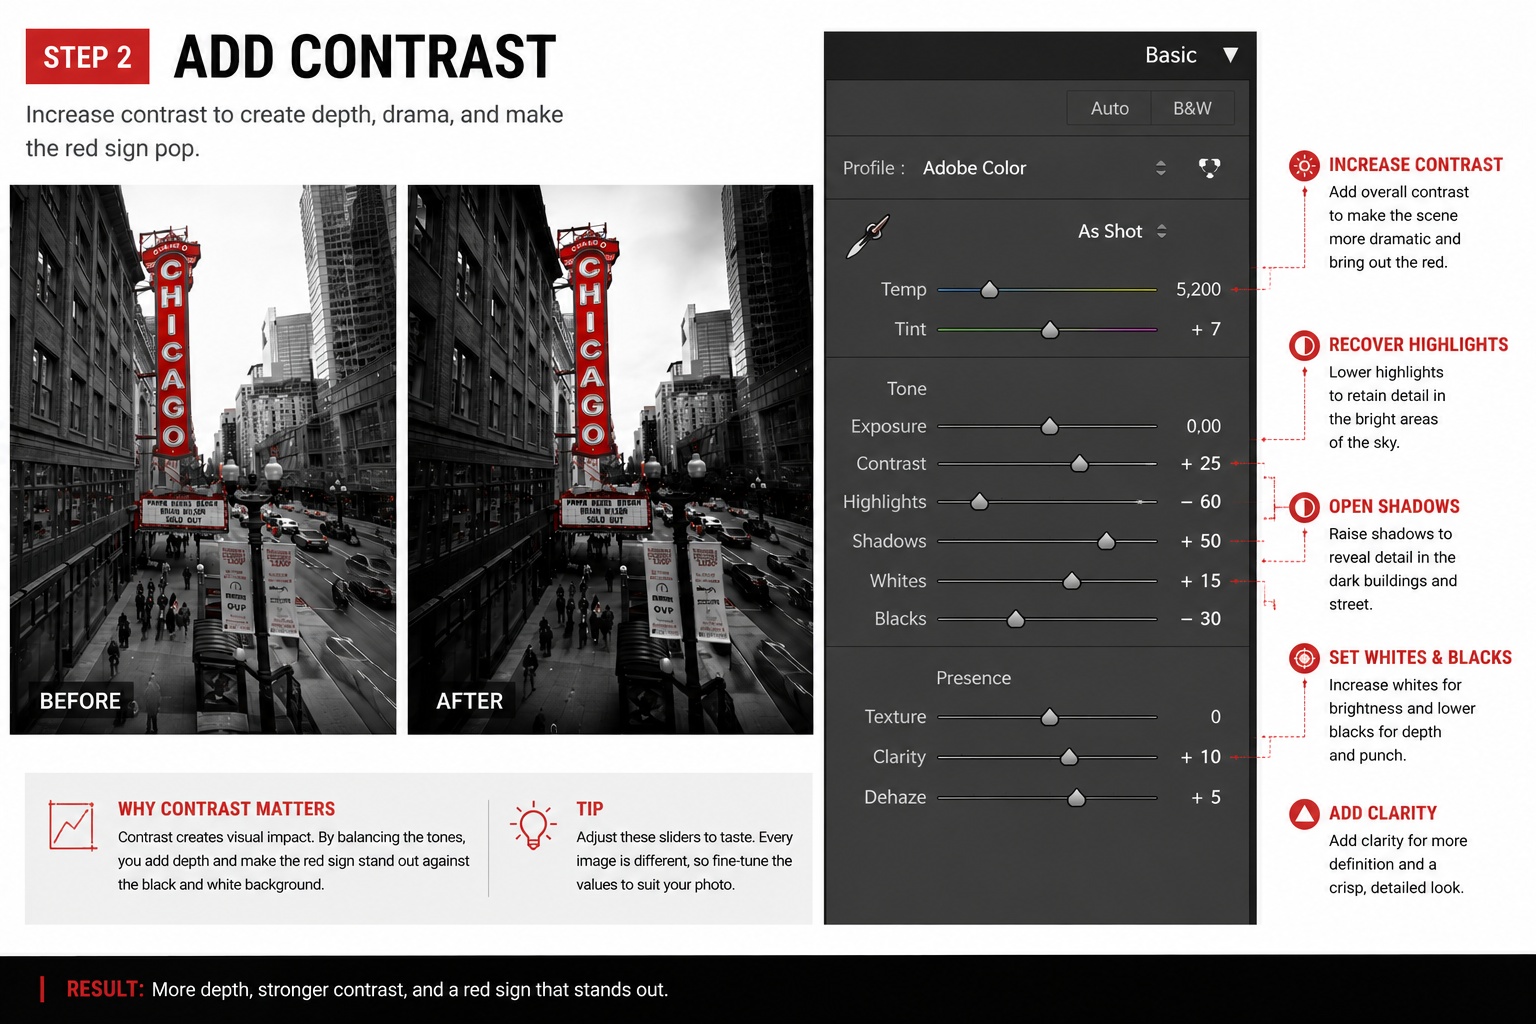
Step 2: Increase Contrast and Recover Detail
To create a dramatic black and white look:
- Raise the Shadows
- Lower the Highlights
- Deepen the Blacks
- Adjust the Whites
These adjustments help recover detail from the RAW file while adding depth and impact to the image.
A strong selective color effect usually relies on strong contrast.
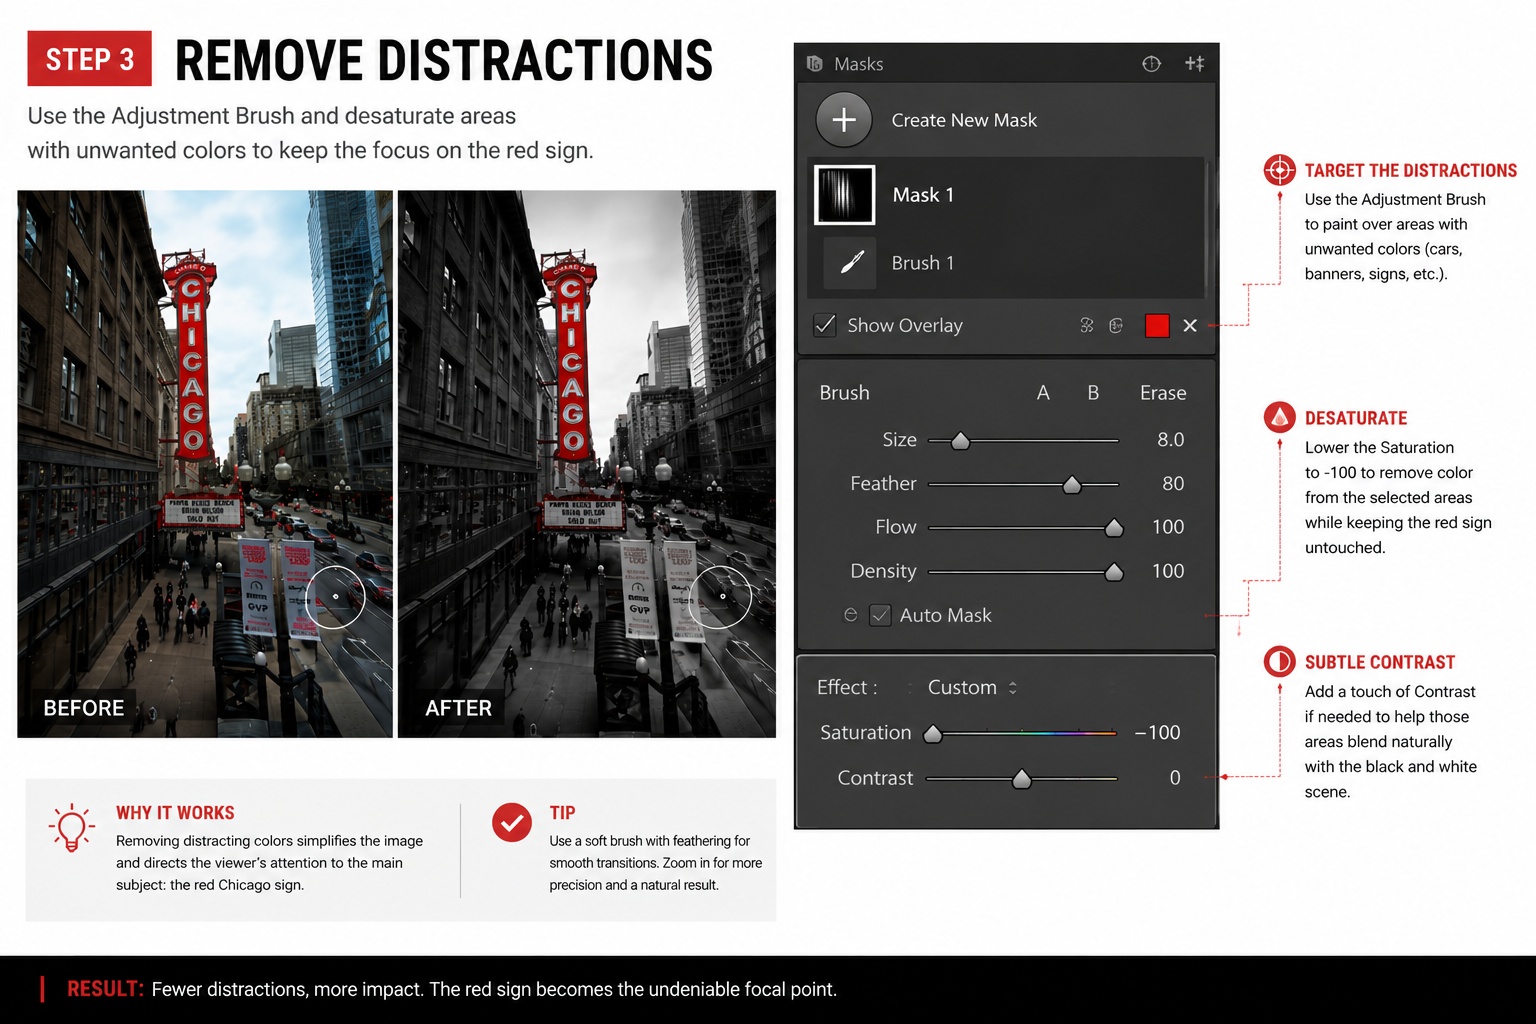
Step 3: Remove Unwanted Colors
Even after desaturating the image, some color may remain in small areas.
Use a local adjustment brush and reduce saturation to remove any distracting colors that compete with your main subject.
The cleaner the image, the stronger the visual impact.
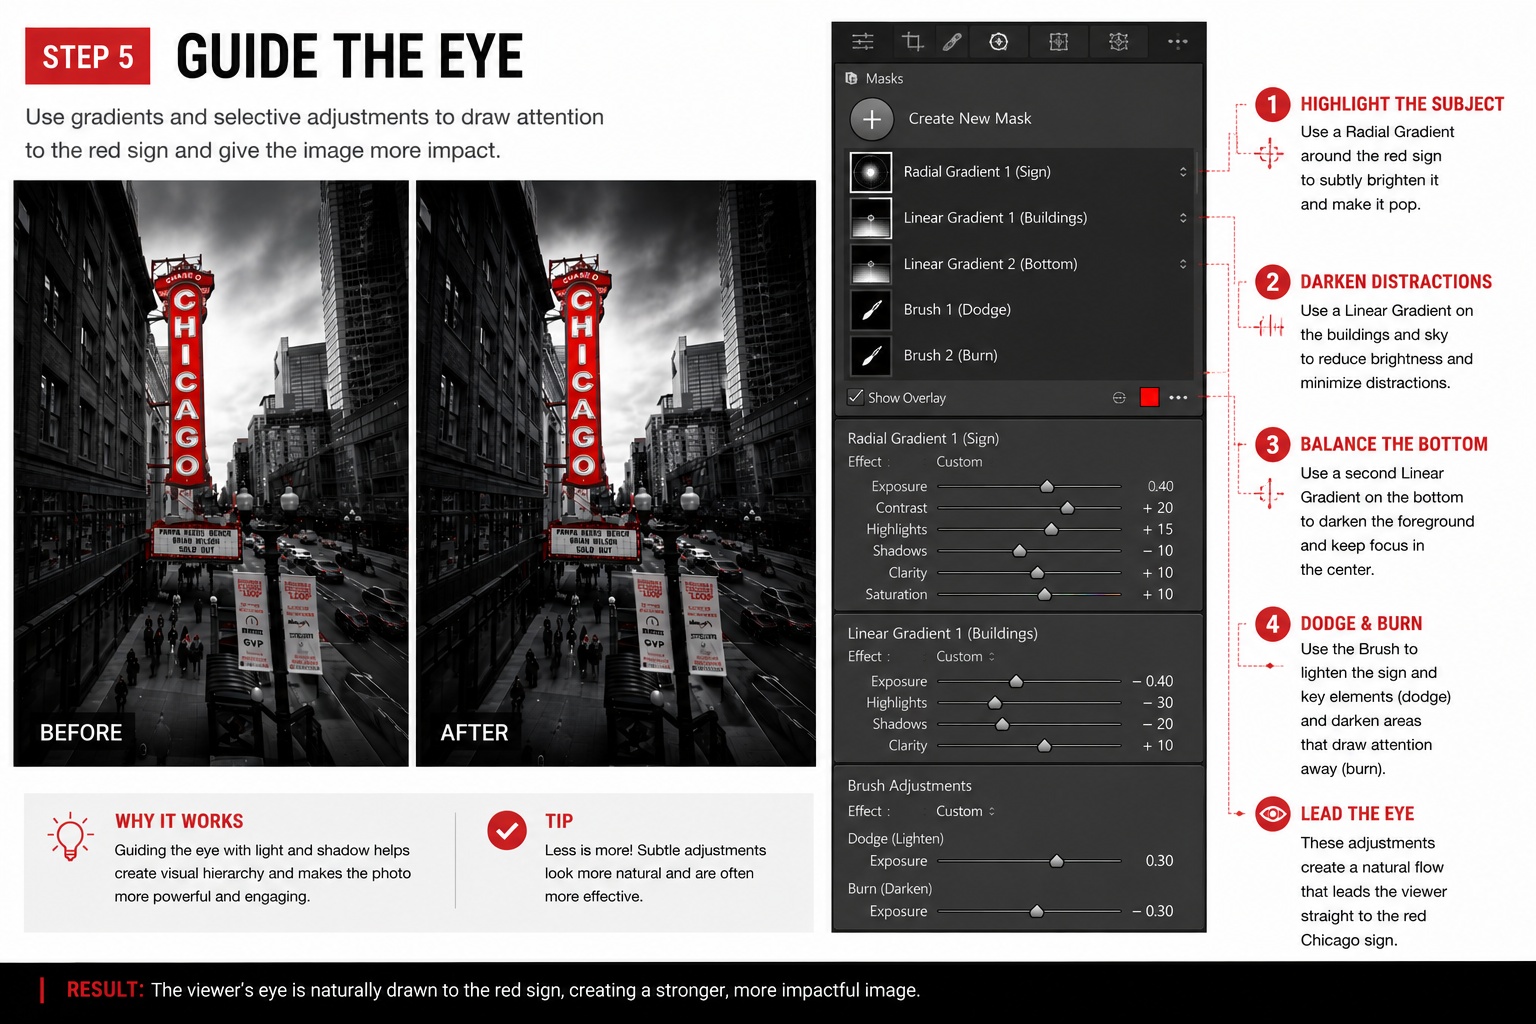
Step 4: Guide the Viewer's Eye
Professional photographers don't just edit photos—they control where viewers look.
Use gradients and local brushes to:
- Darken distracting areas
- Brighten important details
- Create depth throughout the frame
These subtle adjustments naturally lead the viewer toward the subject.
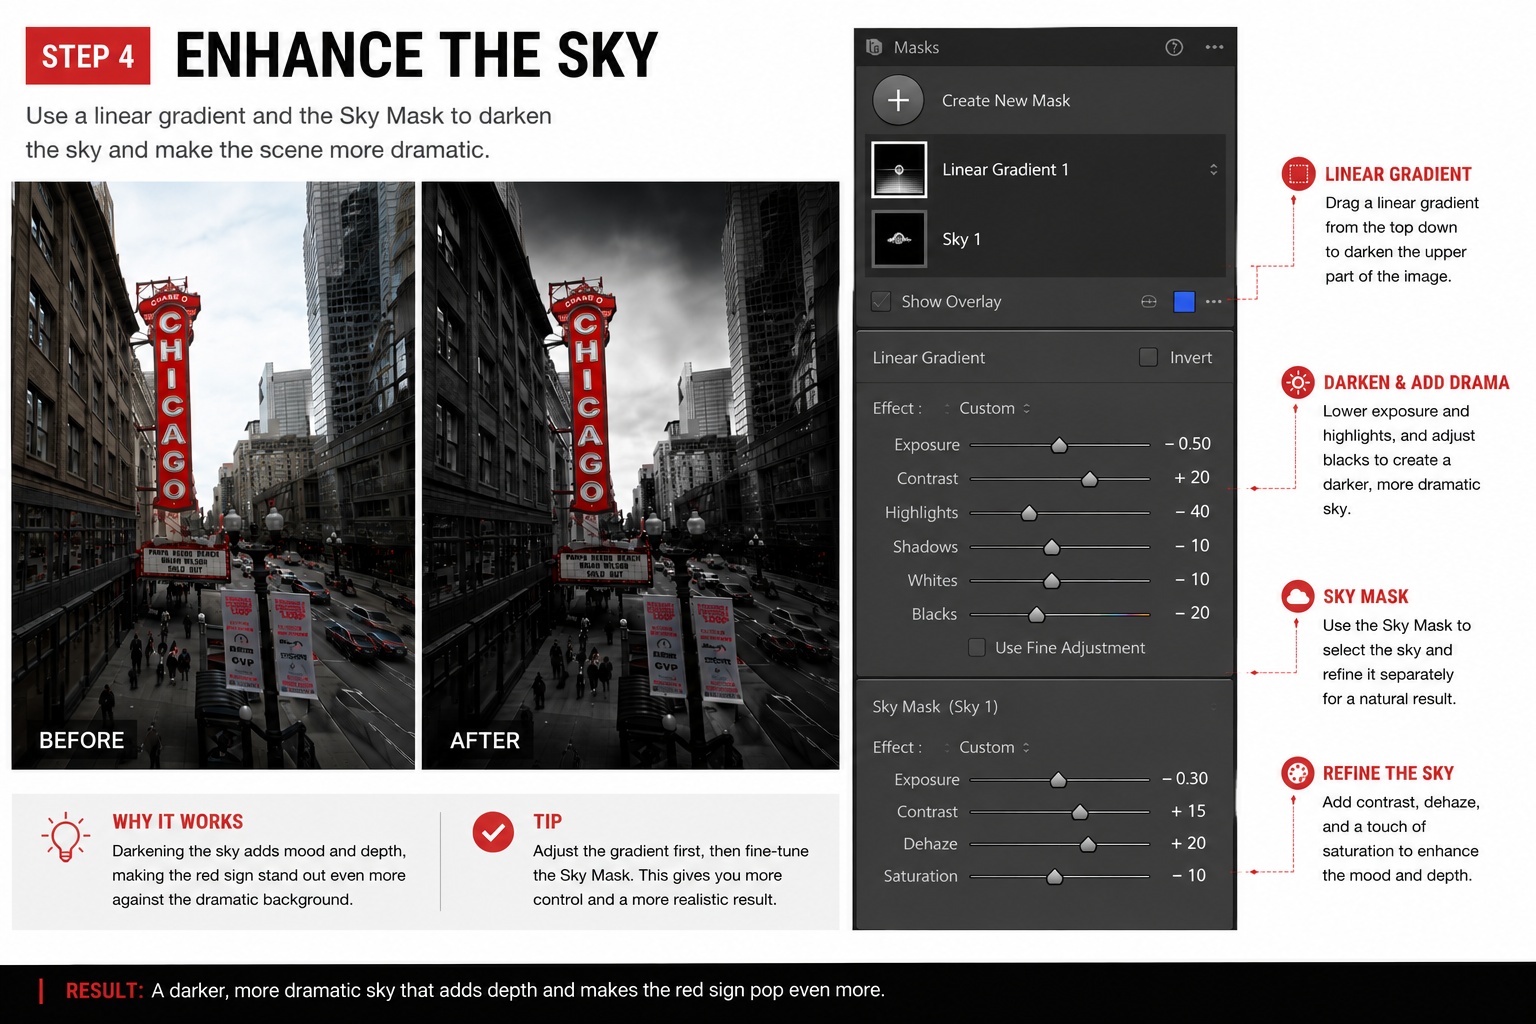
Step 5: Enhance the Sky with Lightroom Masks
A dramatic sky can make a huge difference.
Apply a linear gradient to darken the sky, then use Lightroom's AI Sky Mask to limit the adjustment to the sky only.
This technique adds mood and contrast without affecting buildings or other elements in the scene.
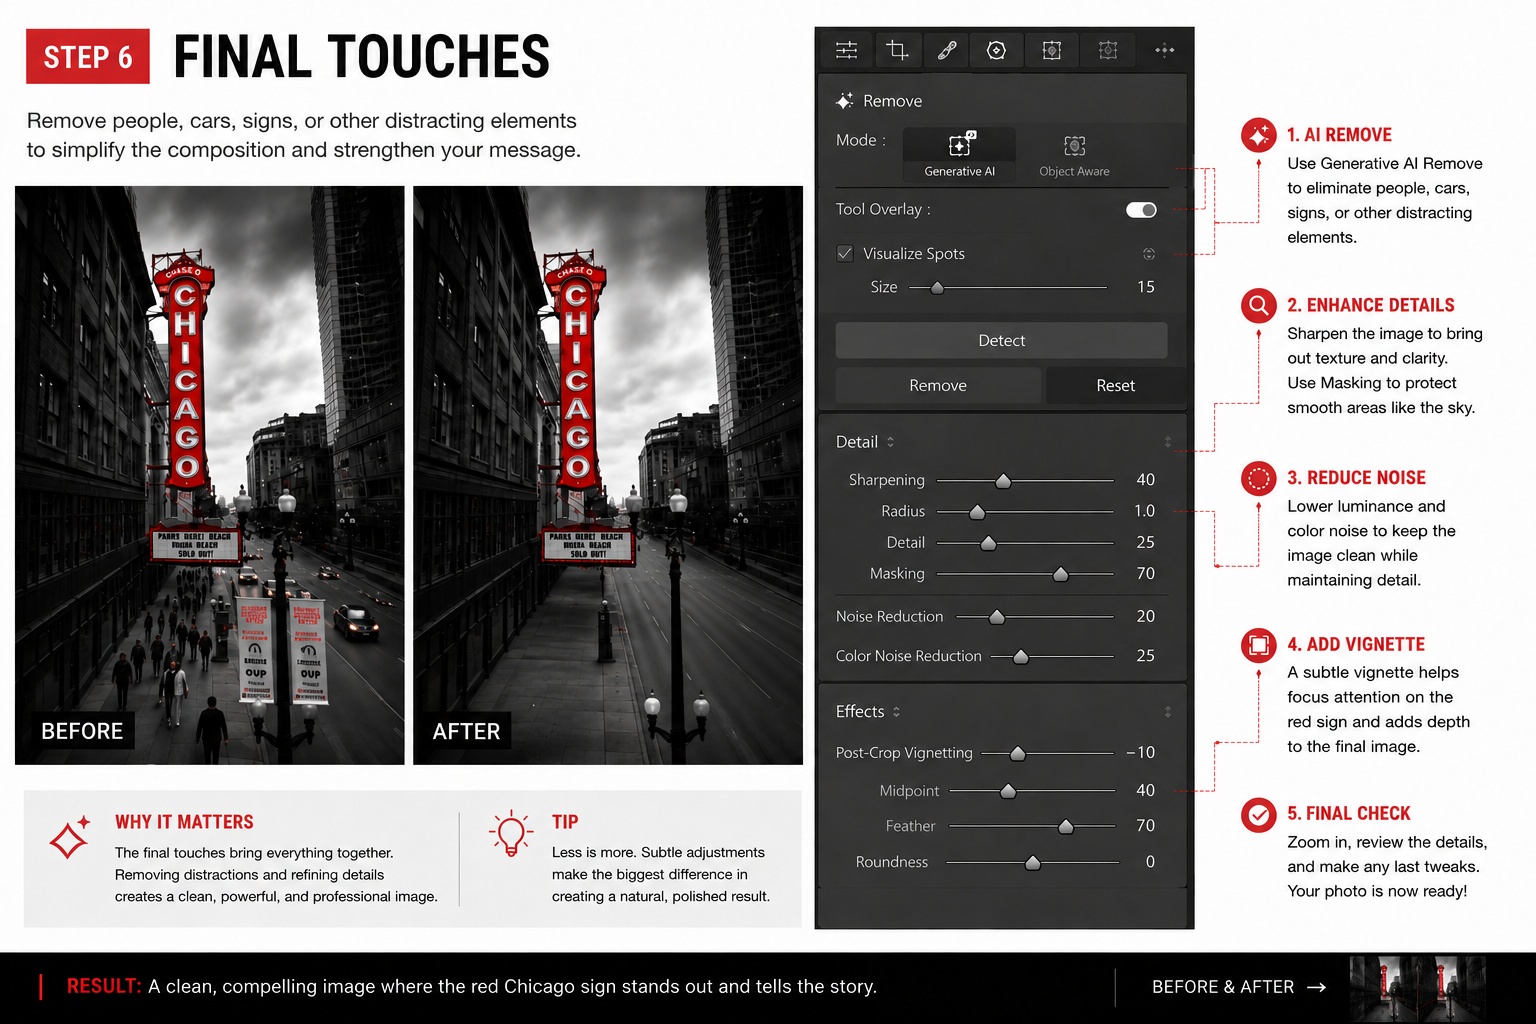
Step 6: Remove Distractions Using AI
Lightroom's AI tools make cleanup easier than ever.
Remove people, cars, signs, or other distracting elements to simplify the composition and strengthen your message.
Every element left in the frame should support the story you're trying to tell.
Before and After: The Power of Selective Color
The biggest transformation often comes from simplification.
By combining selective color, strong contrast, local adjustments, and AI masking, you can turn an ordinary photo into an image that immediately captures attention.
![]()
Final Thoughts
Selective black and white photography is more than just a creative effect. It's a powerful storytelling technique that helps viewers focus on what matters most.
The next time you're editing in Lightroom, try isolating a single color and removing everything that distracts from it.
Sometimes, one color is all you need to create a memorable photograph.
Get my FREE Lightroom preset here: https://bit.ly/AIPresets
Serge — Photoserge | Coaching photographers who are serious about getting to the next level.
Struggling To Get Good Results With Your Photos?
Apply now to finally master your tools and capture photos that have that 'WOW' factor using the Natural Drama Formula
