
How to Edit Leica Photos in Lightroom (My Full Q3, M11 & SL Workflow)
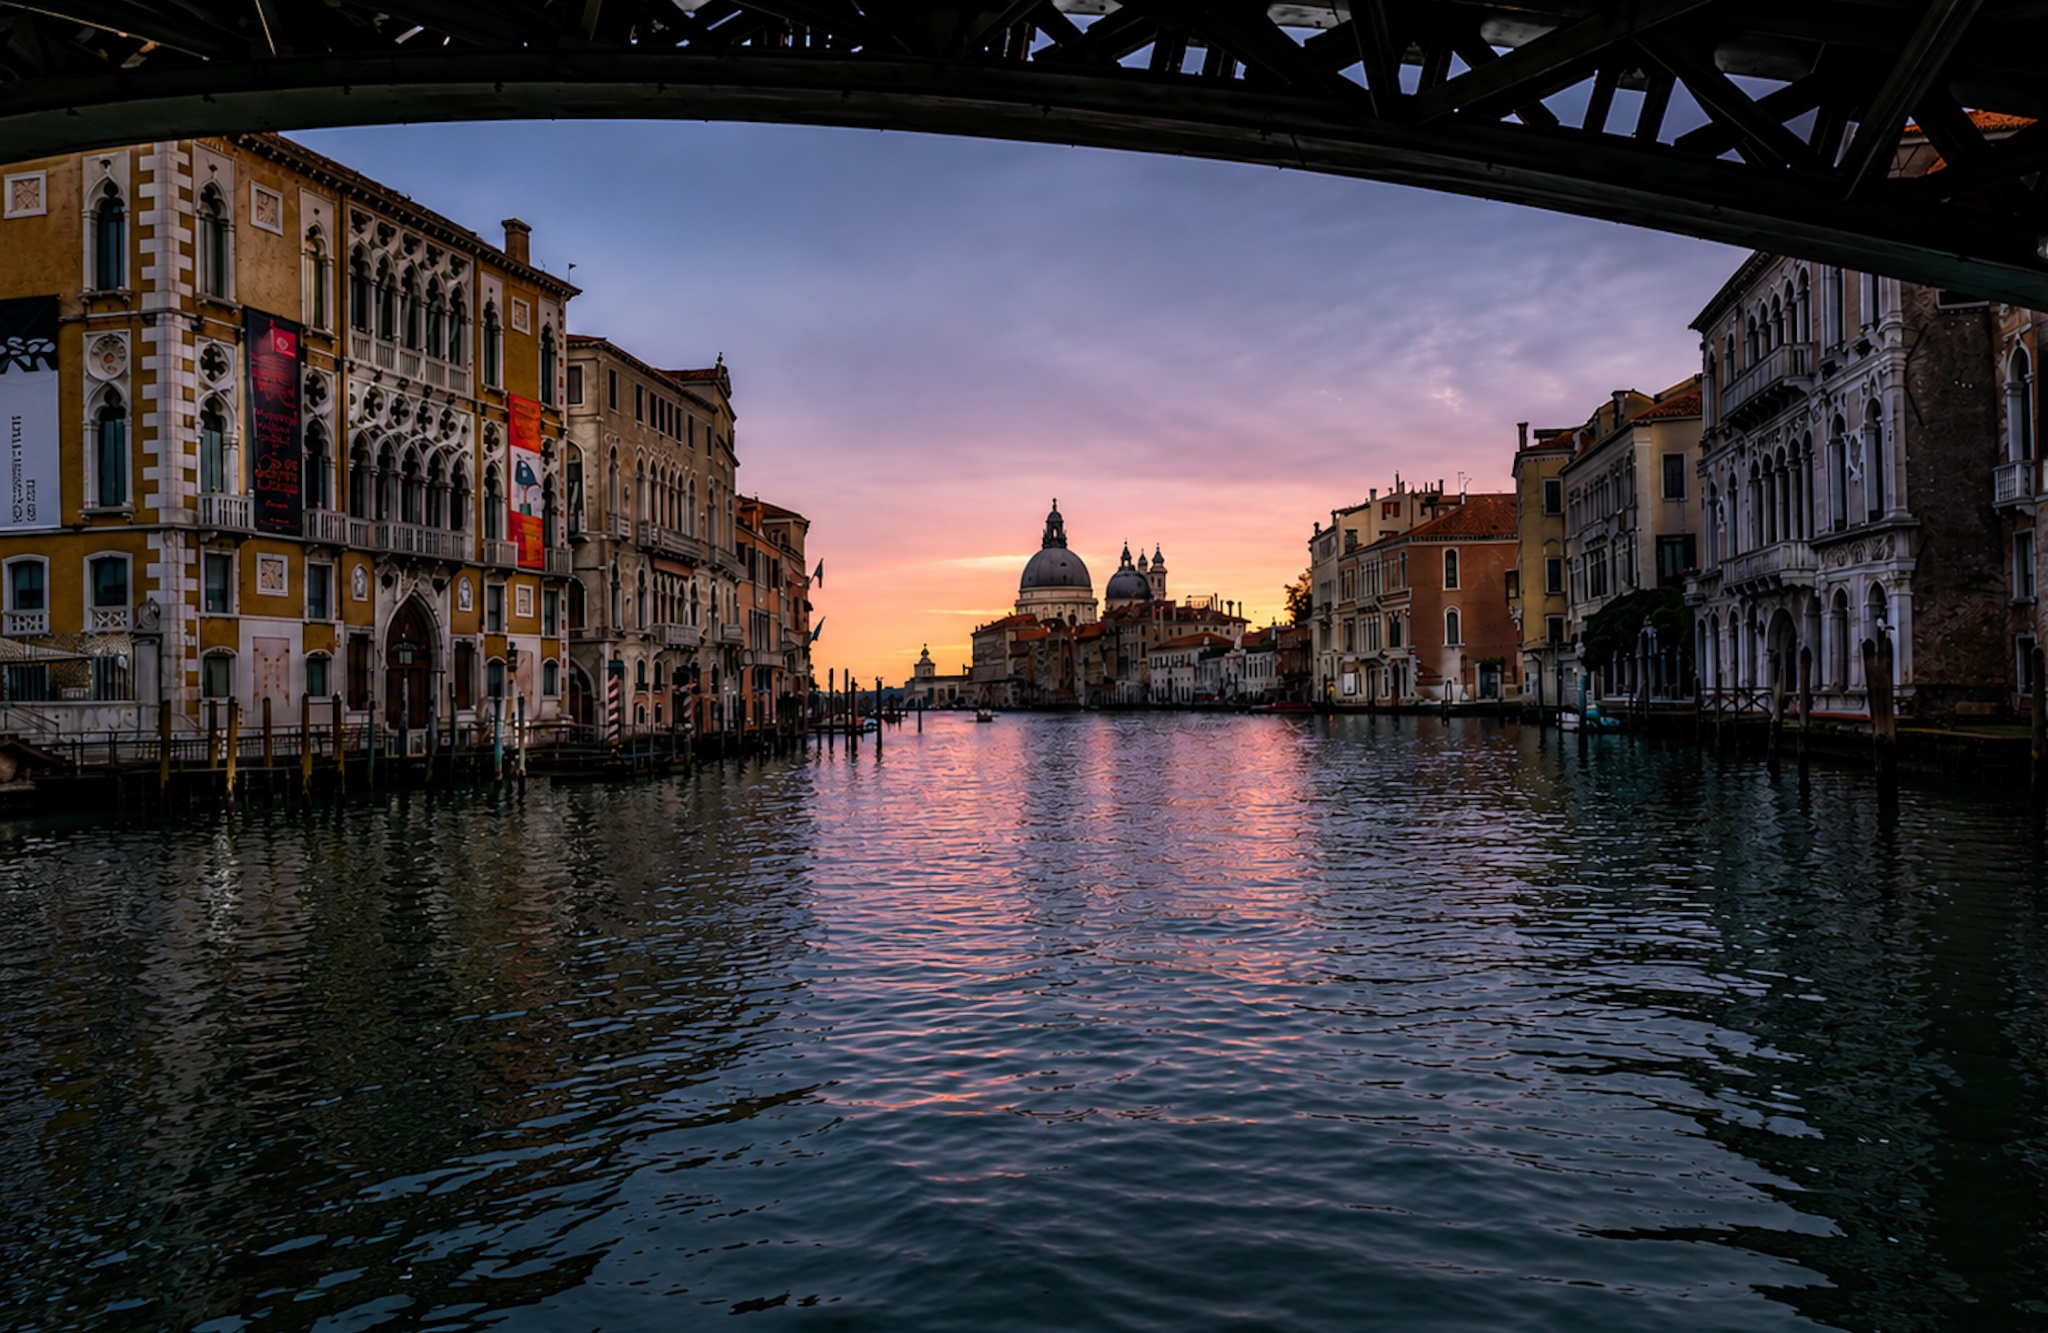
I fell in love with the Leica Q3 a couple of years ago, specifically with the RAW file it produces and how little work it takes to turn that file into something gallery-ready. This is my complete Lightroom workflow for Leica files: the same approach works across the Q3, the M11, the SL, and the Q2, since Leica's color science is consistent across the lineup.
Everything below is a real photo from a real shoot: a vaporetto ride in Venice, a building in Copenhagen, and a handheld session in Tivoli Gardens with no tripod allowed.
Why Leica Files Don't Need You to Stop Down for Sharpness
I see this constantly with students in my coaching program: they shoot at f/9, f/10, f/11 because they want everything sharp, then have to push the ISO to compensate. On a Leica, you don't need to.
The Venice shot in this workflow was taken at ISO 100, f/3.2, 1/25s, handheld on a moving vaporetto, and it's tack sharp edge to edge, sharp enough to read fine text in the background. That's what lets me shoot wide open late into blue hour without touching my ISO.
My Go-To Leica Develop Routine
I shoot slightly underexposed, almost always at ISO 100, and every file gets the same starting routine:
- Open the shadows all the way. It will look flat and strange at this point. That's expected.
- Bring the highlights all the way down.
- Hold Option (Alt on Windows) and drag the Blacks slider until you see about 3-4% pure black appear (shown as a solid color overlay, usually green or yellow, meaning that pixel has zero information left).
- Hold Option again and drag the Whites slider to reveal the photo, watching for where pure white starts to clip.
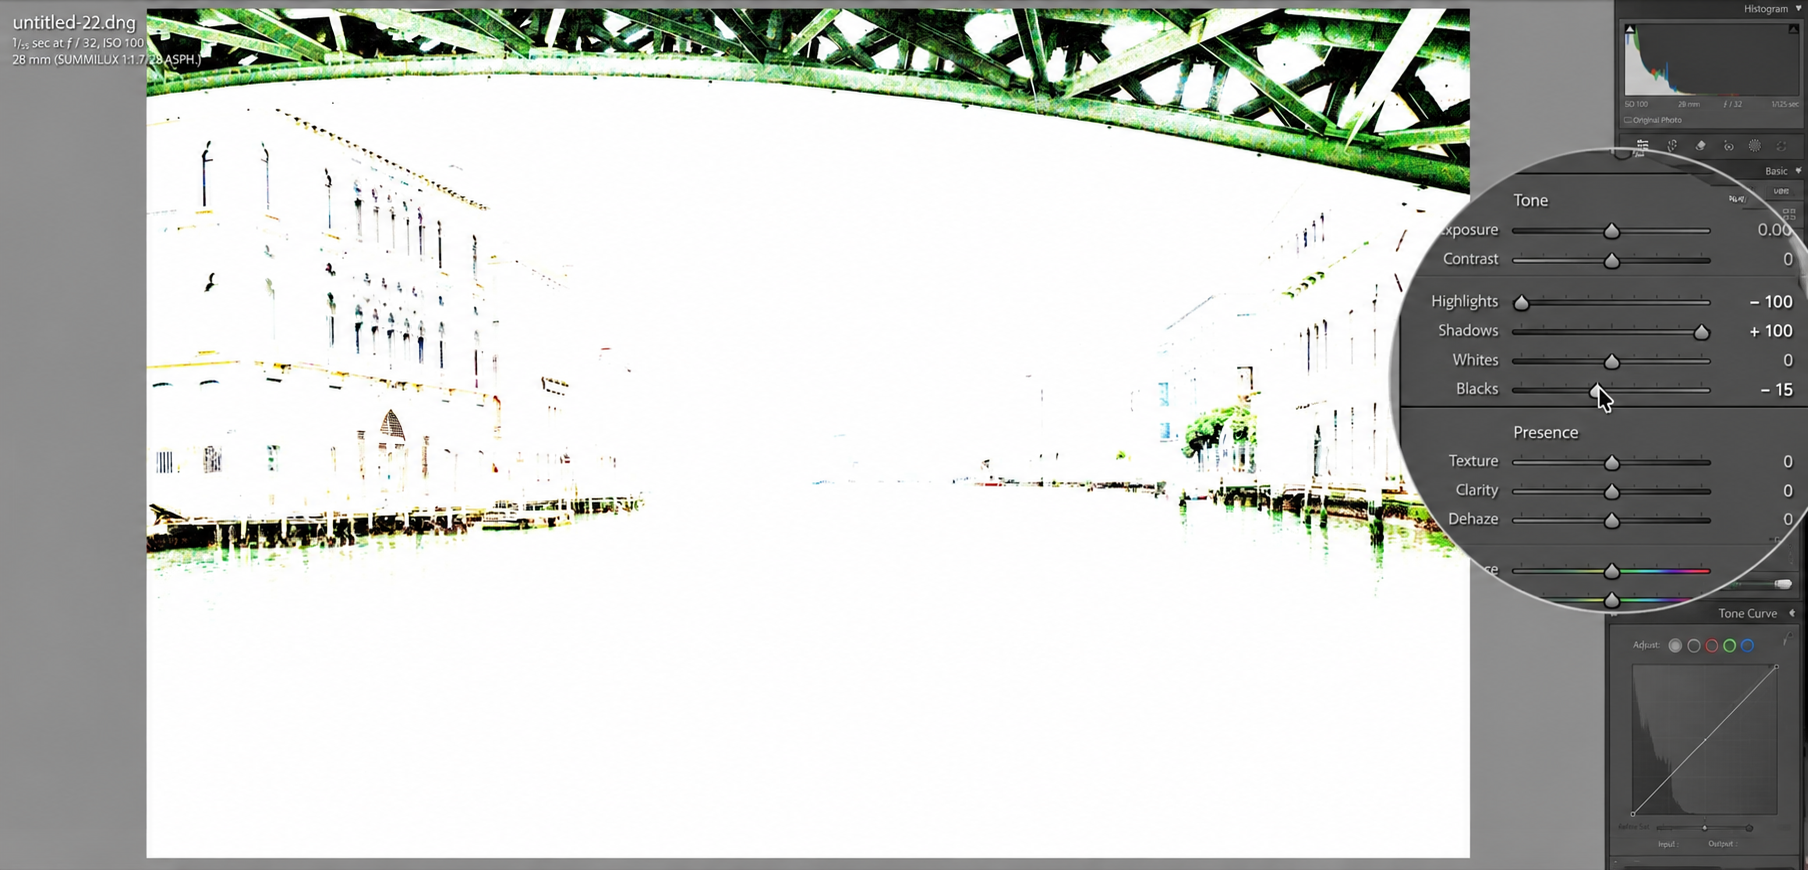
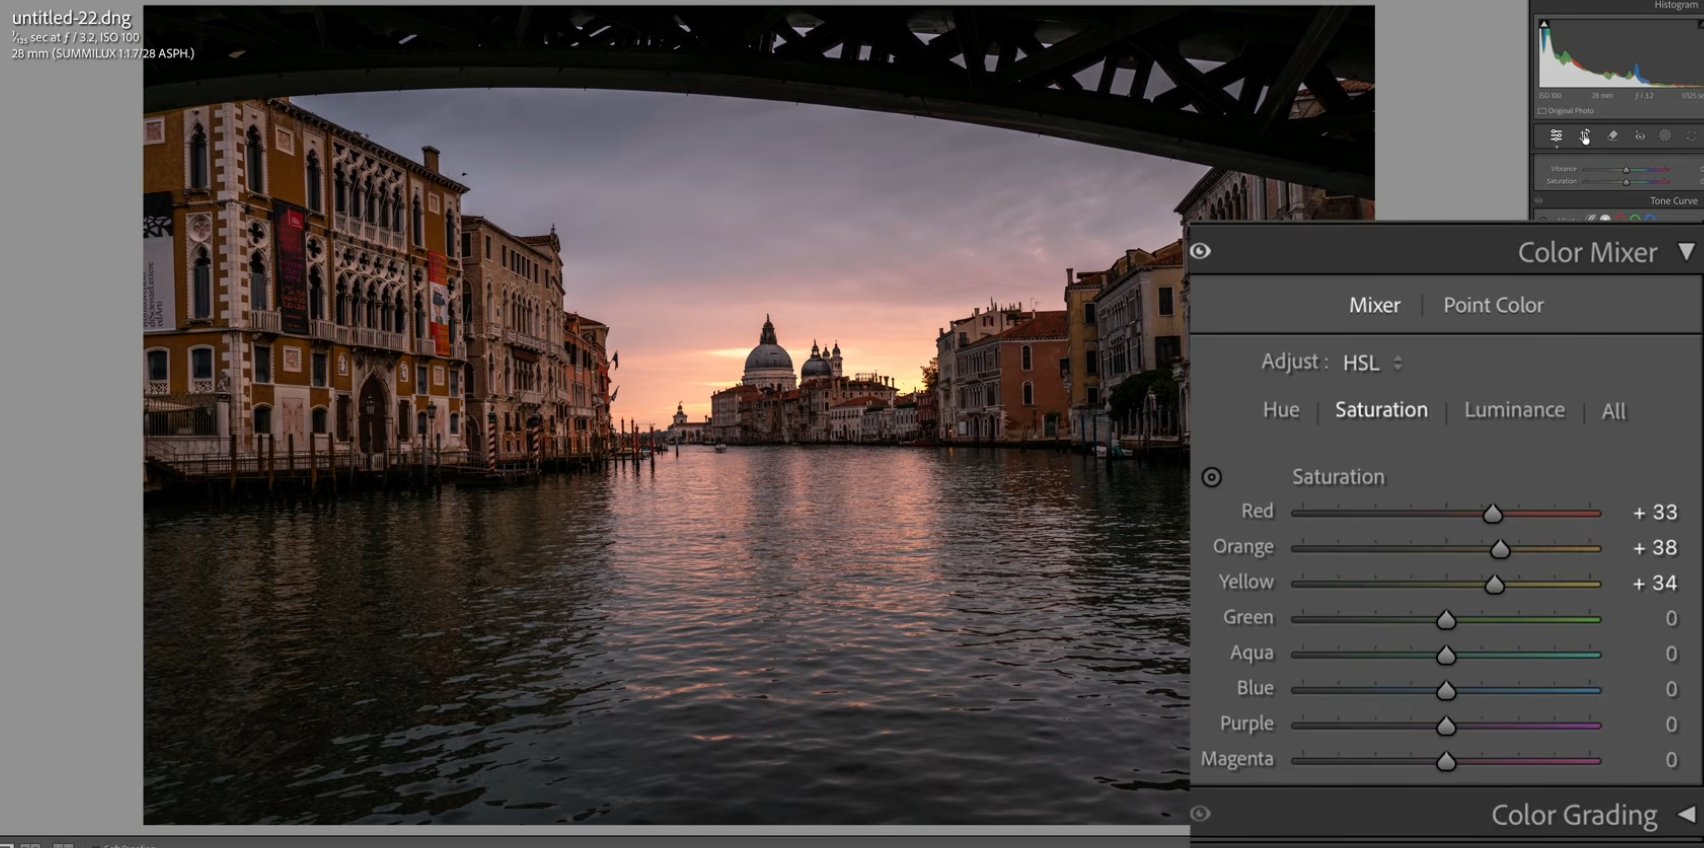
That combination, crush the black point, then reveal with the white point, is where most of a Leica file's contrast and punch comes from, before you've touched color at all.
Getting Leica's Colors Right
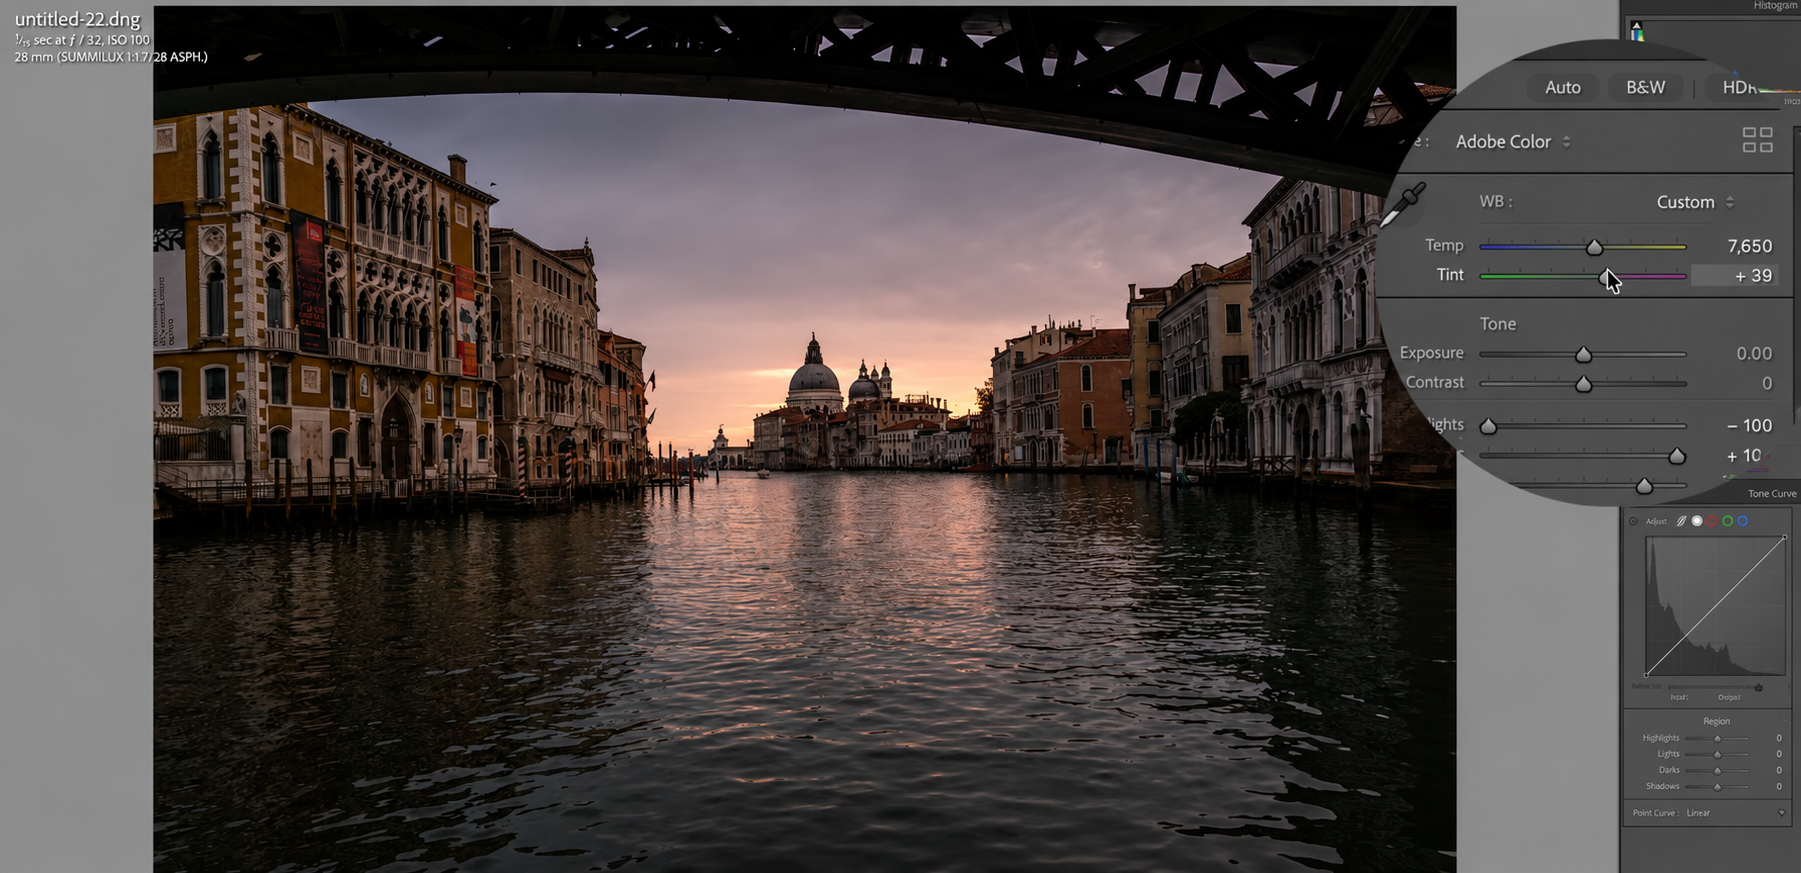
Leica white balance often needs correcting, and where you push it depends on the mood:
- For a warm sunset feel (like the Venice shot), I set white balance to Shade and push magenta and yellow noticeably strong, more than feels natural at first.
- For cooler, blue-hour, or tungsten-heavy scenes, I go to Daylight instead and add just a touch of magenta, enough to cancel out any green cast without looking purple.
If white balance alone isn't giving you enough color, open the Color Mixer and add saturation to red, orange, and yellow. On the Venice file this pushed the warmth further without blowing out the whole image.
A Dramatic Sky Trick That Still Looks Natural
Once the base color is right, straighten the horizon (Auto works fine for this) and crop to 16:9. Then, for a sunset or sunrise sky that still feels a little flat:
- Add a radial gradient centered on the sun, with Feather at 100%. Skip this and you'll get a hard, unnatural-looking ring instead of a soft glow.
- Push yellow and magenta into that gradient.
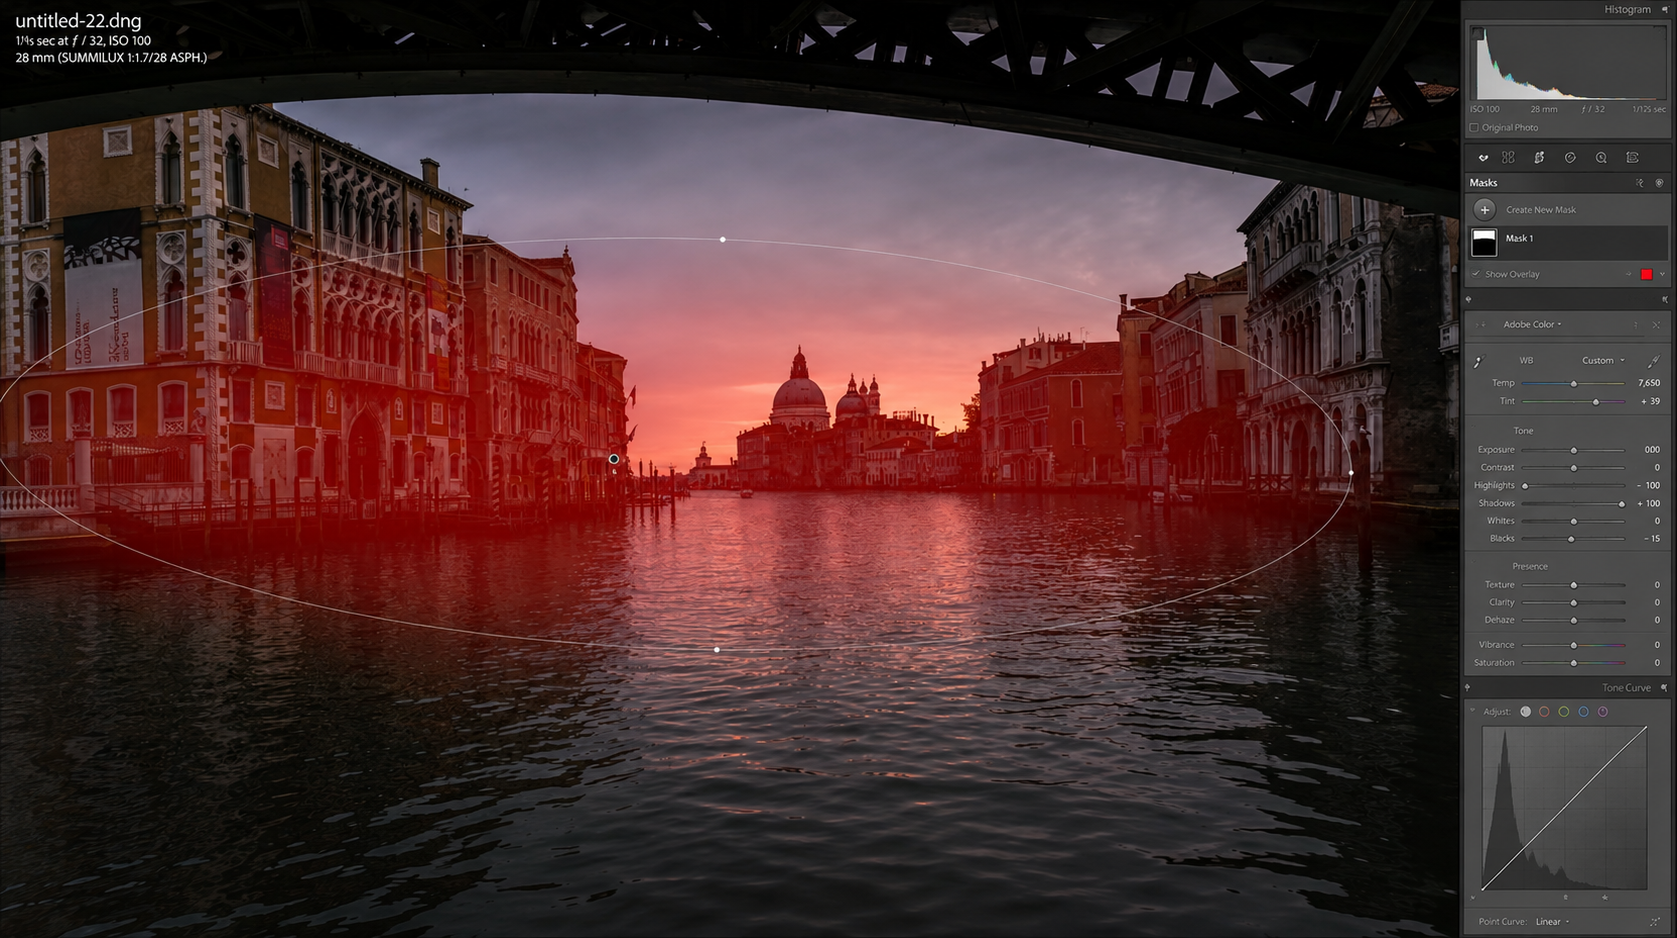
The gradient will spill onto everything, buildings, water, not just the sky. Open the mask's three-dot menu and choose Intersect Mask with Sky. This confines the effect to the sky Lightroom already detected and pulls it off everything below the horizon, in real time.
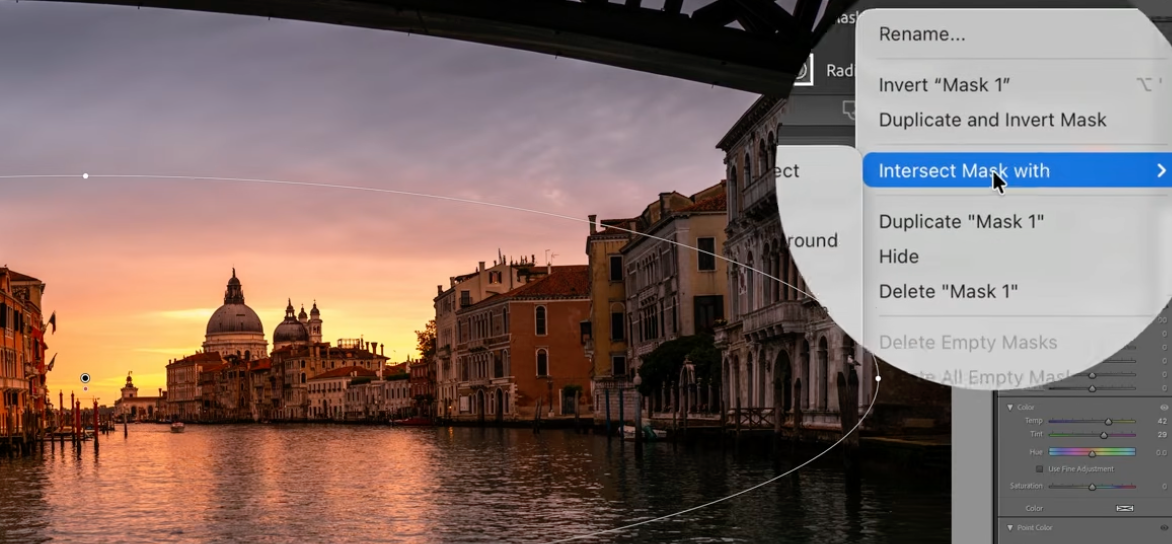
I use this same trick constantly; I cover it in more depth in my guide to Lightroom's AI masking tools. Here's the Venice file, finished:
A Second Example: Copenhagen at Night
The same routine looks a little different applied to a night cityscape. I'm currently working on a Copenhagen coffee table book, and this building, lit up against the deep sky, needed the same develop pass: shadows opened, highlights brought down, then the black point crushed with Option held down.
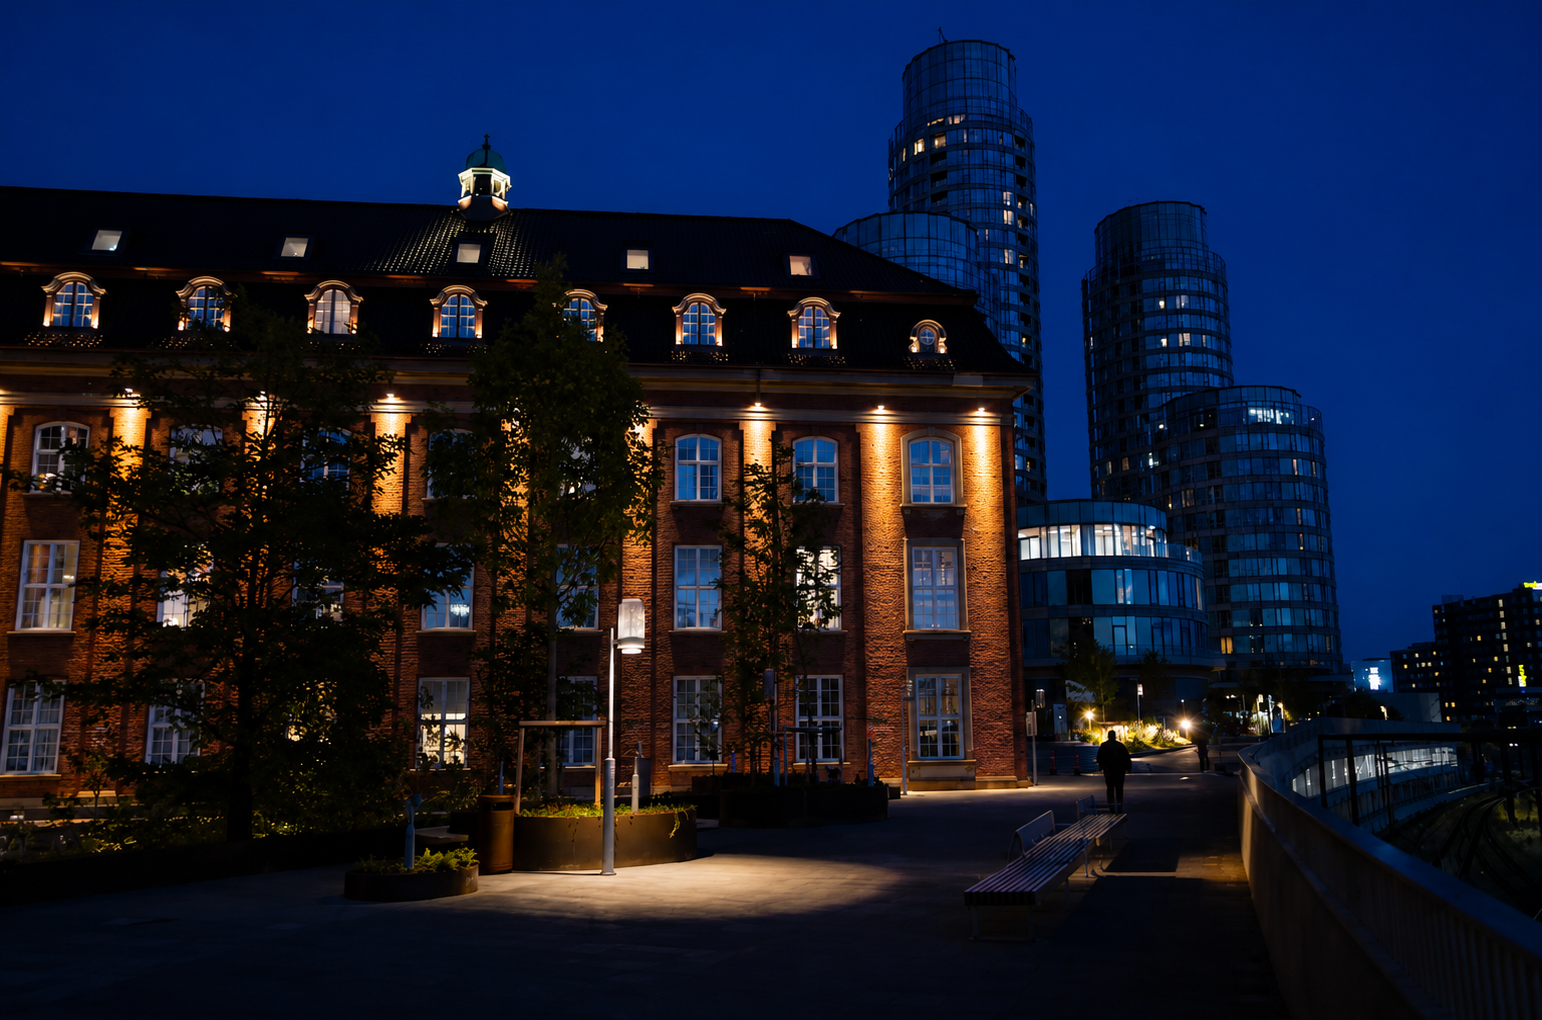
From there, holding Option again to reveal the white point, then over to white balance. Copenhagen's tungsten street lighting carries a lot of green, so I went to Daylight and added a little magenta, just enough to cancel the green out without tipping into purple.
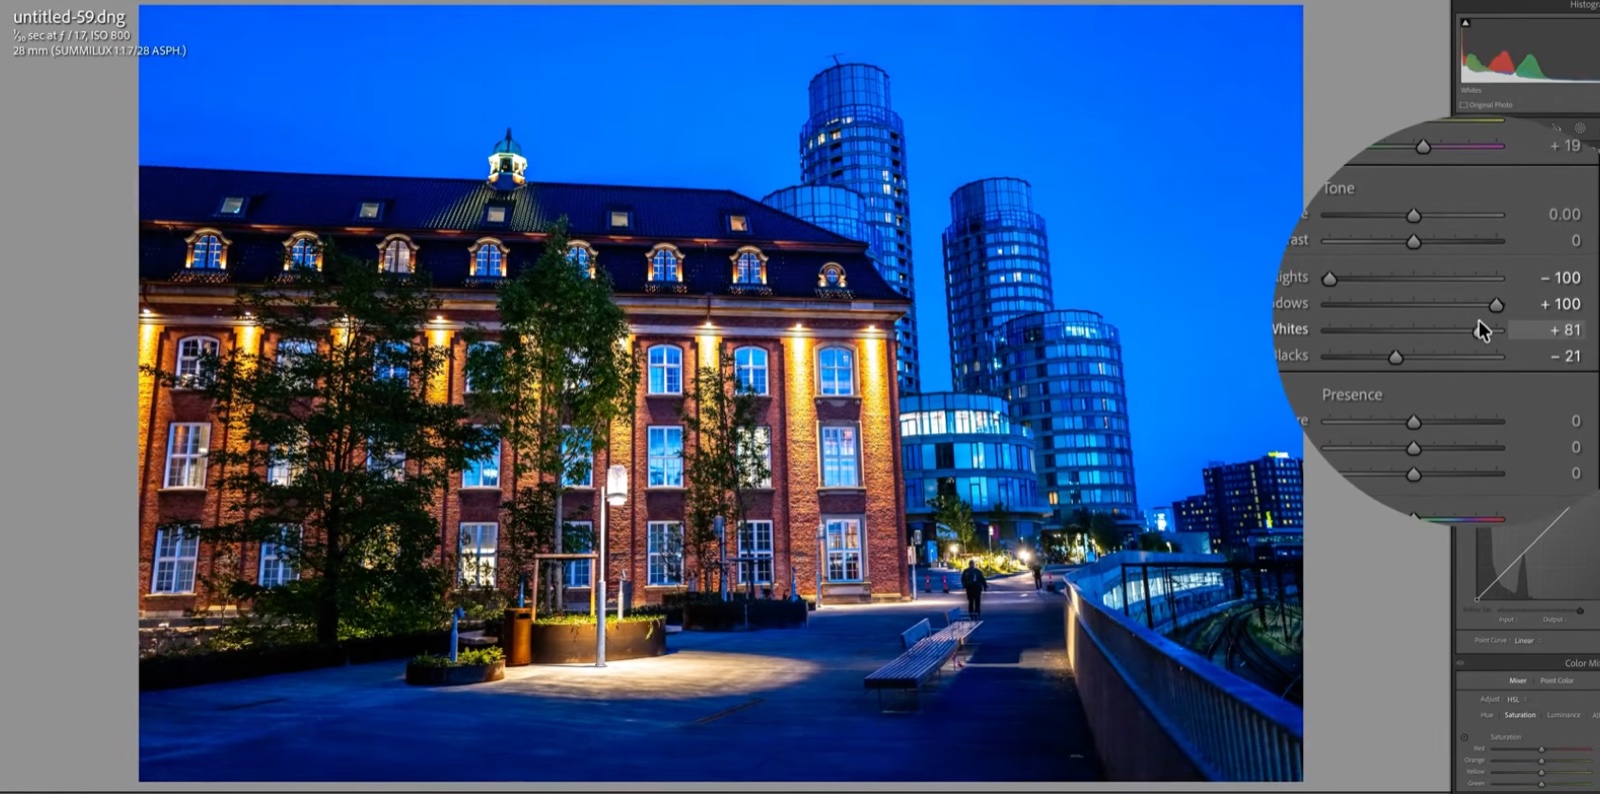
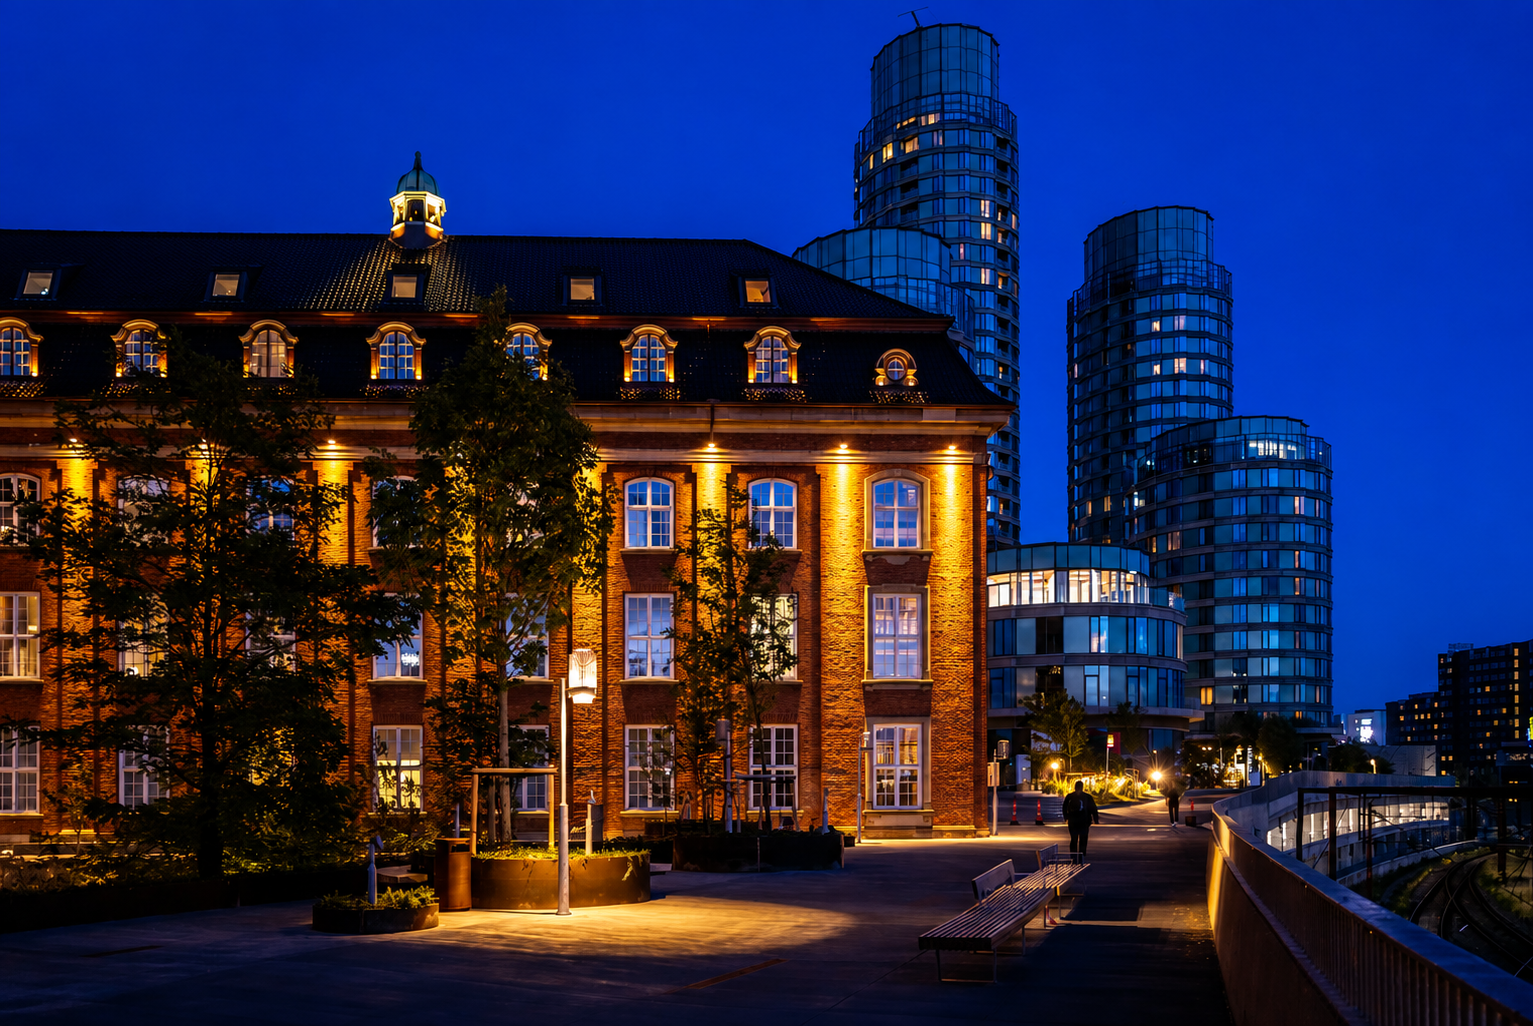
In just a few clicks, that's done. This is what I mean when I say Leica doesn't ask for much retouching.
Shooting Handheld When You Can't Use a Tripod
Tivoli Gardens in Copenhagen doesn't allow tripods. The shot from there in this workflow was taken at f/1.7, 1/30s, with a 2-second self-timer, handheld, in fading light, right at the park's famous illuminated entrance.
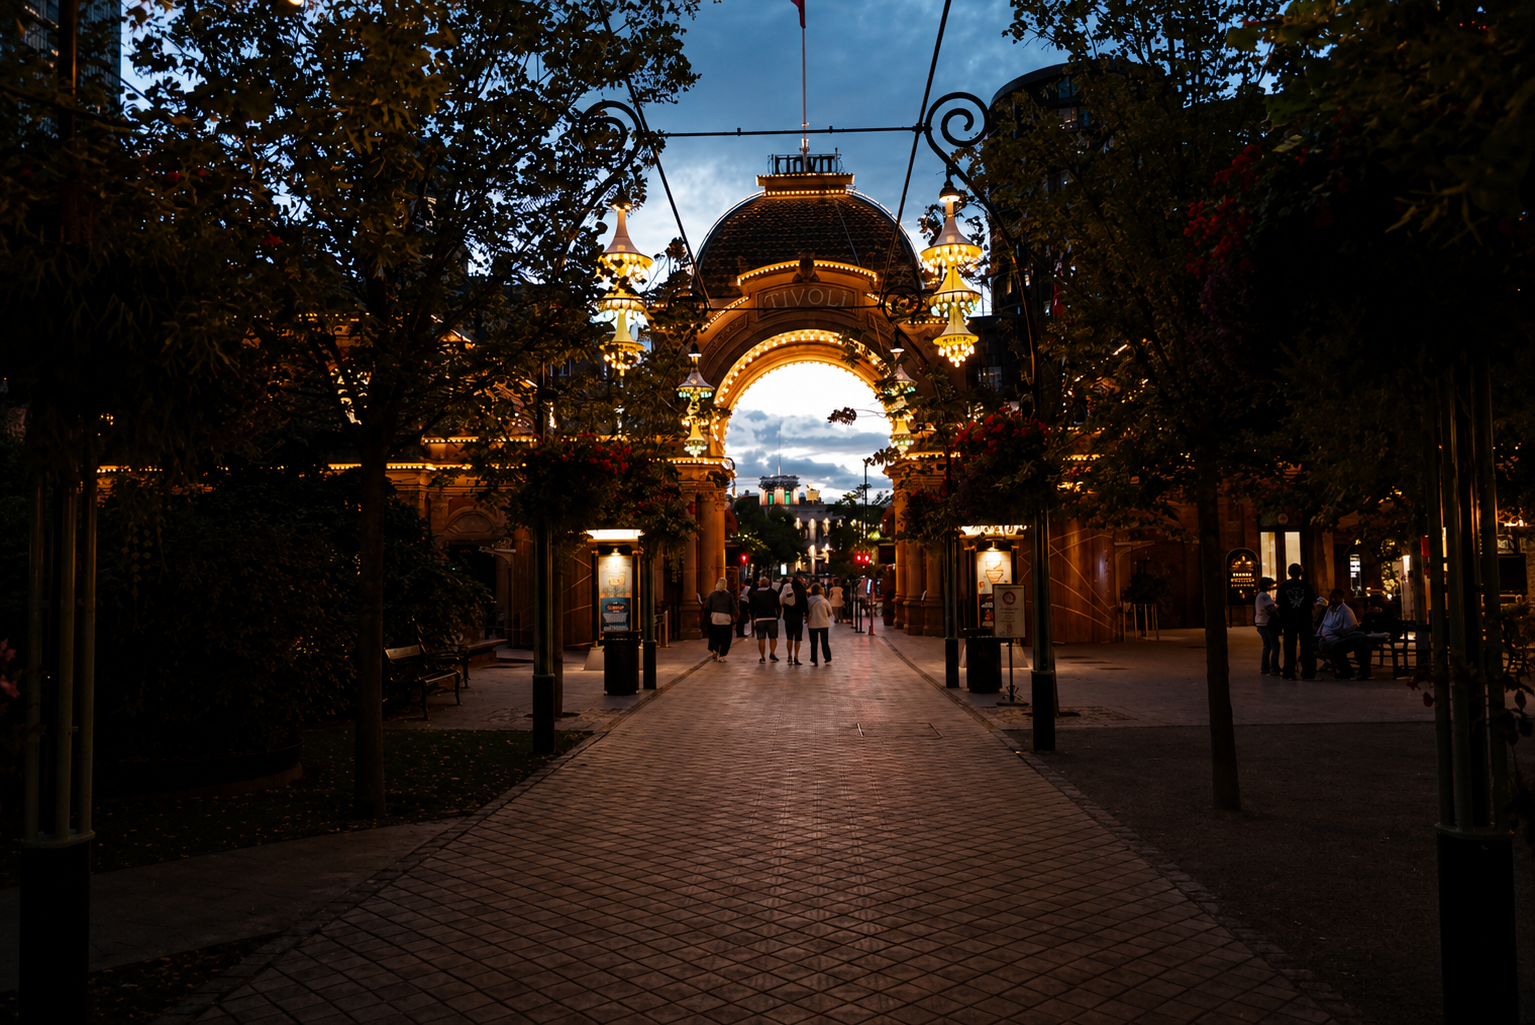
Once the file was developed and the crowd was still in frame, I used Lightroom's People tool: detect, then remove.
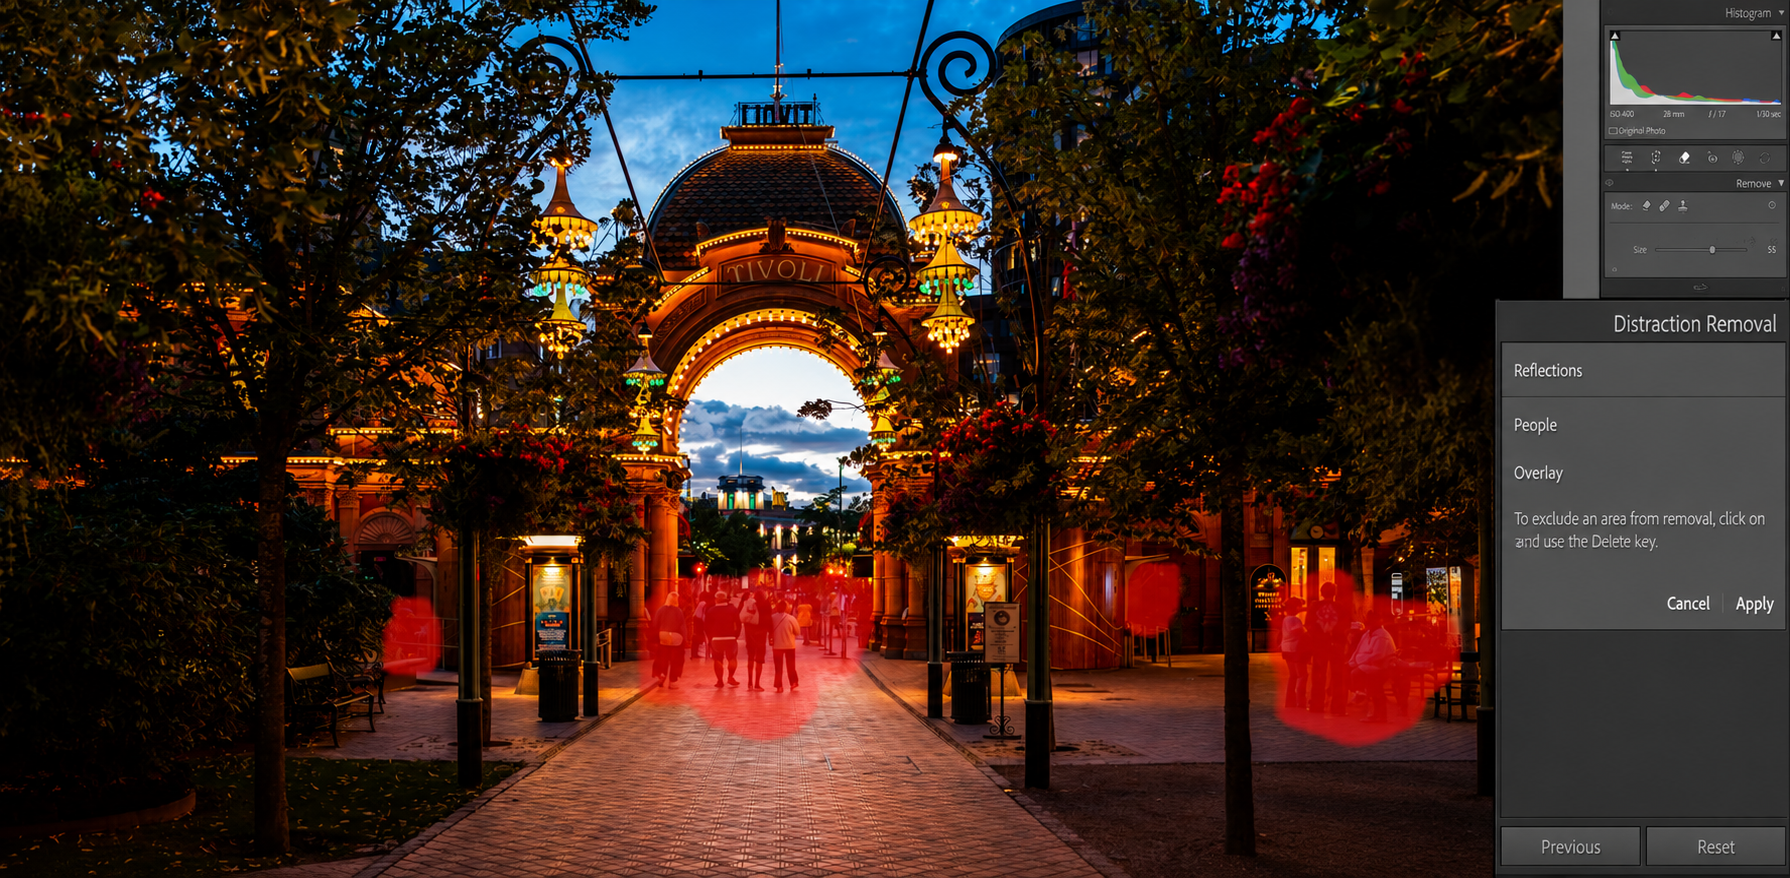
One click, and a park full of tourists was gone.
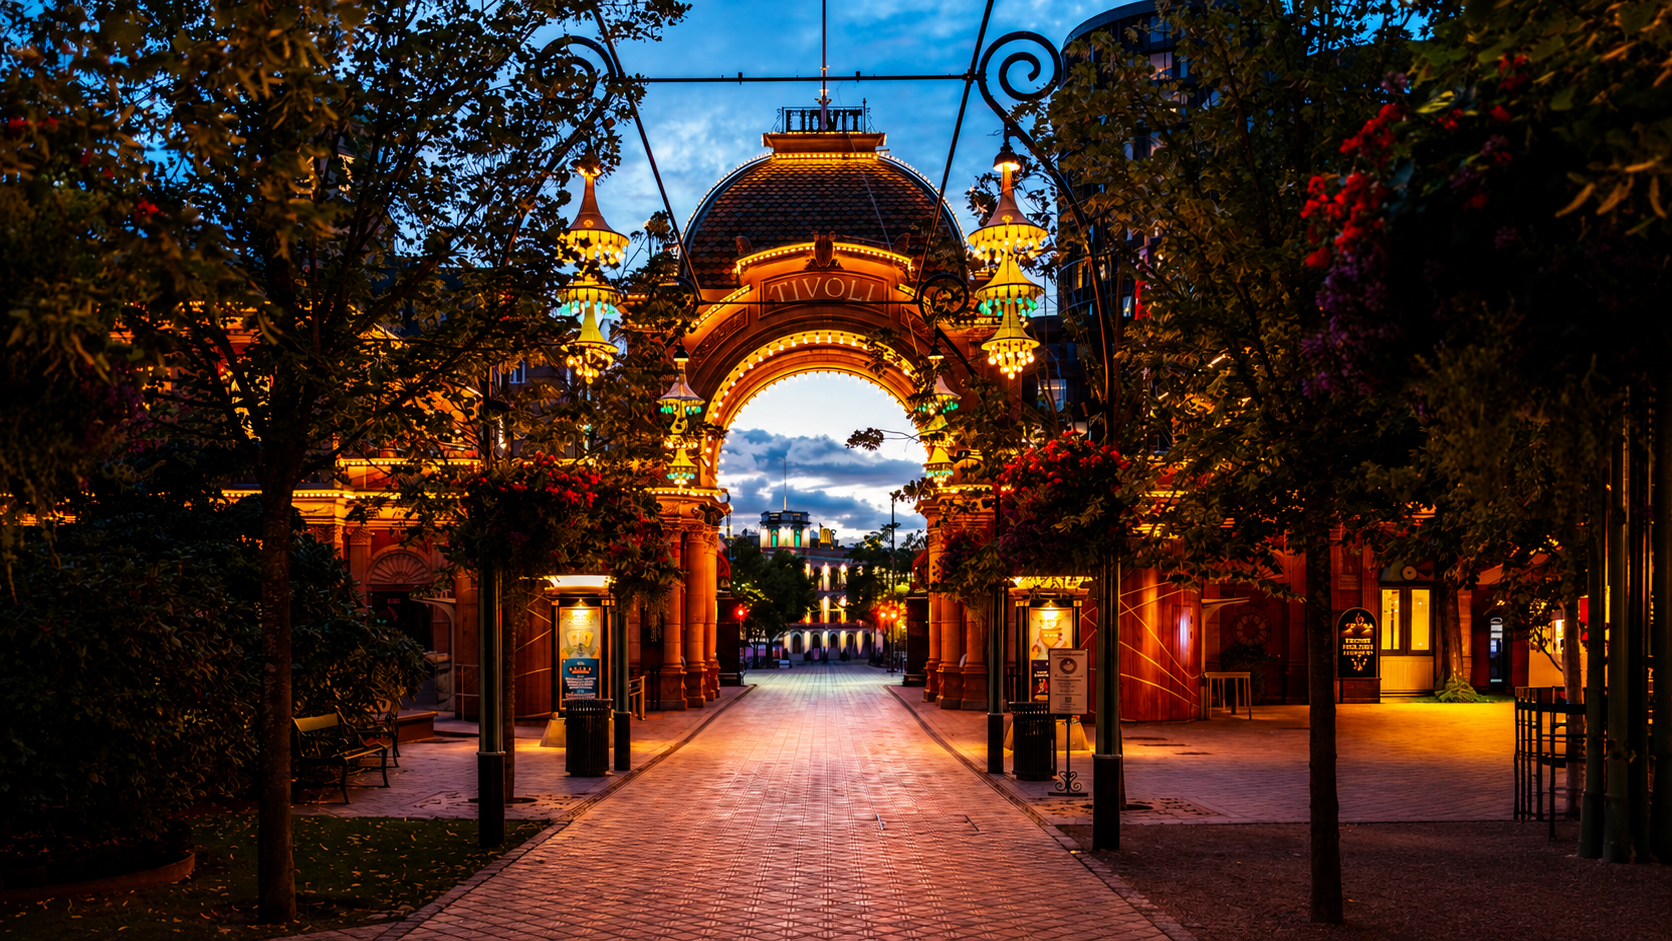
The result was clean enough that my publisher now has to request permission to use it in an upcoming book, since it reads as a professional, tripod-shot frame even though it wasn't. If you want the fuller breakdown of dust, crowds, and other distractions, I wrote a separate guide on removing anything from a photo.
Editing Black and White With a Simplified Zone System
If you're shooting a Q3 Monochrome, an M11 Monochrome, or just converting Leica files to black and white, Ansel Adams' Zone System is worth knowing, simplified down to something usable in Lightroom.
Adams rated tones from 0 (pure black) to 10 (pure white) and aimed for a good balance of both across a frame, real black, real white, not just mid-gray everywhere.
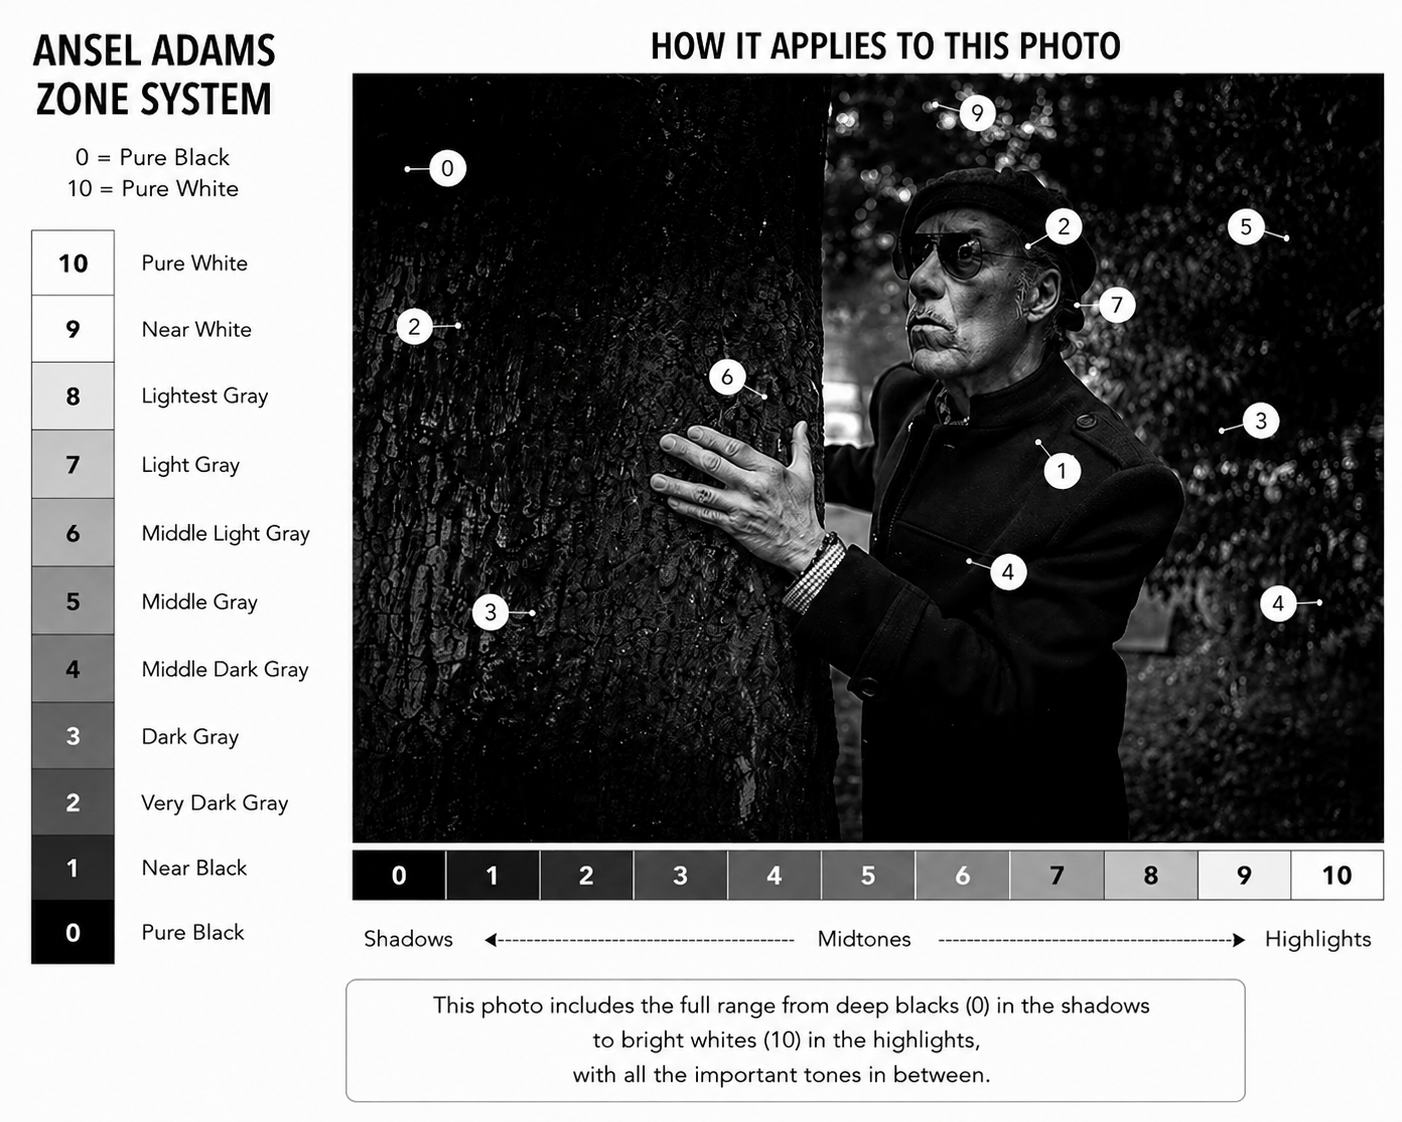
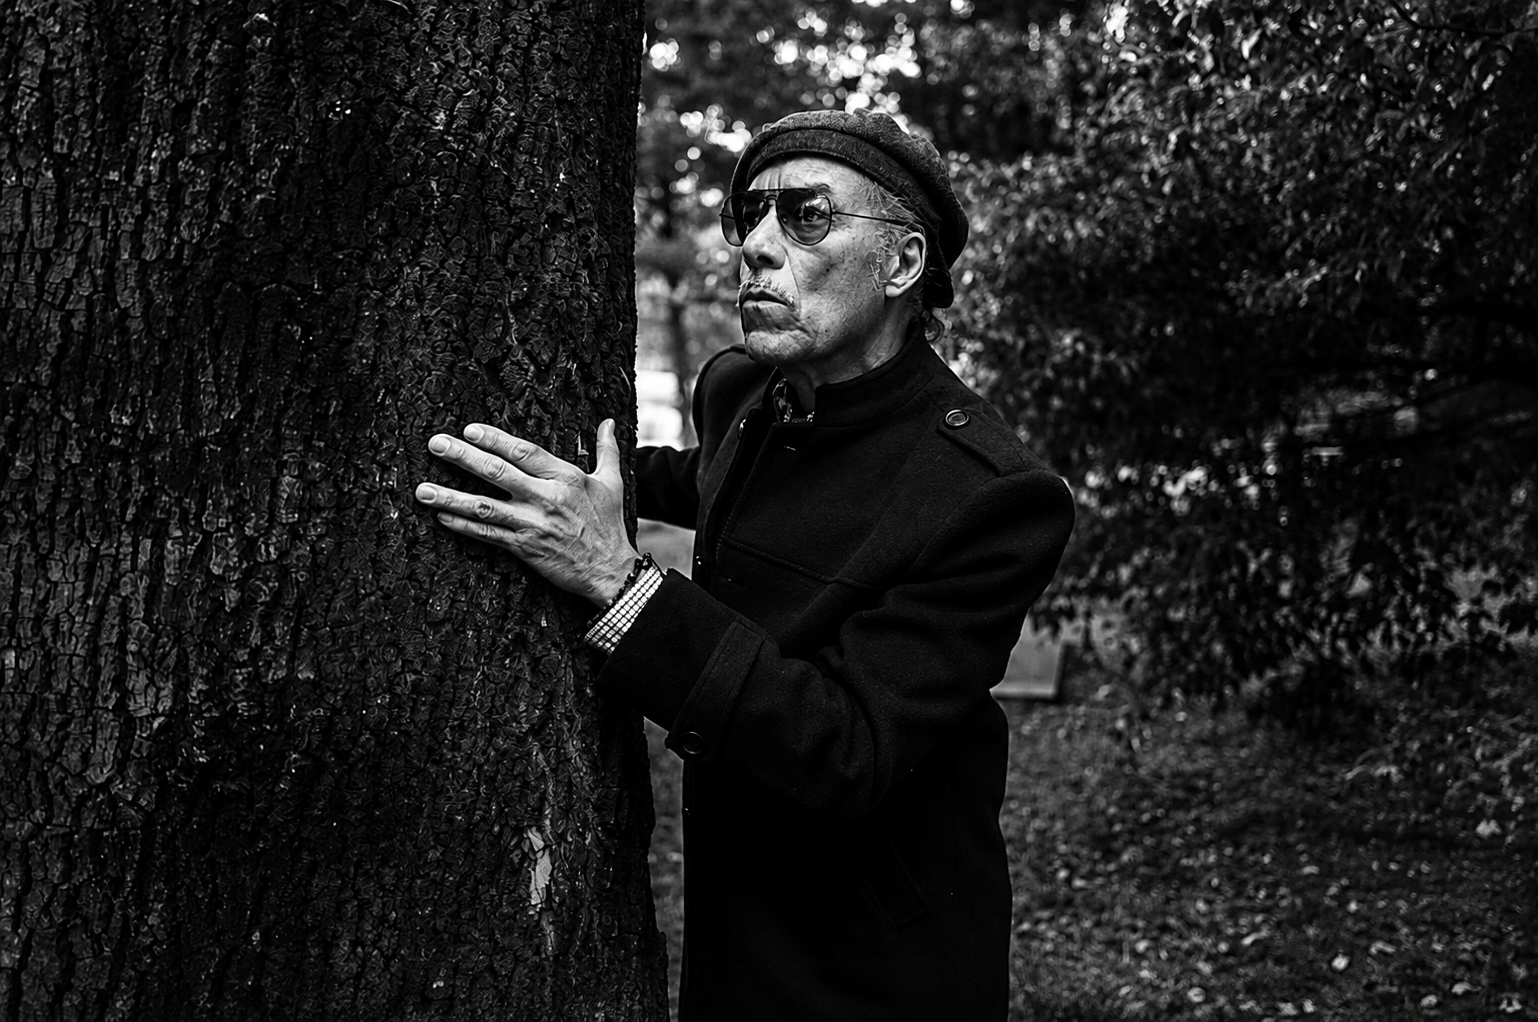
Here's how I apply that to a portrait:
- Open the shadows a little, around +50, and bring highlights down to about -50. Not all the way, portraits need less crushing than landscapes.
- Hold Option and crush the black point until you see pure black appear.
- Hold Option again and bring up the white point, but stop before you hit pure white. I aim for around 9 on the zone scale, not 10, I don't want to burn out any detail.
- Add a touch of contrast.
For a portrait specifically, I'll sometimes add two small gradients at the edges of the frame with a bit of black in each, no rule that says you have to, but it quietly pulls the viewer's eye back toward the subject's eyes.
The One-Click Version With Presets
Everything above, done manually, takes a few minutes per photo. With a preset built for this look, it takes seconds. Apply a preset, here I'm using AI Night on a night archway shot, then fine-tune from there.
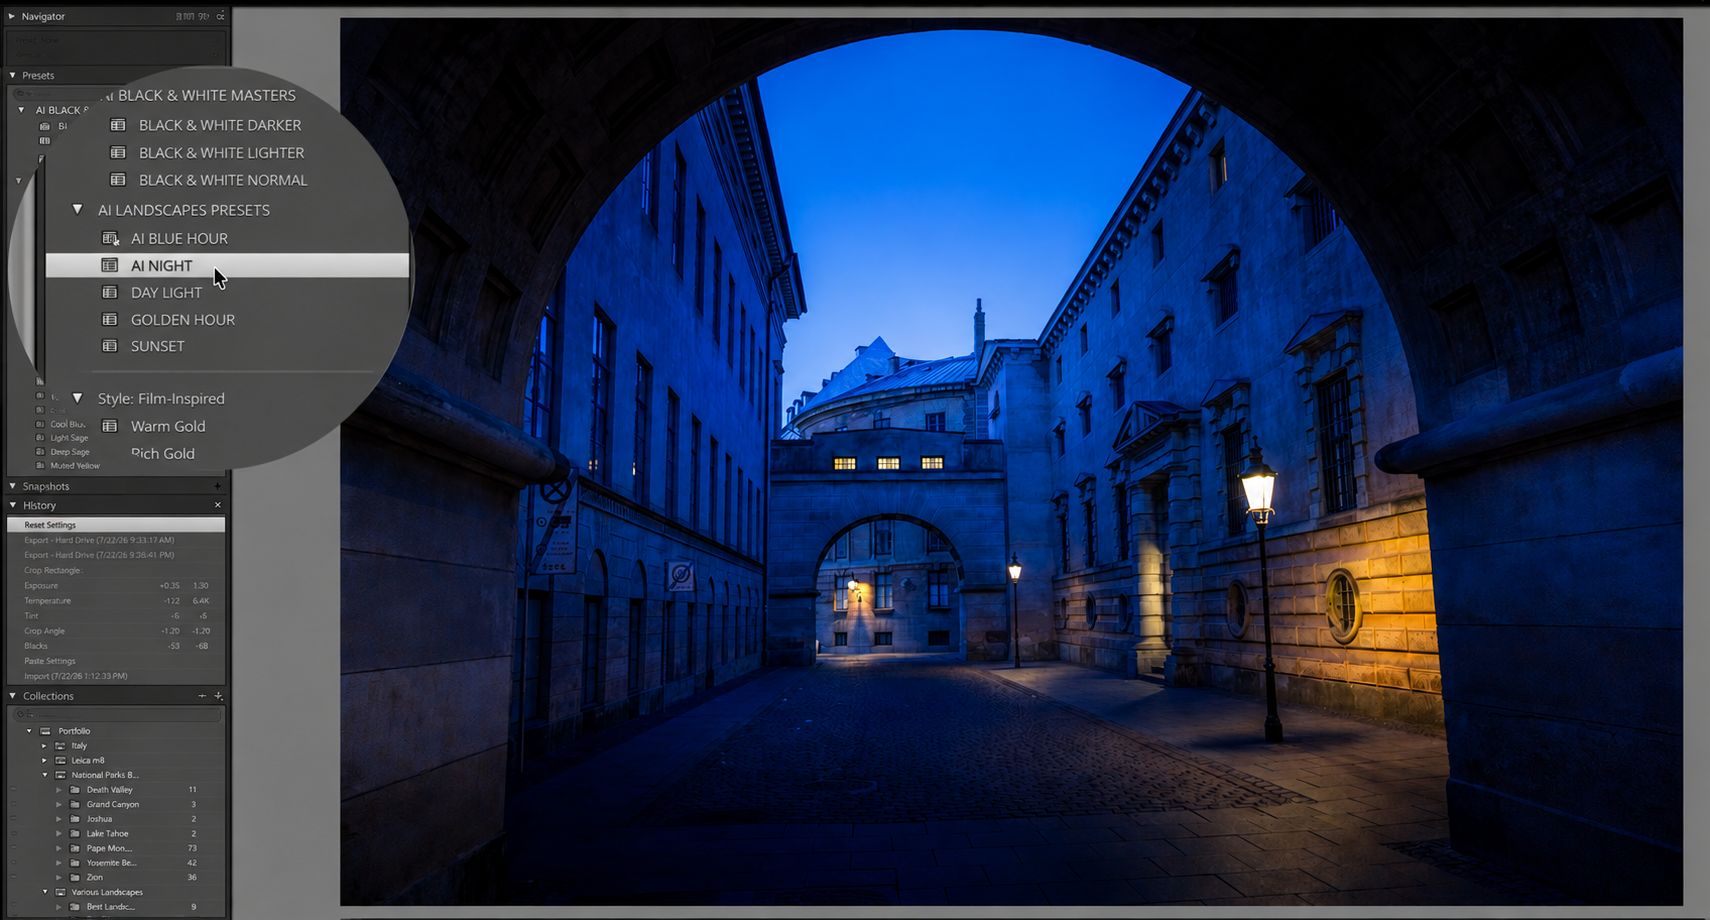
- Apply the preset.
- Hold Option and adjust the black point to taste.
- Cycle white balance between Daylight, Cloudy, and Shade until one feels right, then nudge magenta and yellow.
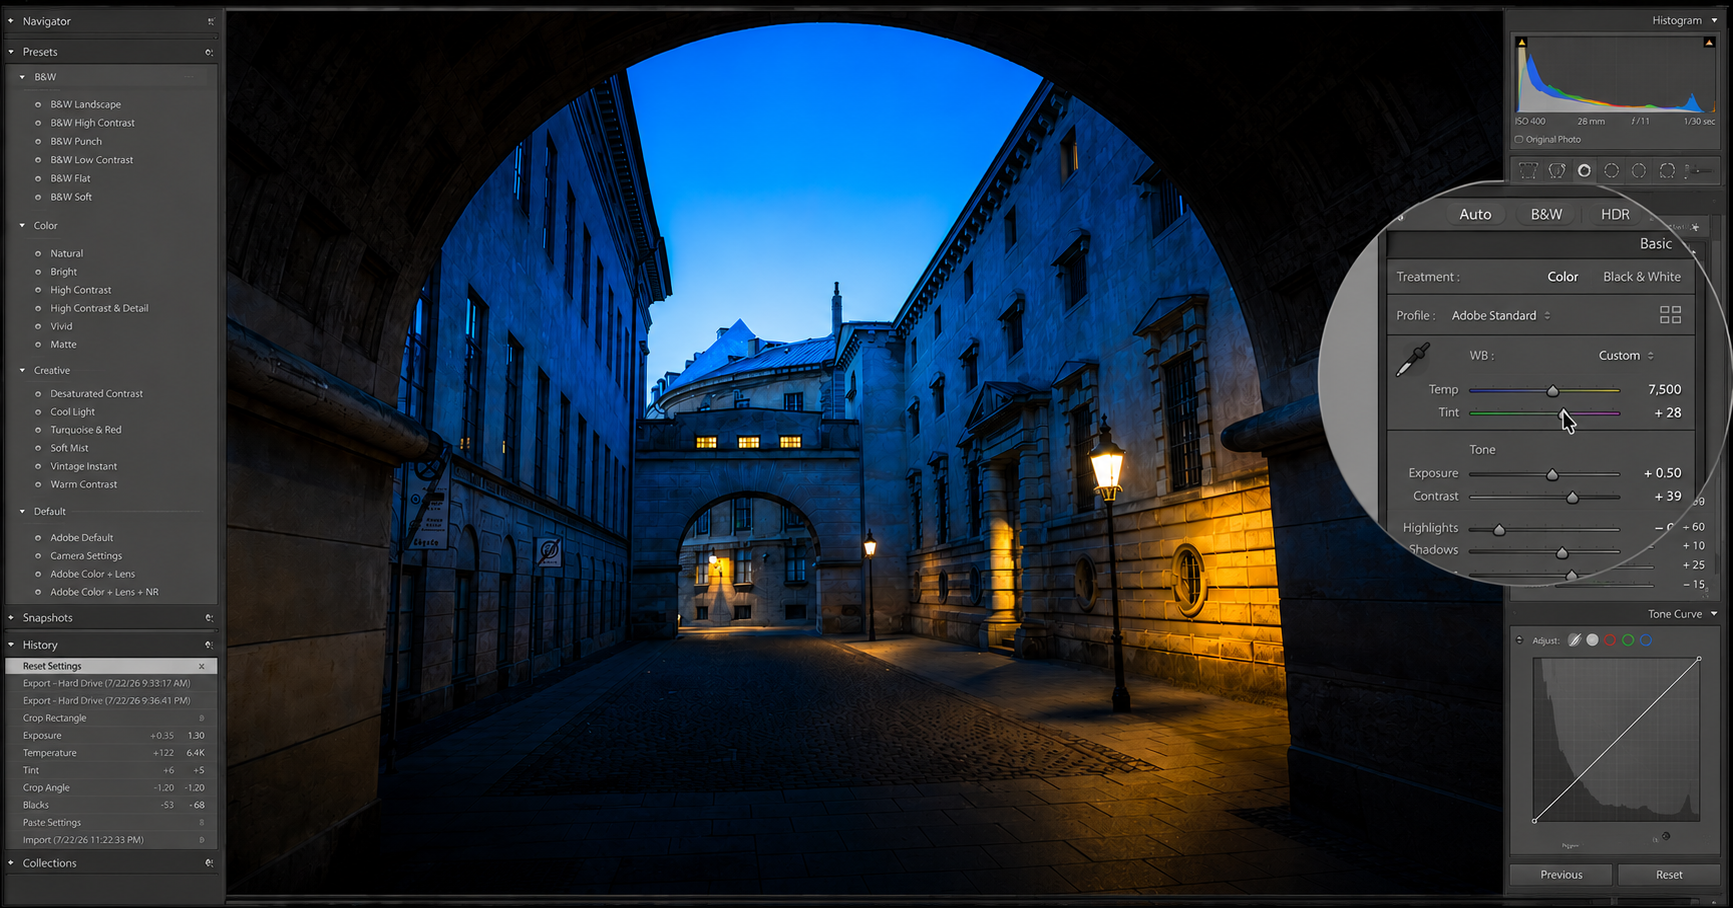
That's it. My presets were built around exactly this kind of file, and they're free to download here.
Why I Coach Leica Shooters Specifically
I want to tell you about Pat Honey. He'd sold a business, retired, taken up golf, and told me he'd been praying for something to actually pull him in. He picked up a camera late in life, at 74, joined my coaching program, and finished it faster than anyone I've taught. He shoots exclusively Leica and Hasselblad, and his photography went from average to the kind of work his own friends refused to believe he'd taken.
That jump, from good to genuinely great, is bigger than most people expect, and it's exactly what I work on with photographers one on one. If you shoot Leica and want that same kind of coaching, I'm opening a handful of spots. Book a call and send me your 4 best photos.
What It Actually Takes to Get Picked as "The Photographer"
In 2024, out of 70 photographers considered, I was chosen as the official photographer of Las Vegas. When I later asked the mayor's assistant why, she said she'd looked through the Paris section of my portfolio and couldn't find a single weak photo.
That didn't happen by accident. For the past ten years, my friend Scott Kelby and I have played a simple game with that portfolio: if I add a photo, I have to remove one. Ten years of that discipline is what a portfolio with no weak photos actually looks like, and it's the same discipline I teach inside my coaching program.
Frequently Asked Questions
What ISO should I use with a Leica Q3?
I shoot at ISO 100 whenever possible and let the aperture and shutter speed do the work instead, since Leica files stay remarkably clean and sharp even wide open at f/1.7-f/3.2. That gives you far more flexibility in low light than pushing ISO does.
How do I get accurate Leica colors in Lightroom?
Start with white balance, Shade for warm sunset tones, Daylight plus a touch of magenta for cooler or tungsten-heavy scenes, then fine-tune with the Color Mixer, boosting saturation on red, orange, and yellow if you need more warmth than white balance alone gives you.
Do I need a tripod for low-light Leica photography?
Not necessarily. With a wide aperture, a 2-second self-timer, and steady hands, you can get sharp, usable files handheld in very low light. Lightroom's People removal tool can also clean up any crowds that got in the way of a tripod-free shot.
