After 15 Years of Lightroom, I Only Use These 3 Tools
Most photographers already know how to adjust Exposure, Highlights, Shadows, Blacks, Whites and White Balance. Those global adjustments matter, but they can only take a photo so far, they affect the entire image at once, and a professional edit rarely does that. After more than 15 years of editing photos for a living, these are the only three Lightroom tools I actually reach for to turn a basic edit into something that looks intentional.
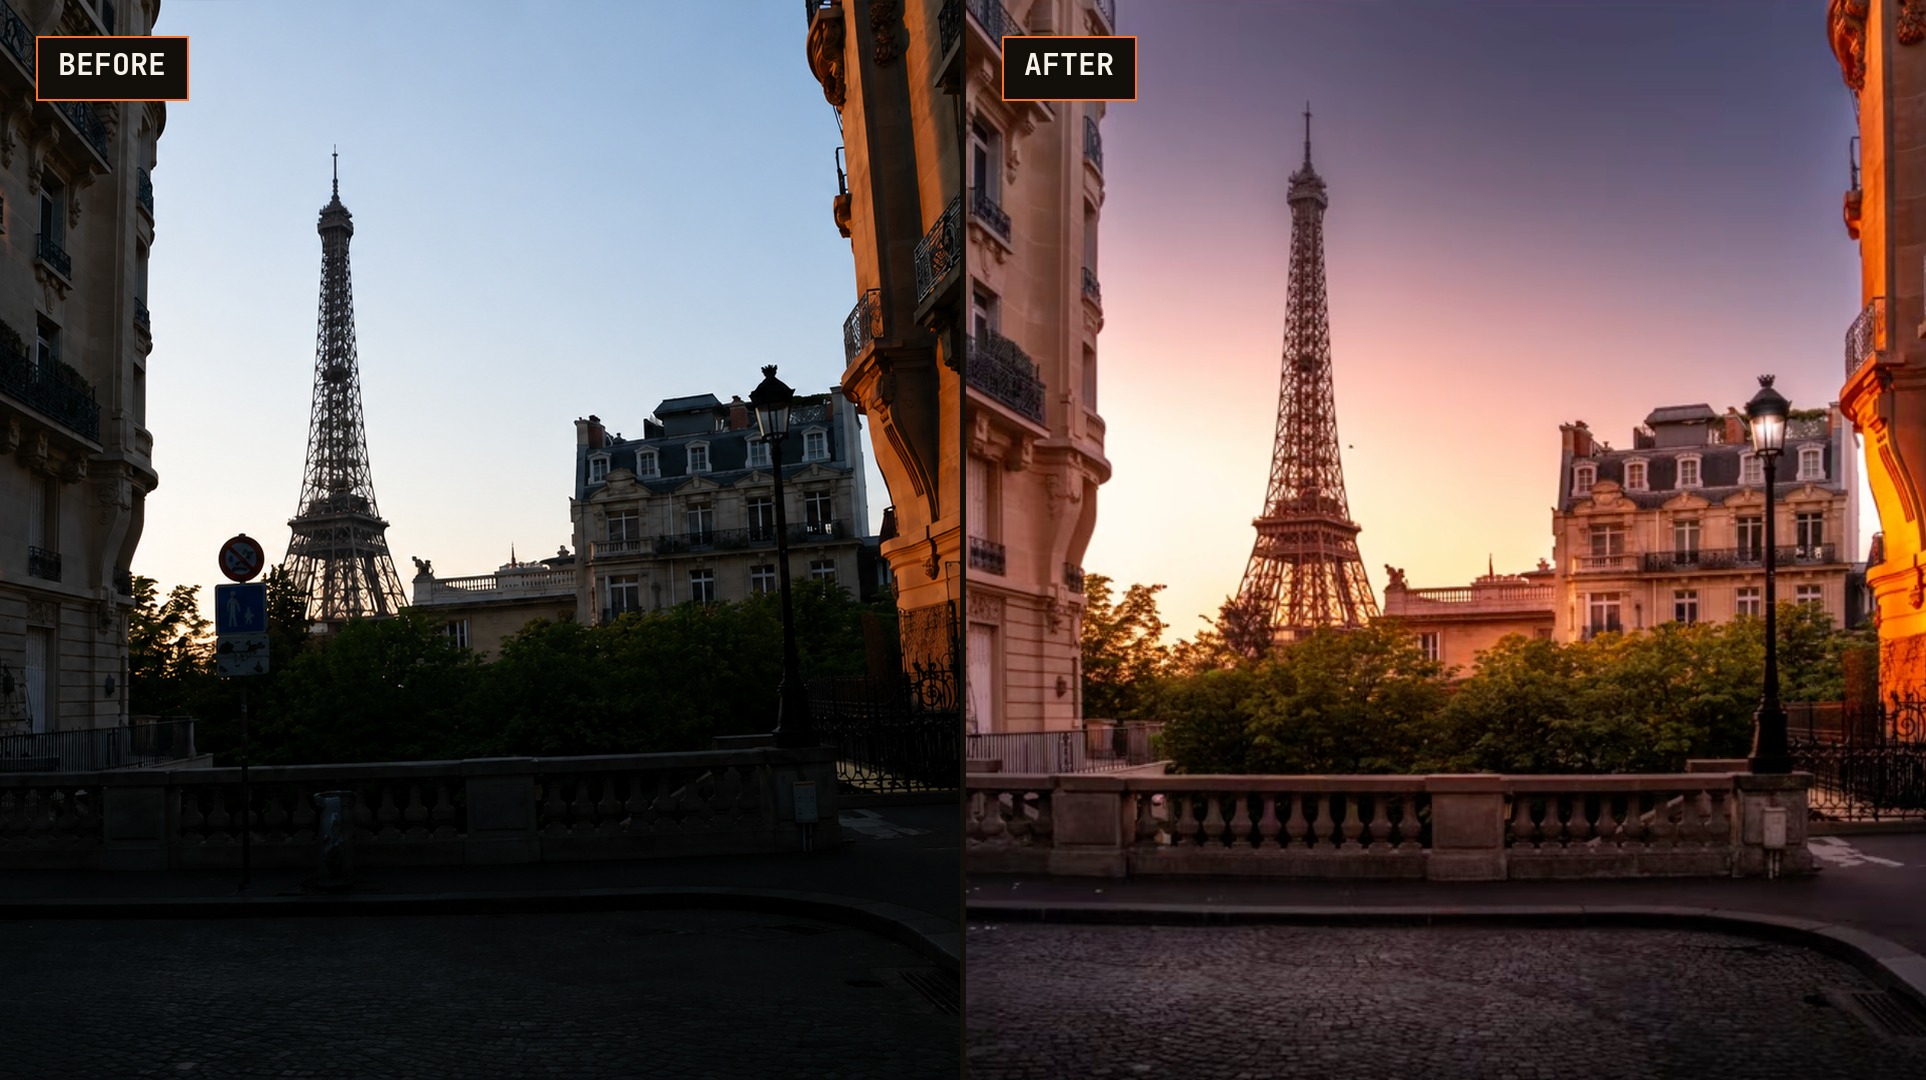
To show exactly what that means, here's the same photo of the Eiffel Tower, straight out of camera, and after a complete edit using the three tools below. The difference is the entire point of this article.
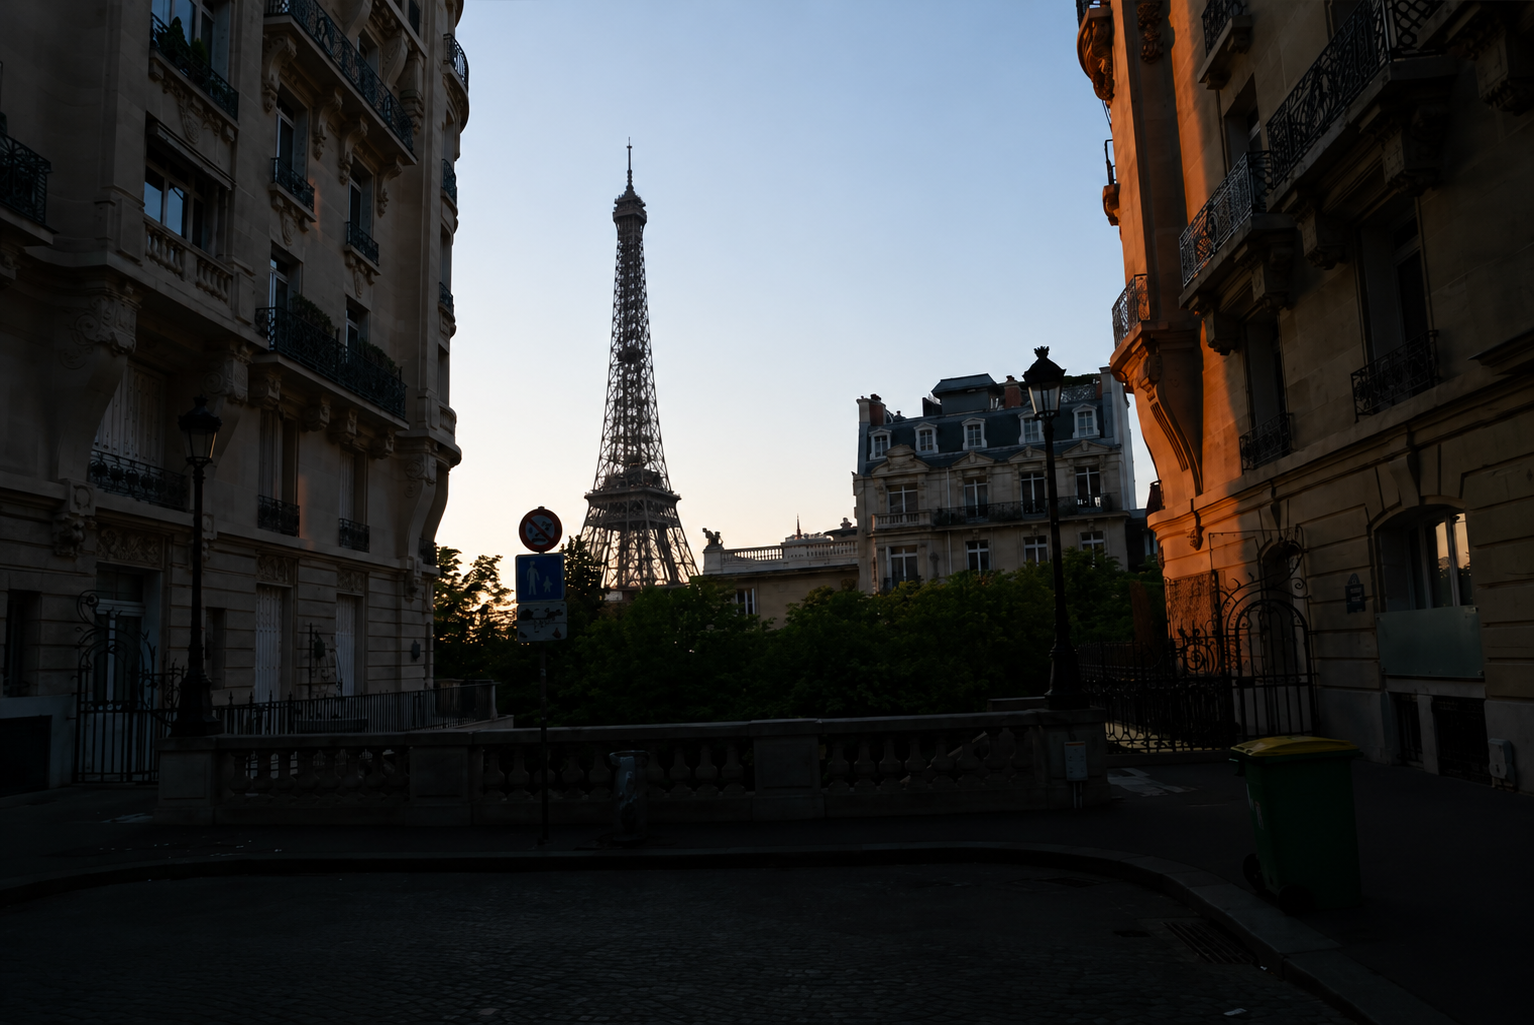
The starting point: straight out of camera, no adjustments yet.
Why Global Adjustments Aren't Enough
Exposure, Highlights, Shadows, Blacks, Whites and White Balance all apply to the entire photo at once. That's exactly their limitation. A real scene doesn't have even light, some areas should be brighter, some should recede, and the viewer's eye needs to be guided somewhere specific. You can't do that with sliders that touch every pixel equally. Local control is what separates a beginner edit from a professional one, and these three tools are how I apply it.
Tool 1: Masks and Gradients, to Control Light Locally
This is the tool I use on almost every photo, in a few different forms.
A Linear Gradient dragged down from the top of the frame is my default way to darken a sky that's pulling too much attention, or to add a subtle vignette effect that pushes the viewer's eye back toward the subject. To keep that gradient from darkening anything below the horizon, I combine it with Lightroom's AI sky masking, which detects the sky automatically and constrains the gradient to it.
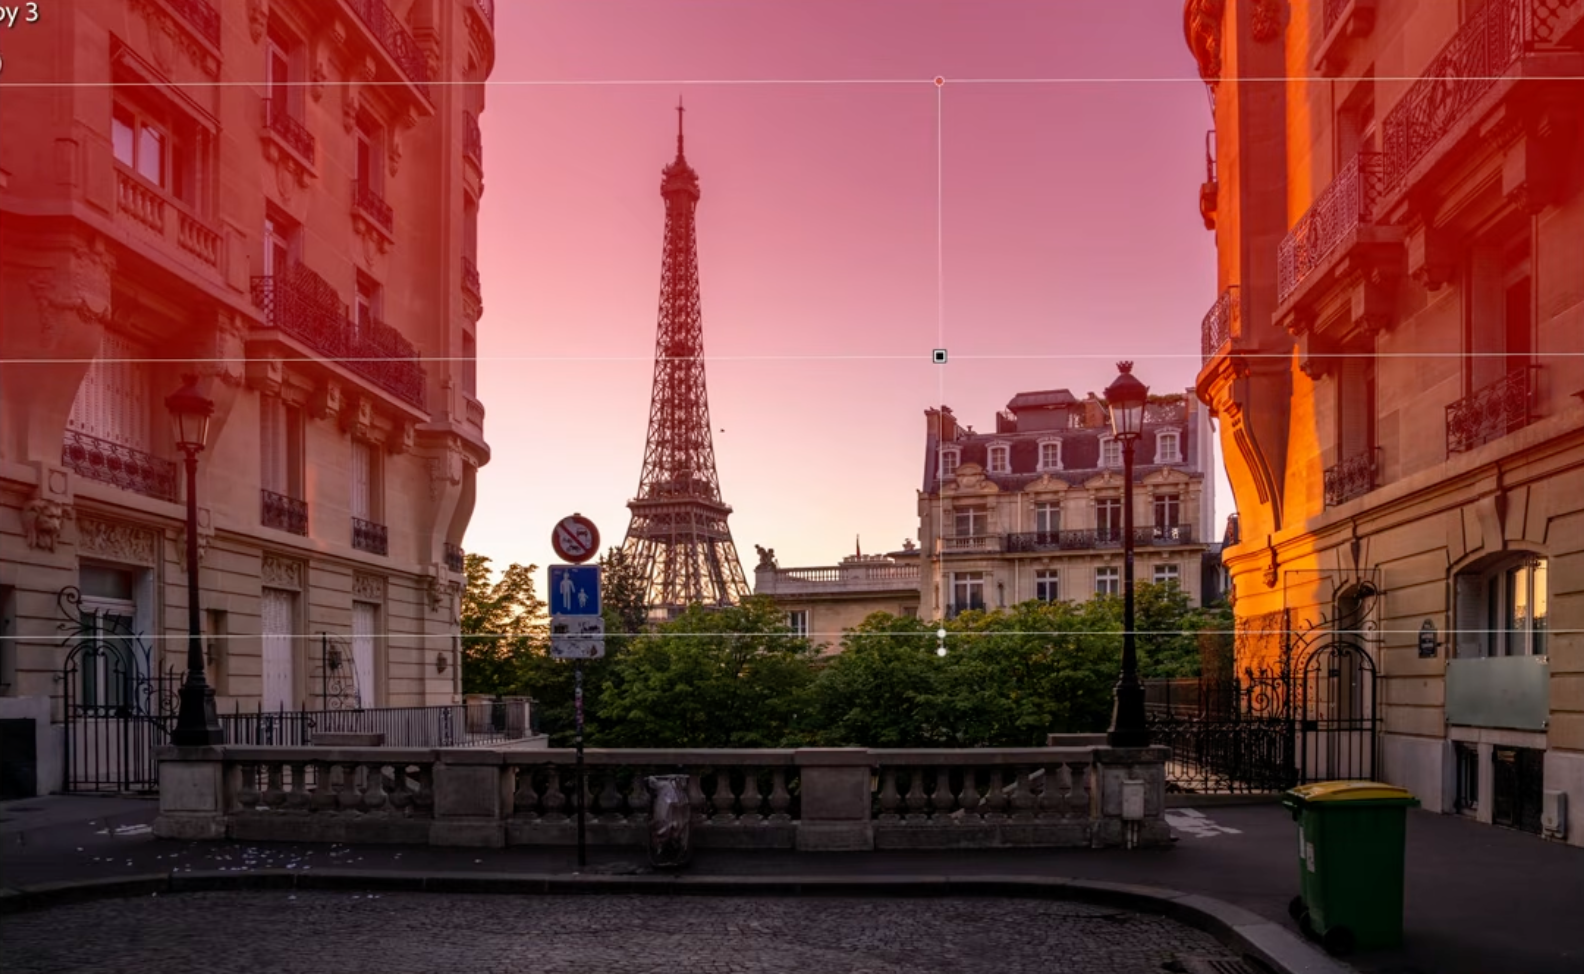
Linear Gradient, constrained to the sky by AI masking, so the ground stays untouched.
A Radial Gradient does the opposite job: instead of darkening a large area, I use it to add a pool of light directly around my subject, the Eiffel Tower in this case, so the eye lands there first instead of wandering the frame.
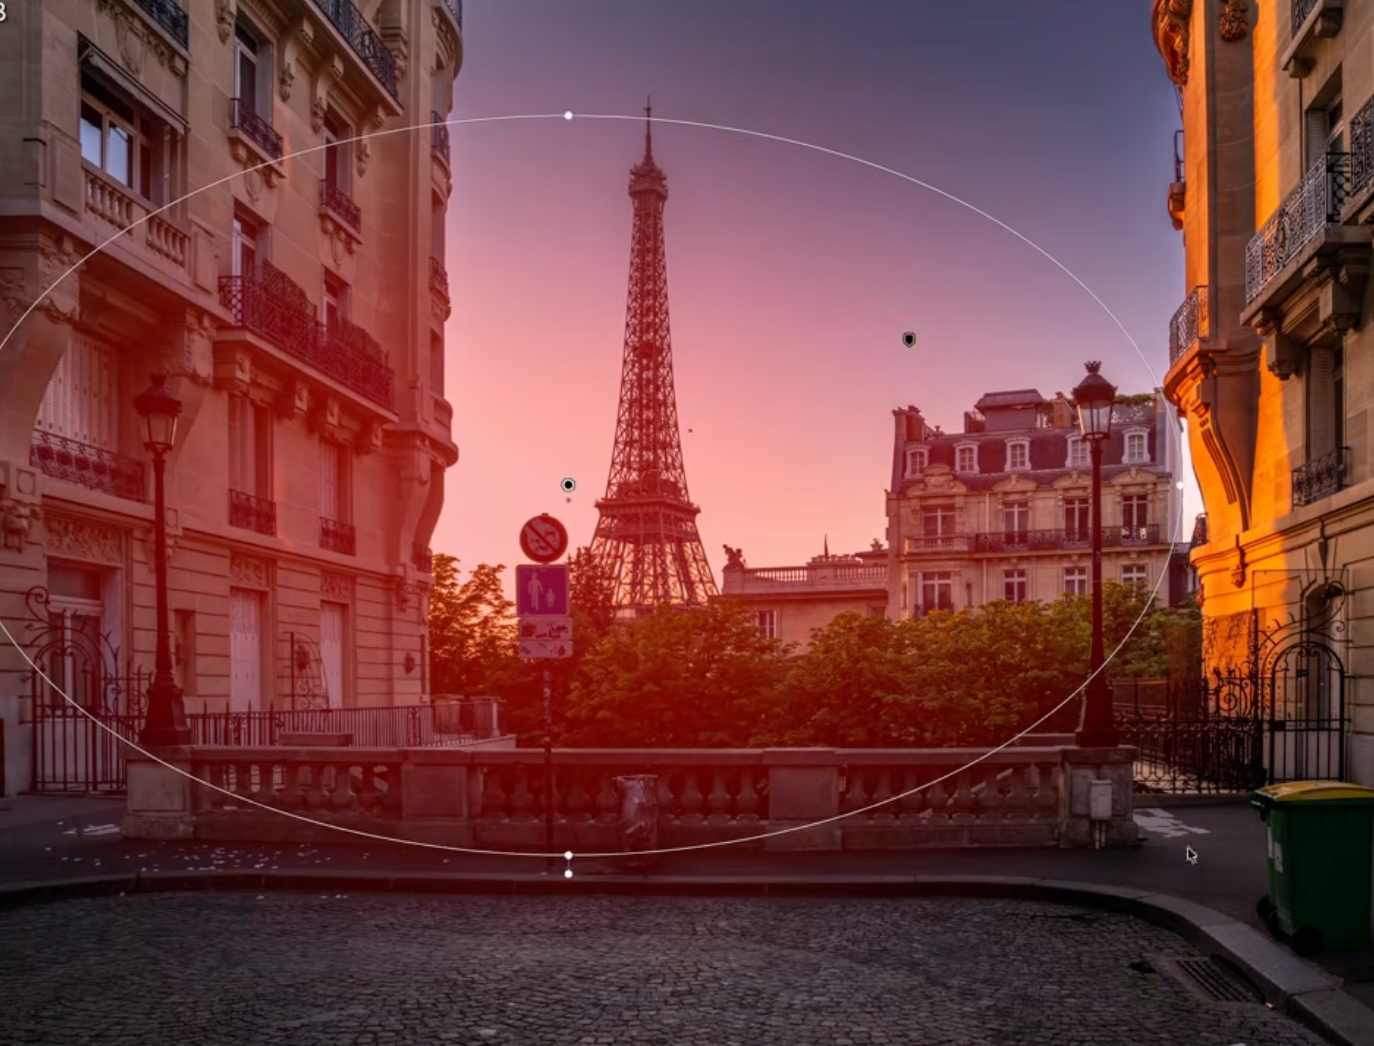
Radial Gradient, centered on the Eiffel Tower itself: a pool of light placed exactly where the eye should land first.
The same tool works just as well on a smaller scale, here it's placed on a single street lamp to lift it out of the shadows without touching anything else in the frame.
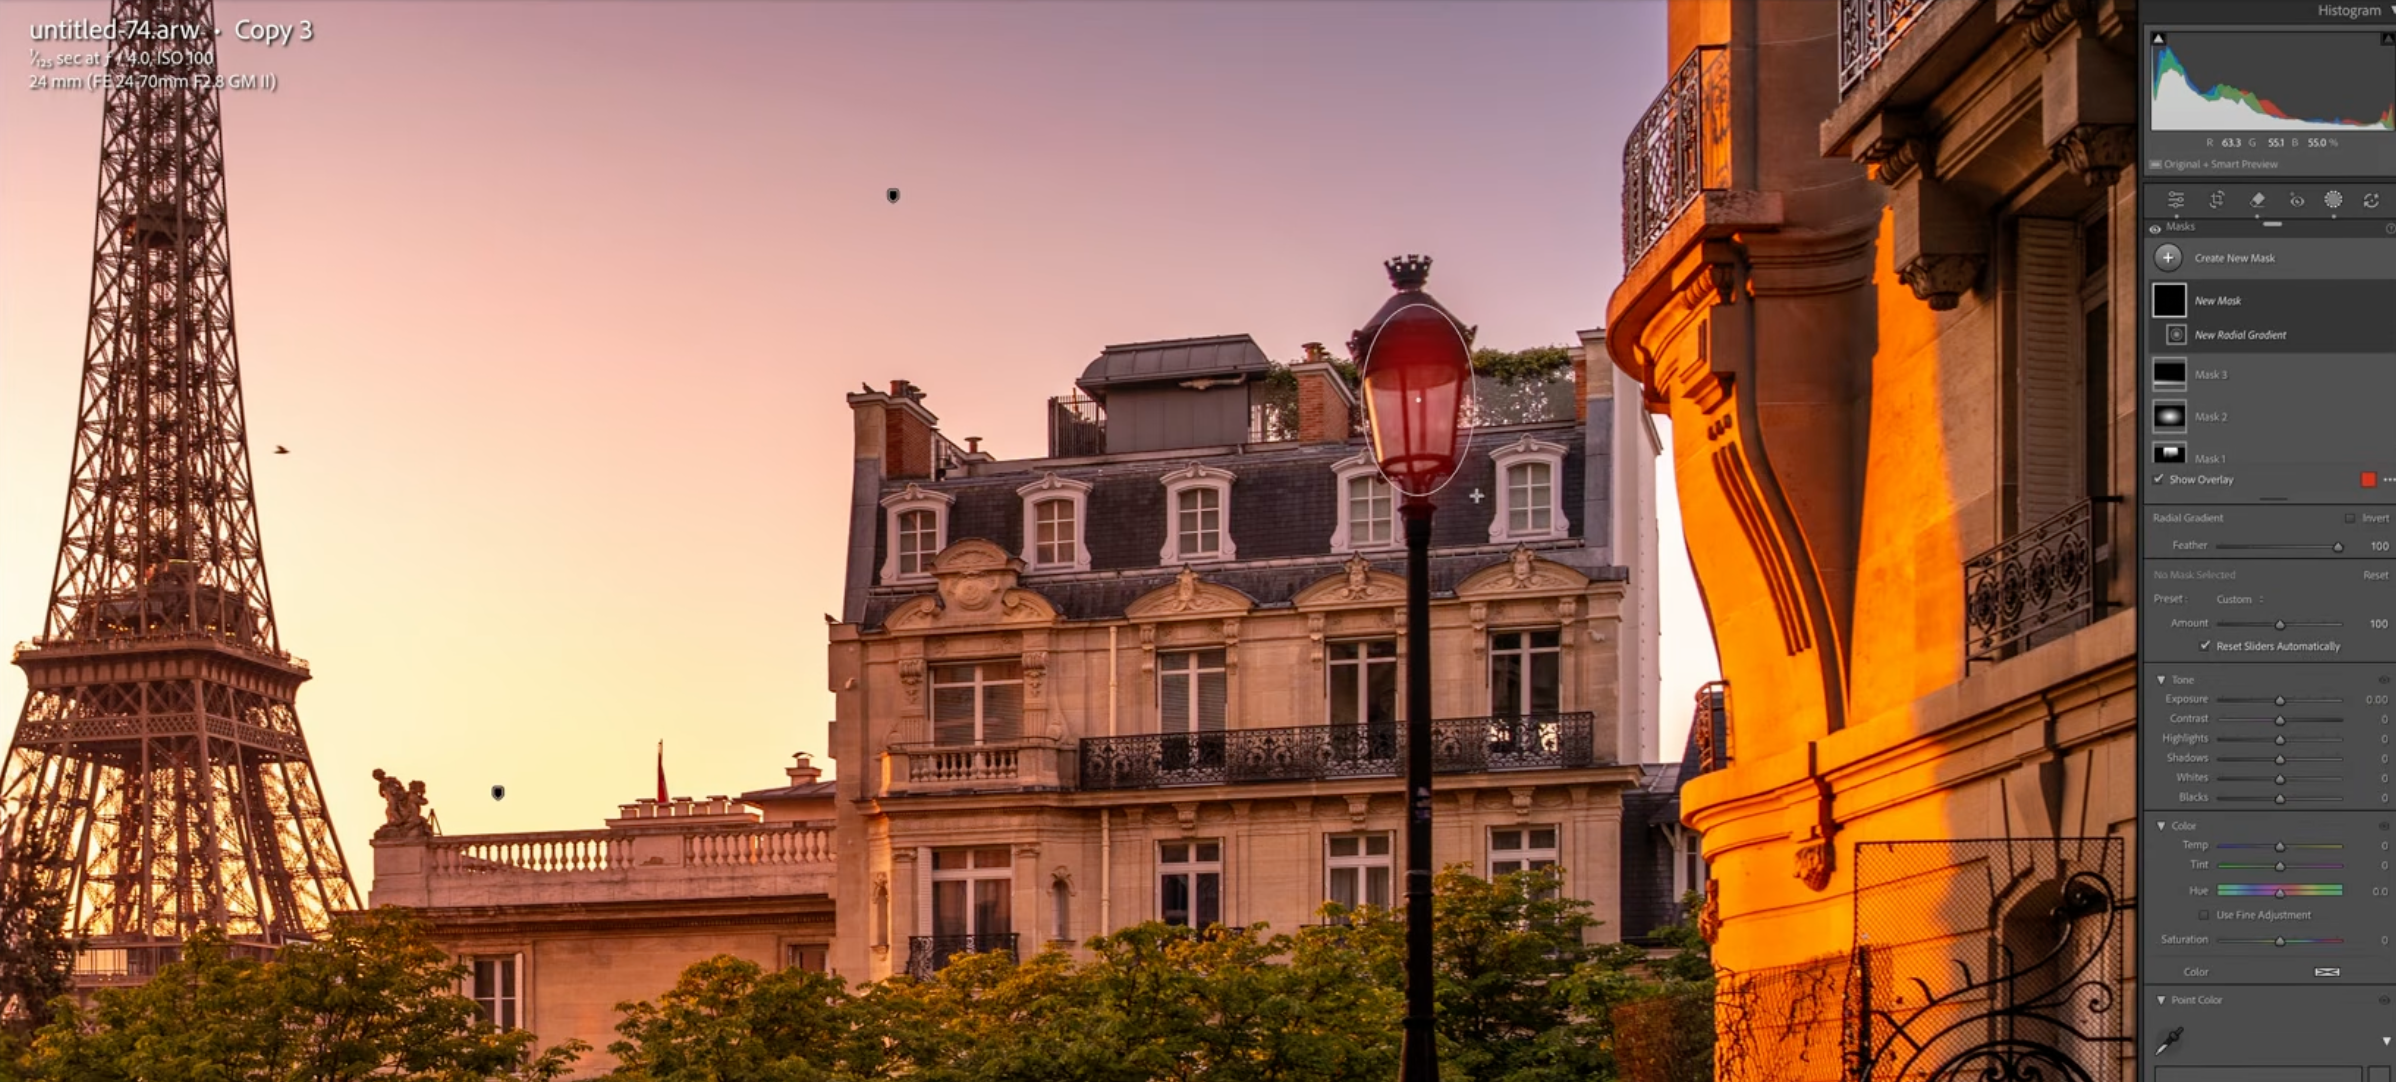
The same Radial Gradient, scaled down to lift a single street lamp out of the shadows.
The last piece isn't strictly a light tool, but it lives in the same masking panel and I use it constantly: Generative Remove, to clean up distracting elements, a stray tourist, a sign, a wire, before they compete with the subject for attention.
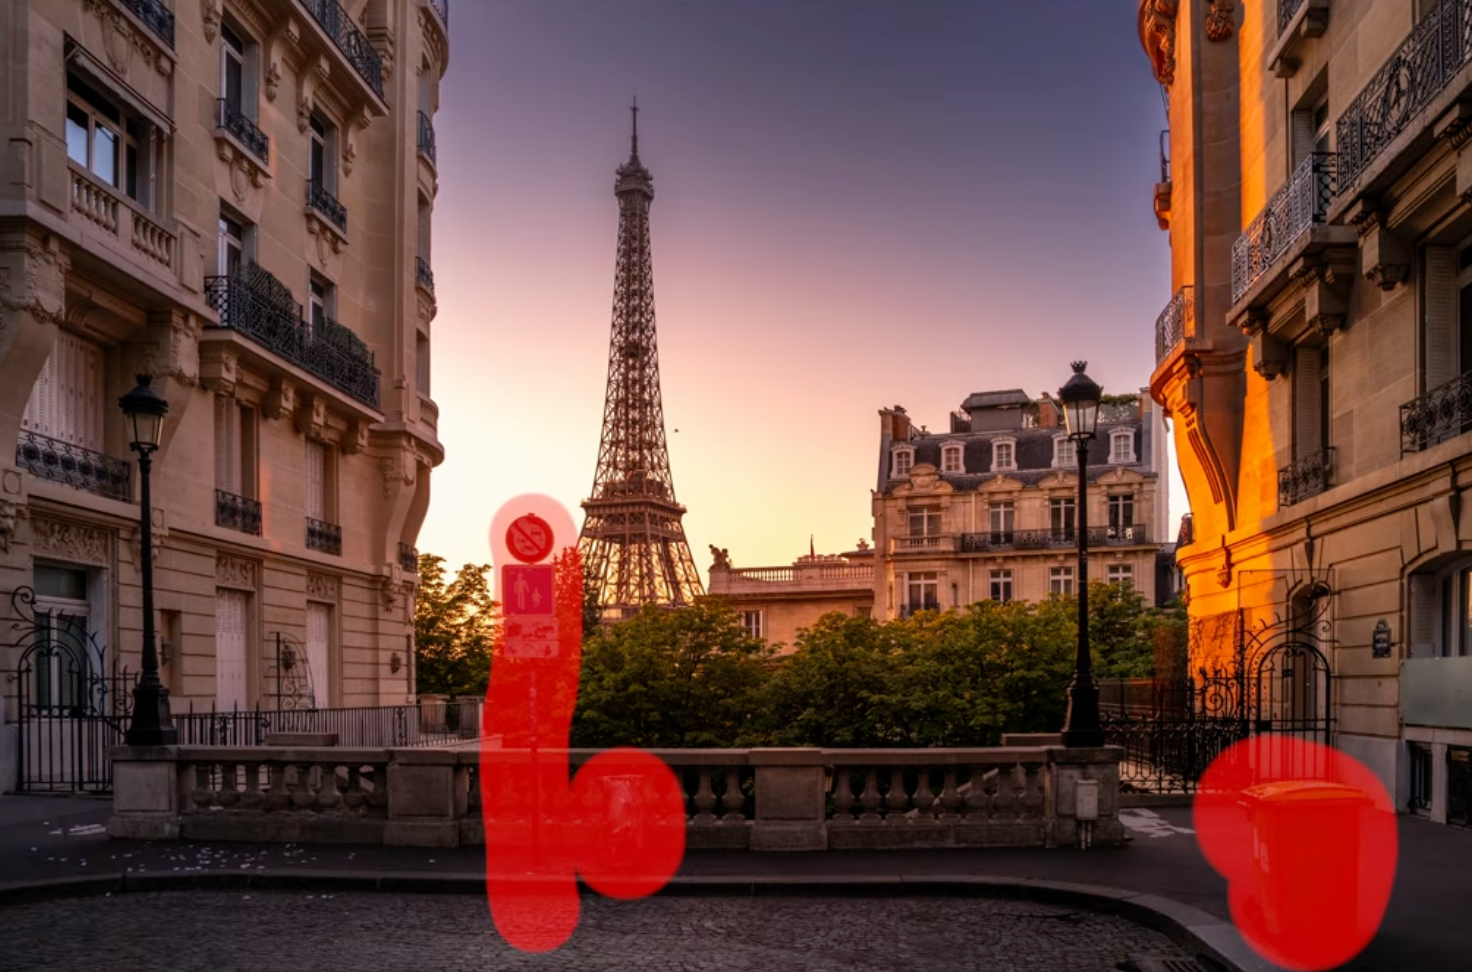
Generative Remove: clearing out whatever is competing with the subject.
Tool 2: The Color Mixer, to Improve Hue and Saturation
Global saturation and vibrance sliders push every color in the photo at once, which is exactly why so many edits end up looking oversaturated in one area and flat in another. The Color Mixer lets me adjust the hue and saturation of individual color ranges separately, so I can make the sky richer without touching the stone of the tower, or warm up the lights without shifting the blues in the sky.
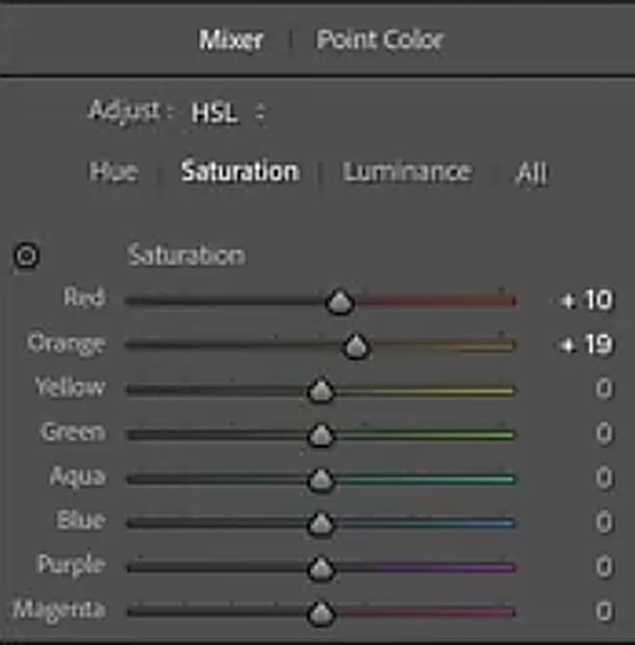
The Color Mixer: each color range pushed on its own, not one blanket saturation slider.
Tool 3: The Brush Tool, for Dodge and Burn
This is the most manual of the three, and the one that takes the longest to get comfortable with. The Brush Tool lets me brighten or darken small, specific areas by hand, the classic darkroom technique of dodging and burning, translated to Lightroom.
The setting that actually makes this look natural instead of obviously edited is the combination of Feather, Flow and Density. A high Feather keeps the edge of the brush soft so there's no visible line. Flow and Density kept low, usually in the 70s rather than maxed out, mean each brush stroke adds only a small amount, so you can build up an effect gradually instead of applying it in one heavy-handed pass.
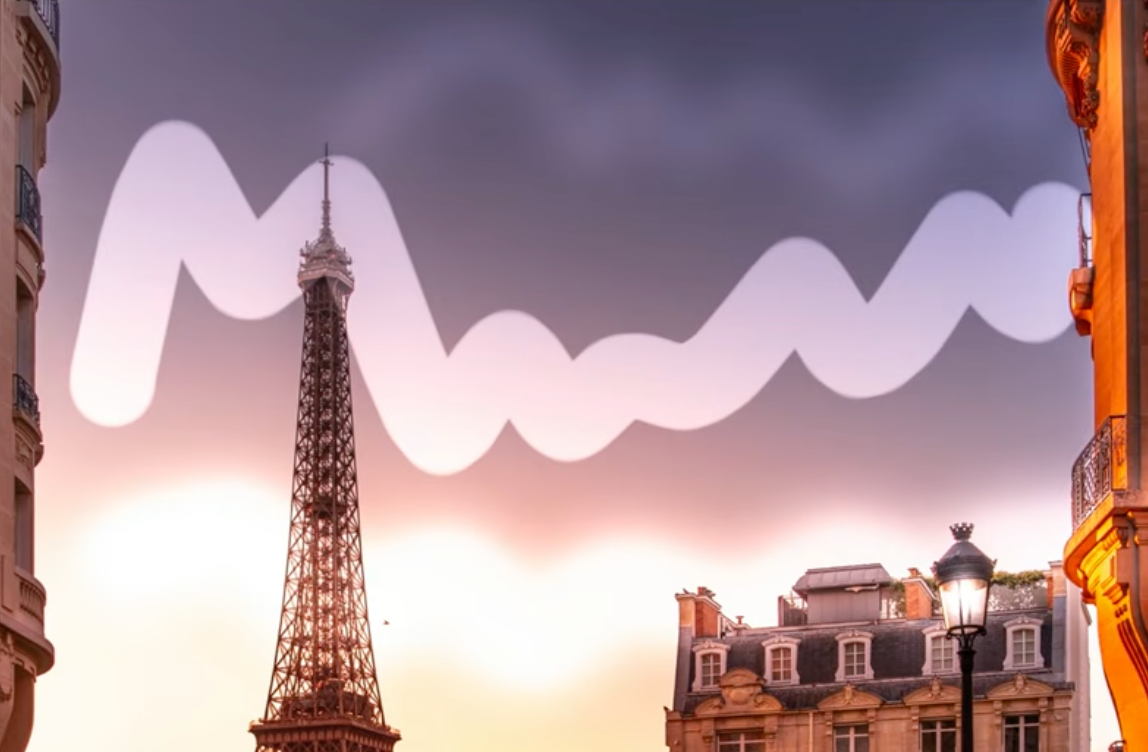
The brush stroke path itself, small and deliberate rather than one broad sweep.
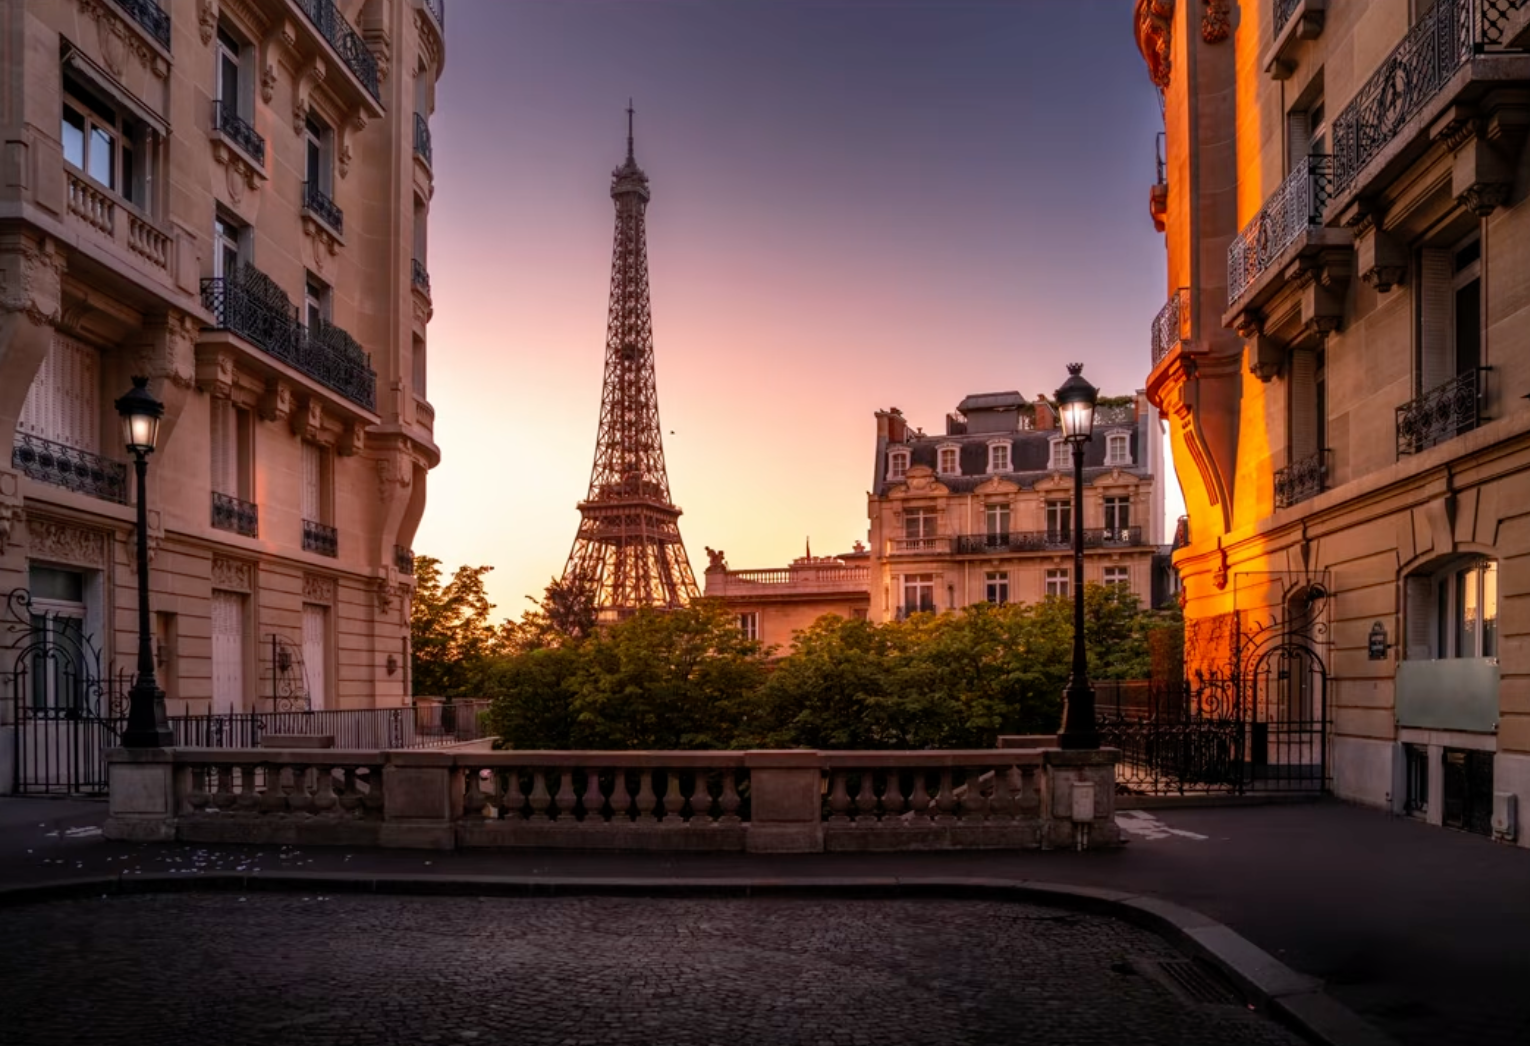
The result: brightened and darkened by hand, small area by small area.
The Complete Before and After
Here's the same photo, side by side: the unedited RAW file, and the version built with masks and gradients, the Color Mixer, and Dodge and Burn. Same starting file, same photographer, and the only difference is local control applied on top.
Same file, two states: untouched RAW versus the full edit with all three tools.
Frequently Asked Questions
What's the difference between global and local adjustments in Lightroom?
Global adjustments, like Exposure, Highlights, Shadows, Blacks, Whites and White Balance, apply evenly across the entire photo. Local adjustments, made with masks, gradients and the brush tool, target specific areas, which is what lets you guide the viewer's eye and add depth.
What does AI sky masking do in Lightroom?
It automatically detects the sky in a photo, so any gradient or adjustment you attach to that mask only affects the sky, and stops precisely at the horizon instead of bleeding onto the ground or your subject.
How do I make Dodge and Burn look natural instead of fake?
Keep the brush's Feather setting high so edges stay soft, and keep Flow and Density moderate, in the 70s rather than maxed out, so each stroke adds a small amount of effect. Build the result up gradually instead of applying it in one heavy pass.
What does the Color Mixer do that saturation sliders don't?
Global saturation and vibrance sliders push every color in the photo at once. The Color Mixer adjusts the hue and saturation of individual color ranges separately, so you can enrich one color, like the sky, without affecting others, like stone or skin tones.
Explore More From Photo Serge
Want to go further with your Lightroom workflow? Here are more guides:
- The Best Masking Tool in Lightroom: A Step-by-Step AI Masking Guide
- The #1 Lightroom Retouching Mistake: How to Fix Mask Halos and Fringing
- How to Get Rich, Natural Colors in Lightroom (Without Overediting)
