
How to Install Lightroom Presets (Lightroom Classic, Lightroom & Camera Raw)
By Serge Ramelli
Hey everyone! Just got some presets and not sure what to do with them? Don't worry — it's the easiest thing in the world once someone shows you where to click. In this guide I'll show you exactly how to install Lightroom presets in Lightroom Classic, in Lightroom, on your phone, and in Adobe Camera Raw — step by step, with screenshots. Let's go!
Important: you do not need to unzip the file. Just import the .zip exactly as you downloaded it — Lightroom does the rest.
New to editing? You may also like my guide on Lightroom editing for beginners. Want presets to follow along with? Grab my free toolbox here — the exact presets I use every day.
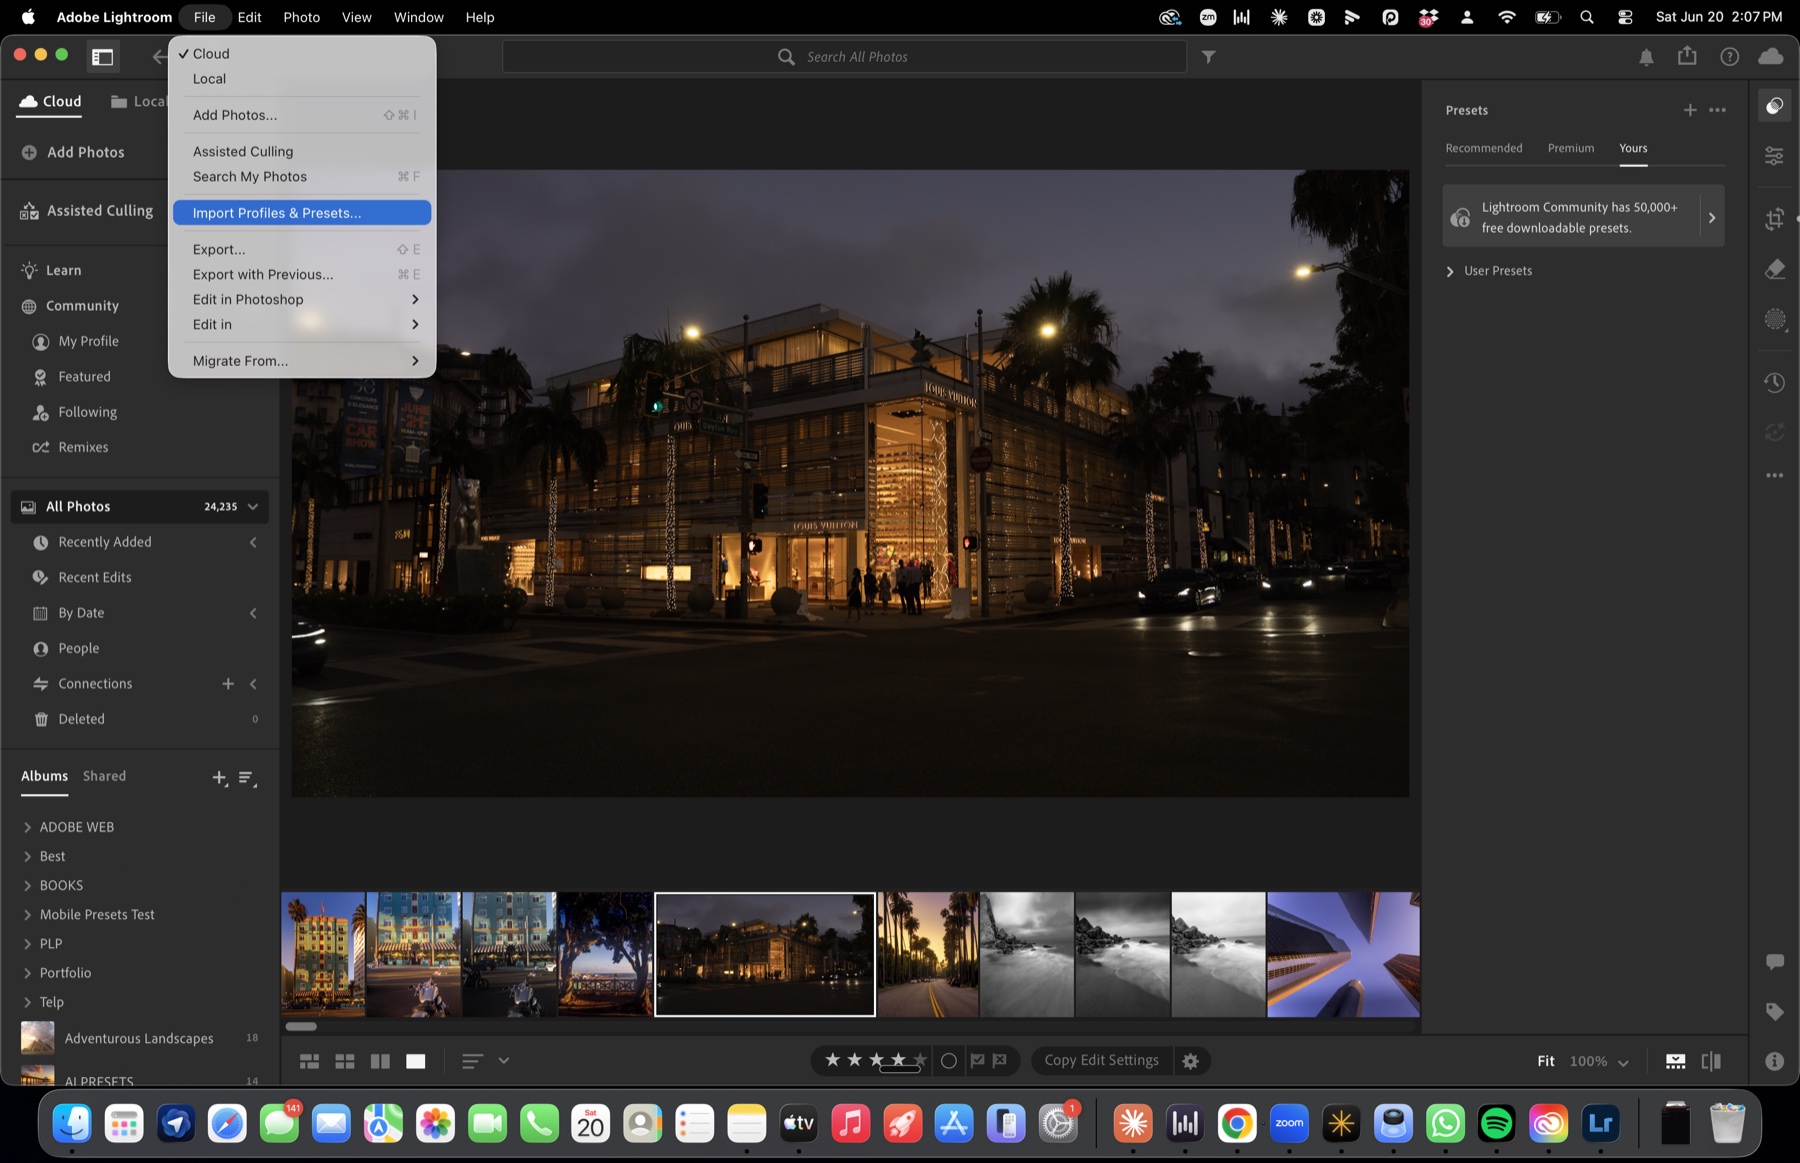
How to Install Presets in Lightroom Classic
Step 1. Open Lightroom Classic, click the Develop module (top right), then go to File ▸ Import Develop Profiles and Presets…
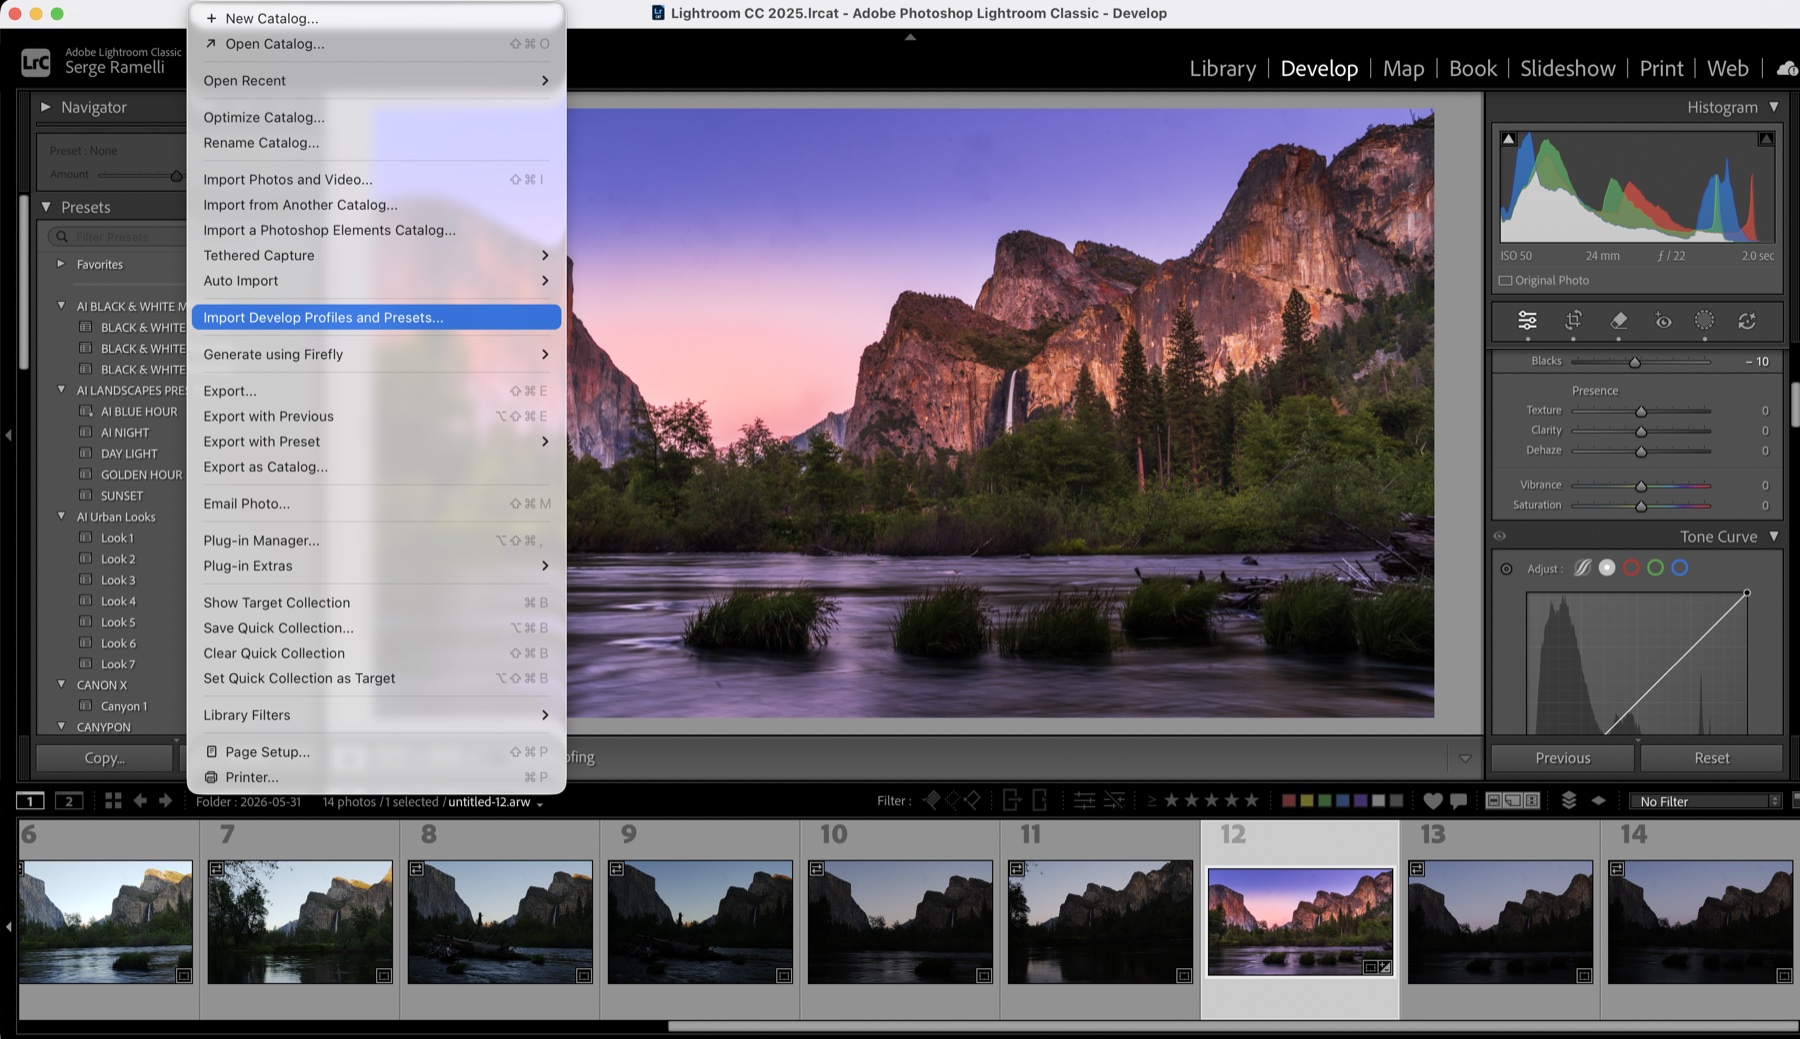
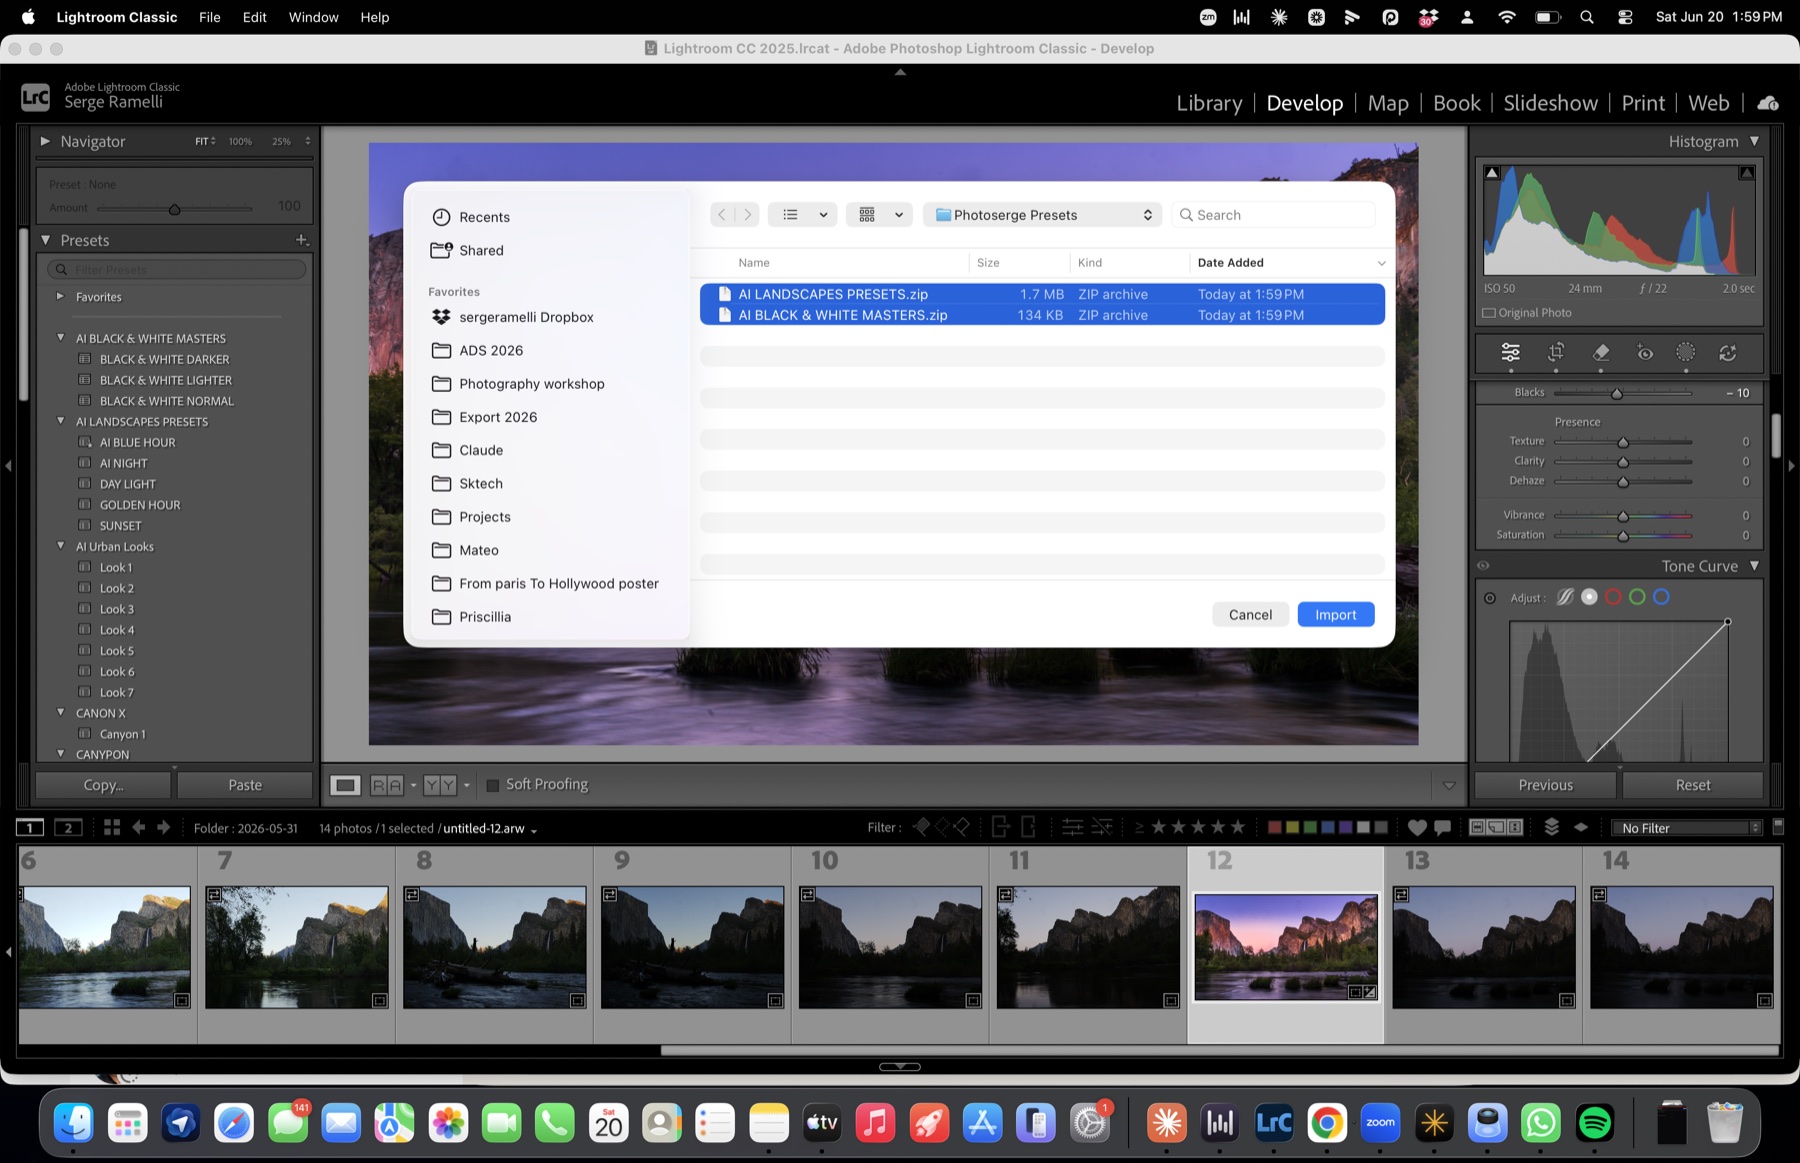
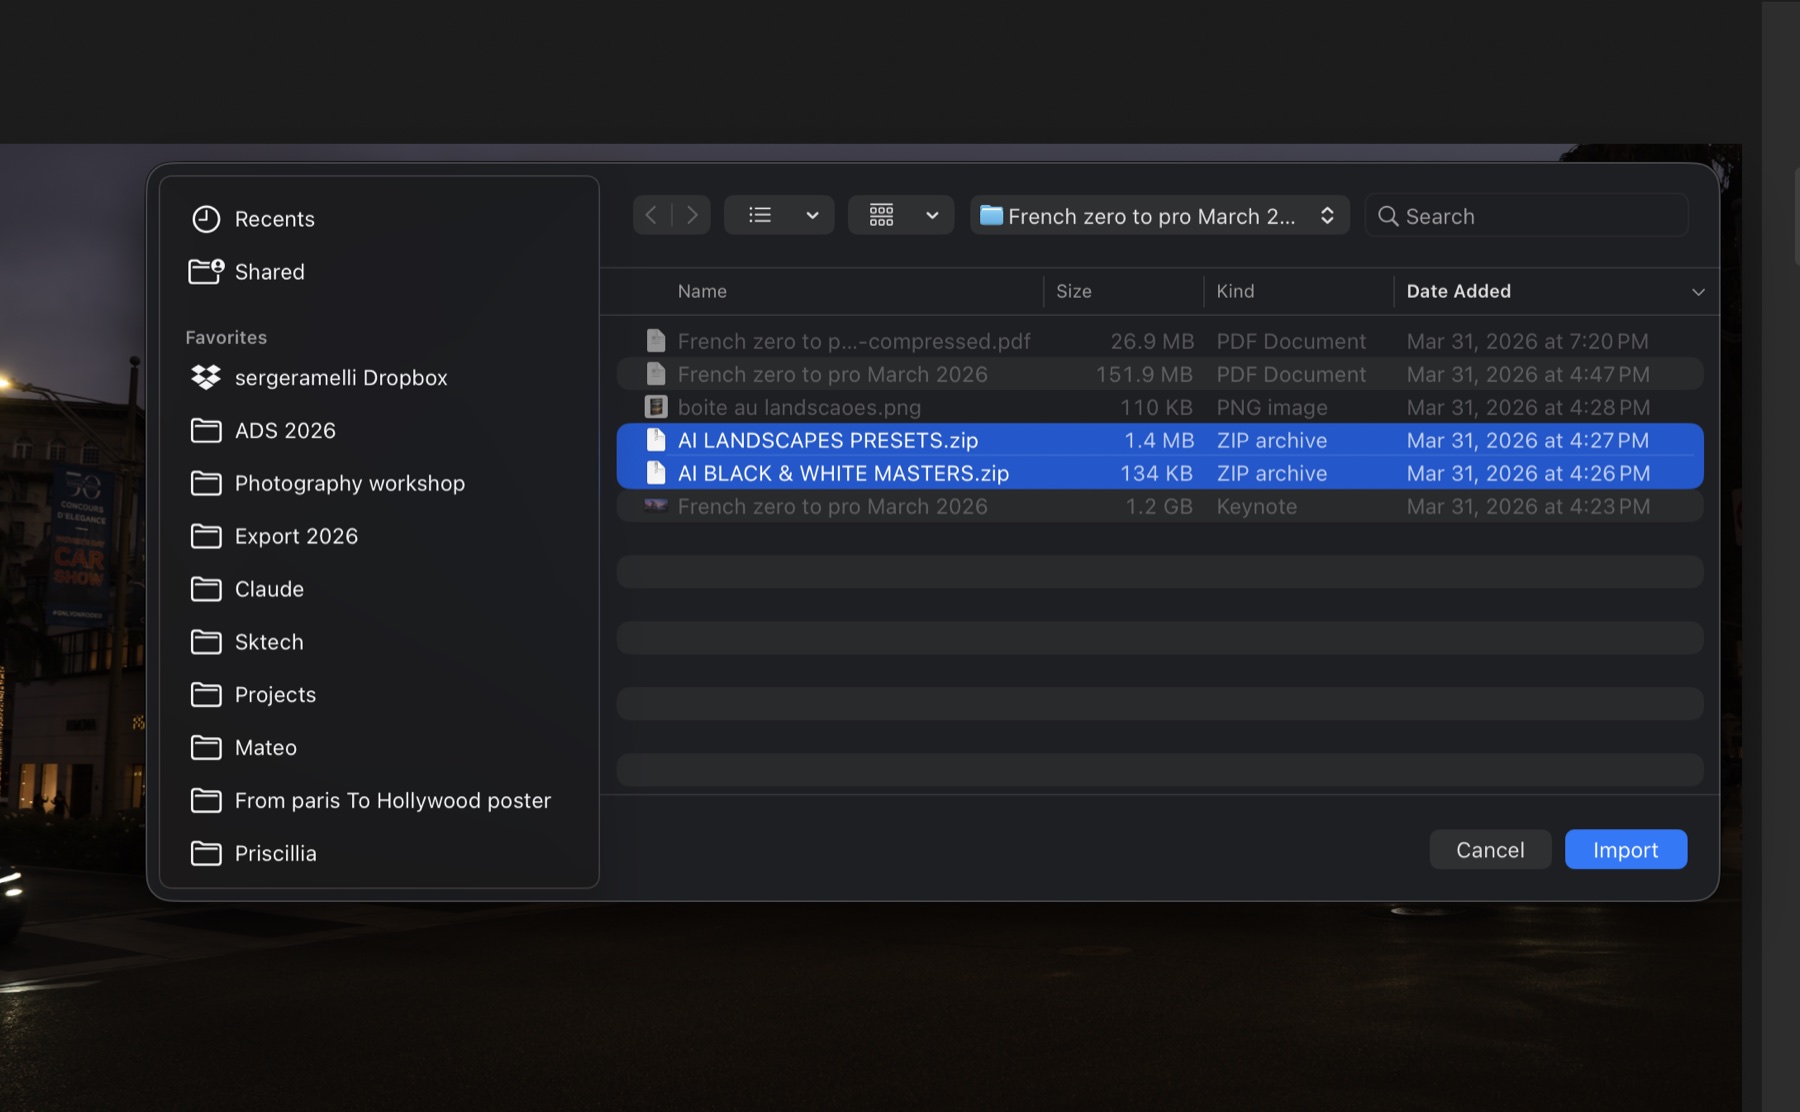
Step 2. Select your downloaded preset file (my AI Landscapes Presets and AI Black & White Masters) and click Import. Leave it as a .zip — there is no need to unzip it.
Step 3. That's it — your Lightroom presets now show up in the Presets panel on the left, in their groups.
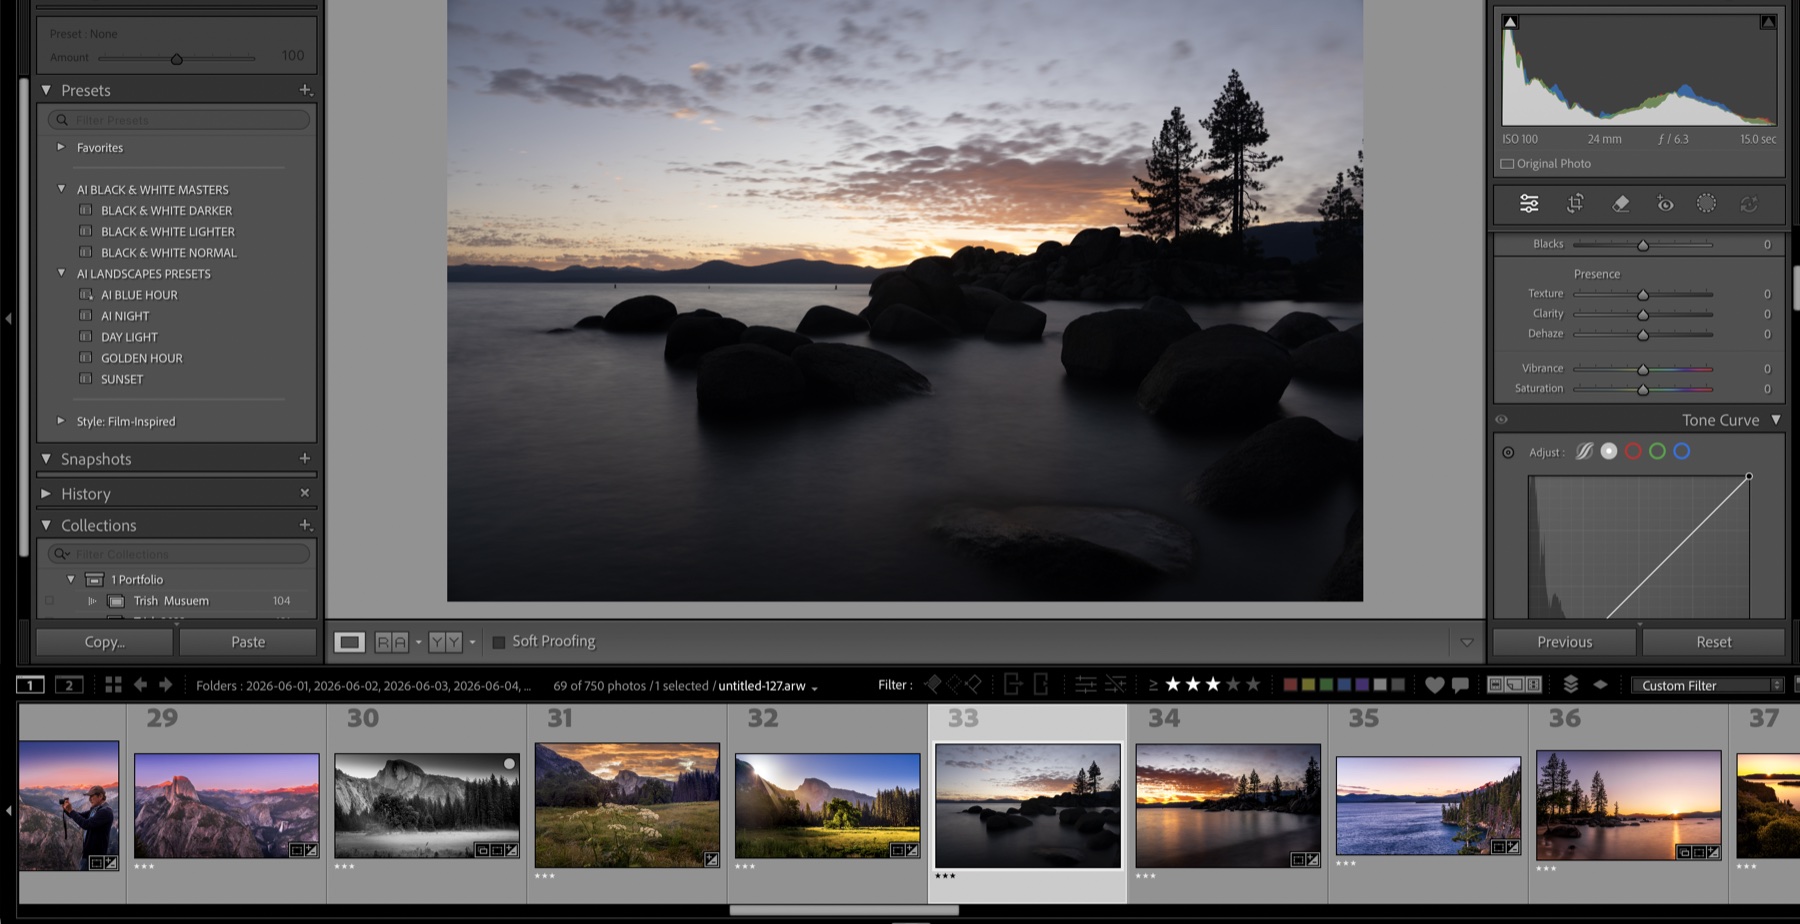
Step 4. Now click any preset (here I clicked Sunset) and watch your photo transform instantly. 🔥

How to Install Presets in Lightroom
Step 1. Open Lightroom and go to File ▸ Import Profiles & Presets…
Step 2. Select your preset .zip file (no need to unzip) and click Import. Done — your presets appear in the Presets panel, ready to use.
On Lightroom Mobile? It Happens Automatically ✨
Here's the magic: because Lightroom syncs through the cloud, once you install your presets on the computer they show up automatically on the free Lightroom app on your phone — nothing to install on the phone at all.
Just open the app, open any photo, tap Presets, and look under the Yours tab — there they are, ready to edit on your phone.

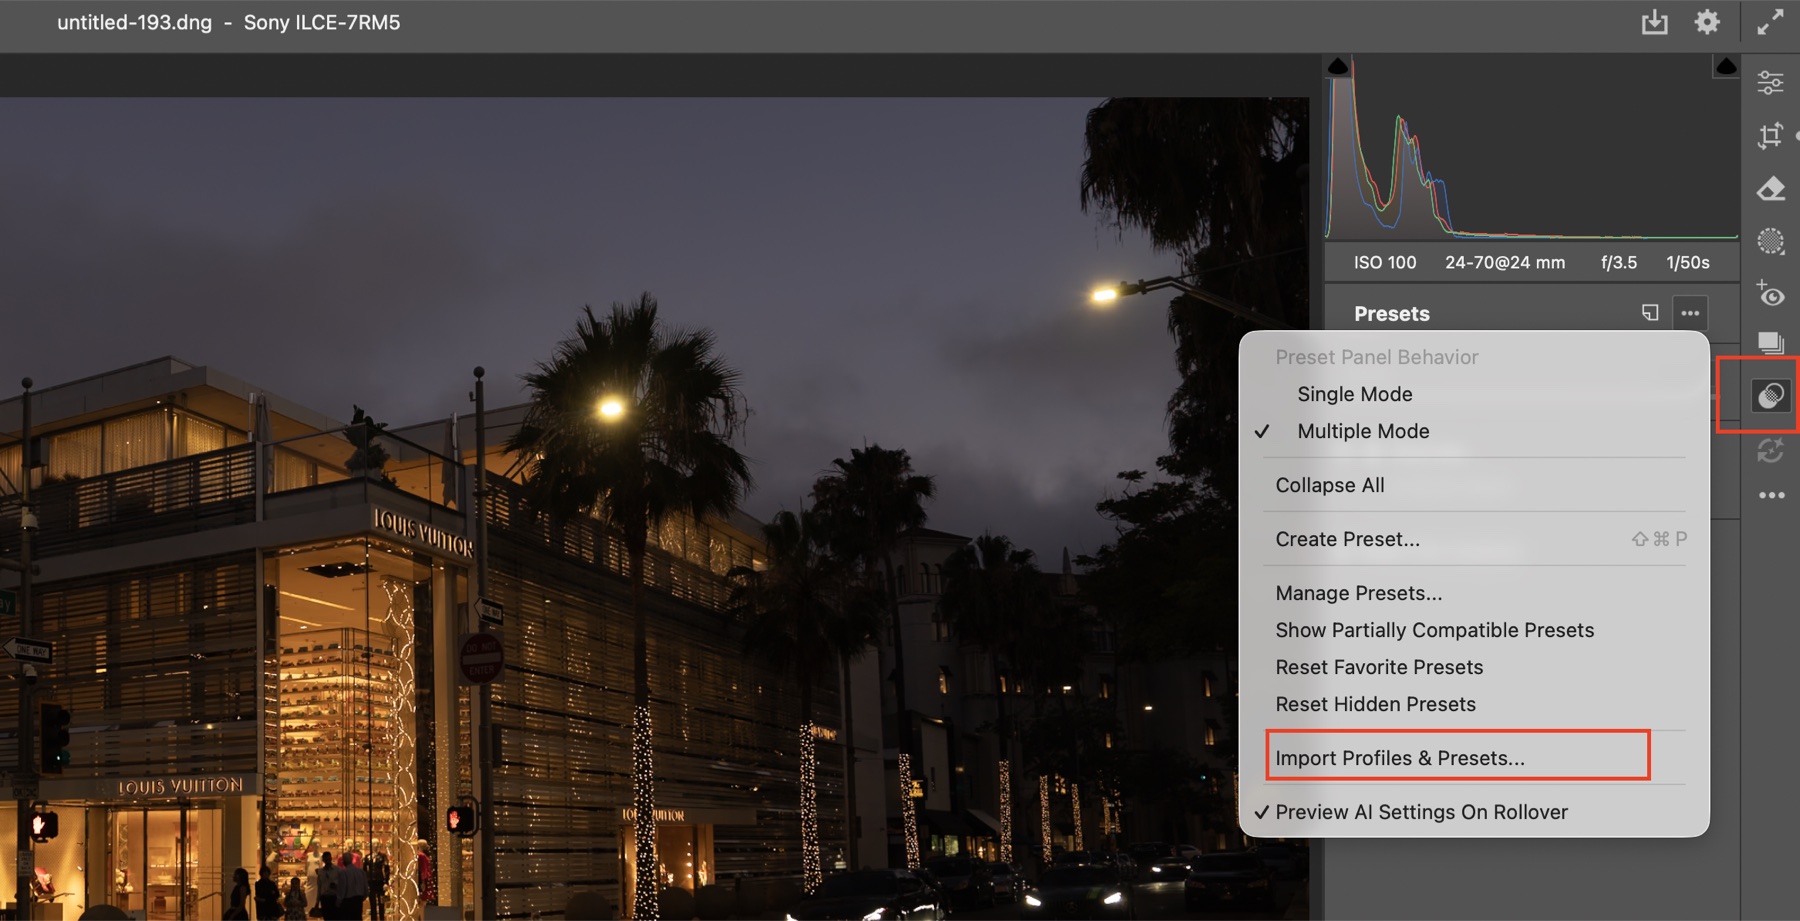
How to Install Presets in Adobe Camera Raw
Step 1. In Adobe Camera Raw, open the Presets panel on the right, click the three dots (⋯) and choose Import Profiles & Presets…
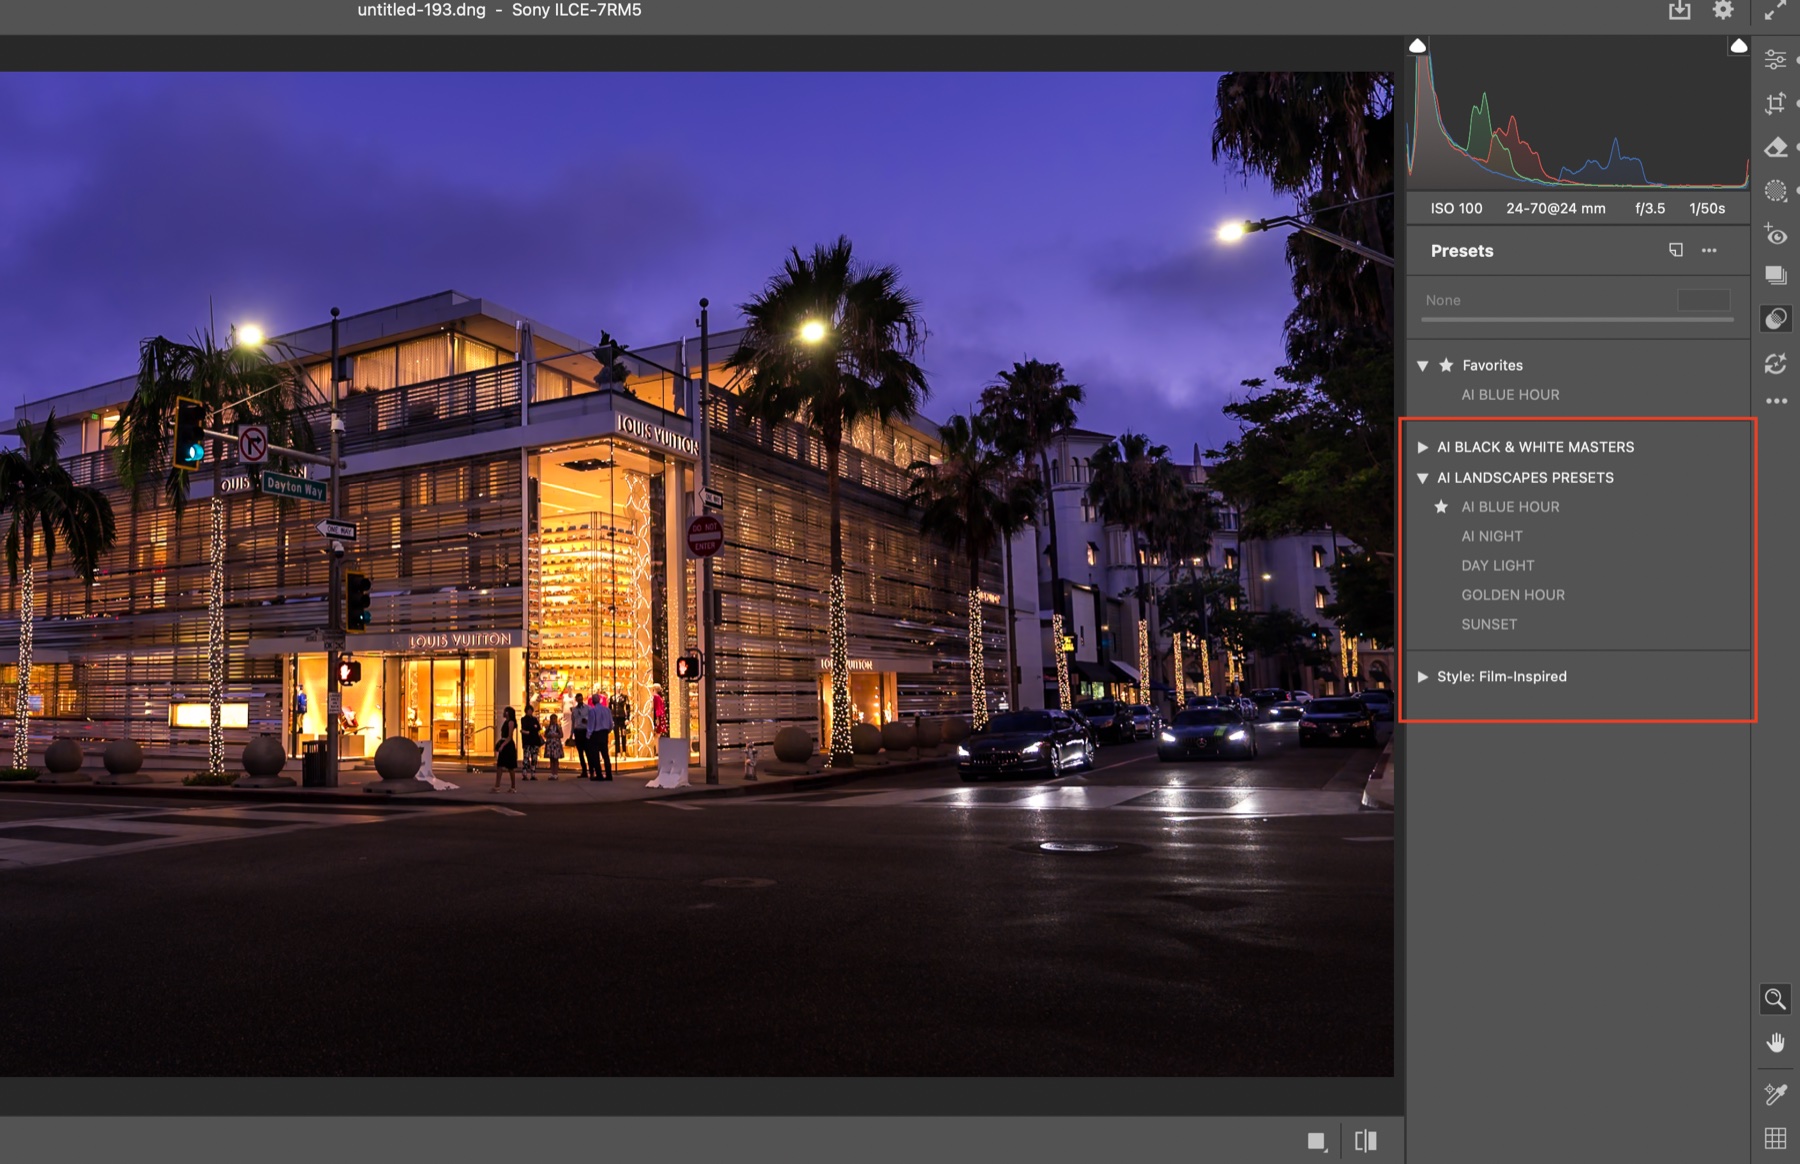
Step 2. Select your preset .zip file (no need to unzip). It appears in the Presets panel — click one and your photo is transformed.
See the Presets in Action: Before & After
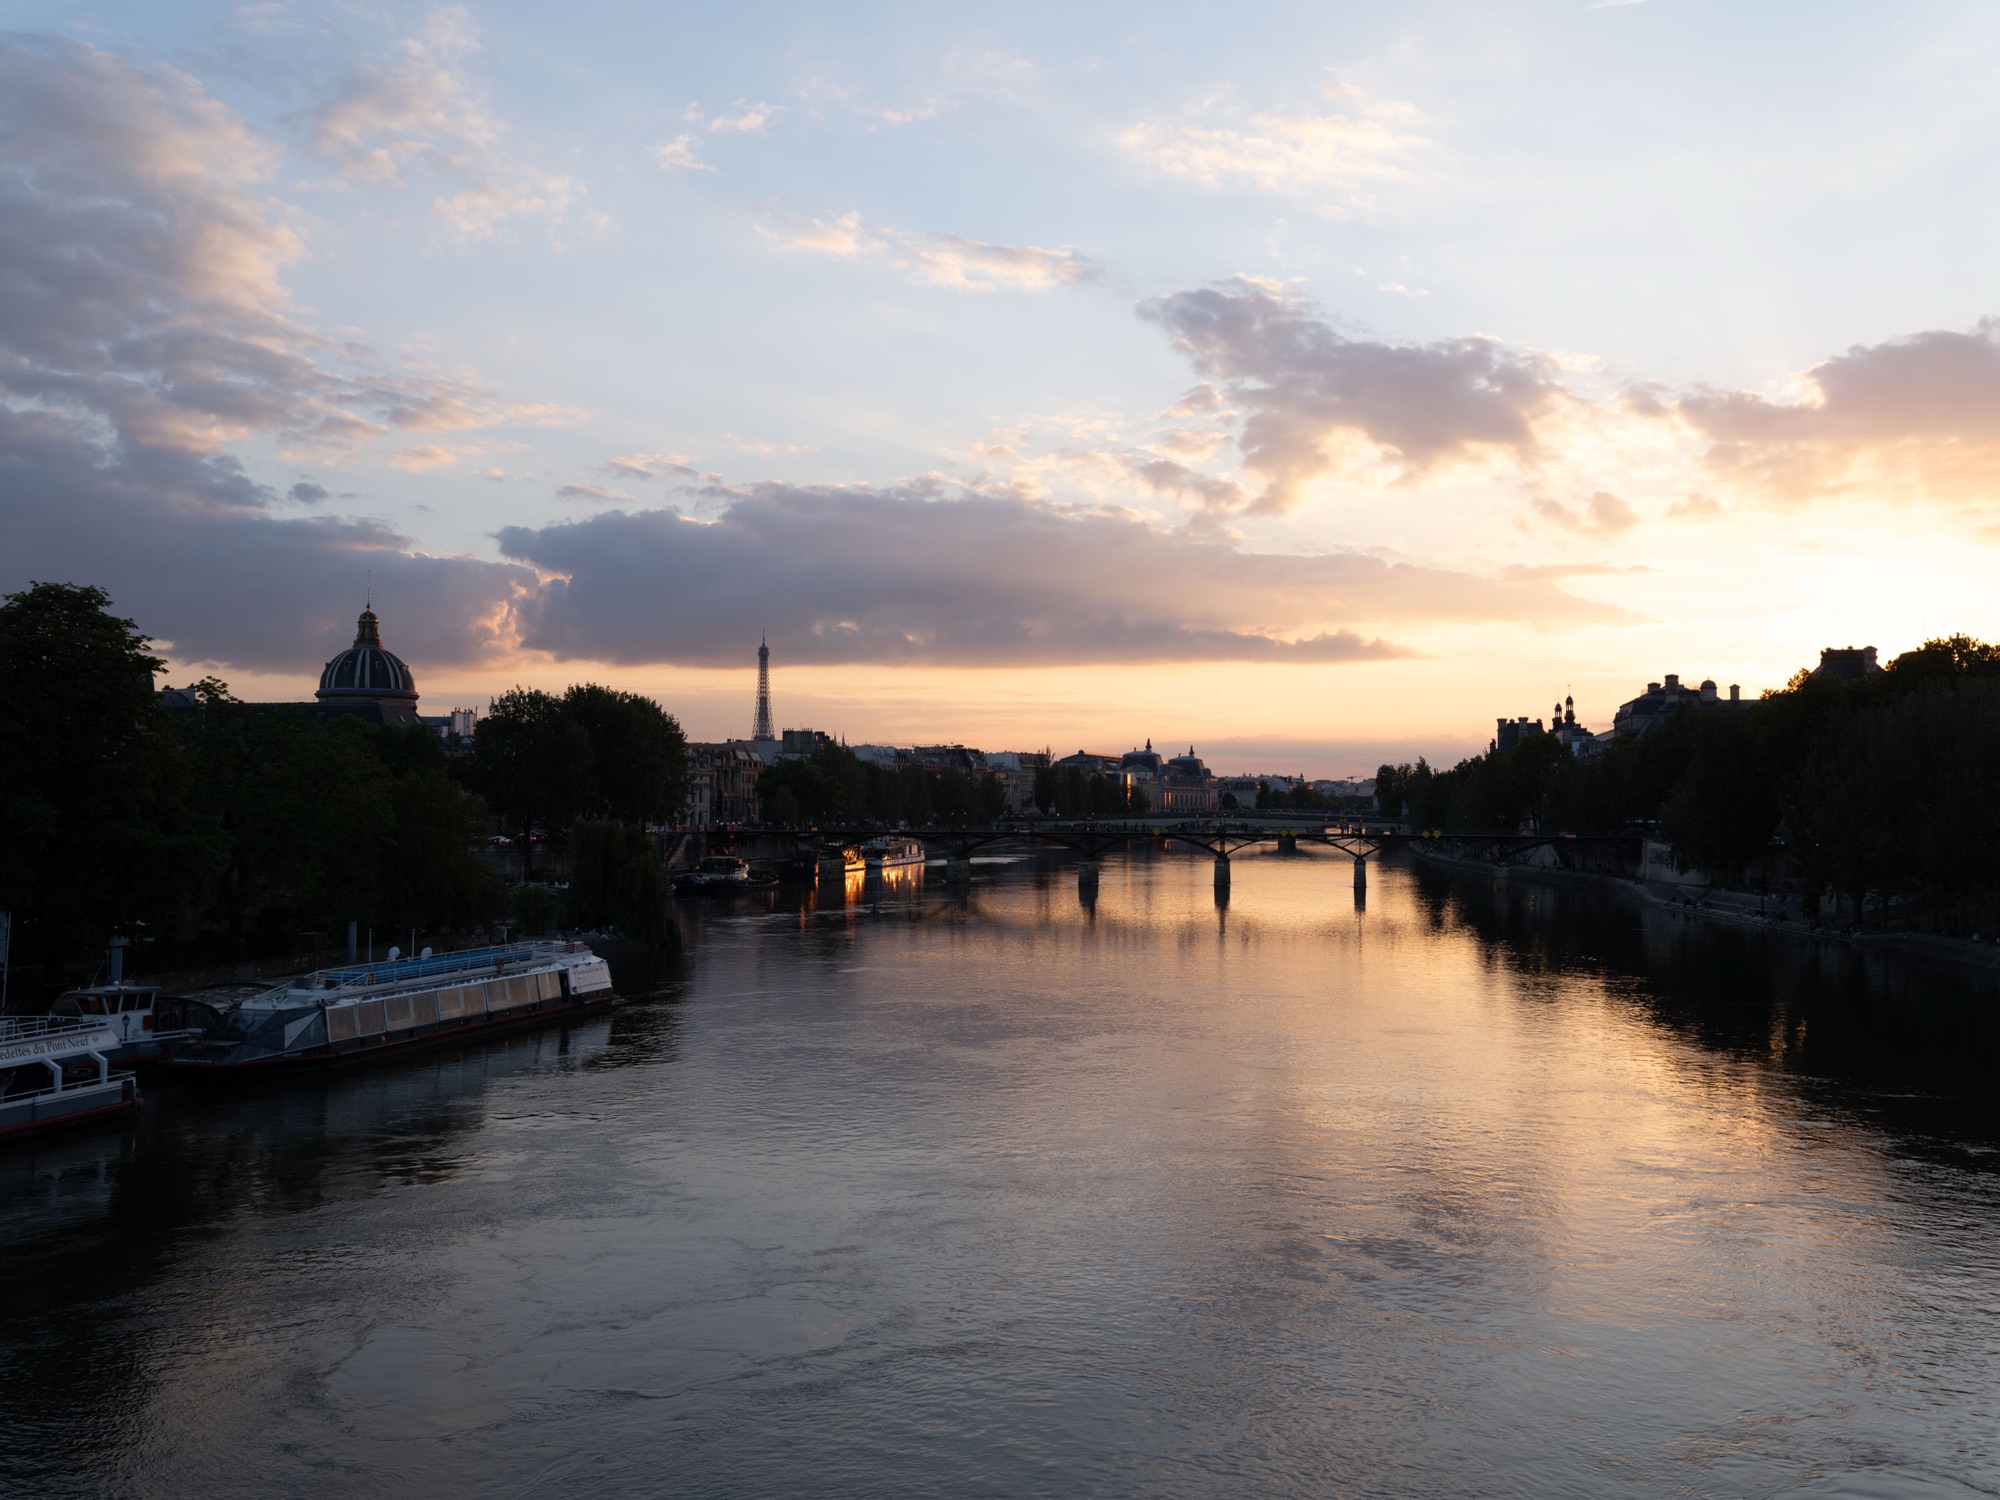
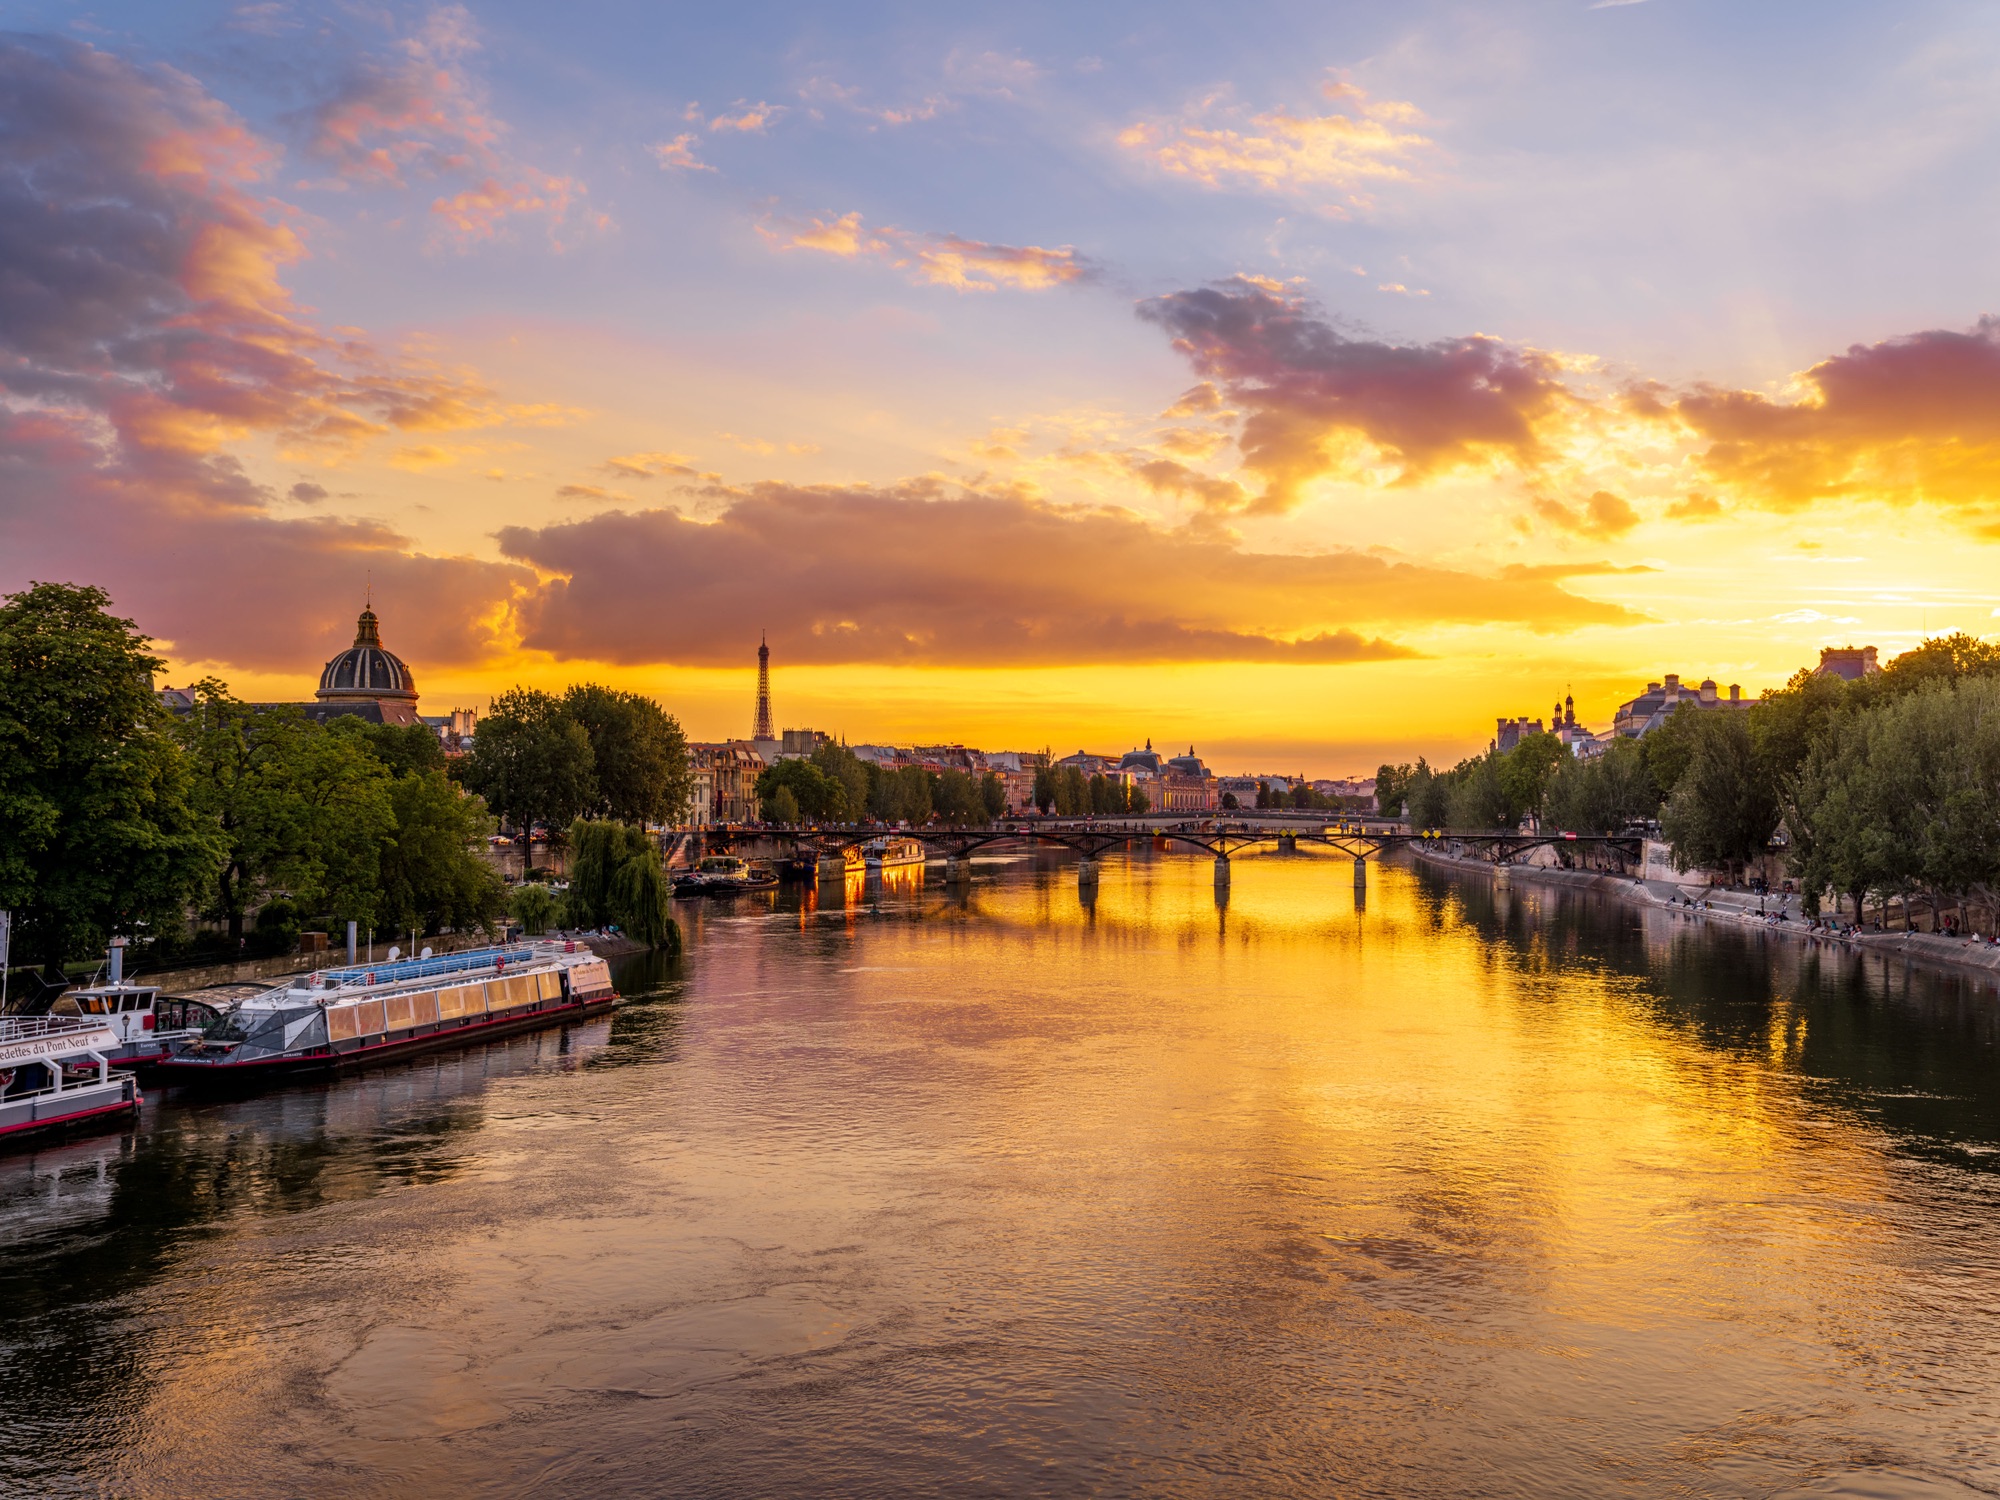
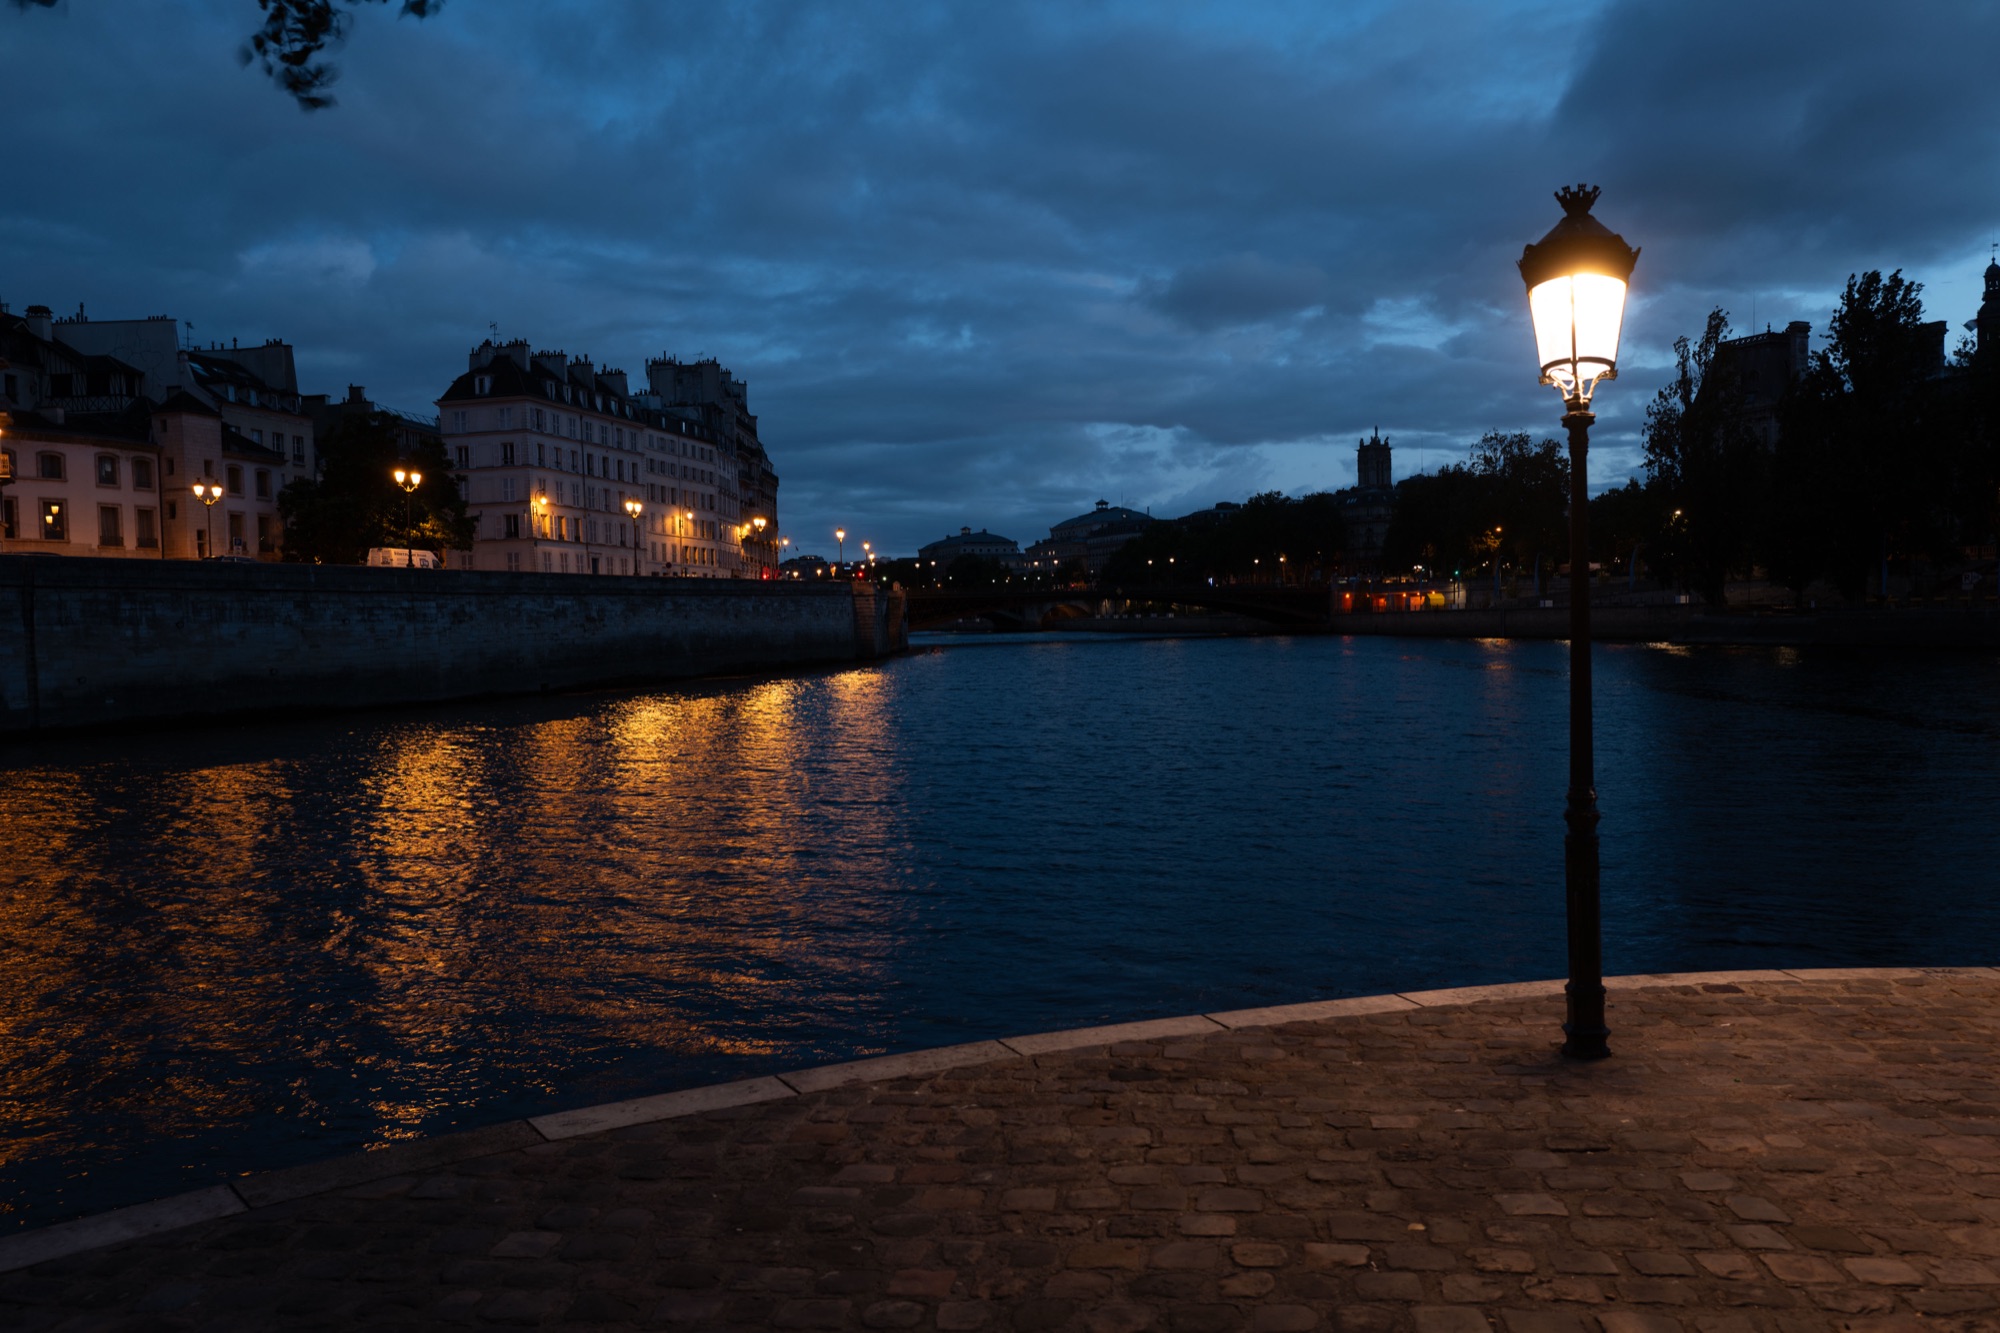
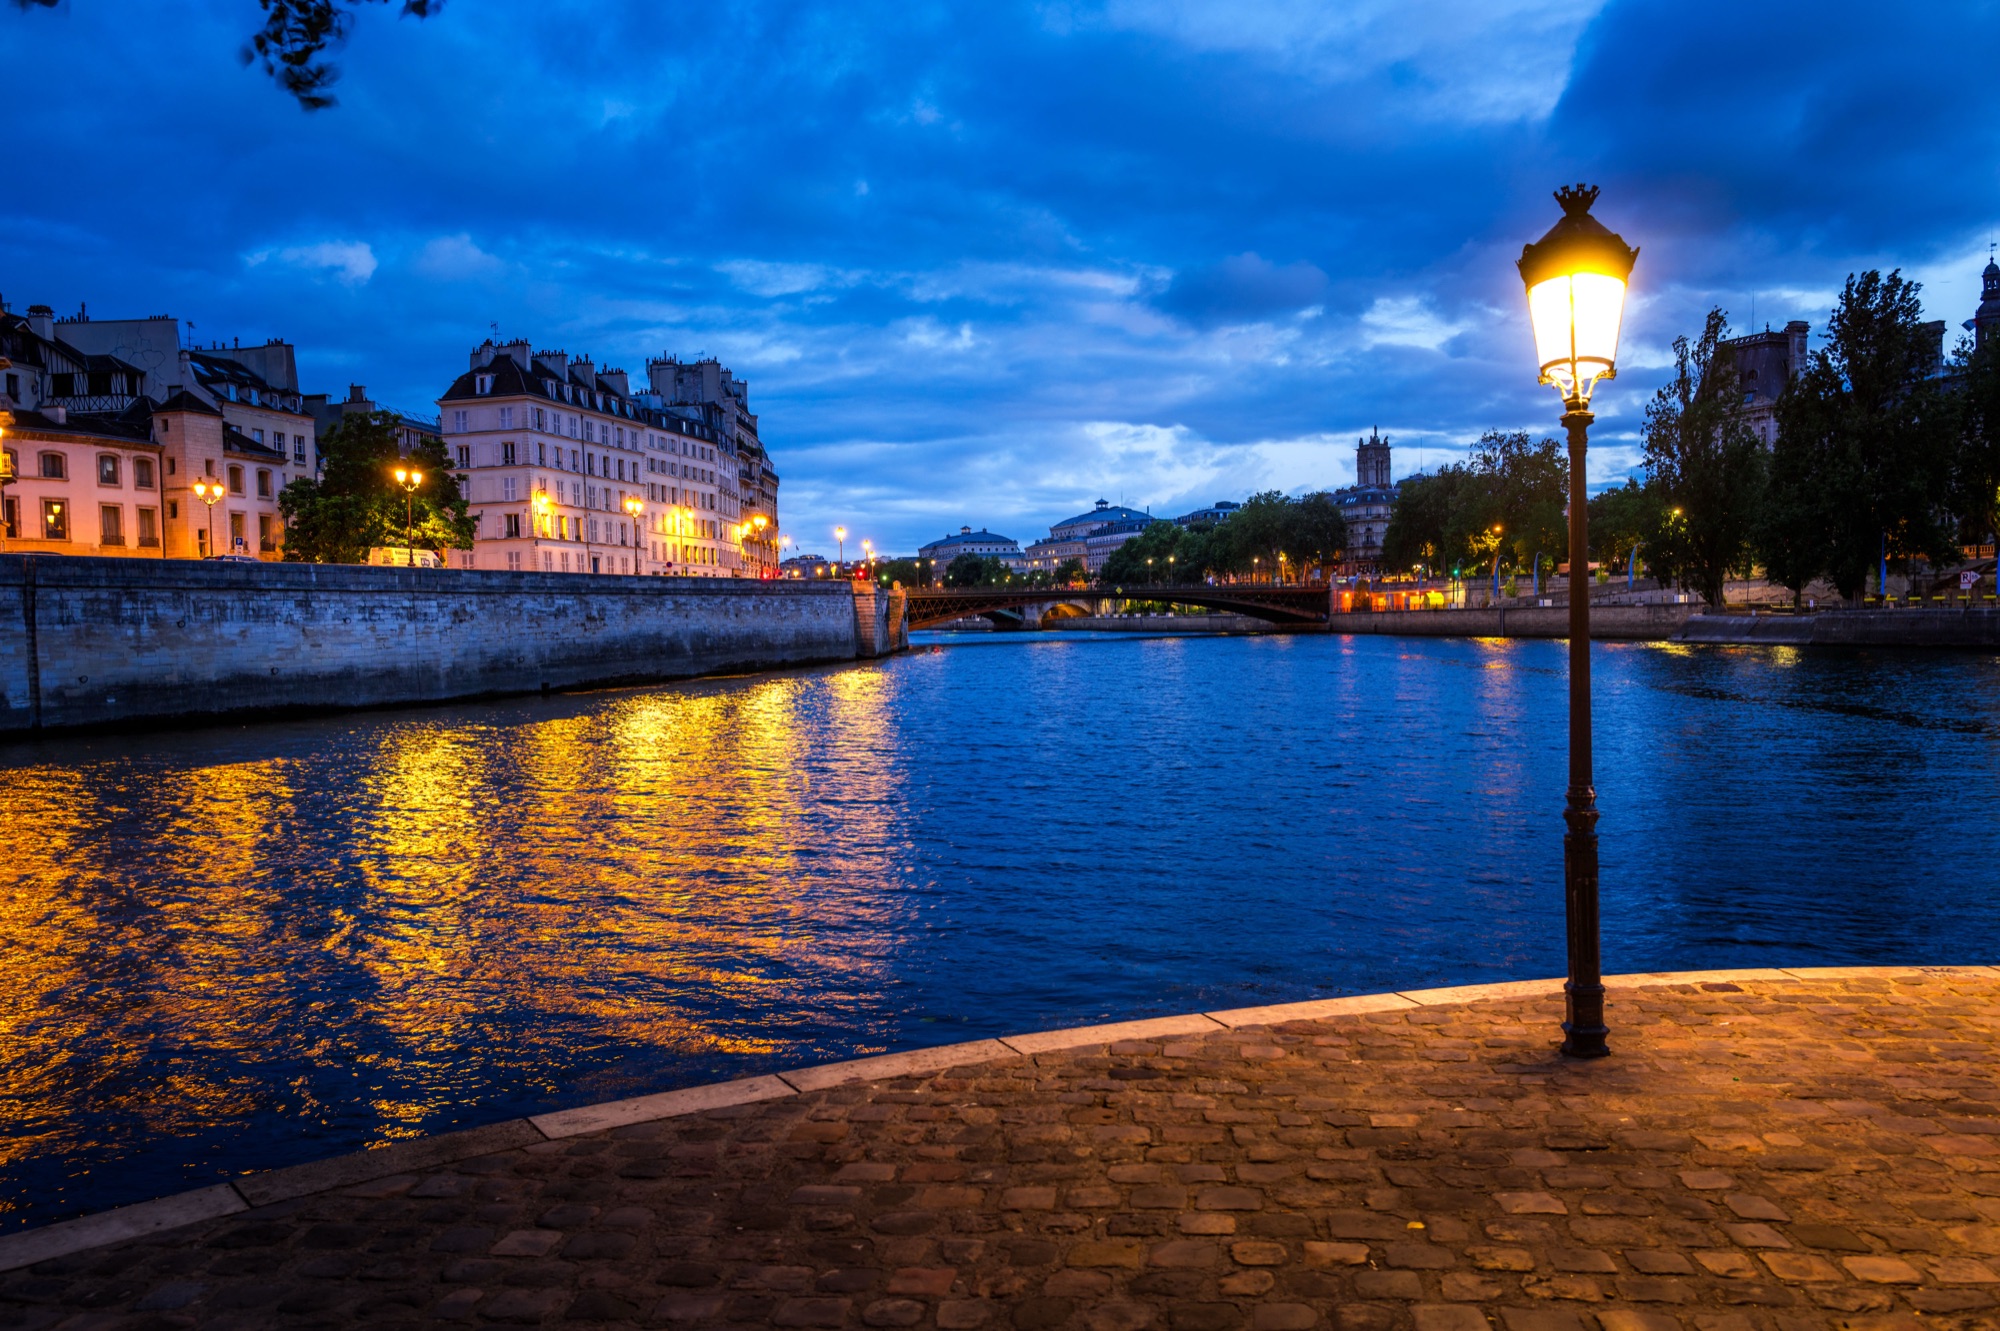
This is why presets are so powerful — one click takes a flat RAW file to a finished, emotional image. Here are a few of mine.
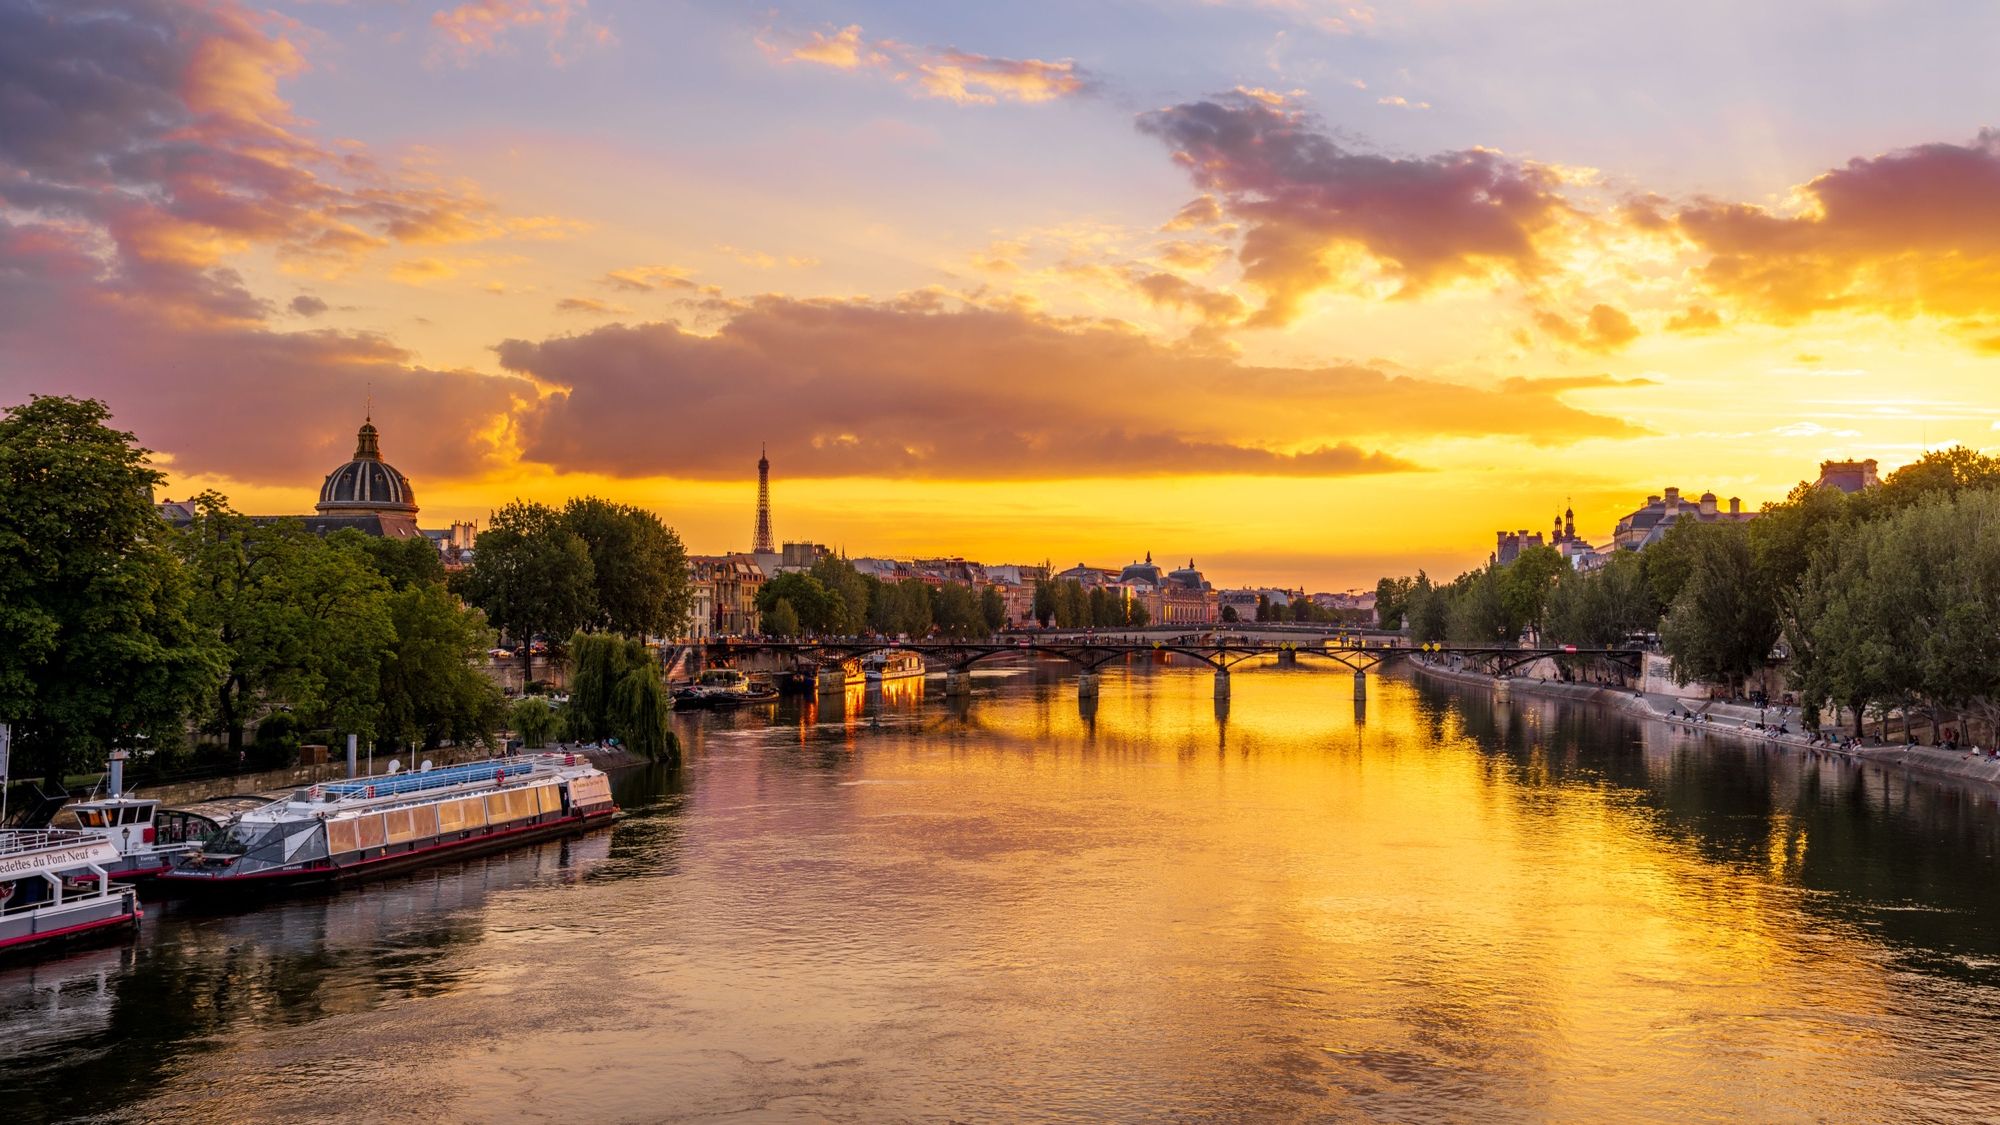
Color presets — Paris sunset on the Seine:
Before
After (one click)
Color presets — Paris blue hour:
Before
After
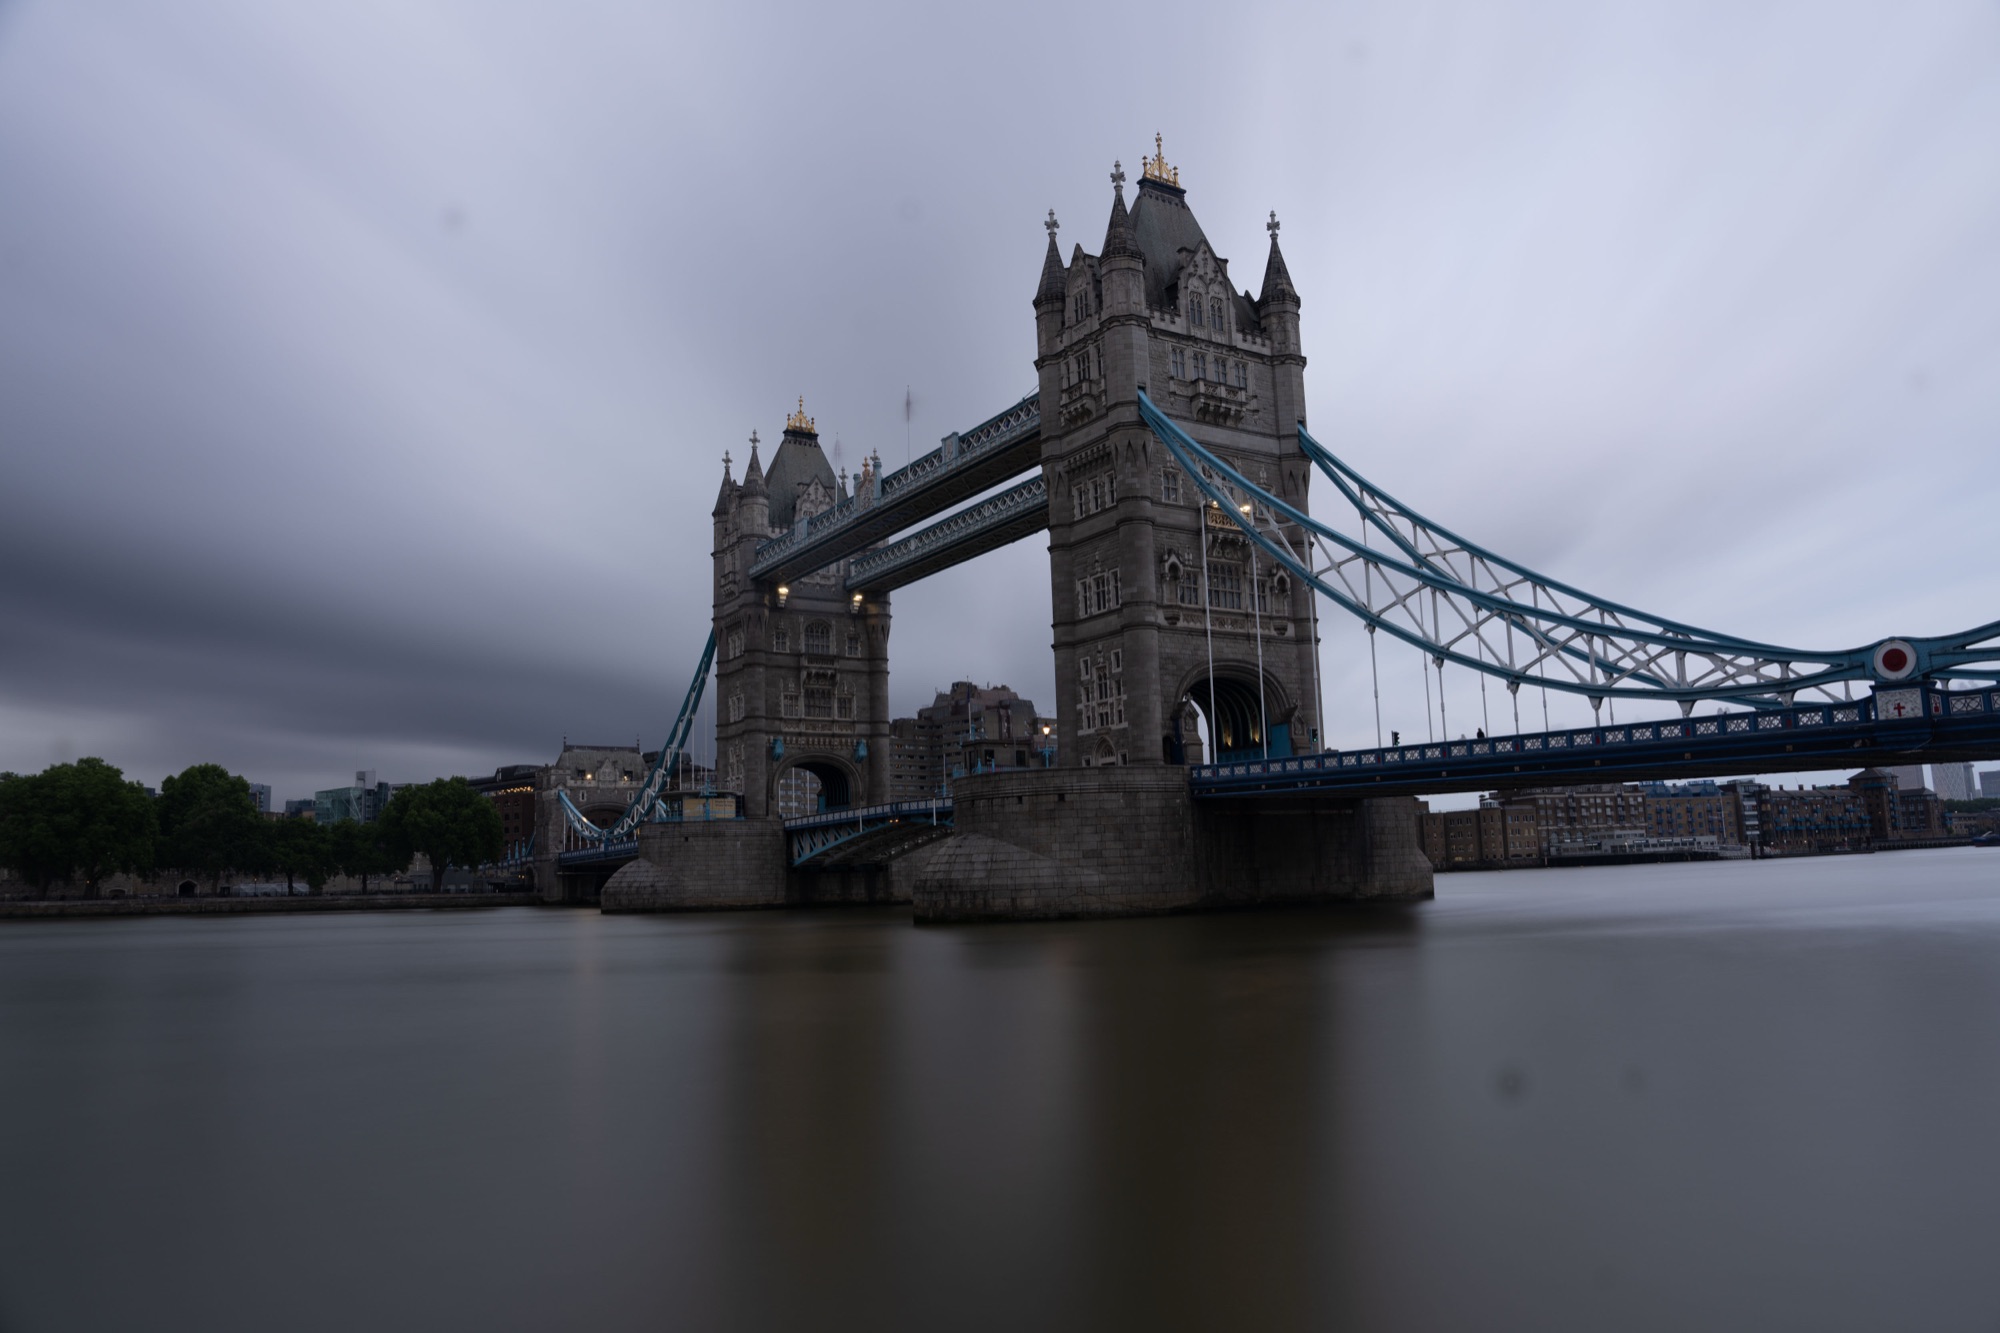
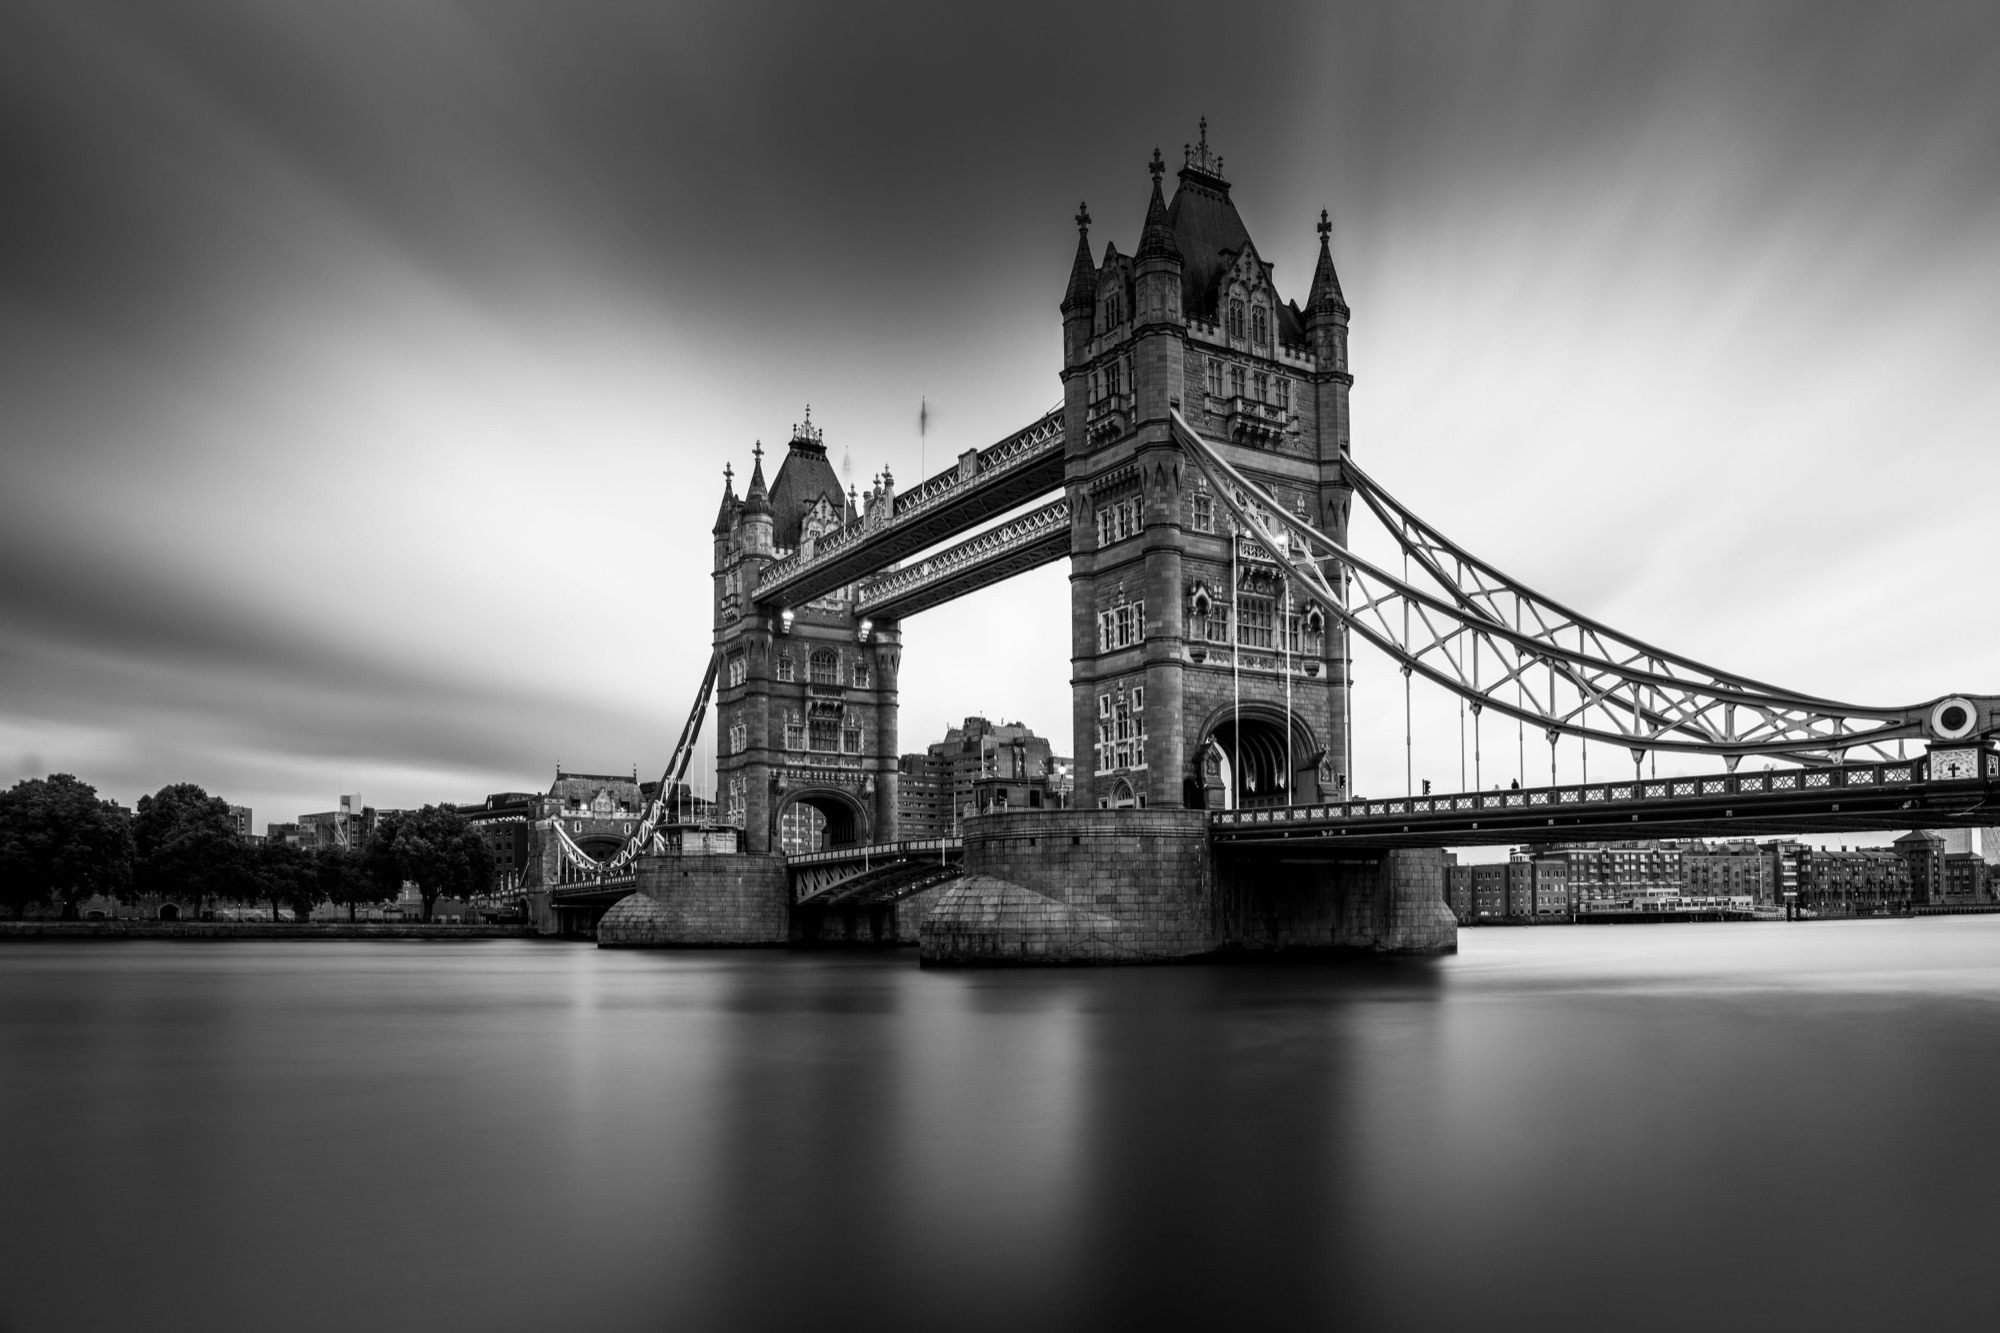
Black & White Masters — Tower Bridge, London:
Before
After
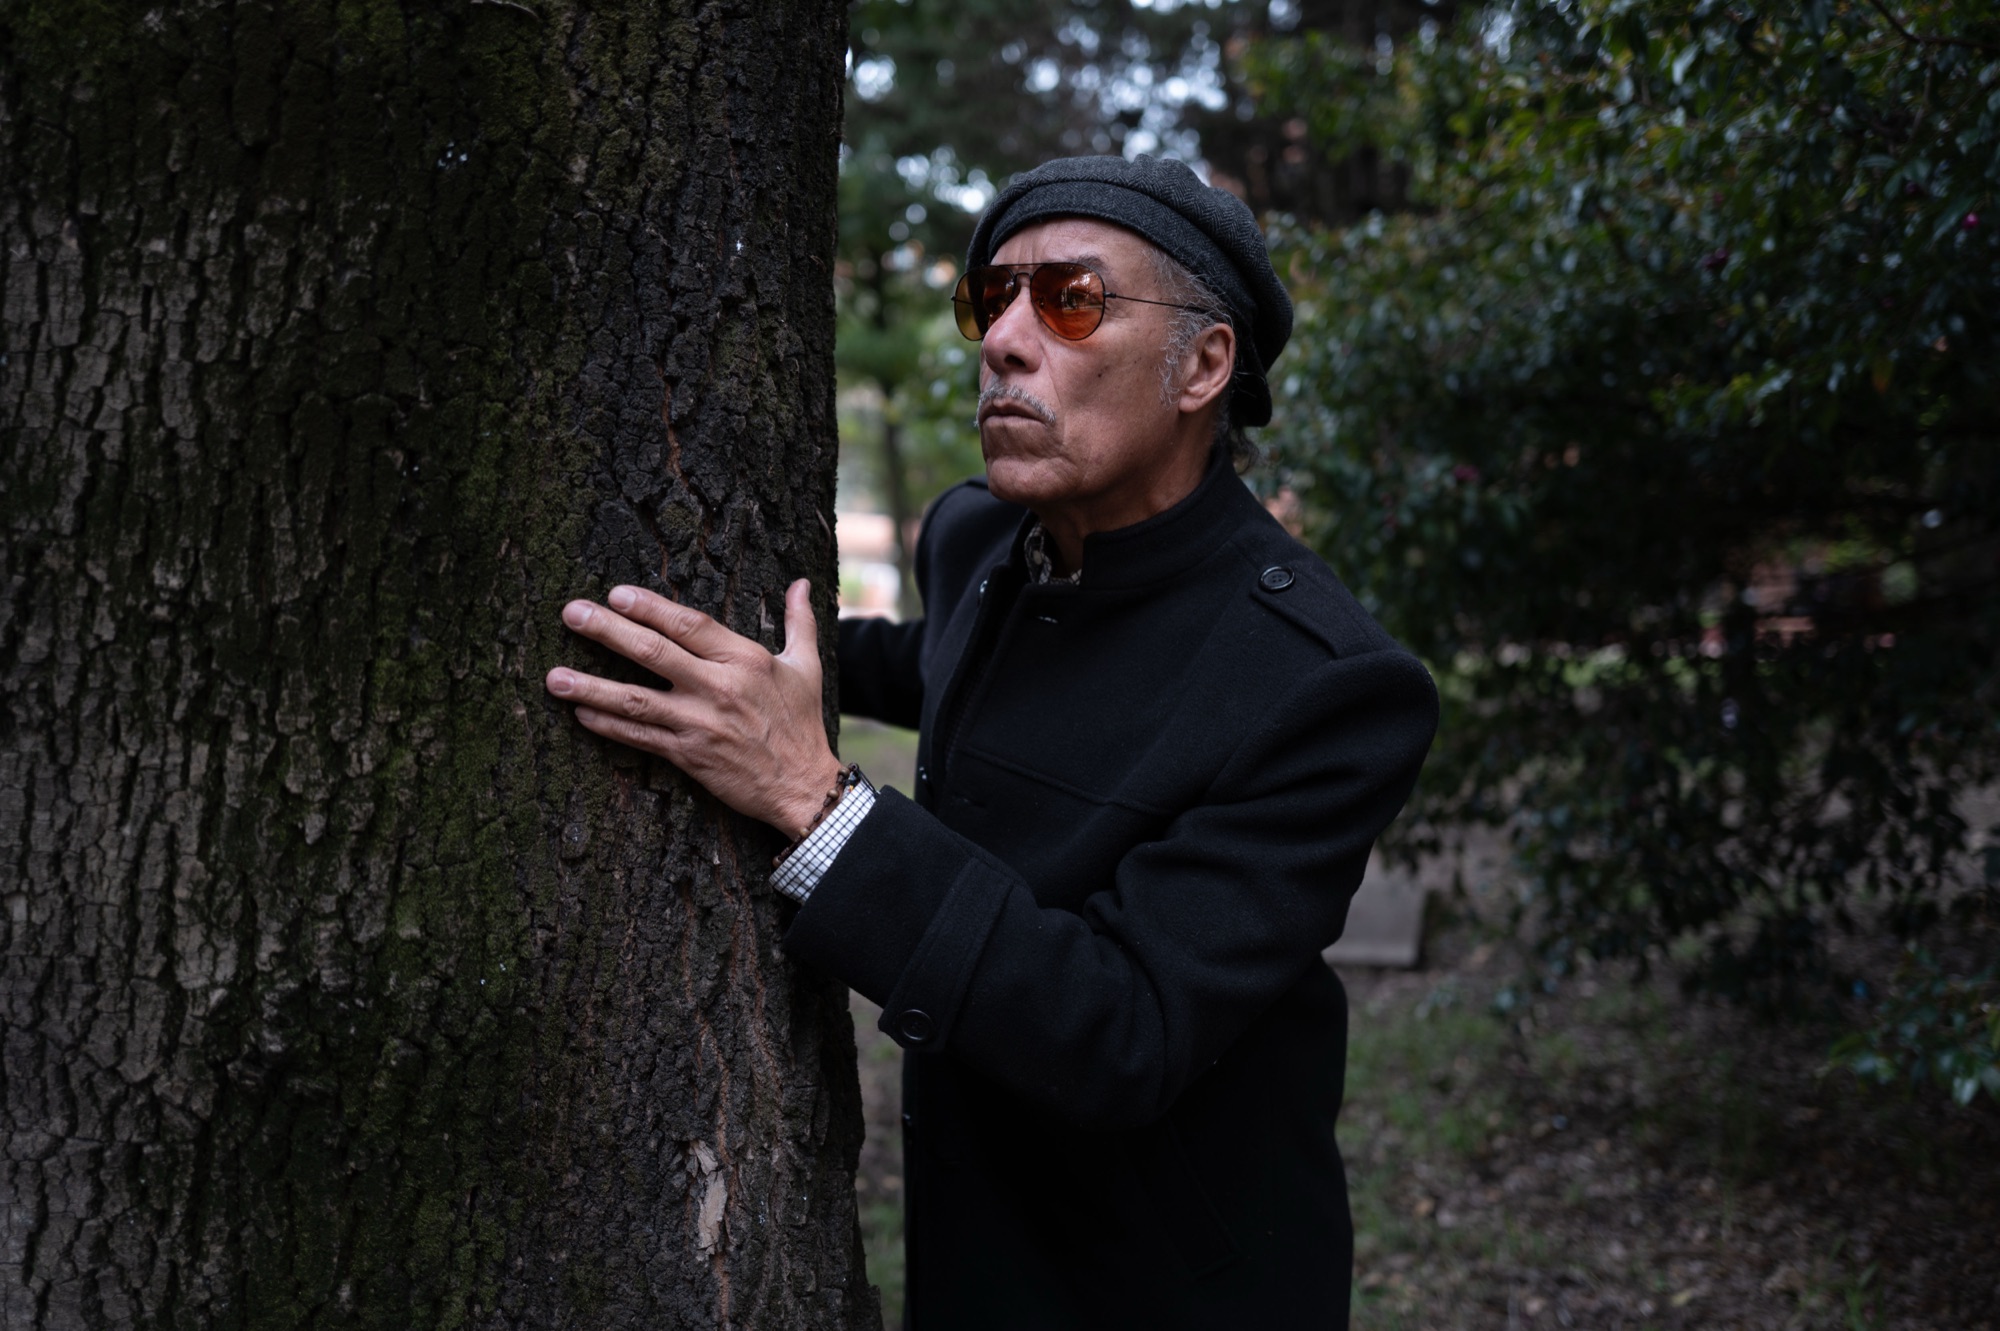
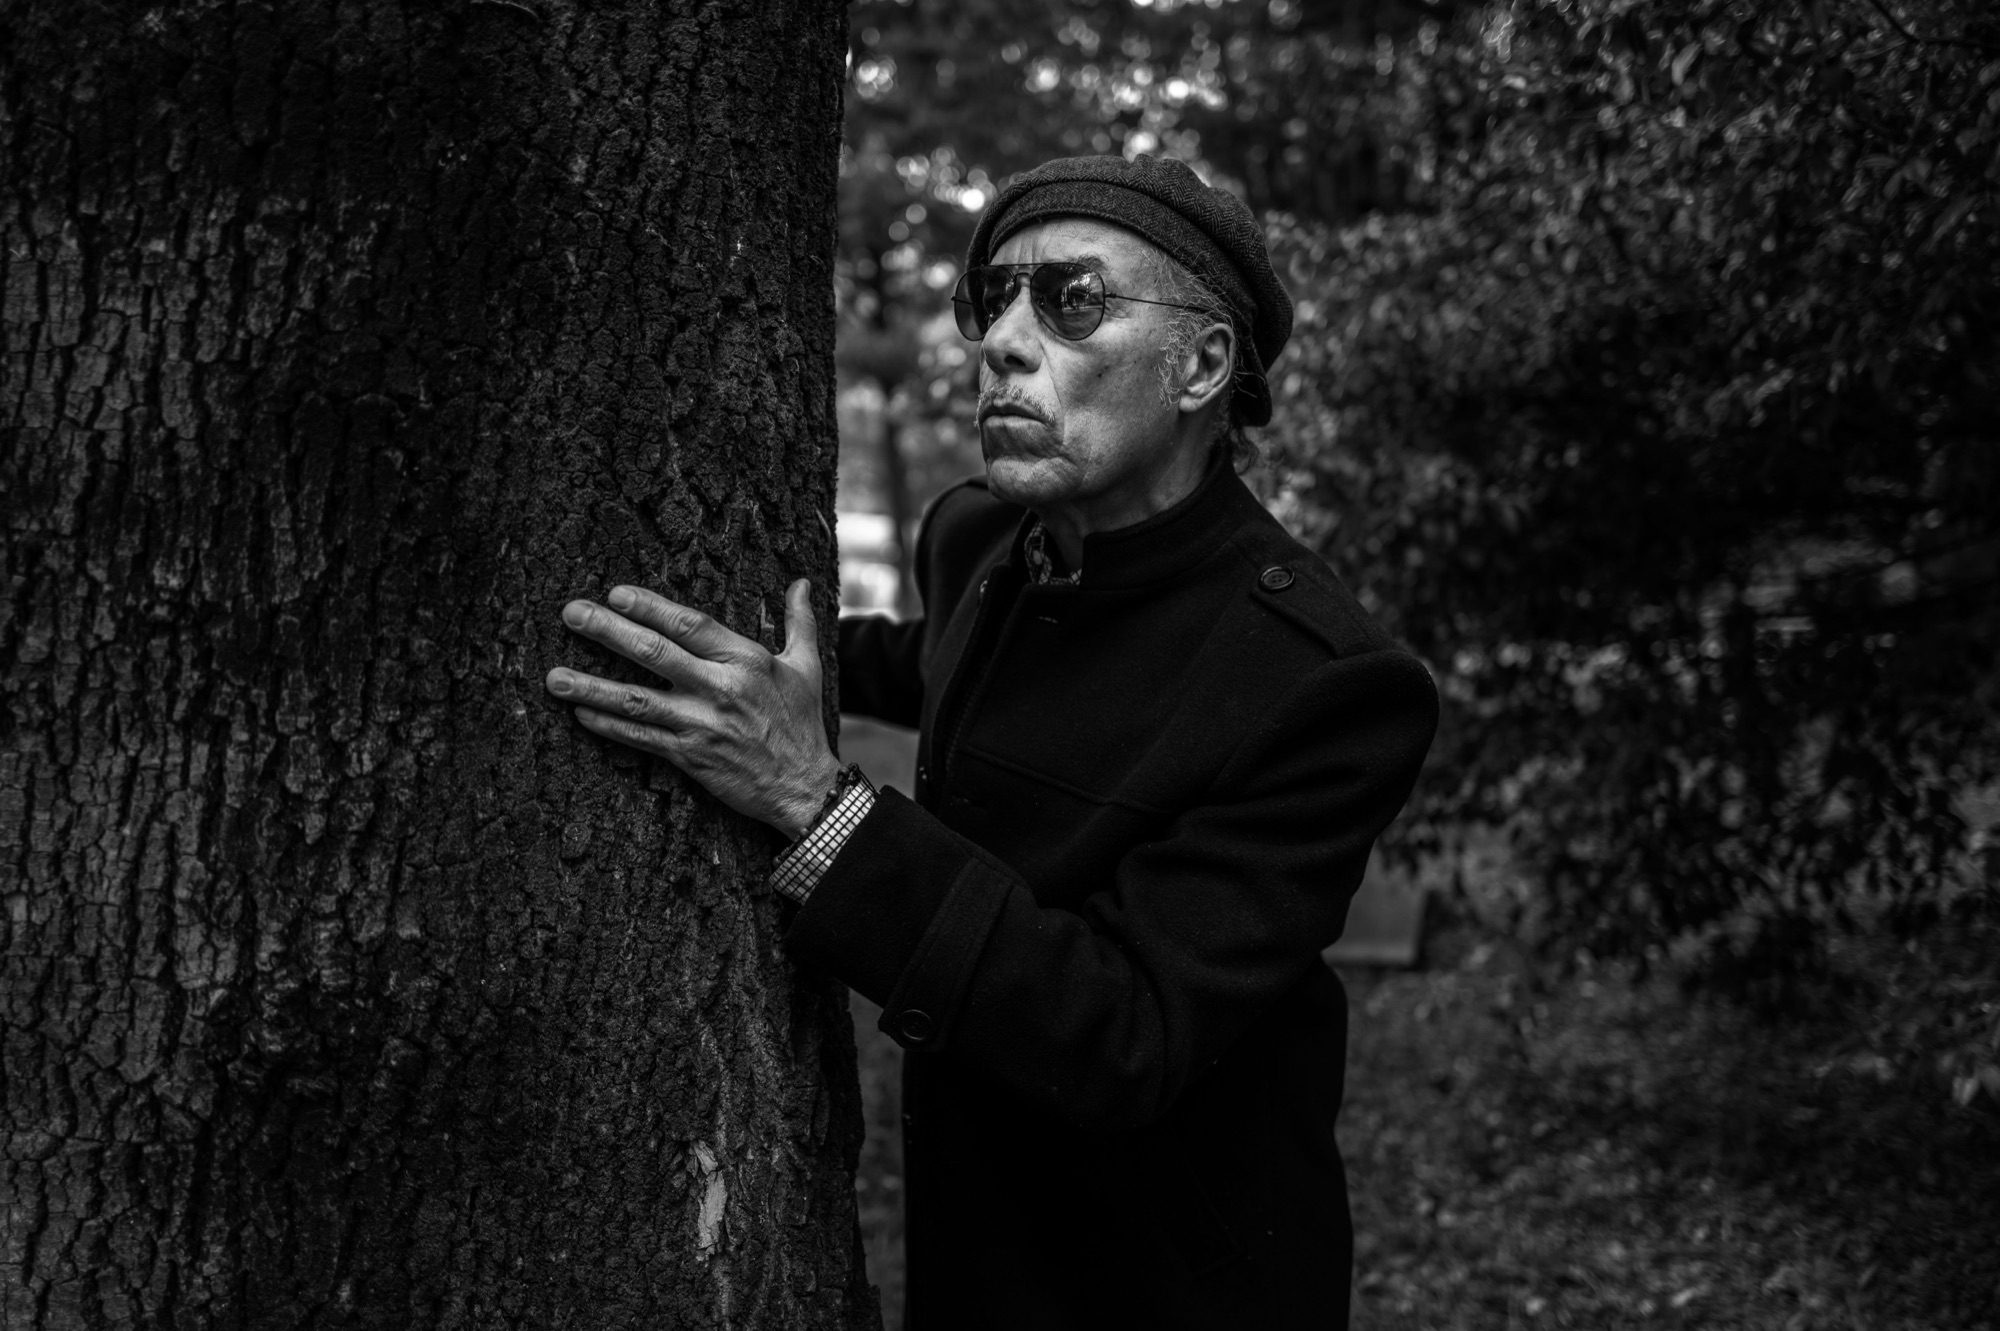
Black & White Masters — portrait:
Before
After
🎁 Get My Free Photography Toolbox
The presets you just saw — my AI Landscapes Presets and AI Black & White Masters — are the exact ones I use every single day in my own work. I honestly believe they're the best on the internet… and you can have them 100% free, along with my full toolbox.
Free preset packs · installs in 2 minutes using the steps above
Frequently Asked Questions
How do I install Lightroom presets?
In Lightroom Classic, go to File ▸ Import Develop Profiles and Presets and select your preset .zip (no need to unzip). In Lightroom it's File ▸ Import Profiles & Presets. They then appear in your Presets panel.
Do I need to unzip the preset file?
No. Import the .zip exactly as you downloaded it — Lightroom reads it directly. Unzipping is not needed.
Do presets installed in Lightroom sync to my phone?
Yes! Install them once in Lightroom and they sync automatically to the free Lightroom app on your phone, on the same Adobe account — nothing to install on the phone.
Can I use the same presets in Adobe Camera Raw?
Yes. In Camera Raw, open the Presets panel, click the three dots, and choose Import Profiles & Presets — the same .zip works.
Why don't my presets show up after installing?
Restart Lightroom and look in the Presets panel under your preset group name. Make sure you imported the .zip itself (not an extracted folder) and that you're in the Develop module in Lightroom Classic.
Serge — Photoserge | Coaching photographers who are serious about getting to the next level.
Struggling To Get Good Results With Your Photos?
Finally master your tools and capture that 'WOW' factor using the Natural Drama Formula
