
I Waited 15 Years for This Monument Valley Shot (Here's Exactly How I Got It)
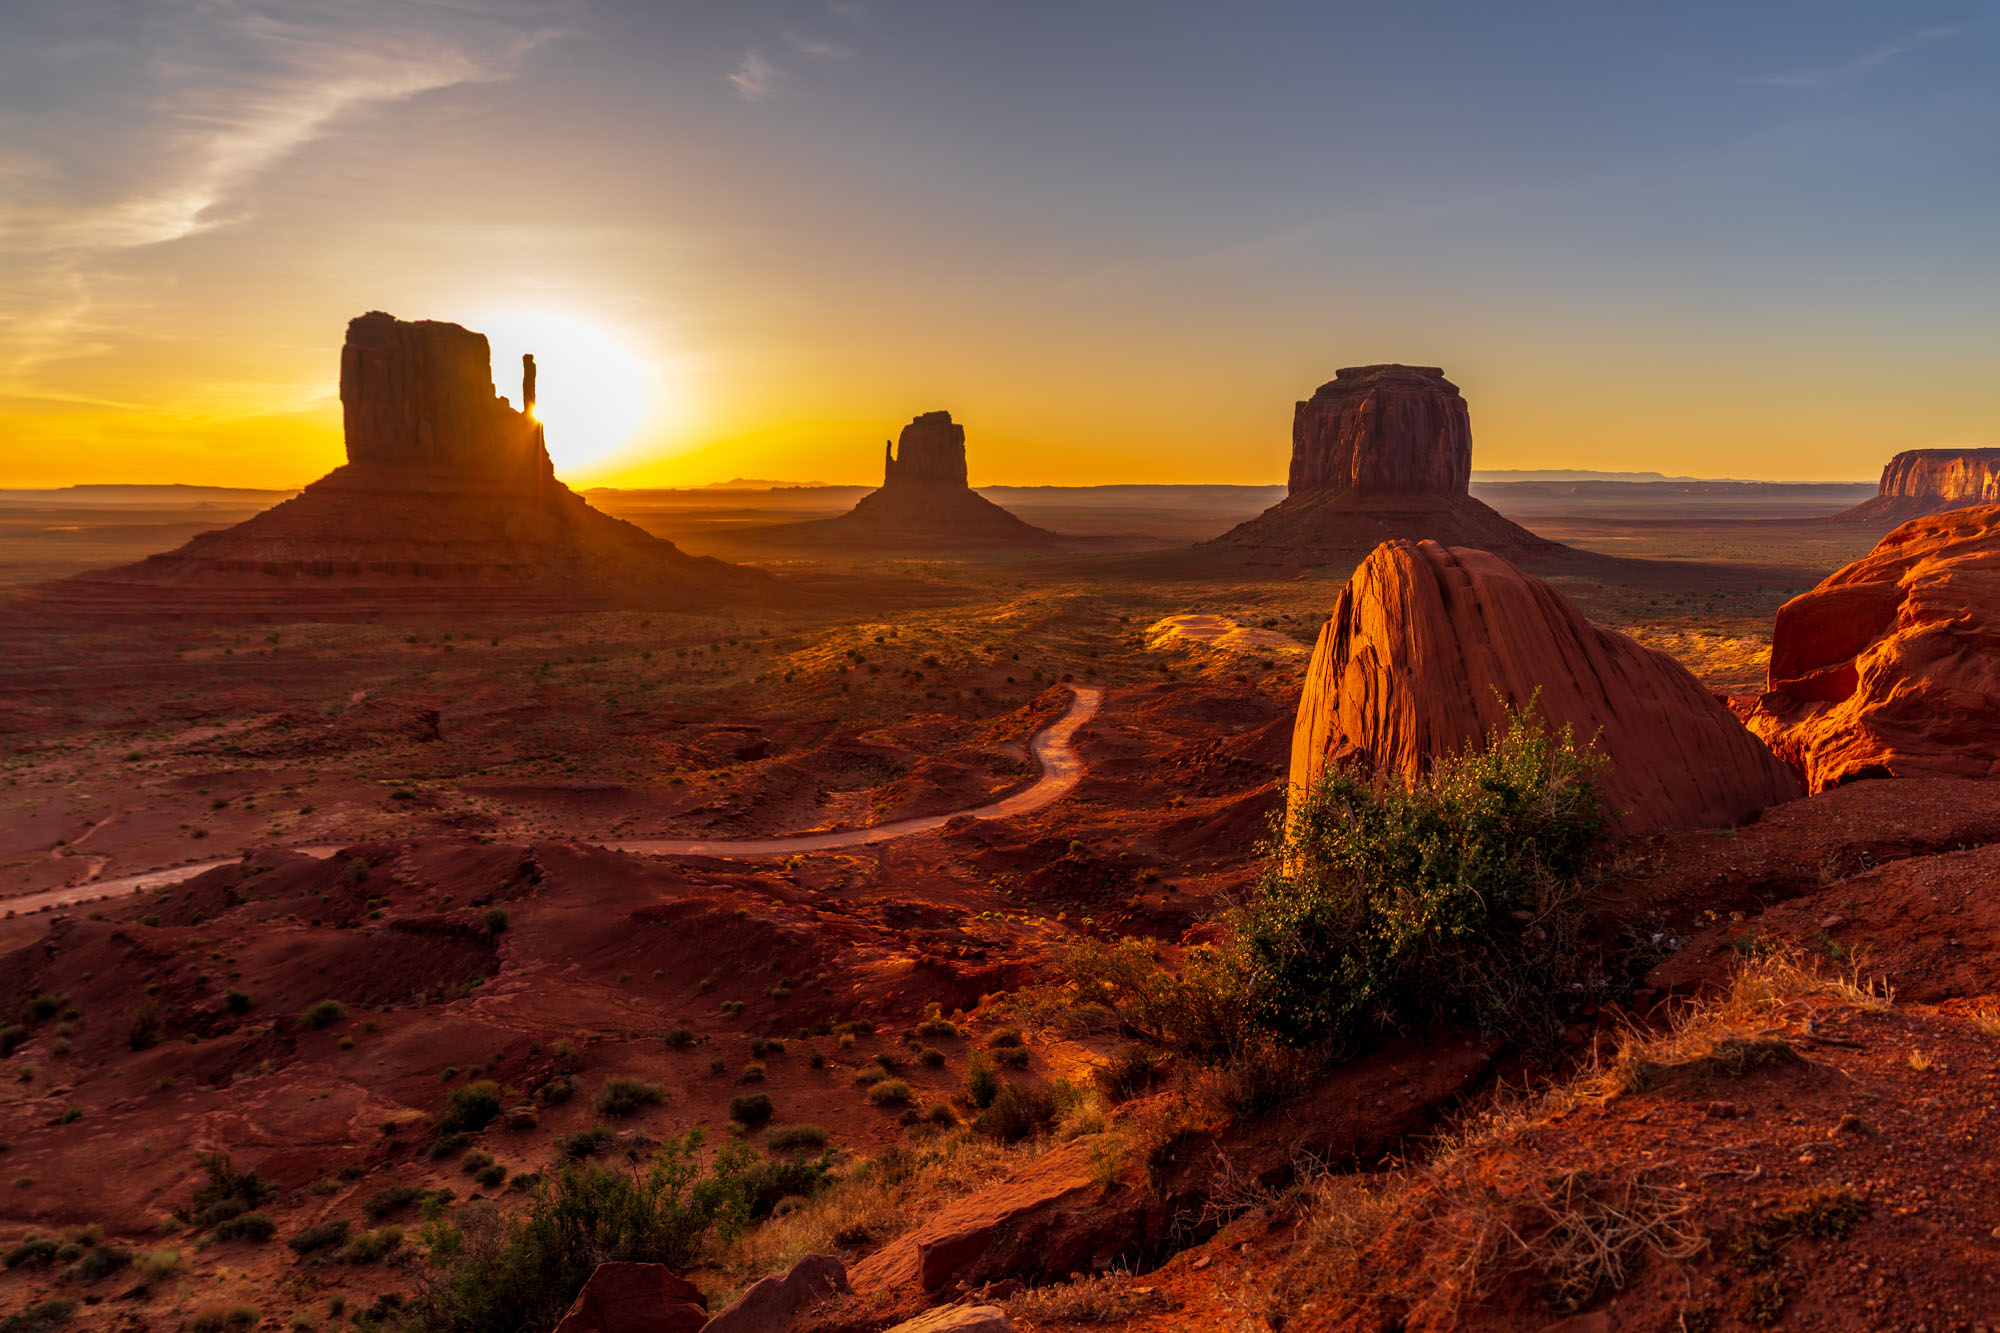
I grew up in France on songs about Monument Valley. We have a very famous singer, Johnny Hallyday, who had a song about it, and I spent my childhood watching John Ford westerns where Monument Valley was basically a character in the film. I had never actually been there, and I had one very specific shot in my head that I wanted to bring home.
This trip did not go the way I imagined. I want to walk you through the bad photos, the good photos, and how I retouched the image until I got the result I had been dreaming about for 15 years. If you're planning your own trip, I also put together a full guide to the best photography locations in Antelope Canyon and Monument Valley.
The First Night Taught Me Something I Didn't Know
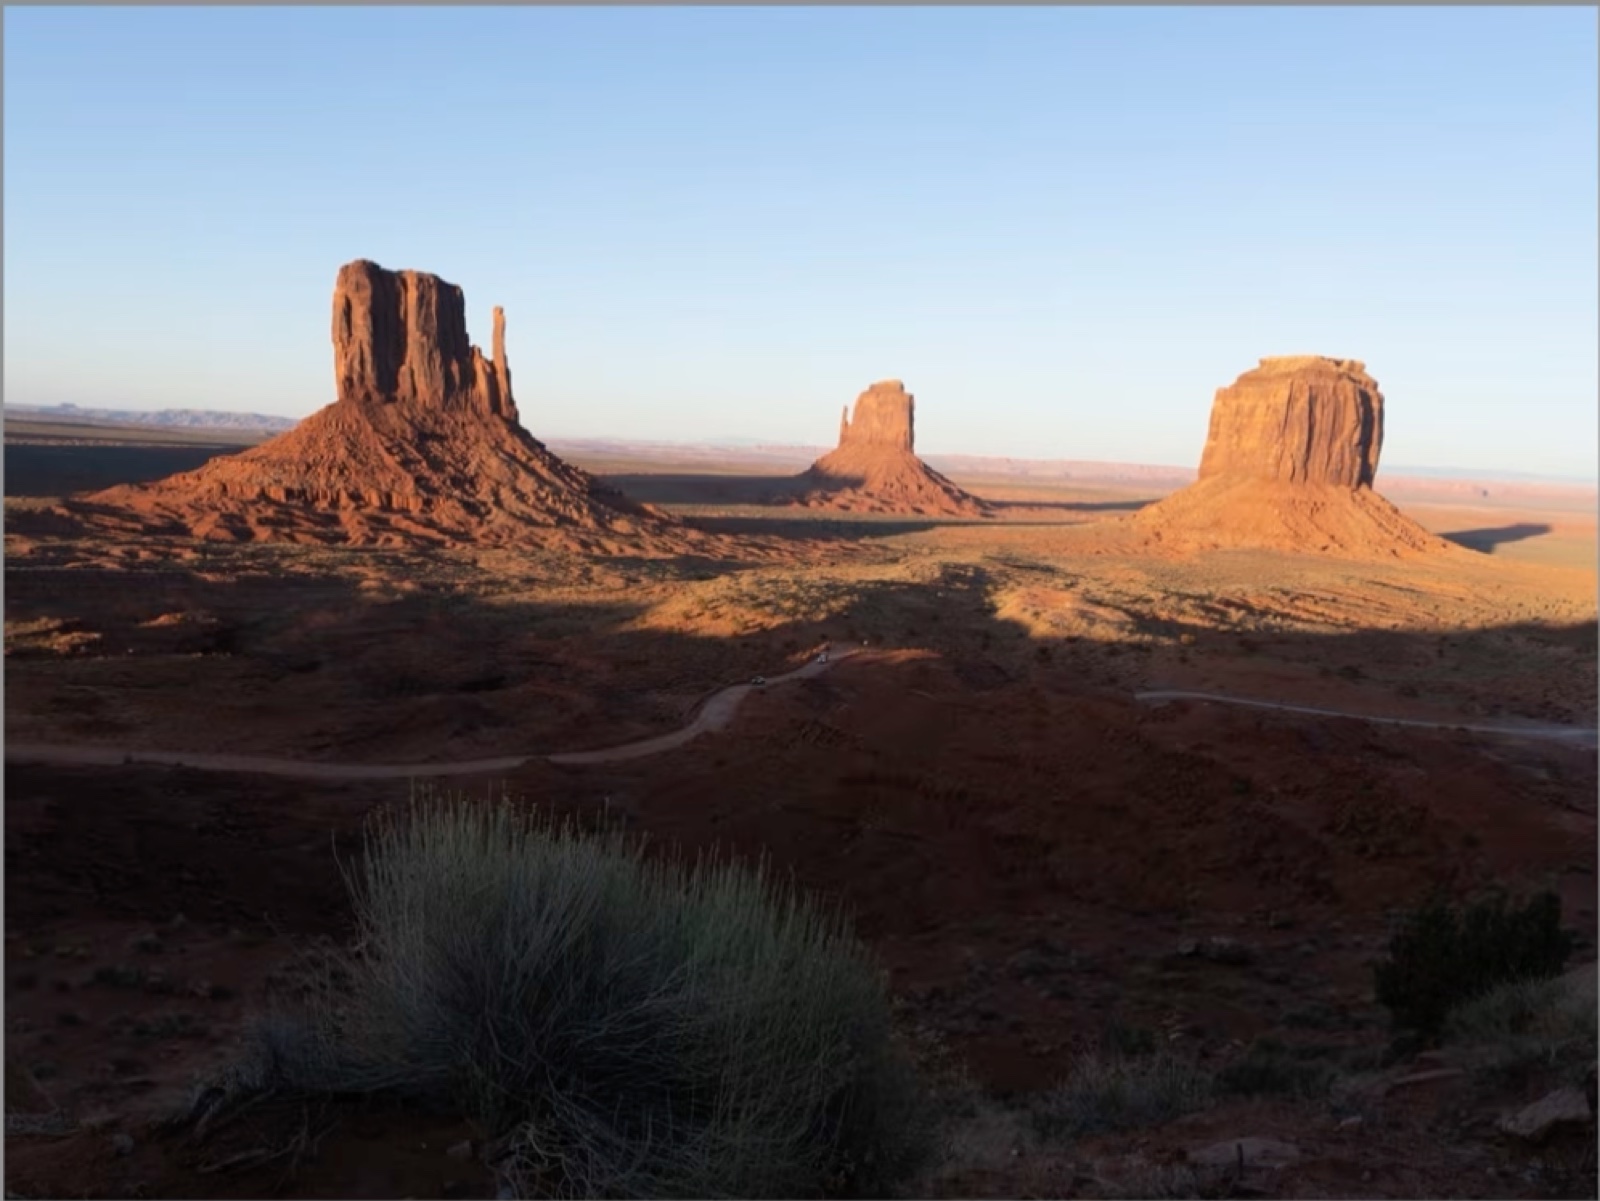
I arrived the first evening and did what most people do: I set up for sunset. What I didn't know is that at the classic Mittens viewpoint, the sun actually sets behind you. You're facing east, so all you get is flat, shadowed light on the buttes. It's boring. I stayed all the way through blue hour hoping it would improve. It just got more boring.
So I told myself: fine, I'll get up at 5:00 in the morning and shoot sunrise instead, because that's where the light actually happens at this viewpoint. If you want a deeper breakdown of when each type of light works best, I wrote a full comparison of golden hour versus blue hour.
Building the Composition Around One Rule from John Ford
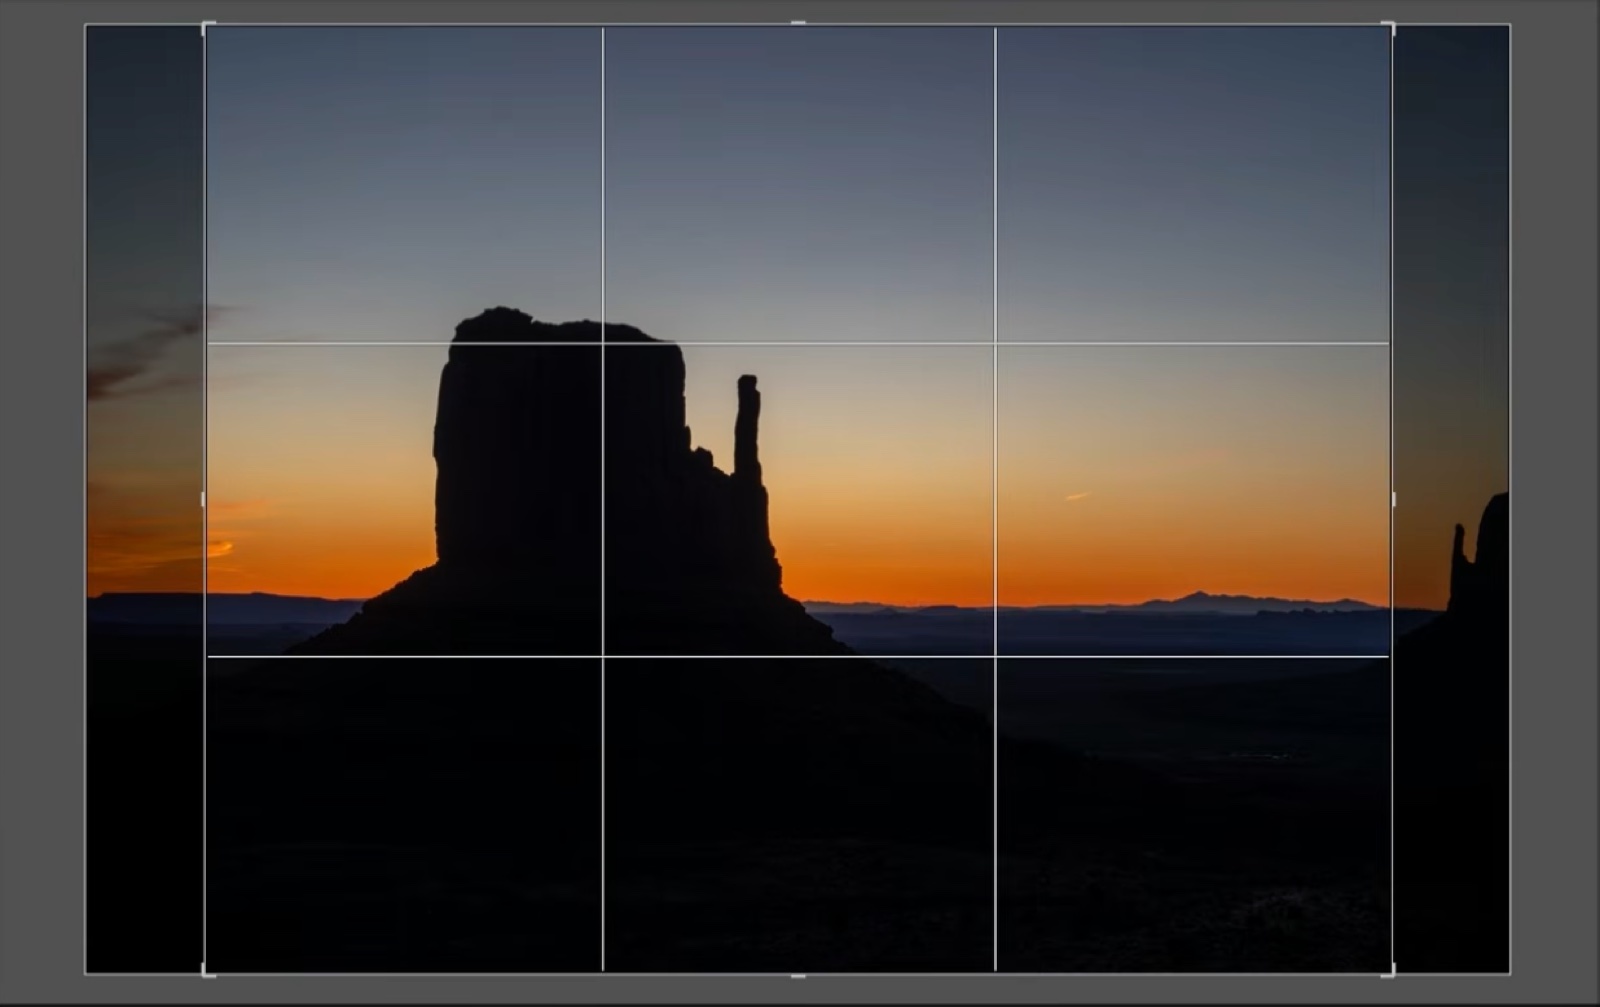
Before sunrise, half an hour out, I started framing. I kept coming back to something John Ford himself was known for saying about composition: when the horizon sits at the bottom of the frame, it's interesting. When it sits at the top, it's interesting. When it sits in the middle, it's boring.
I also wanted the sun to be "half in, half out" of the frame right as it crested the horizon, not fully up yet.
I tried several versions. I flipped to a 4x5 portrait crop (in Lightroom, pressing X toggles a crop between landscape and portrait instantly), tried a rule-of-thirds placement, then tried centering the buttes. Nothing beat a simple wide-angle frame with the horizon pushed high, exactly like Ford's rule says. That was the composition that finally worked. If you want the fuller picture, I break down 7 composition rules every beginner photographer should know in a separate article.
Planning the Exact Second the Sun Would Rise
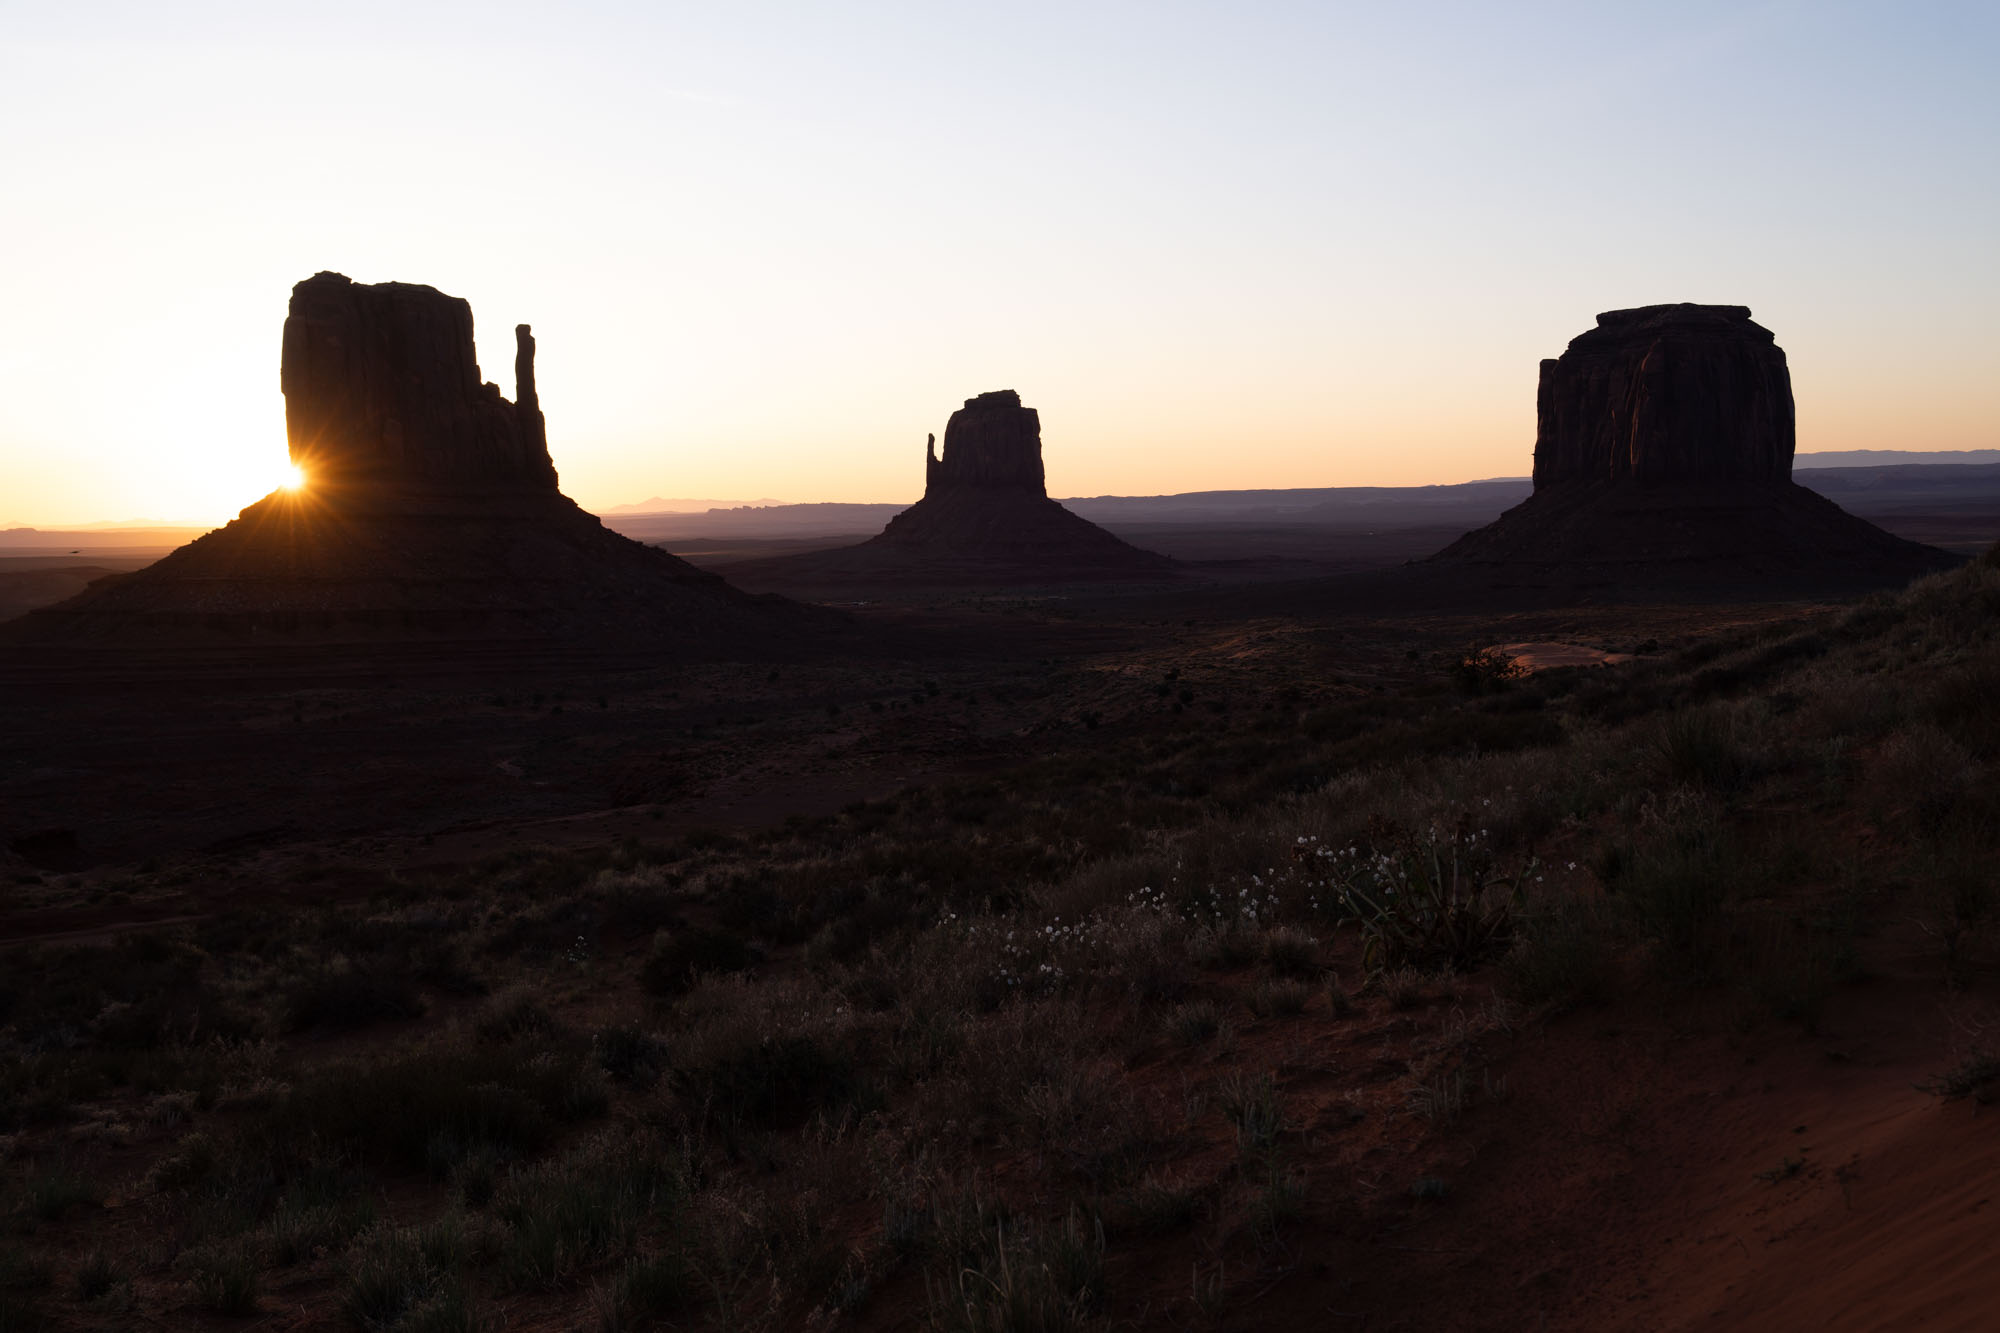
Getting a shot like this isn't luck. I used an app called Sunseeker to know precisely where the sun would break the horizon, so I could frame for it in advance instead of guessing in the dark.
My settings for the final shot:
- Aperture: f/6.3
- ISO: 100
- Shutter speed: 1/80s
I didn't stop down to f/13 or f/14 like you might expect for a sunstar. My lens had a small scratch, and at those narrower apertures the flare became huge and distracting. f/6.3 kept it under control while still giving me a nice starburst. If you're still shooting in auto and want to understand why these three settings matter, start with my camera settings guide for landscape photography.
Get Feedback on Your Own Landscape Work
If you're working on shots like this and want a second pair of eyes, I offer a free portfolio review. Send me your 4 best photos and I'll tell you honestly what's holding you back and what's working. Apply for your review here.
My 3-Step Process to Make the Sky Pop in Lightroom
The RAW file out of camera was flat, the way most sunrise files are before you shape the light. Here's the exact process I used to bring that sky to life, built entirely on Lightroom's AI masking (I cover the tool itself in much more depth in my step-by-step masking guide).
Step 1: Select the Sky and Darken It Slightly
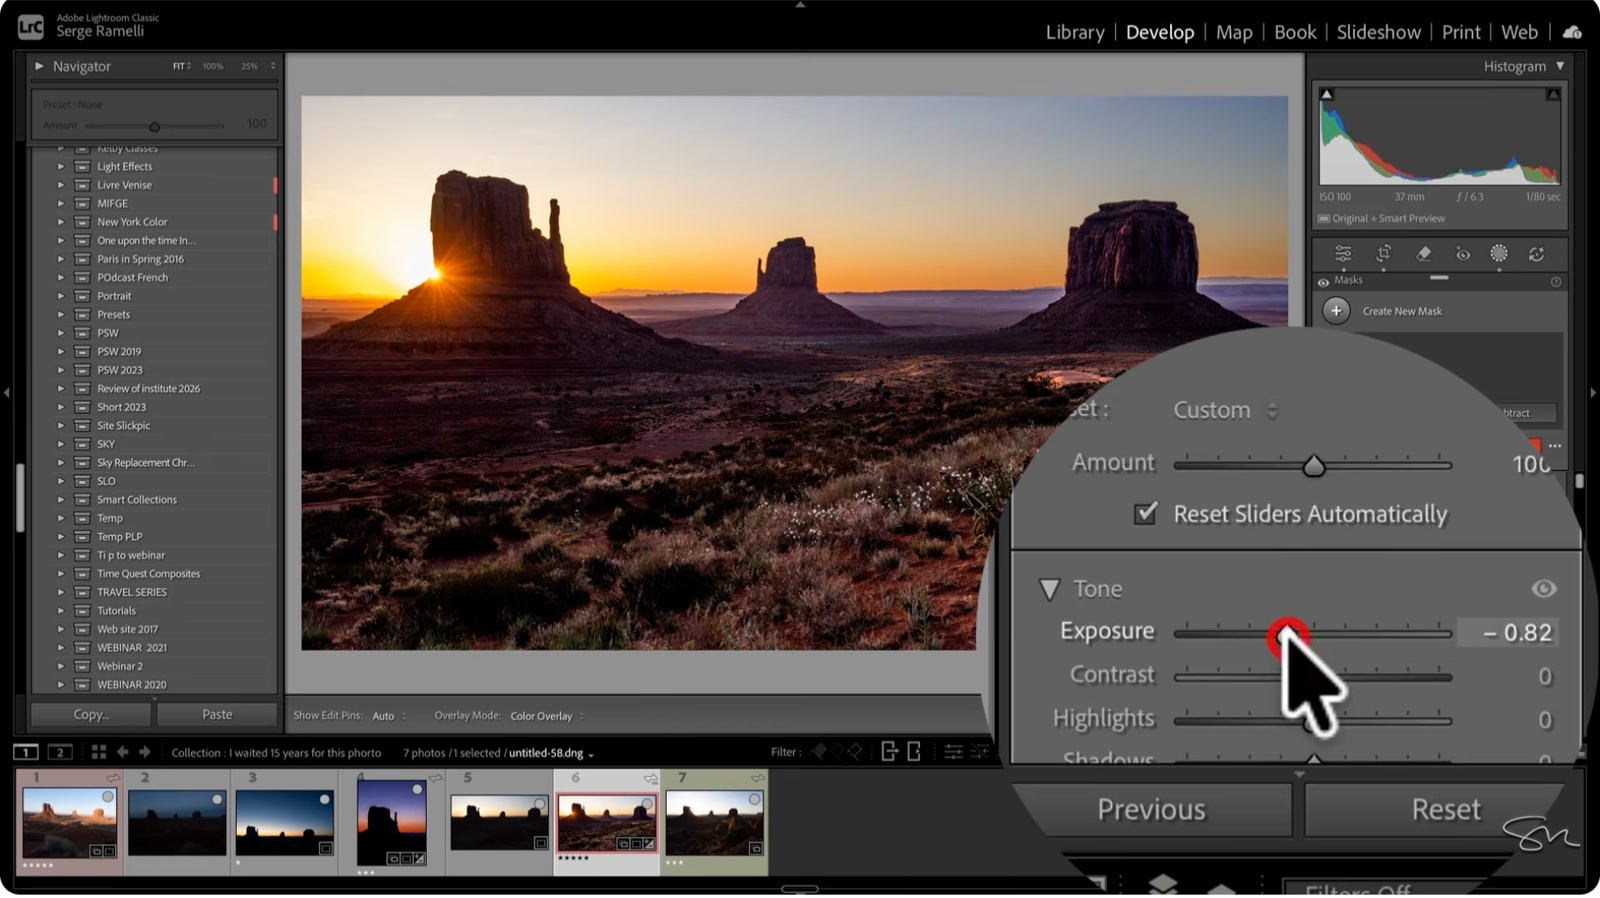
Using Lightroom's Select Sky mask, I selected just the sky and brought the exposure down a small amount. That's it for step one, but it immediately makes the color more dense and saturated.
Step 2: A Linear Gradient From the Top
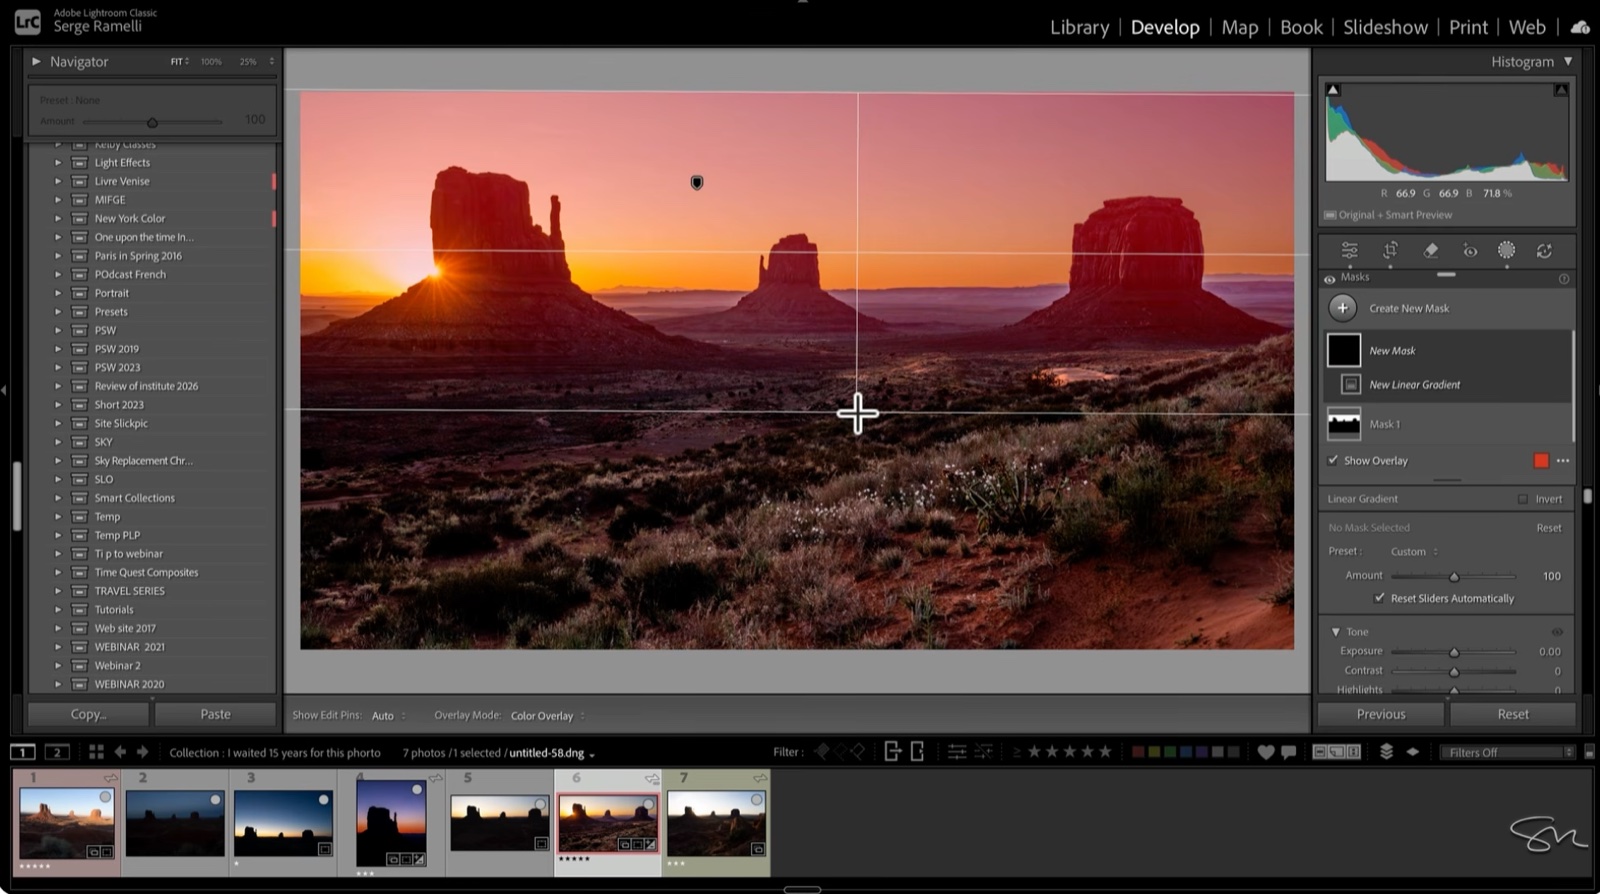
Next, I added a linear gradient running from the very top of the frame down to about the middle of the photo. On that gradient, I pushed in a bit of blue, since I'd lost some of that blue tone, and a touch of magenta. Comparing before and after at this stage, the difference in the sky is already huge.
Step 3: A Radial Gradient on the Rising Sun
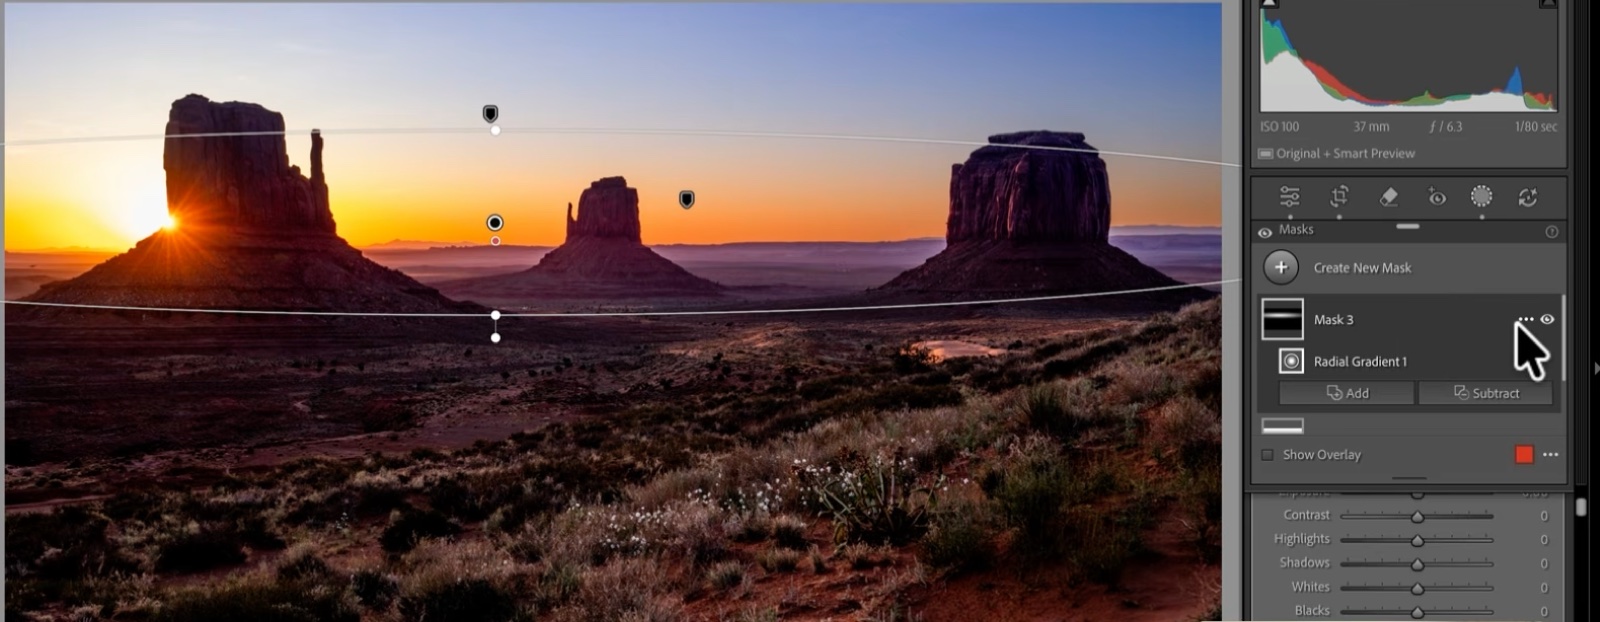
This is the step most people get wrong. I placed a radial gradient right where the sun was breaking the horizon and added yellow and magenta to build that warm glow line. The problem: that gradient was also spilling over onto the Mittens themselves, and I only wanted it on the sky.
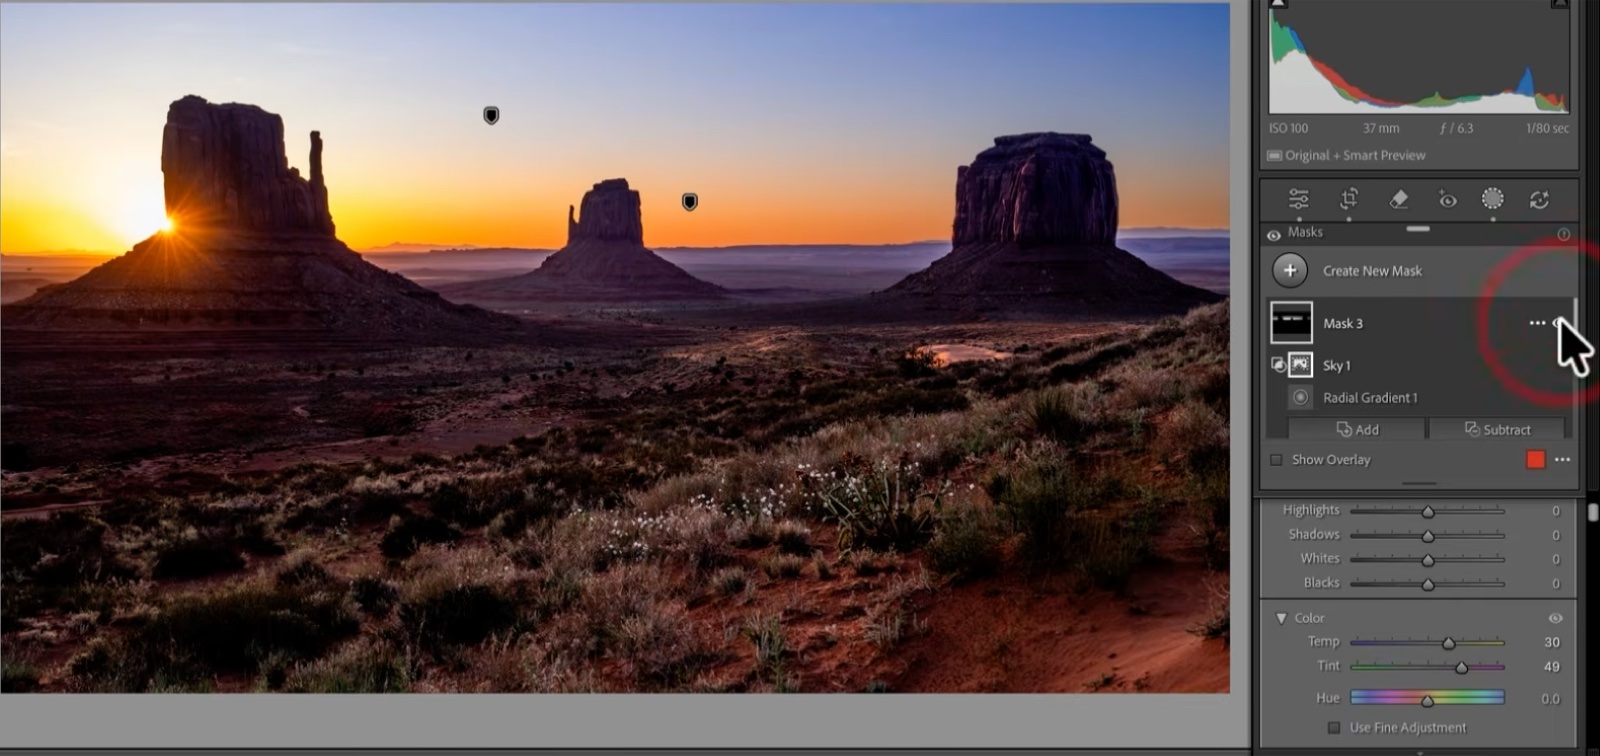
The fix is a small trick that solves this on almost any photo with a horizon: open the mask menu (the three dots), and choose Intersect Mask with Sky. That tells Lightroom to only apply your gradient where it overlaps with the sky it already detected, and to leave everything below the horizon, like the buttes, alone. One click, and the glow snapped back to exactly where I wanted it.
The Finishing Touches: Dodging, Burning, and a Flower
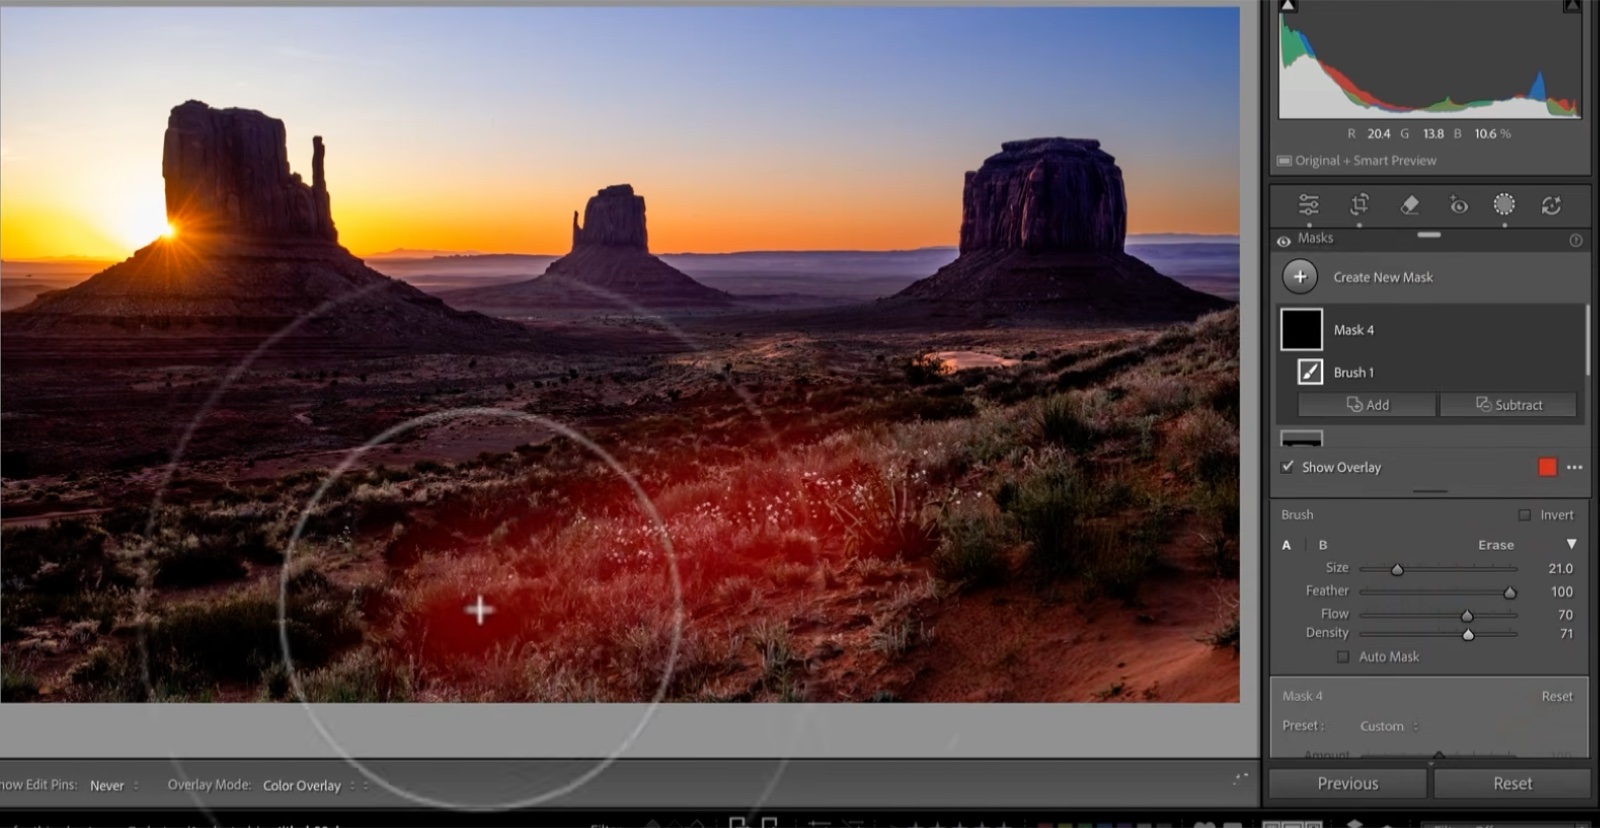
There was a small flower in the foreground I loved, and I wanted to bring it forward a little without it looking painted on.
Here's the difference between a brush edit that looks fake and one that looks natural. If your Feather is at 0% and Flow/Density are cranked all the way up, you'll get a hard, visible edge every time you brush. Instead, keep your Feather at 100%, and bring Flow and Density down into the 70s. Brush over the flower, add about +0.5 exposure, and you get a lift that's basically invisible but still does the work.
I also added one more gradient to darken a bright patch on the frame's edge; I wanted the eye pulled toward the center of the image, not pushed out toward a bright corner. Then I made sure my horizon was perfectly straight and cropped to 16:9.
That's the photo I'd been dreaming about for 15 years.
Why Timing Mattered More Than Any Setting
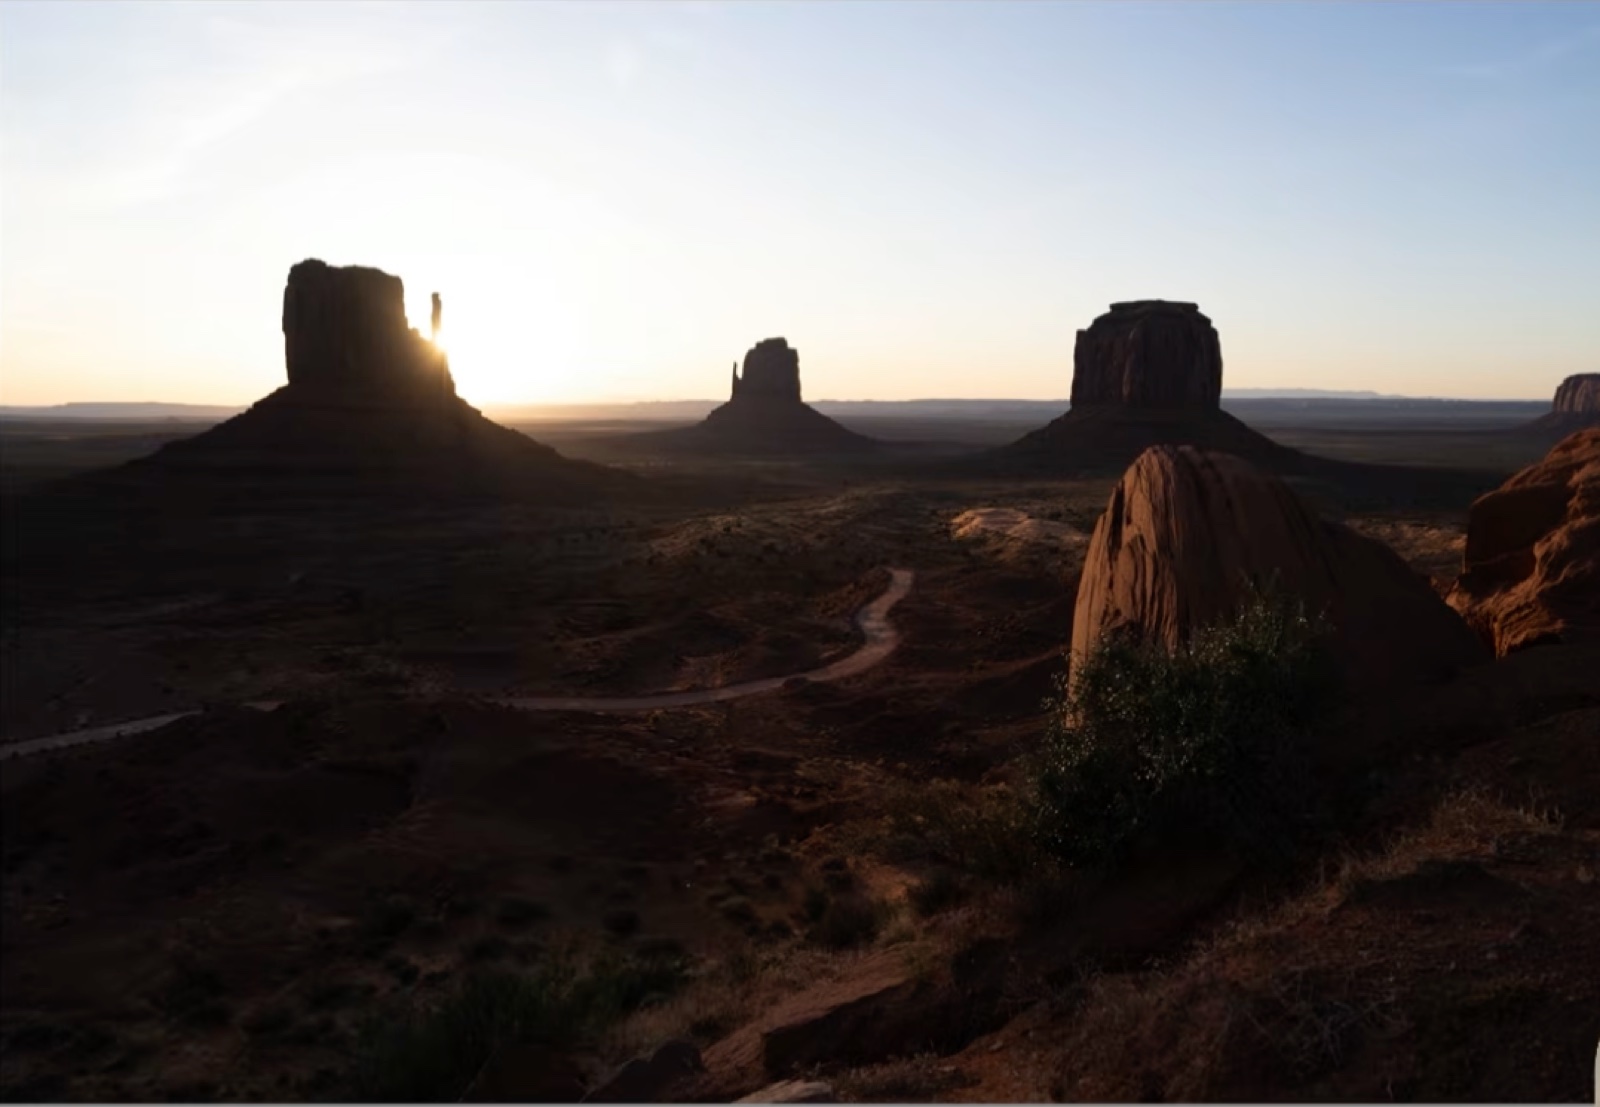
To prove the point about timing, I pulled up a frame from just a few minutes later, with the same edit copied over. The sun had climbed higher, the flare had exploded, and the whole shot lost the mood the earlier frame had. Same spot, same settings, same edit, just a few minutes off, and it's simply not as strong. When you're chasing a shot like this, being in position and ready at the right second matters more than almost anything else.
One Story That Stays With Me
One of the members of my Institute of Photography coaching program was going through an incredibly hard time. Her husband was very sick, and the heat made it impossible for them to keep running their business. She poured herself into photography, and ended up selling her work on Fine Art America and Etsy, and in local galleries in Venice, Florida. She won the Fine Art America award twice. It changed her life, and gave her a way to provide for her family through her art.
If you want to learn my complete retouching workflow, from selecting the right composition through to a finished, gallery-ready file, that is exactly what I teach inside the Institute of Photography.
